1. Introduction
This manual provides detailed instructions for the LFF DAB Plus Digital FM Radio. It covers setup, operation, maintenance, and troubleshooting to ensure optimal performance and user experience. Please read this manual thoroughly before using the device.

Front view of the LFF DAB Plus Digital FM Radio, showing the speaker grille, color display, and extended antenna.
2. Package Contents
Please check the package for the following items:
- 1 x LFF DAB Plus Digital FM Radio
- 1 x AC Power Adapter
- 1 x Quick Start Guide
3. Product Overview
Familiarize yourself with the radio's components and controls.
3.1 Key Features

This diagram illustrates the radio's key functions: DAB+ radio, 60 station presets, FM radio, sleep timer, headphone jack, Bluetooth connectivity, full-color screen, and dual alarm capability.
3.2 Controls and Ports

Top and side view of the radio, showing control buttons and knobs on the top panel, and the 3.5mm headphone jack located on the side.
Refer to the diagram above for the location of the following:
- Power Button: Turns the radio on/off.
- Mode Button: Switches between DAB+, FM, and Bluetooth modes.
- Tune/Select Knob: Rotates to tune stations or navigate menus, press to select.
- Volume Knob: Adjusts the audio volume.
- Preset Buttons: For saving and recalling favorite stations.
- Alarm/Sleep Timer Button: Accesses alarm and sleep timer settings.
- Color Display: Shows station information, time, and menu options.
- Headphone Jack (3.5mm): For private listening.
- DC IN Port: For connecting the AC power adapter.
- Telescopic Antenna: For improved radio reception.
4. Setup
4.1 Powering On
The radio can be powered by the included AC adapter or by batteries.
- AC Power: Connect the AC power adapter to the DC IN port on the back of the radio and plug it into a wall outlet.
- Battery Power: Open the battery compartment on the back of the radio and insert 4 x 1.5V AA (LR6) batteries, ensuring correct polarity.
Back view of the radio, detailing the battery compartment for 4x AA batteries, the AC adapter input (5V/1000mA), and the 360° rotatable antenna. Product dimensions are also indicated.
4.2 Antenna Adjustment
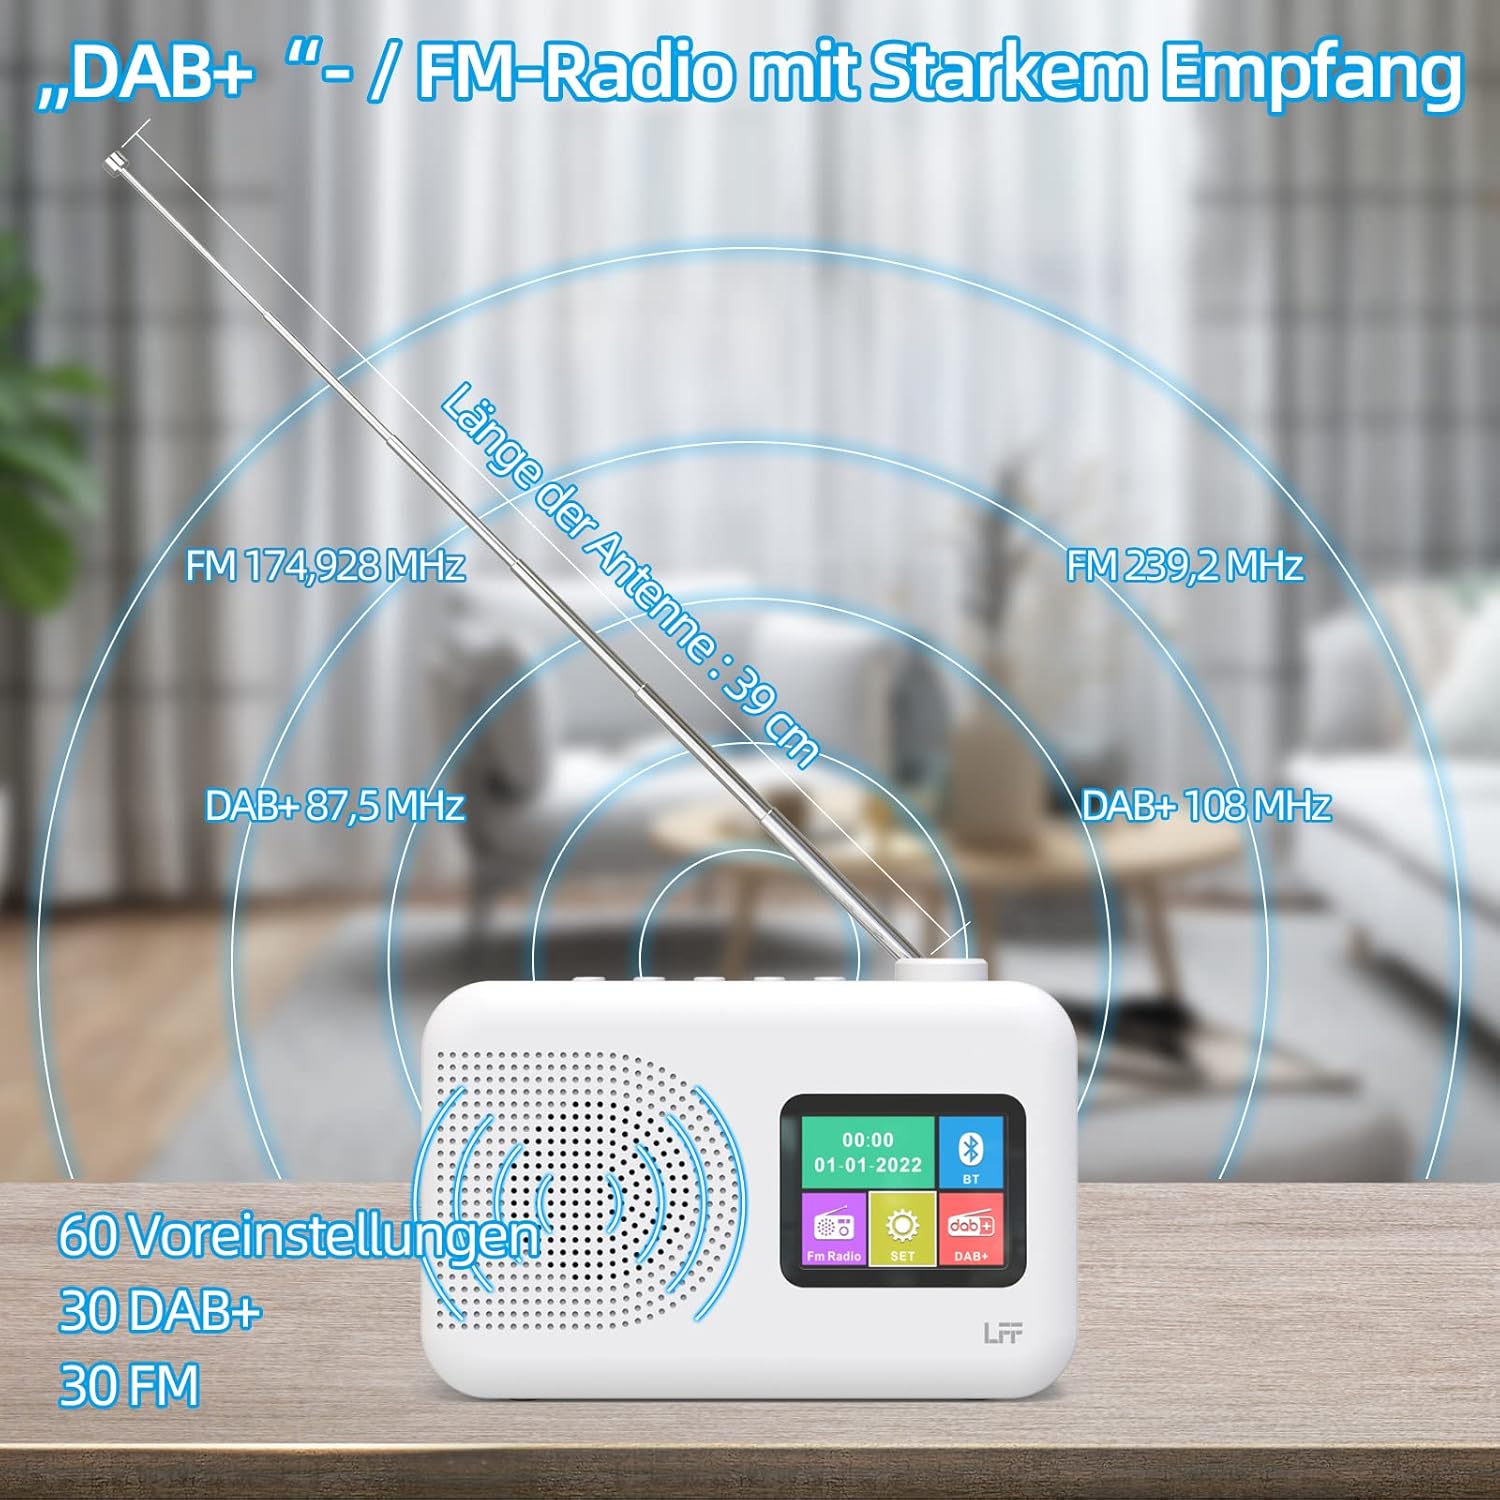
Extend the telescopic antenna fully (approximately 39 cm) and adjust its angle for optimal reception, especially for DAB+ and FM stations.

This diagram illustrates the radio's strong DAB+ and FM reception capabilities with the fully extended 39cm antenna, showing frequency ranges and the capacity for 60 total presets (30 DAB+, 30 FM).
4.3 Initial Scan (DAB+)
- Turn on the radio.
- Ensure the mode is set to DAB+. If not, press the Mode button to switch.
- The radio will automatically perform a full scan for available DAB+ stations. This may take a few minutes.
- Once the scan is complete, the radio will display a list of found stations.
5. Operating Instructions
5.1 DAB+ Radio Mode
- Press the Mode button to select DAB+ mode.
- Rotate the Tune/Select knob to browse through the available stations.
- Press the Tune/Select knob to select a station.
- Saving Presets: To save a station, press and hold a Preset button until the display confirms. To recall, briefly press the corresponding Preset button. Up to 30 DAB+ stations can be saved.
5.2 FM Radio Mode
- Press the Mode button to select FM mode.
- Rotate the Tune/Select knob to manually tune to a frequency.
- Press and hold the Tune/Select knob for a few seconds to auto-scan for the next available station.
- Saving Presets: Similar to DAB+ mode, press and hold a Preset button to save, and briefly press to recall. Up to 30 FM stations can be saved.
5.3 Bluetooth Mode

This diagram illustrates the three primary playback options for the radio: through its internal speaker, via Bluetooth connection to an external device, or using headphones connected to the headphone jack.
- Press the Mode button to select Bluetooth mode. The display will show "Bluetooth Pairing" or similar.
- On your external device (e.g., smartphone), enable Bluetooth and search for available devices.
- Select "LFF Radio" (or similar name) from the list to pair.
- Once paired, you can play audio from your device through the radio's speaker.
- Note: This radio acts as a Bluetooth receiver. It does not support connecting to Bluetooth headphones or other Bluetooth speakers.
5.4 Sleep Timer
The sleep timer allows the radio to automatically turn off after a set period.

This image depicts the sleep timer function, offering selectable durations of 15, 30, 45, 60, 90, and 120 minutes before the radio automatically powers off.
- Press the Alarm/Sleep Timer button repeatedly to cycle through sleep timer options (15 min, 30 min, 45 min, 60 min, 90 min, 120 min, OFF).
- Select your desired duration. The radio will turn off automatically after this time.
5.5 Alarm Clock
The radio features a dual alarm function.
- Press and hold the Alarm/Sleep Timer button to enter alarm settings.
- Use the Tune/Select knob to set the alarm time, alarm source (DAB+, FM, or buzzer), and volume.
- Press the Tune/Select knob to confirm each setting.
- Repeat the process for the second alarm if needed.
5.6 Headphone Use
Plug 3.5mm headphones into the headphone jack on the side of the radio for private listening. The internal speaker will automatically mute.
6. Maintenance
6.1 Cleaning
- Wipe the radio's surface with a soft, dry cloth.
- Do not use abrasive cleaners, waxes, or solvents as they may damage the finish.
6.2 Battery Replacement
When using battery power, replace all four AA batteries when the low battery indicator appears on the display or when performance degrades.
- Ensure the radio is turned off and disconnected from AC power.
- Open the battery compartment cover on the back.
- Remove old batteries and dispose of them properly.
- Insert new 4 x 1.5V AA (LR6) batteries, observing correct polarity (+/-).
- Close the battery compartment cover securely.
6.3 Screen Protection Film
The radio's display comes with a transparent protective film. For optimal clarity, gently peel off this film before first use.
7. Troubleshooting
If you encounter issues, refer to the following common problems and solutions:
| Problem | Possible Cause | Solution |
|---|---|---|
| No power | AC adapter not connected, batteries depleted or incorrectly inserted. | Check AC adapter connection. Replace batteries or ensure correct polarity. |
| Poor radio reception | Antenna not extended, weak signal area, interference. | Fully extend and adjust the telescopic antenna. Move the radio to a different location. Avoid sources of interference. |
| Bluetooth not connecting | Radio not in Bluetooth mode, device too far, already paired with another device. | Ensure radio is in Bluetooth mode. Keep devices within range. Disconnect from other devices. |
| No sound | Volume too low, headphones connected, mute activated. | Increase volume. Disconnect headphones. Check if mute is active. |
8. Specifications
- Brand: LFF
- Model: DAB Plus Digital FM Radio
- Color: White
- Connectivity Technology: Bluetooth
- Dimensions (L x W x H): 16.1 cm x 5.9 cm x 10.9 cm
- Tuning Technology: DAB
- Power Source: AC Adapter (5V/1000mA) or 4 x 1.5V AA (LR6) Batteries
- Supported Radio Bands: DAB+, FM
- DAB+ Frequency Range: 174.928 - 239.2 MHz
- FM Frequency Range: 87.5 - 108 MHz
- Presets: 30 DAB+, 30 FM
- Antenna Length: 39 cm (extendable)
- Special Features: DAB Plus Radio, Sleep Timer, Dual Alarm, Headphone Jack, Color Display
- Included Components: DAB Digital Radio, AC Power Adapter, Quick Start Guide
9. Warranty and Support
For any quality-related issues or technical support, please contact the seller directly. We are committed to resolving any problems you may encounter with your LFF DAB Plus Digital FM Radio.


