1. Introduction
This manual provides detailed instructions for the installation, operation, and maintenance of your Night Owl 1080p HD Wired Security System. This system includes a Digital Video Recorder (DVR) and 8 wired spotlight cameras, designed to provide comprehensive surveillance for your property. Please read this manual thoroughly before setup and use to ensure proper functionality and safety.
2. Package Contents
Verify that all components are present in your package:
- 1x Night Owl 1080p HD DVR with 1TB Hard Drive
- 8x 1080p Wired Spotlight Cameras
- 8x Camera Cables (BNC)
- 1x DVR Power Adapter
- 2x Camera Power Adapters (for multiple cameras)
- 1x USB Mouse
- 1x HDMI Cable
- Mounting Hardware for Cameras
- Quick Setup Guide

Image: The Night Owl 1080p HD Wired Security System, showing the DVR unit and eight wired spotlight cameras.
3. System Overview
The Night Owl security system provides 1080p resolution video surveillance with integrated spotlight cameras for enhanced night vision and deterrence. The DVR includes a pre-installed 1TB hard drive for local storage.
3.1 Digital Video Recorder (DVR)
The DVR is the central unit for recording, storing, and managing video footage from up to 8 cameras. It features a 1TB SATA HDD for continuous recording without subscription fees.
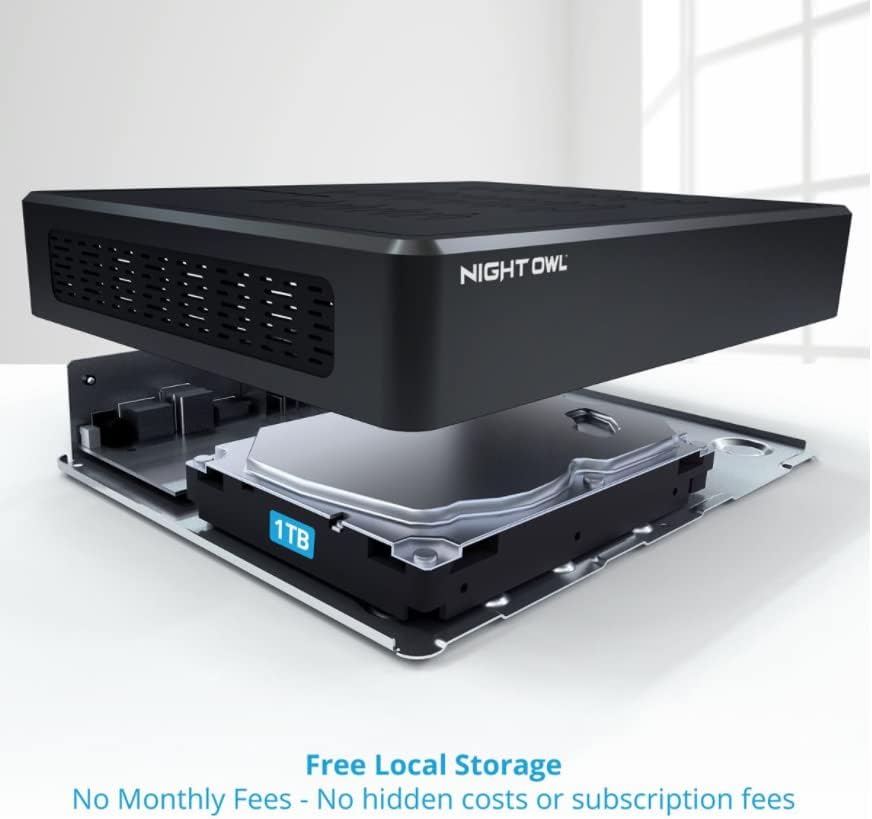
Image: An exploded view of the Night Owl DVR, highlighting the internal 1TB hard drive for local video storage.
3.2 1080p Wired Spotlight Cameras
Each camera captures video in 1080p resolution and includes a built-in spotlight for color night vision and a deterrent effect. They are wired for reliable power and video transmission.
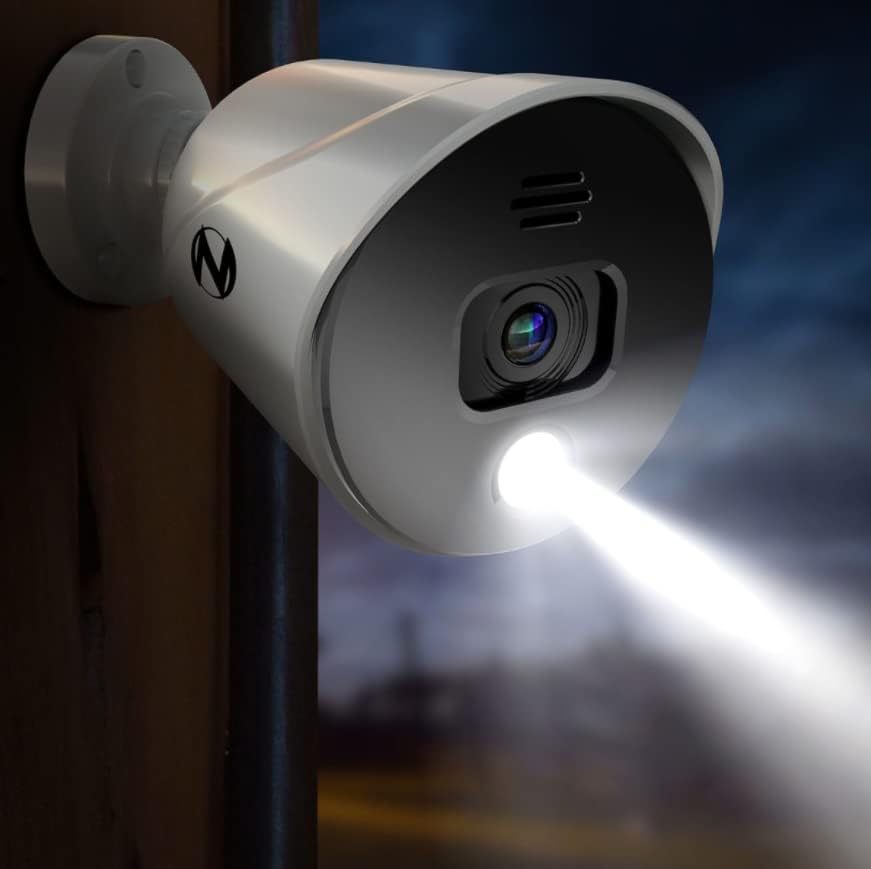
Image: A Night Owl spotlight camera mounted outdoors, with its integrated spotlight actively illuminating a dark area.
4. Setup
4.1 Connecting the DVR
- Connect to a Monitor: Use the provided HDMI cable to connect the DVR's HDMI output to a monitor or TV.
- Connect USB Mouse: Plug the USB mouse into one of the USB ports on the DVR's rear panel.
- Connect to Network: For remote viewing and app functionality, connect an Ethernet cable from the DVR's LAN port to your router.
- Power On: Connect the DVR power adapter to the DVR and then to an electrical outlet. The DVR will power on automatically.
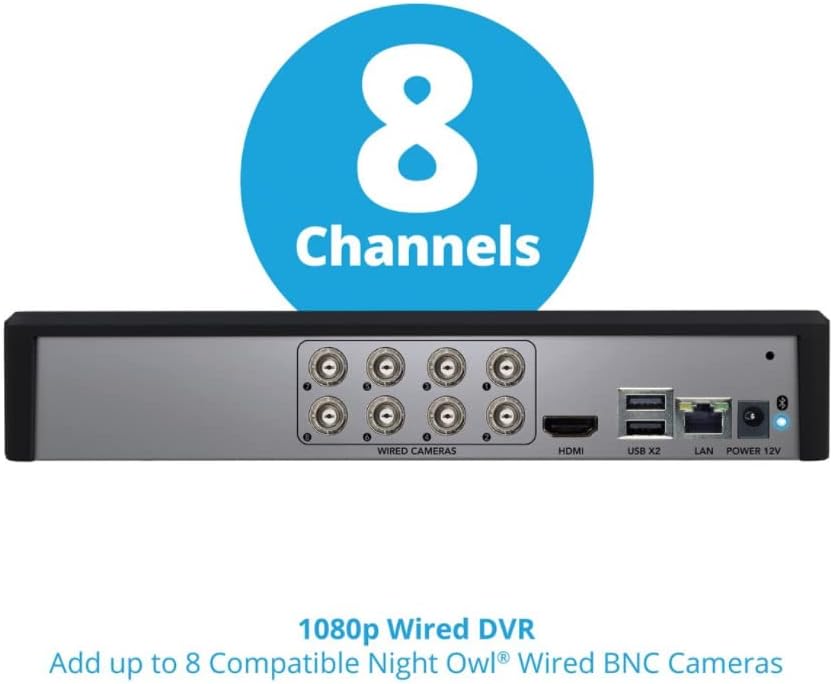
Image: The rear panel of the Night Owl DVR, displaying ports for wired cameras (BNC), HDMI, USB, LAN, and power input.
4.2 Connecting Cameras
Each camera requires a BNC cable for video transmission and a power connection. The system supports up to 8 wired BNC cameras.
- Mount Cameras: Securely mount each camera in your desired location using the provided hardware. Ensure the camera's field of view covers the intended surveillance area.
- Connect BNC Cables: Connect one end of the BNC cable to the camera's video output and the other end to an available BNC input port on the DVR.
- Connect Power: Connect the camera's power input to a power adapter. Multiple cameras may share a single power adapter using splitters (if provided).
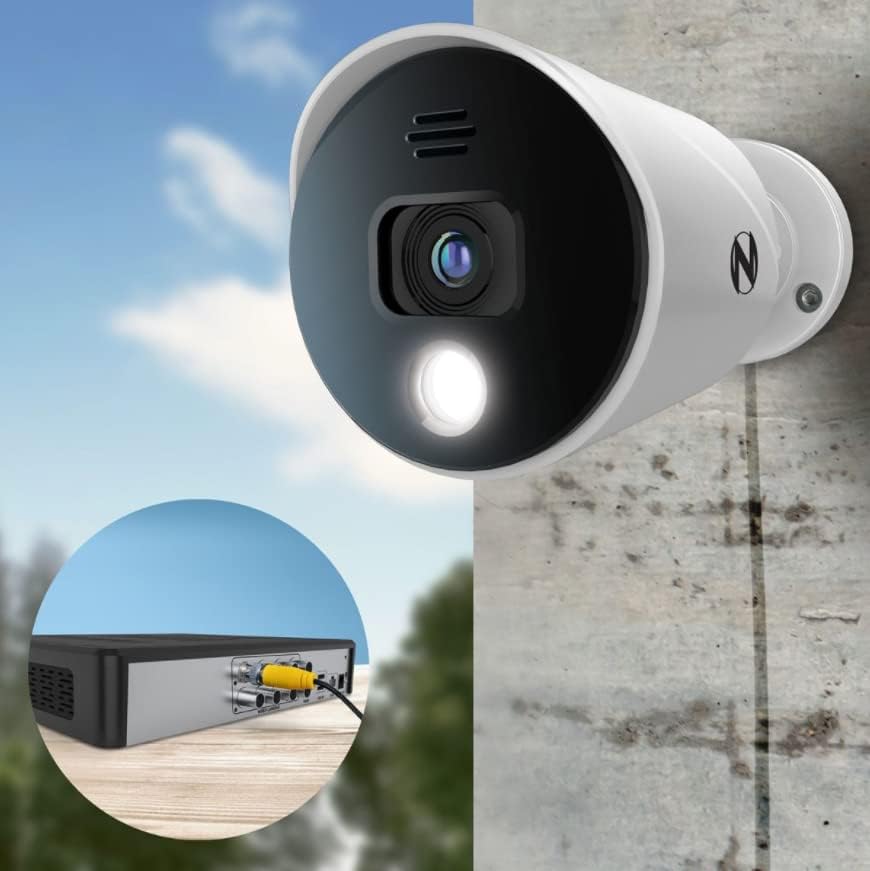
Image: A close-up view showing a Night Owl camera connected to the DVR using a yellow BNC cable, illustrating the wired connection.
4.3 Initial Configuration and App Setup
The system features easy built-in Bluetooth wireless setup, eliminating the need for a monitor during initial configuration.
- Download the Night Owl Protect App: Search for "Night Owl Protect" in your smartphone's app store (App Store for iOS, Google Play for Android).
- Enable Bluetooth: Ensure Bluetooth is enabled on your smartphone.
- Pair with DVR: Open the Night Owl Protect app and follow the on-screen instructions to pair your smartphone with the DVR via Bluetooth. This will guide you through the initial setup process, including network configuration and account creation.

Image: A smartphone displaying the Night Owl app's Bluetooth setup screen, prompting the user to turn on Bluetooth for device pairing.
5. Operating the System
5.1 Live View and Recording
Once configured, you can view live camera feeds and manage recordings through the connected monitor or the Night Owl Protect mobile app.
- Monitor: Use the USB mouse to navigate the DVR's on-screen interface. Select camera views, access settings, and review recorded footage.
- Mobile App: The app provides remote access to live views, playback, and system settings from anywhere with an internet connection.
5.2 Mobile App Features
The Night Owl Protect app offers several features for convenient remote monitoring:
- Single Sign-On: Access all your Night Owl devices with one account.
- Live View: Stream real-time video from your cameras.
- Playback: Review recorded events stored on your DVR.
- Save and Share: Download and share important video clips.
- Multi-Channel Viewing: View multiple camera feeds simultaneously.
- Real-Time Alerts: Receive notifications for detected activity.

Image: A smartphone displaying the Night Owl Protect mobile app, showing live view, event notifications, and playback options.
5.3 Smart Detection and Voice Alerts
The cameras are equipped with smart detection technology to identify relevant motion and reduce false alarms. Built-in camera sirens and preset voice alerts can be configured to deter intruders.

Image: An illustration depicting a Night Owl camera emitting a voice alert and siren, with a smartphone displaying the live feed of a detected person.
6. Maintenance
6.1 Hard Drive Management
The 1TB hard drive automatically overwrites the oldest footage when full. Regularly back up important recordings to an external USB drive if needed.
6.2 Camera Cleaning
Periodically clean camera lenses with a soft, damp cloth to ensure clear image quality. Avoid abrasive cleaners.
6.3 Software Updates
Ensure your DVR firmware and mobile app are updated to the latest versions for optimal performance and security. Updates can typically be managed through the DVR's system settings or the mobile app.
7. Troubleshooting
- No Video from Camera:
- Check BNC cable connections at both the camera and DVR.
- Verify the camera is receiving power.
- Ensure the camera is compatible with the DVR.
- DVR Not Connecting to Network/App:
- Confirm the Ethernet cable is securely connected to both the DVR and your router.
- Check your router's internet connection.
- Restart the DVR and router.
- Ensure Bluetooth is enabled on your phone for initial setup.
- Poor Image Quality:
- Clean the camera lens.
- Check cable integrity for any damage.
- Ensure sufficient lighting for optimal performance, especially at night.
- False Motion Alerts:
- Adjust motion detection sensitivity settings in the DVR or app.
- Define specific detection zones to exclude areas with frequent irrelevant motion (e.g., trees swaying).
8. Specifications
| Feature | Specification |
|---|---|
| Brand | Night Owl |
| Model | B09TFZBPMK |
| Connectivity Technology | Wired |
| Video Capture Resolution | 1080p |
| Special Feature | Night Vision, Spotlight |
| Number of Channels | 8 |
| Memory Storage Capacity | 1 TB (Hard Drive) |
| Power Source | Corded Electric |
| Compatible Devices | Cameras |
| Low Light Technology | Night Vision |
| Frame Rate | 30 fps |
| Hardware Interface | Ethernet, BNC |
| UPC | 816522024796 |
| Item Weight | 16.17 pounds (System) |

Image: An infographic summarizing key specifications: 8 Channels, 8 Cameras, 1TB SATA HDD, and 1080p Resolution.
9. Warranty and Support
For warranty information, technical support, or further assistance, please visit the official Night Owl website or contact their customer service. Keep your purchase receipt as proof of purchase.
You can find more information and support resources on the Night Owl Store on Amazon.


