1. Introduction
This manual provides detailed instructions for the JRHC S-6606 2D Wireless Barcode Scanner. This device integrates barcode scanning, data collection, and inventory counting functionalities, making it suitable for various applications including warehouses, retail stores, medical facilities, and logistics operations.
The scanner supports both 1D and 2D barcode types and connects wirelessly via a 2.4G USB receiver, ensuring compatibility with Windows operating systems and common office software.

Figure 1: JRHC S-6606 Multifunctional Portable Wireless Barcode Scanner. This image highlights the device's key features including intelligent decoding, wireless transmission, long-distance scanning, large battery capacity, plug and play functionality, and an HD screen.
2. Package Contents
Verify that all items are present in the package:
- JRHC S-6606 2D Wireless Barcode Scanner
- 2.4G USB Receiver
- USB Charging Cable
- User Manual (this document)
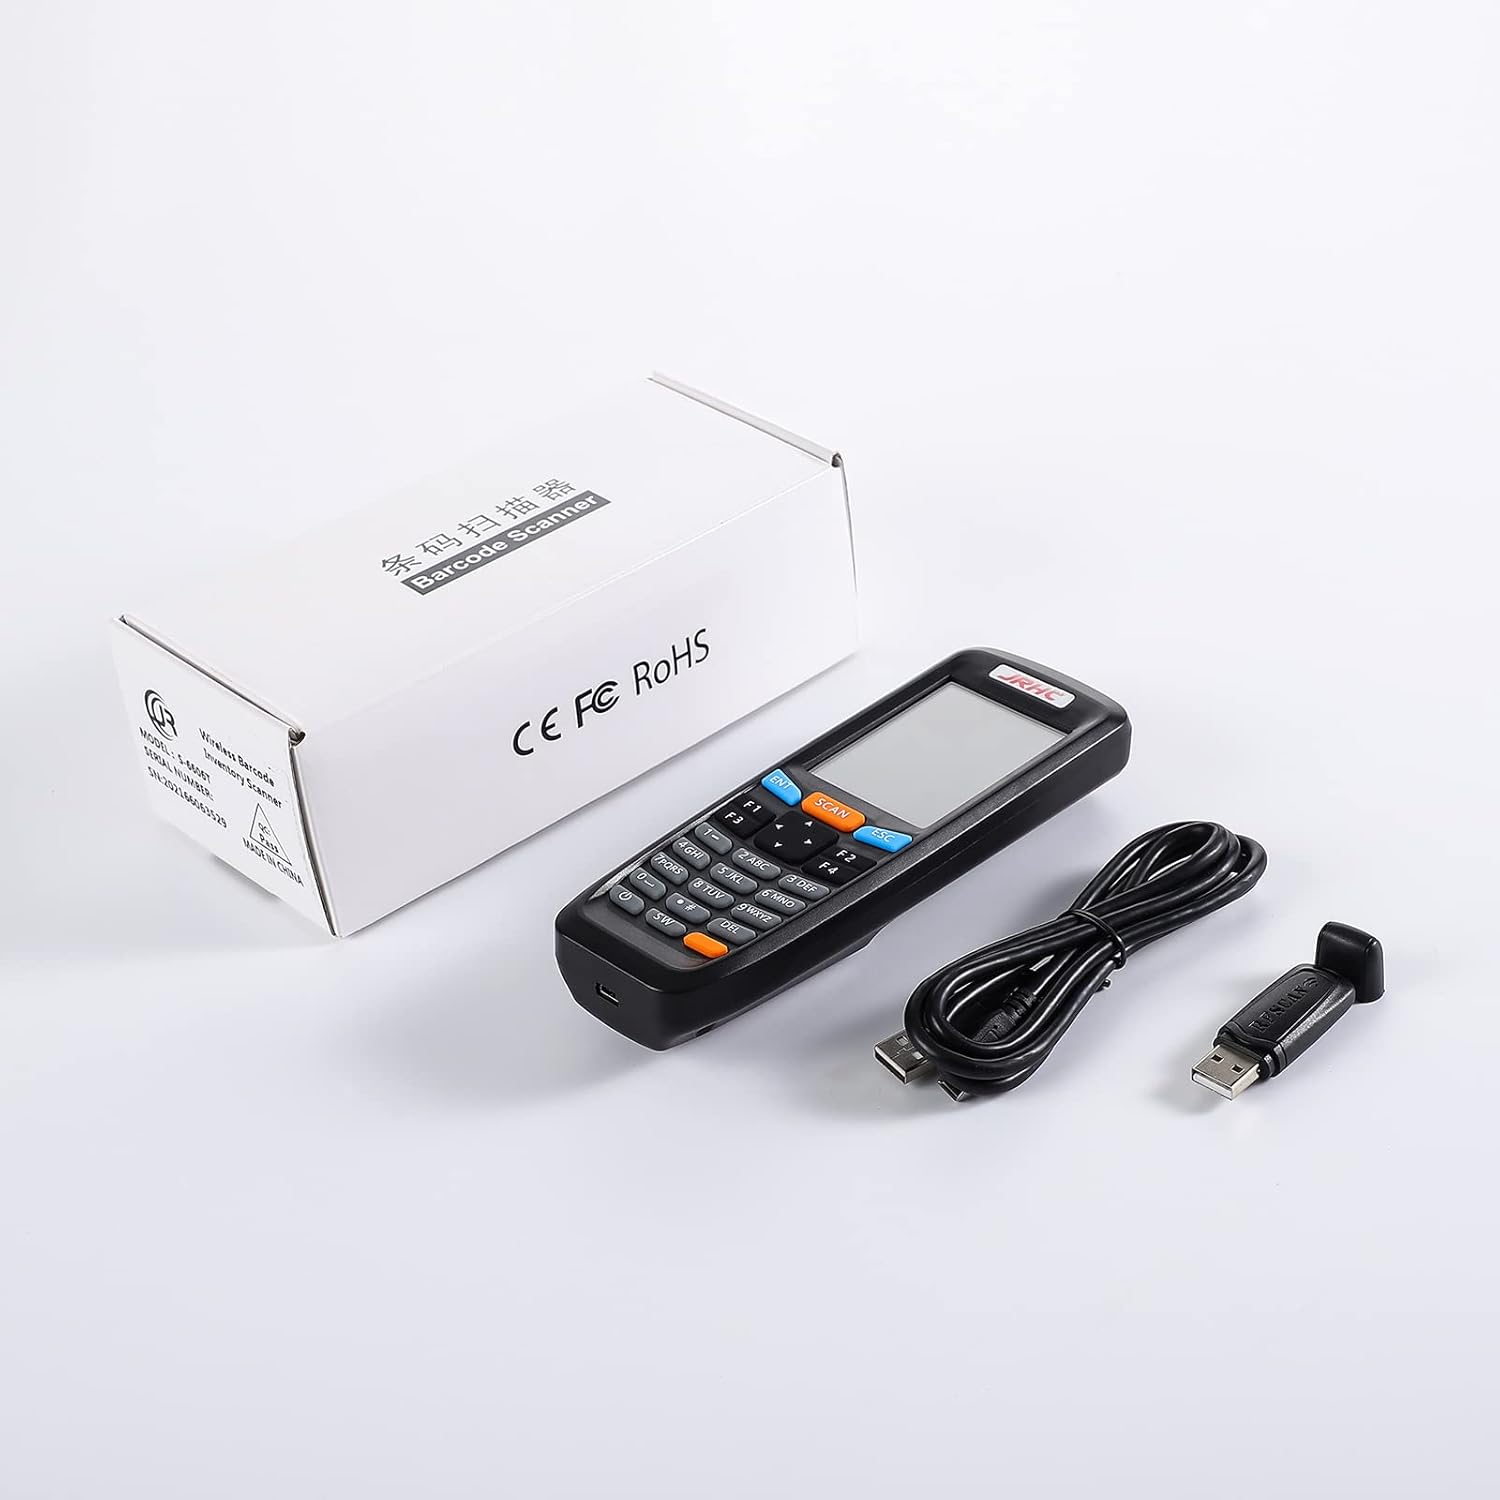
Figure 2: Package contents including the JRHC S-6606 barcode scanner, USB receiver, and USB charging cable.
3. Product Overview
Familiarize yourself with the components and controls of your JRHC S-6606 scanner.

Figure 3: Detailed view of the JRHC S-6606 scanner's front and back, indicating the location and function of each button and component. Key elements include the LCD screen, scan button, function keys, navigation keys, power button, and the product information label on the back (Model S-6606, SN: 202166062833).
Key Components:
- LCD Screen: Displays operational information, settings, and scanned data.
- SCAN Button: Initiates barcode scanning.
- ENT (Enter) Key: Confirms selections or inputs.
- ESC (Escape) Key: Cancels operations or returns to the previous menu.
- Function Keys (F1-F4): Perform specific functions as indicated on the screen.
- Direction Keys: Navigate through menus and options.
- Number Keys: For manual data input.
- DEL (Delete) Key: Deletes characters or data.
- On/Off Button: Powers the device on or off.
- SW (Switch) Key: Toggles hand input barcode and input method, or acts as a spare function key.
- Buzzer: Provides audio feedback for scans and operations.
4. Setup
4.1. Charging the Scanner
Before initial use, fully charge the scanner's internal battery.
- Connect the small end of the USB charging cable to the scanner's charging port (Micro-USB).
- Connect the larger end of the USB cable to a USB power adapter (not included) or a computer's USB port.
- The charging indicator on the screen will show charging status. A full charge typically takes approximately 2 hours.

Figure 4: The scanner connected to a USB charging cable, illustrating the charging process and the device's high-capacity battery.
4.2. Connecting the USB Receiver
The scanner connects to your computer wirelessly via the 2.4G USB receiver.
- Insert the 2.4G USB receiver into an available USB port on your computer.
- The computer will automatically install the necessary drivers (Plug and Play).
- Power on the scanner by pressing and holding the On/Off button.
- The scanner will automatically pair with the receiver within a few seconds. A confirmation message or indicator will appear on the scanner's screen.
Note: Ensure the receiver is within the operational range of the scanner for stable connection.
5. Operating Modes
The JRHC S-6606 offers three primary operating modes: Scan Gun Mode, Collection Mode, and Inventory Mode.
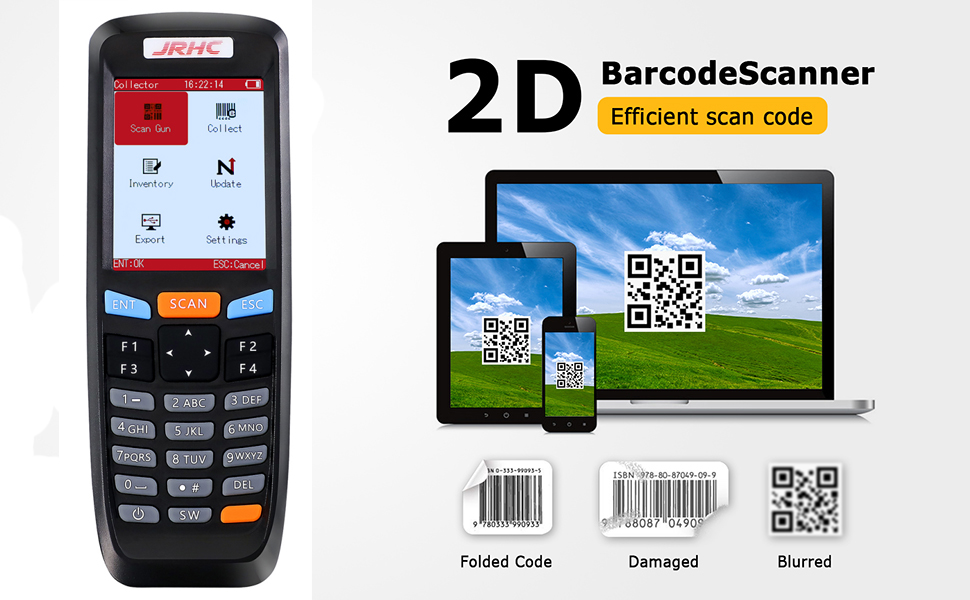
Figure 5: Overview of the three main operating modes: Scan Gun Mode, Collection Mode, and Inventory Mode, detailing how each mode interacts with a connected computer.
5.1. Scan Gun Mode
In Scan Gun Mode, the scanner functions as a traditional barcode reader. Scanned data is transmitted directly to the connected computer in real-time. If the scanner is offline or out of wireless range, scanned data is temporarily stored and automatically transmitted once a signal is re-established.
5.2. Collection Mode
Collection Mode allows for more secure data capture. It supports "Plug and Play" functionality and can be configured to prevent scanning of duplicate codes. This mode is ideal for gathering data where unique entries are critical.
5.3. Inventory Mode
Inventory Mode is designed for inventory management. It automatically accumulates scanned barcode data. Users can browse the collected data and modify incorrect entries directly on the scanner's screen before exporting.
6. Basic Operation
6.1. Scanning Barcodes
To scan a barcode:
- Point the scanner's head towards the barcode.
- Press the SCAN button.
- A successful scan will be indicated by a beep and the barcode data appearing on the screen.
The scanner is capable of reading various 1D and 2D barcode formats, including those displayed on digital screens.

Figure 6: The scanner's capability to read both 1D and 2D barcodes, including QR codes from digital screens. The image shows the scanner's scanning aperture.
Supported Barcode Types:
- 1D: Codabar, Code 11, Code 93, MSI, Code 128, EAN, UPC, Code 39, UPC-A, ISBN, Industrial 25, Standard 25, Matrix.
- 2D: QR Code, DataMatrix, PDF417, Aztec, Micro PDF417.
6.2. Language Settings
The scanner supports multiple languages. To change the language:
- Navigate to the "Settings" menu on the scanner's LCD screen.
- Select "Language" and choose from Japanese, English, or Chinese.
- Confirm your selection using the ENT key.
7. Maintenance
7.1. Battery Care
The scanner is equipped with a 1400mAh polymer lithium battery, providing 20-40 hours of operation on a 2-hour charge.
- Recharge the battery when the low battery indicator appears on the screen.
- Avoid fully discharging the battery frequently to prolong its lifespan.
- Store the scanner in a cool, dry place if not used for extended periods, with the battery partially charged.
7.2. Cleaning
To ensure optimal performance and longevity:
- Wipe the scanner's exterior with a soft, damp cloth.
- Do not use abrasive cleaners or solvents.
- Keep the scanning window clean and free of dust or smudges for accurate scanning.
8. Troubleshooting
Refer to the following table for common issues and their solutions.
| Problem | Possible Cause | Solution |
|---|---|---|
| Scanner does not power on. | Low battery. | Charge the scanner for at least 2 hours. |
| Scanner does not connect to computer. | USB receiver not properly inserted or out of range. | Ensure the USB receiver is securely plugged in and the scanner is within range. Re-pair if necessary. |
| Cannot scan barcodes. | Scanning window is dirty; barcode is damaged or poorly printed; incorrect operating mode. | Clean the scanning window. Ensure the barcode is clear. Check the selected operating mode. |
| Scanned data is incorrect or garbled. | Incorrect keyboard layout setting on computer (e.g., QWERTY vs AZERTY). | Adjust your computer's keyboard input language/layout to match the scanner's default or configured setting. |
| Scanner freezes or becomes unresponsive. | Temporary software glitch. | Perform a soft reset by pressing and holding the On/Off button until the device powers off, then restart. |
9. Specifications
| Feature | Detail |
|---|---|
| Model | S-6606 |
| Brand | JRHC |
| Color | Black |
| Connectivity | 2.4G Wireless (USB Receiver), USB Wired |
| Compatible Operating Systems | Windows XP/7/8/10, Linux |
| Compatible Devices | Laptop, Desktop Computer |
| Barcode Types (1D) | Codabar, Code 11, Code 93, MSI, Code 128, EAN, UPC, Code 39, UPC-A, ISBN, Industrial 25, Standard 25, Matrix |
| Barcode Types (2D) | QR Code, DataMatrix, PDF417, Aztec, Micro PDF417 |
| Scan Rate | 300 frames per second |
| Battery Type | 1400mAh Polymer Lithium-ion (Rechargeable) |
| Charging Time | Approx. 2 hours |
| Operating Time | 20-40 hours |
| Display | 2.8-inch HD Color LCD |
| Compliant Standards | CE, RoHS, WEEE |
10. Warranty and Support
For warranty information and technical support, please refer to the documentation provided with your purchase or contact your retailer. Keep your purchase receipt for warranty claims.
Manufacturer: JRHC
Model Number: S-6606
Serial Number: 202166062833 (Example, refer to your device's label)
Date of Availability: April 18, 2022


