
1. Important Safety Information
Read and understand all instructions before operating the snow thrower. Failure to follow all instructions listed below may result in electric shock, fire, and/or serious personal injury.
- Always keep hands and feet away from rotating parts.
- Wear appropriate safety gear, including gloves and eye protection.
- Do not operate the snow blower in enclosed spaces to prevent carbon monoxide buildup.
- Always follow the manufacturer's instructions for operation and maintenance.
- Ensure the work area is clear of debris and obstacles before operation.
- Keep children and bystanders away from the operating area.
For detailed safety guidelines, refer to the full safety manual provided with your product.
2. Product Overview
The RYOBI 40V HP Brushless 21" Snow Thrower is a battery-powered unit designed for efficient snow removal. It features a high-performance brushless motor and is compatible with RYOBI 40V batteries.
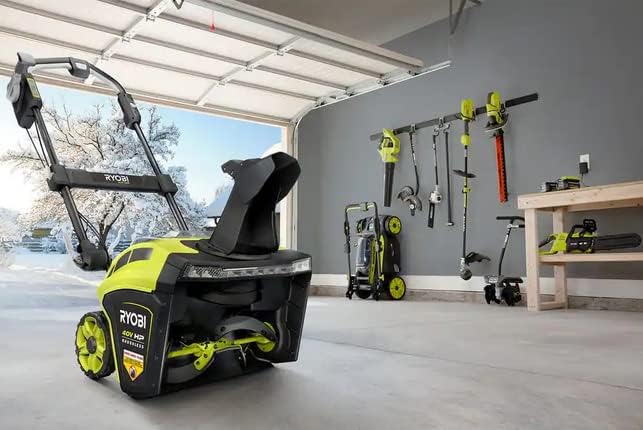
Image 2.1: The RYOBI 40V HP Brushless 21" Snow Thrower, ready for use.
Key Features:
- High Performance Brushless Motor for increased power.
- Clears snow up to 13 inches deep.
- 2 Active Dual Discharge Battery Ports for optimal performance and extended runtime.
- 21 inch clearing width.
- 180° directional chute for snow-throwing control.
- Variable speed auger for user control and longer run time.
- Telescoping collapsible handles for easy storage.
- LED headlight bar for increased visibility.

Image 2.2: Labeled diagram highlighting key features of the snow thrower.
3. Setup
3.1 Unpacking and Assembly
Carefully remove all components from the packaging. The snow thrower features telescoping collapsible handles for compact storage. To prepare for use, extend the handles and secure them in the operating position according to the assembly instructions in the full manual.
3.2 Battery Installation and Charging
This kit includes two 40V 5.0 Ah lithium-ion batteries and a 40V charger. Ensure batteries are fully charged before first use.
- Connect the charger to a standard power outlet.
- Insert the 40V battery into the charger. The indicator light will show charging status.
- Once fully charged, remove the battery from the charger.
- Open the battery compartment on the snow thrower.
- Insert up to two charged 40V batteries into the active battery ports until they click into place.
- Close the battery compartment cover securely.
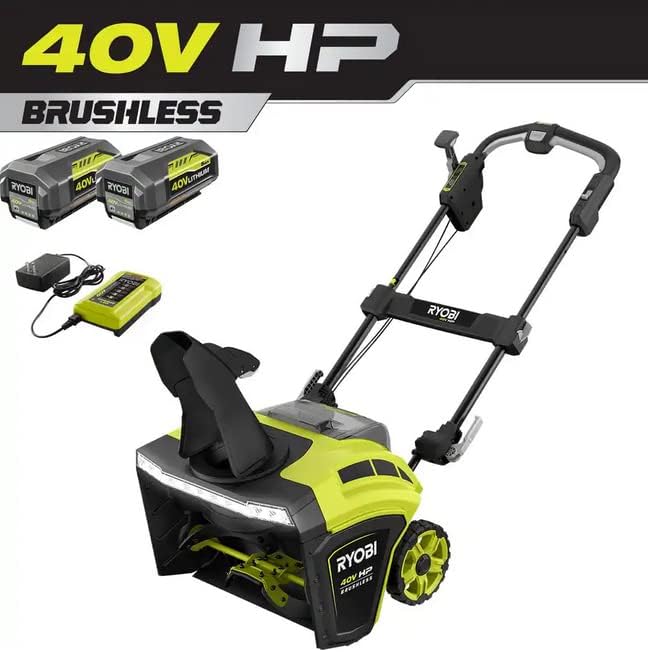
Image 3.1: The snow thrower kit, including batteries and charger.
4. Operating Instructions
4.1 Starting the Snow Thrower
With charged batteries installed, press and hold the safety button, then squeeze the bail switch to start the motor. Release the safety button once the motor is running.
4.2 Clearing Snow
Push the snow thrower forward into the snow. The 21-inch clearing width and powerful auger are designed to clear snow up to 13 inches deep. Adjust your pace based on snow depth and density.

Image 4.1: The snow thrower effectively clearing snow from a paved surface.
4.3 Chute Control and Snow Direction
The snow thrower features a 180° directional chute. Use the chute control lever (typically located near the handle) to adjust the direction of snow discharge. This allows you to throw snow up to 35 feet away, directing it precisely where needed.
4.4 Variable Speed Auger
Utilize the variable speed auger control to match the auger speed to the snow conditions. A higher speed is suitable for deeper or heavier snow, while a lower speed can extend battery runtime in lighter conditions.
4.5 LED Headlight
Activate the integrated LED headlight bar for improved visibility during early morning or late evening snow removal operations.

Image 4.2: Front view highlighting the LED headlight bar and auger mechanism.
4.6 Product Demonstration Video
Video 4.1: A user demonstration of the RYOBI 40V HP Brushless 21" Snow Thrower, showcasing its features and operation.
5. Maintenance
5.1 Cleaning
After each use, disconnect batteries and clean the snow thrower. Remove any snow, ice, or debris from the auger housing, chute, and exterior surfaces. Use a damp cloth; avoid using harsh chemicals or abrasive cleaners.
5.2 Storage
For storage, especially during off-season, ensure the snow thrower is clean and dry. Remove batteries and store them in a cool, dry place. The telescoping collapsible handles allow the unit to be folded for compact storage, saving space in your garage or shed.
5.3 Battery Care
Store batteries in a charged state. Avoid storing fully discharged batteries for extended periods. Refer to the battery and charger manuals for specific care instructions.
6. Troubleshooting
If you encounter issues with your snow thrower, consult the following common troubleshooting tips:
- Snow Thrower Does Not Start: Ensure batteries are fully charged and properly seated in the battery ports. Check that the safety button is pressed before engaging the bail switch.
- Reduced Performance: Verify batteries are fully charged. Clear any obstructions from the auger or chute. Avoid attempting to clear snow deeper than the recommended 13 inches in a single pass.
- Unusual Noise/Vibration: Immediately stop the unit and remove batteries. Inspect the auger and housing for any foreign objects or damage. Do not operate if damage is present.
For more complex issues or repairs, contact RYOBI customer support or an authorized service center.
7. Specifications
| Feature | Specification |
|---|---|
| Brand | RYOBI |
| Model Number | RY40862VNM |
| Power Source | Battery Powered (40V) |
| Engine Type | Brushless Electric |
| Clearing Width | 21 Inches |
| Ideal Snow Depth | Up to 13 Inches |
| UPC | 046396040039 |
| Color | Green |
8. Warranty and Support
8.1 Warranty Information
The RYOBI 40V HP Brushless 21" Snow Thrower is backed by a 5-year limited warranty. Please retain your proof of purchase for warranty claims. For full warranty terms and conditions, refer to the warranty documentation included with your product or visit the official RYOBI website.
8.2 Customer Support
For technical assistance, parts, or service, please contact RYOBI customer support. Contact information can typically be found in your product's packaging or on the official RYOBI website.


