
1. Introduction
This manual provides essential information for the installation, operation, and maintenance of your liriuda 2-barrel marine carburetor. This carburetor is designed as a replacement for Mercruiser Rochester Mercarb units in 3.0L and 2.5L 4-cylinder engines, specifically for 3.0L ALPHA ONE - 3.0L GM 181 I/L4 engines originally equipped with a 2-barrel Mercarb.
Refer to this guide to ensure proper function and longevity of your marine carburetor. For optimal performance and safety, professional installation is recommended.
2. Safety Information
Always prioritize safety when working with marine engines and fuel systems. Ensure the engine is off and cooled before beginning any work. Disconnect the battery to prevent accidental starting. Work in a well-ventilated area to avoid inhaling fuel vapors. Wear appropriate personal protective equipment, including gloves and eye protection. Fuel is highly flammable; keep ignition sources away from the work area. If you are unsure about any step, consult a qualified marine mechanic.
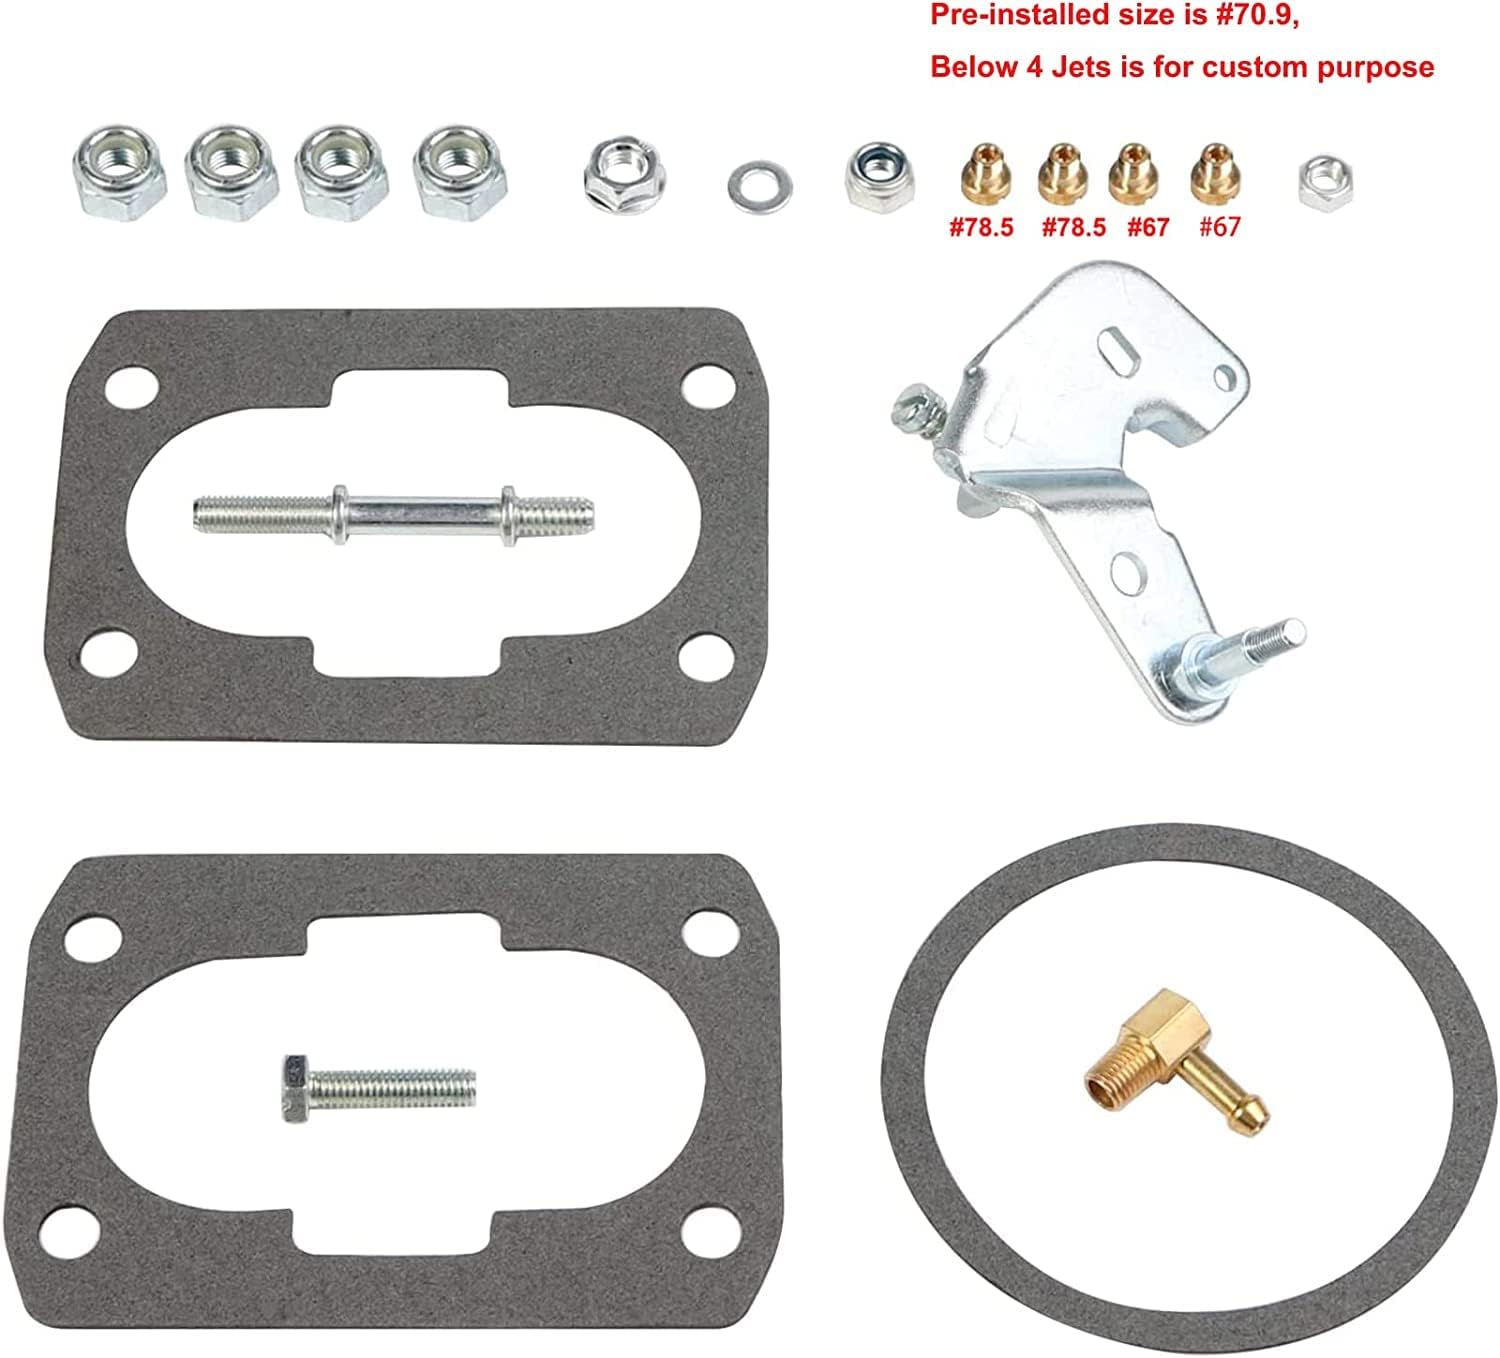
3. Package Contents
Verify that all components are present in your package before beginning installation:
- 1x liriuda 2-Barrel Marine Carburetor (with short linkage installed)
- 3x Gaskets
- 1x Brass fitting
- 1x Replacement throttle arm
- 4x Custom purpose jets (pre-installed size is #70.9)
- 1x Air filter bolt
- 1x Bolt
- 1x Shim
- 7x Nuts
- 1x Long linkage kit
4. Specifications
| Brand | liriuda |
| Model Number | 3310-864940A01, 8M0045397 |
| UPC | 747749037002 |
| Vehicle Service Type | Boat |
| Compatible Engines | Mercruiser 2.5L and 3.0L 4-Cylinder (e.g., 3.0L ALPHA ONE - 3.0L GM 181 I/L4) |
| Flange Type | Bolt On |
| Base Bolt Pattern | 3 3/4 x 2 inches |
| Fuel Type | Gasoline |
| Choke Type | Electric Choke |
| Pre-installed Jet Size | #70.9 |
| Exterior Finish | Polished |

5. Setup and Installation
Before installing the new carburetor, ensure the engine's fuel system is clean. This includes cleaning oil channels and replacing the air filter. Use only clean fuel to prevent contamination.
5.1 Pre-Installation Checks
- Compare the new carburetor with your old unit, paying close attention to the base bolt pattern (3 3/4 x 2 inches) and linkage connections.
- Ensure all included gaskets match the mounting surfaces.
- Decide whether to use the pre-installed short linkage or the provided long linkage kit based on your engine's requirements.

5.2 Installation Steps
- Carefully remove the old carburetor, noting the connections for fuel lines, vacuum hoses, and throttle linkage.
- Clean the mounting surface on the intake manifold thoroughly to ensure a proper seal.
- Place the new gasket(s) on the manifold.
- Mount the new liriuda carburetor, ensuring the base bolt pattern aligns correctly. Secure with appropriate bolts and nuts, tightening evenly to prevent warping.
- Connect the fuel line to the side fuel inlet.
- Attach the throttle linkage. The carburetor comes with a short linkage installed; use the long linkage kit if needed.
- Connect the electric choke wiring.
- Reconnect any vacuum lines or other accessories.
- Install the air filter assembly.

5.3 Initial Adjustments
After installation, initial adjustments for idle speed and automatic choke may be necessary. Refer to online resources or a service manual for your specific engine model for detailed adjustment procedures. Professional tuning is recommended for optimal engine performance.
Video 5.1: An official product video demonstrating the liriuda Marine Carburetor for Mercruiser 3.0L/2.5L 4-cylinder engines, showcasing its features and design.
6. Operation
Once installed and adjusted, the carburetor will regulate the air-fuel mixture for your marine engine. Ensure the engine starts smoothly and idles consistently. Monitor engine performance during initial operation, checking for any unusual noises, vibrations, or fuel leaks. The electric choke will automatically adjust the air-fuel mixture for cold starts.
7. Maintenance
Regular maintenance is crucial for the longevity and reliable operation of your marine carburetor.
- Cleaning: Periodically inspect the carburetor for dirt, debris, or fuel varnish. Cleaning should be performed in a clean environment using a specialized carburetor cleaner or industrial gasoline.
- Air Filter: Ensure the air filter is clean and free of obstructions to allow proper airflow.
- Fuel Quality: Always use clean, fresh fuel. Stale or contaminated fuel can lead to carburetor issues.
- Disassembly/Assembly: If disassembly is required, use appropriate tools and moderate force to prevent damage. Keep disassembled parts organized to avoid loss or incorrect reassembly.
8. Troubleshooting
If you experience issues with your carburetor, consider the following common problems:
- Engine not starting: Check fuel supply, electric choke operation, and spark plugs. Ensure proper fuel delivery to the carburetor.
- Rough idle or stalling: May indicate incorrect idle mixture adjustment, vacuum leaks, or fuel delivery issues.
- Poor acceleration: Could be related to main jet sizing or accelerator pump function.
- Fuel leaks: Inspect gaskets, fuel lines, and float level.
For complex issues or persistent problems, it is highly recommended to consult a professional marine mechanic.
9. Warranty and Support
This liriuda marine carburetor comes with a 12-month warranty. If you have any questions regarding the product, its installation, or require warranty assistance, please contact liriuda customer support. Ensure you have your purchase details and model number (3310-864940A01) available when contacting support.