1. Introduction
This manual provides instructions for the Jancane 4K KVM Switch (Model V806-A1). This device allows you to control two computers using a single set of peripherals: one monitor, one keyboard, and one mouse. It supports Ultra HD 4K@60Hz resolution, ensuring a high-quality visual experience. The KVM switch is designed for efficiency and ease of use, featuring a simple one-button switching mechanism between connected computers.

Image: The Jancane 4K KVM Switch, a compact black device, shown with its accompanying HDMI and USB cables.
2. Package Contents
Please verify that all items are present in the package:
- 1 x Jancane KVM Switch (Model V806-A1)
- 2 x HDMI Cables (1.2m)
- 2 x USB 2.0 Cables (1.2m)
- 1 x User Manual

Image: A visual representation of the package contents, including the KVM switch, two HDMI cables, two USB cables, and the user manual.
3. Product Interface Introduction
Familiarize yourself with the ports and indicators on the KVM switch:

Image: A detailed diagram illustrating the front and rear interfaces of the KVM switch, with numbered labels for each port and button.
- PC1-USB Input: Connects to the USB port of Computer 1.
- PC1-HDMI Input: Connects to the HDMI output of Computer 1.
- PC2-HDMI Input: Connects to the HDMI output of Computer 2.
- PC2-USB Input: Connects to the USB port of Computer 2.
- Signal Switch Button: Press to switch between Computer 1 and Computer 2. The LED indicator around the button changes color (Blue for PC1, Green for PC2).
- HDMI Output (Monitor): Connects to your display monitor.
- USB-A Outputs (Keyboard/Mouse): Connect your keyboard, mouse, or other USB peripherals here.
4. Setup Instructions
Follow these steps to connect your Jancane KVM Switch:
- Connect Monitor: Use an HDMI cable (not included) to connect your monitor's HDMI input to the HDMI Output (Monitor) port on the KVM switch.
- Connect Peripherals: Plug your USB keyboard and USB mouse into the USB-A Output ports on the front of the KVM switch.
- Connect Computer 1:
- Use one of the included HDMI cables to connect Computer 1's HDMI output to the PC1-HDMI Input port on the KVM switch.
- Use one of the included USB cables to connect Computer 1's USB port to the PC1-USB Input port on the KVM switch.
- Connect Computer 2:
- Use the second included HDMI cable to connect Computer 2's HDMI output to the PC2-HDMI Input port on the KVM switch.
- Use the second included USB cable to connect Computer 2's USB port to the PC2-USB Input port on the KVM switch.
- Power On: Ensure both computers and the monitor are powered on. The KVM switch does not require an external power adapter.
Important: Ensure both the HDMI and USB cables are connected from each computer to the KVM switch for proper functionality of both video and peripheral sharing.

Image: A visual guide demonstrating how to connect two PCs, a monitor, keyboard, and mouse to the KVM switch using the provided cables.
5. Operating Instructions
Operating the Jancane KVM Switch is straightforward:
- Initial State: Upon powering on, the KVM switch will automatically select one of the connected computers. The LED indicator around the switch button will illuminate either blue (for PC1) or green (for PC2).
- Switching Computers: To switch control between the two connected computers, simply press the Signal Switch Button located on the top of the KVM device.
- Indicator: The LED light will change color to indicate which computer is currently active: blue for PC1 and green for PC2.

Image: A hand pressing the central button on the KVM switch, illustrating the one-click switching functionality between PC1 and PC2.
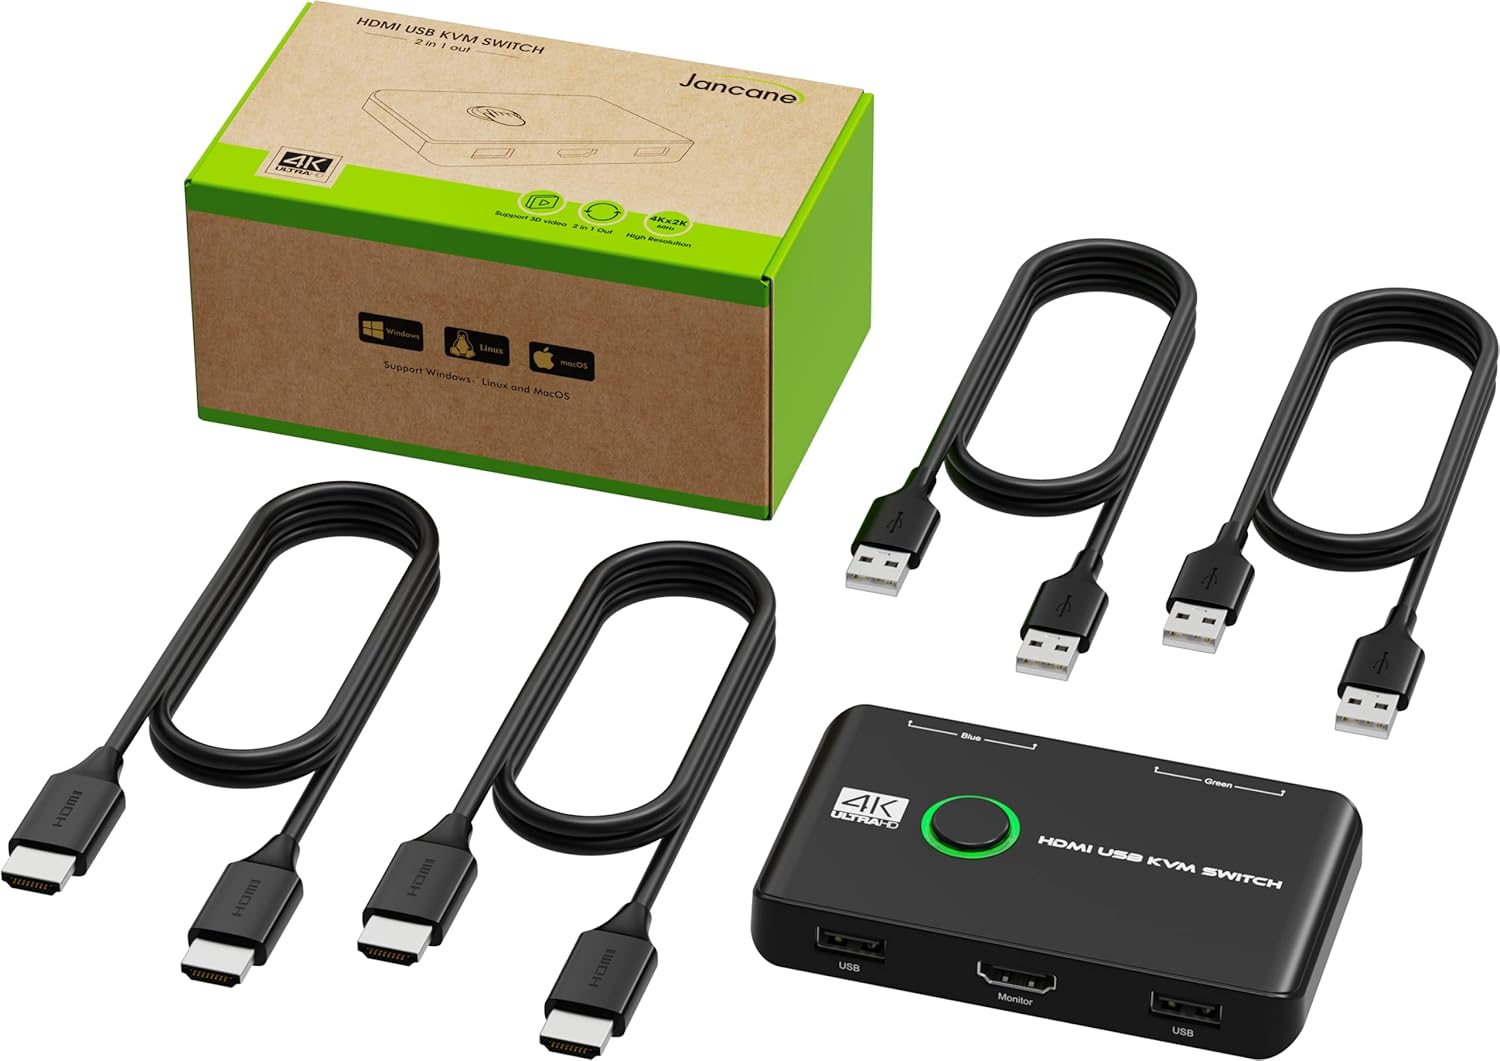
Image: A visual representation of the KVM switch button, showing its blue state for PC1 and green state for PC2, indicating the active computer.
6. Compatibility
The Jancane KVM Switch offers broad compatibility with various operating systems and devices:
- Operating Systems: Driver-free for Windows 10/8/8.1/7/Vista/XP, Mac OS, Linux, and Chrome OS.
- Input Devices/Signal Sources: Supports PS4, PS4 Pro, PS3, Xbox One, TV Box, PC, laptop, Nintendo Switch, and most HDMI-capable devices.

Image: Icons representing Windows, Mac OS, and Linux, illustrating the KVM switch's universal compatibility with different operating systems.
7. Troubleshooting
If you encounter issues with your KVM switch, please refer to the following troubleshooting steps:
- No Display or Flickering Screen:
- Ensure all HDMI cables are securely connected to both the KVM switch and your computers/monitor.
- Verify that your monitor is set to the correct HDMI input source.
- Try using different HDMI cables to rule out cable defects.
- Restart the connected computers.
- Confirm your monitor supports the output resolution (e.g., 4K@60Hz).
- Keyboard or Mouse Not Responding:
- Ensure all USB cables are securely connected from the computers to the KVM switch.
- Ensure your keyboard and mouse are plugged into the correct USB-A output ports on the KVM switch.
- Try unplugging and replugging the keyboard and mouse from the KVM switch.
- Test the keyboard and mouse directly with the computer to confirm they are functional.
- Some specialized gaming keyboards/mice with advanced features may require direct connection or specific drivers not supported by KVM switches. Try a standard keyboard/mouse to isolate the issue.
- Switching Issues:
- Ensure the KVM switch button is pressed firmly.
- Check if the LED indicator changes color after pressing the button.
8. Specifications
| Feature | Detail |
|---|---|
| Model Number | V806-A1 |
| Product Dimensions | 7.87 x 4.72 x 1.18 inches |
| Item Weight | 10.86 ounces |
| Maximum Resolution | 4K@60Hz (also supports 4K@30Hz, 3D, 1080P and lower resolutions) |
| Connector Type | HDMI, USB |
| Operation Mode | ON-ON |
| Operating Voltage | 5 Volts |
| Current Rating | 1 Amps |
| Actuator Type | Push Button |

Image: Three monitors showcasing different supported resolutions: 1080P Full HD, 4K@30Hz, and 4K@60Hz, highlighting the KVM switch's high-resolution capabilities.
9. Maintenance
To ensure the longevity and optimal performance of your KVM switch, follow these simple maintenance guidelines:
- Cleaning: Use a soft, dry cloth to clean the exterior of the device. Avoid using liquid cleaners, solvents, or abrasive materials, as these can damage the finish or internal components.
- Environment: Keep the KVM switch in a dry, dust-free environment. Avoid exposing it to extreme temperatures, humidity, or direct sunlight.
- Handling: Handle the device with care. Avoid dropping it or subjecting it to strong impacts.
10. Warranty and Support
Jancane is committed to providing reliable products and customer satisfaction.
- Technical Support: Jancane provides lifetime technical support for this KVM switcher.
- Contact: For any problems, questions, or technical assistance, please contact Jancane customer service. Refer to the contact information provided with your purchase or visit the official Jancane website for support details.


