1. Safety Information
Please read all safety instructions carefully before using this appliance.
- Always unplug the hair clipper before cleaning or replacing parts.
- Do not use near water or in wet environments.
- Keep out of reach of children.
- Use with caution around the face and eyes.
- Avoid contact with skin if the blades are damaged or misaligned.
- Clean and store properly after each use to ensure hygiene and longevity.
- Do not use the appliance if the cord or plug is damaged.
- Do not attempt to repair the appliance yourself; contact qualified service personnel.
2. Package Contents
Verify that all items listed below are included in your package:

Image: Haokry Hair Clipper with full accessory kit.
- Electric Hair Clipper
- 6 Guide Combs (3mm, 6mm, 10mm, 13mm, 16mm, 19mm)
- Hair Cutting Cape
- Lubricating Oil
- Cleaning Brush
- Comb
- Scissors
- USB Charging Cable
3. Product Overview
3.1 Cordless & Corded Operation
The Haokry Hair Clipper supports both cordless and corded operation, offering flexibility for use. It can be used while plugged in and charging, or wirelessly after a full charge.

Image: Clipper illustrating cordless and corded functionality with USB charging.
3.2 Adjustable Blade Length
The clipper features an adjustable blade lever, allowing for fine-tuning of cutting lengths from 0.5mm to 2.5mm without a guide comb.

Image: Clipper highlighting the adjustable blade and LED display.
3.3 LED Power Indicator & Gear Display
An intelligent LED display shows the current battery percentage (10%, 20%, 40%, 70%, 100%) and the selected cutting speed (gear 1, 2, or 3).
3.4 R-Type Acute Angle Cutter Blade
The clipper is equipped with an R-type acute angle cutter blade designed for self-sharpening, providing a comfortable and skin-friendly cutting experience.

Image: Detail of the R-Type acute angle cutter blade.
3.5 Powerful Rotary Motor
A strong 3.7V rotary motor ensures efficient cutting through various hair types without snagging or pulling.

Image: Illustration of the clipper's internal motor.
4. Setup
4.1 Charging the Clipper
- Connect the USB charging cable to the clipper's charging port.
- Plug the other end of the USB cable into a compatible USB power adapter (not included) or a USB port.
- During charging, the five indicators on the LED display will light up sequentially from bottom to top.
- When all five indicators remain steadily lit, the clipper is fully charged. A full charge provides up to 200 minutes of use.
- Disconnect the charging cable once fully charged.
4.2 Attaching Guide Combs
To achieve desired hair lengths, attach one of the six provided guide combs.

Image: Step 1 - Aligning the comb.
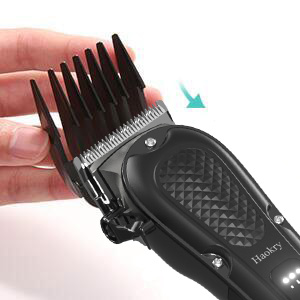
Image: Step 2 - Sliding the comb into place.
- Select the desired guide comb (3mm, 6mm, 10mm, 13mm, 16mm, or 19mm).
- Align the comb with the clipper blade.
- Slide the comb firmly onto the blade until it clicks securely into place.
5. Operating Instructions
5.1 Powering On/Off
- To turn on: Gently press the side power button. The indicator above the short symbol (first gear) will light up.
- To turn off: Press and hold the power button for 3 seconds.
5.2 Adjusting Cutting Speed (Gear)
The clipper has three adjustable cutting speeds.
- After powering on (first gear), press the power button once again to switch to the second gear. The indicator above the medium length symbol will light up.
- Press the power button once more to switch to the third gear. The indicator above the longest symbol will light up.
- Press the power button again to return to the first (slow) gear.
5.3 Adjusting Blade Length (without Guide Comb)
Use the adjustable lever on the side of the clipper to change the cutting length from 0.5mm to 2.5mm.

Image: Adjusting the blade lever.
- Move the lever up for a shorter cut (closer to 0.5mm).
- Move the lever down for a longer cut (closer to 2.5mm).
6. Maintenance
6.1 Cleaning the Blades

Image: Removing a guide comb.
- Ensure the clipper is turned off and unplugged.
- Remove any attached guide comb.
- Use the provided cleaning brush to remove loose hair from the blades and the clipper body.
- For a more thorough cleaning, the blades can be carefully detached (refer to specific instructions if provided in a detailed diagram, otherwise proceed with caution).
- Do not rinse the clipper under water unless explicitly stated as waterproof.
6.2 Oiling the Blades
Regular oiling ensures optimal performance and extends blade life.
- After cleaning, apply a few drops of the lubricating oil (provided) to the blades.
- Turn on the clipper for a few seconds to distribute the oil evenly.
- Wipe off any excess oil with a soft cloth.
7. Troubleshooting
| Problem | Possible Cause | Solution |
|---|---|---|
| Clipper does not turn on. | Battery is depleted. | Charge the clipper fully. |
| Clipper does not turn on. | Power button not pressed correctly. | Press and hold the power button for 3 seconds to turn off, then gently press to turn on. |
| Clipper pulls hair or cuts poorly. | Blades are dull or dirty. | Clean and oil the blades. If blades are dull, consider replacement. |
| Clipper pulls hair or cuts poorly. | Battery is low. | Charge the clipper. |
| Clipper is unusually noisy. | Blades require oiling. | Apply lubricating oil to the blades. |
8. Specifications
| Feature | Detail |
|---|---|
| Brand | Haokry |
| Model Number | 1 |
| Battery Type | Lithium Ion |
| Charging Time | Approximately 200 minutes |
| Operating Time | Up to 200 minutes on a full charge |
| Blade Material | High-Carbon Steel |
| Adjustable Blade Length | 0.5mm - 2.5mm |
| Input Voltage Current | 5V/1A |
| Output Power | 5W |
| Package Dimensions | 8.19 x 5.39 x 2.52 inches |
| Item Weight | 1.01 Pounds |
9. Warranty and Support
This Haokry product is covered by a manufacturer's warranty. For specific warranty details, claims, or technical support, please refer to the documentation included with your purchase or contact Haokry customer service directly.
Contact information for the manufacturer may be found on the product packaging or their official website.


