
1. Introduction
This manual provides essential information for the safe and efficient operation, assembly, and maintenance of your ANCHEER 350/500W Electric Bike. Please read this manual thoroughly before your first ride to ensure proper usage and to maximize the lifespan of your e-bike. Retain this manual for future reference.
2. Safety Information
- Always wear a helmet and appropriate safety gear when riding.
- Ensure all bolts and quick releases are securely tightened before each ride.
- Check tire pressure, brake function, and battery charge level before every use.
- Adhere to local traffic laws and regulations.
- Do not ride under the influence of alcohol or drugs.
- Avoid riding in adverse weather conditions, such as heavy rain or snow, which can reduce visibility and traction.
- Do not exceed the maximum weight capacity of 265 lbs (120 kg).
- Keep hands and feet clear of moving parts, especially the chain and gears.
3. Package Contents
Upon unpacking, please verify that all the following items are included:
- ANCHEER Electric Bike (partially assembled)
- Removable 48V 10Ah Lithium-Ion Battery
- Battery Charger
- Pedals (Left and Right)
- Front Wheel with Quick Release Skewer
- Seat and Seatpost
- Handlebar
- Front Reflector
- Kickstand
- Assembly Tools (Allen wrenches, open-end wrench)
- User Manual (this document)
4. Setup & Assembly
Your ANCHEER Electric Bike is approximately 90% pre-assembled. Follow these steps carefully to complete the assembly. For visual guidance, please refer to the assembly video provided below.
Video: Comprehensive assembly guide for the ANCHEER Electric Bike, demonstrating each step from unboxing to final checks.
4.1. Install the Handlebar
Remove the faceplate from the stem using an Allen wrench. Position the handlebar in the stem clamp, ensuring it is centered. Reattach the faceplate and tighten the bolts evenly in a criss-cross pattern until secure. Ensure the cables are not twisted or pinched.
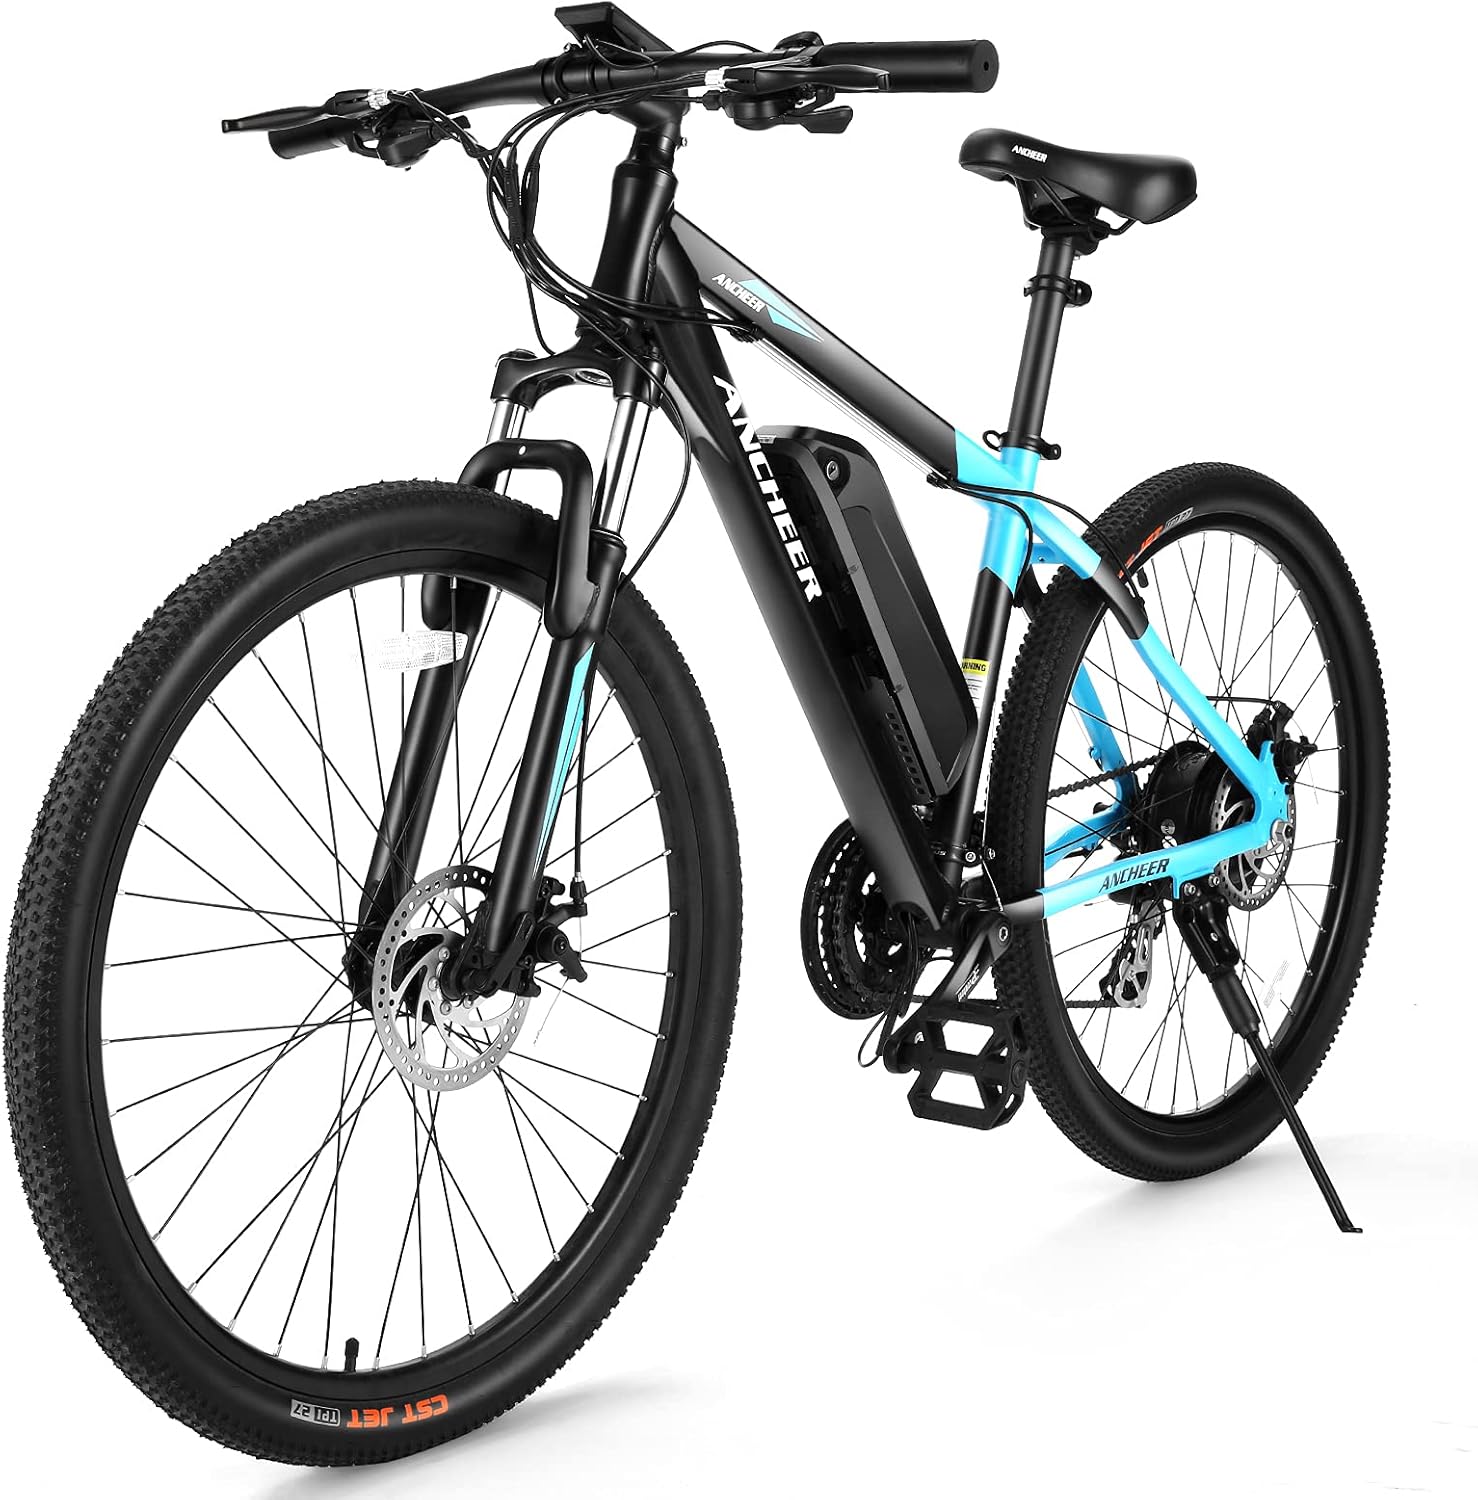
Image: The ANCHEER Electric Bike with the handlebar correctly installed and aligned.
4.2. Install the Seat
Insert the seat post into the seat tube of the bike frame. Adjust the seat height to a comfortable riding position, ensuring the minimum insertion mark on the seat post is not visible. Secure the seat post by closing the quick-release lever firmly.
4.3. Install the Pedals
Identify the left (L) and right (R) pedals. The right pedal (R) threads clockwise into the right crank arm. The left pedal (L) threads counter-clockwise into the left crank arm. Apply a small amount of grease to the pedal threads before installation. Tighten securely with a wrench.
4.4. Install the Front Wheel
Turn the bike upside down, resting it on the handlebars and seat (use padding under the handlebars to protect the display). Carefully align the front wheel into the fork dropouts, ensuring the disc brake rotor slides correctly into the brake caliper. Insert the quick-release skewer through the hub and tighten it firmly. Ensure the wheel is centered and spins freely without brake friction.

Image: The durable 27.5-inch double-layer aluminum alloy mountain wheel, designed for stable performance and smooth rotation.
4.5. Install the Kickstand (Foot Support)
Attach the kickstand to the designated mounting plate near the rear wheel. Secure it with the provided bolts and Allen wrench, ensuring it is stable and allows the bike to stand upright.
4.6. Install the Battery
Slide the removable 48V 10Ah lithium-ion battery into its housing on the bike frame. Push firmly until it clicks into place. Use the key to lock the battery securely to prevent theft and ensure proper connection during rides. Confirm the battery lock is engaged.

Image: The removable 48V 10Ah lithium-ion battery, featuring multiple protection mechanisms for safety and longevity.
4.7. Install the Front Reflector
Attach the front reflector to the handlebar using the provided bracket and screwdriver. Ensure it is securely fastened and visible from the front.
5. Operating Instructions
5.1. Power On/Off
To power on the e-bike, press and hold the power button on the LCD display. To power off, press and hold the same button until the display turns off.

Image: The intuitive LCD display provides real-time information such as battery indicator, speed, mileage, and PAS level.
5.2. Pedal Assist System (PAS)
The e-bike features a Pedal Assist System with multiple levels. Use the '+' and '-' buttons on the handlebar control panel to adjust the assist level. Higher levels provide more motor assistance, making pedaling easier.
5.3. Throttle Mode
For full electric power without pedaling, gently twist the throttle on the right handlebar. The throttle provides immediate acceleration and is ideal for quick boosts or when you prefer not to pedal.
5.4. Gear Shifting
Your ANCHEER e-bike is equipped with a 21-speed Shimano gear system. Use the shifters on the handlebars to change gears, allowing you to adapt to various terrains and optimize your pedaling efficiency. Shift gears smoothly to avoid strain on the drivetrain.

Image: The professional 21-speed Shimano gear system, designed for versatile riding and efficient power transfer.
5.5. LCD Display Functions
The LCD display provides crucial riding data:
- Battery Indicator: Shows remaining battery charge.
- Speed: Displays current riding speed.
- Mileage: Tracks trip distance and total odometer.
- PAS Level: Indicates the current pedal assist level.
- Backlit Screen: Ensures visibility in low-light conditions.
6. Charging the Battery
To charge the battery, first ensure the e-bike is powered off. Connect the charger to the charging port on the battery, then plug the charger into a standard wall outlet. The indicator light on the charger will typically turn red during charging and green when fully charged. Charging time is approximately 4-6 hours. Do not overcharge the battery. Always use the original charger provided with your e-bike.

Image: Visual guide for charging the removable 48V 10.4Ah battery, highlighting the charging process.
7. Maintenance
Regular maintenance is crucial for the longevity and safe operation of your e-bike.
- Tires: Check tire pressure regularly (recommended pressure is usually on the tire sidewall). Inspect for wear, cuts, or punctures.
- Brakes: Regularly check brake pads for wear and ensure brake levers provide firm and responsive braking. Adjust as needed.
- Chain: Keep the chain clean and lubricated to ensure smooth gear changes and prevent rust.
- Fasteners: Periodically check all bolts, nuts, and screws for tightness.
- Cleaning: Clean your e-bike with a damp cloth and mild soap. Avoid high-pressure washing directly on electrical components.
- Battery Care: Store the battery in a cool, dry place. If storing for extended periods, charge it to about 50-70% every 2-3 months.
8. Troubleshooting
This section addresses common issues you might encounter. For problems not listed here, please contact customer support.
| Problem | Possible Cause | Solution |
|---|---|---|
| Bike does not power on. | Battery not charged; Battery not properly installed; Power button not pressed correctly. | Charge the battery; Ensure battery is fully seated and locked; Press and hold the power button firmly. |
| Motor not assisting. | PAS level too low or off; Battery low; Loose electrical connection. | Increase PAS level; Charge battery; Check all cable connections. |
| Brakes are squealing or ineffective. | Brake pads worn; Rotor dirty; Brakes need adjustment. | Inspect and replace brake pads if necessary; Clean rotor with disc brake cleaner; Adjust brake caliper or cable tension. |
| Gears are not shifting smoothly. | Derailleur out of adjustment; Dirty or dry chain. | Adjust derailleur limits and cable tension; Clean and lubricate the chain. |
9. Specifications
| Feature | Specification |
|---|---|
| Bike Type | Electric Bike (Commuter/Mountain) |
| Motor Wattage | 350W (Regular) / 500W (Peak) |
| Battery | 48V 10Ah Removable Lithium-Ion |
| Wheel Size | 27.5 Inches |
| Number of Speeds | 21-Speed Shimano Gears |
| Frame Material | Aluminum Alloy |
| Brake Style | Disc Brakes (Front & Rear) |
| Suspension Type | Rigid (Front Fork with Lockable Suspension) |
| Item Weight | 50 Pounds (approx. 22.7 kg) |
| Weight Capacity | 265 lbs (approx. 120 kg) |
| Recommended Rider Height | 64 - 76 inches (5'4" - 6'4") |
| Special Feature | Digital Display |
10. Warranty and Support
ANCHEER provides customer support and warranty services for your electric bike. For any questions, issues, or to claim warranty service, please refer to the following:
- Contacting Support: Find us directly by order. We aim to reply as soon as possible within 24 hours on working days. Telephone service may also be available if needed.
- Replacement Parts: Within one year after purchase, provide corresponding pictures or videos to prove that parts are damaged to receive free replacement parts.
- Returns: Returns are accepted within one month from the date of purchase.
- Purchasing Accessories: If you need to purchase accessories after one year, please contact us directly by order.
For more information, visit the official ANCHEER store on Amazon: ANCHEER Store


