
Introduction
This manual provides comprehensive instructions for the installation, operation, and maintenance of your GIGABYTE H610M S2H DDR4 motherboard. Designed to support 12th Gen Intel Core Series Processors, this motherboard offers robust performance and essential features for building a reliable personal computer system.

Image: The GIGABYTE H610M S2H DDR4 motherboard shown alongside its retail packaging, highlighting its key features and branding.
Key Features
- Intel LGA 1700 Socket: Supports 12th Gen Intel Core Series Processors.
- DDR4 Compatible: Dual Channel Non-ECC Unbuffered DDR4, 2 DIMMs.
- Commanding Power Design: 6+1+1 Hybrid Digital VRM Design for stable power delivery.
- Connectivity: PCI 4.0, Single NVMe PCIe 3.0 x4 M.2 slot, and USB 3.2 Gen1 ports.
- Fast Networking: Integrated Realtek 2.5GbE LAN for high-speed internet access.
- Dynamic Audio: High-End Audio Capacitors for enhanced sound quality.
Setup Guide
Follow these general steps for installing your GIGABYTE H610M S2H DDR4 motherboard into your PC case and connecting essential components. Always refer to your PC case manual for specific mounting instructions.
1. Motherboard Installation
- Ensure your PC case has the necessary standoffs installed for a Micro ATX motherboard.
- Carefully align the motherboard with the standoffs and the I/O shield opening in the case.
- Secure the motherboard with screws, ensuring it is firmly seated but not overtightened.
2. CPU Installation
Open the CPU socket retention lever. Align the triangular mark on your 12th Gen Intel Core processor with the mark on the socket. Gently place the CPU into the socket without forcing it. Close the retention lever to secure the CPU.
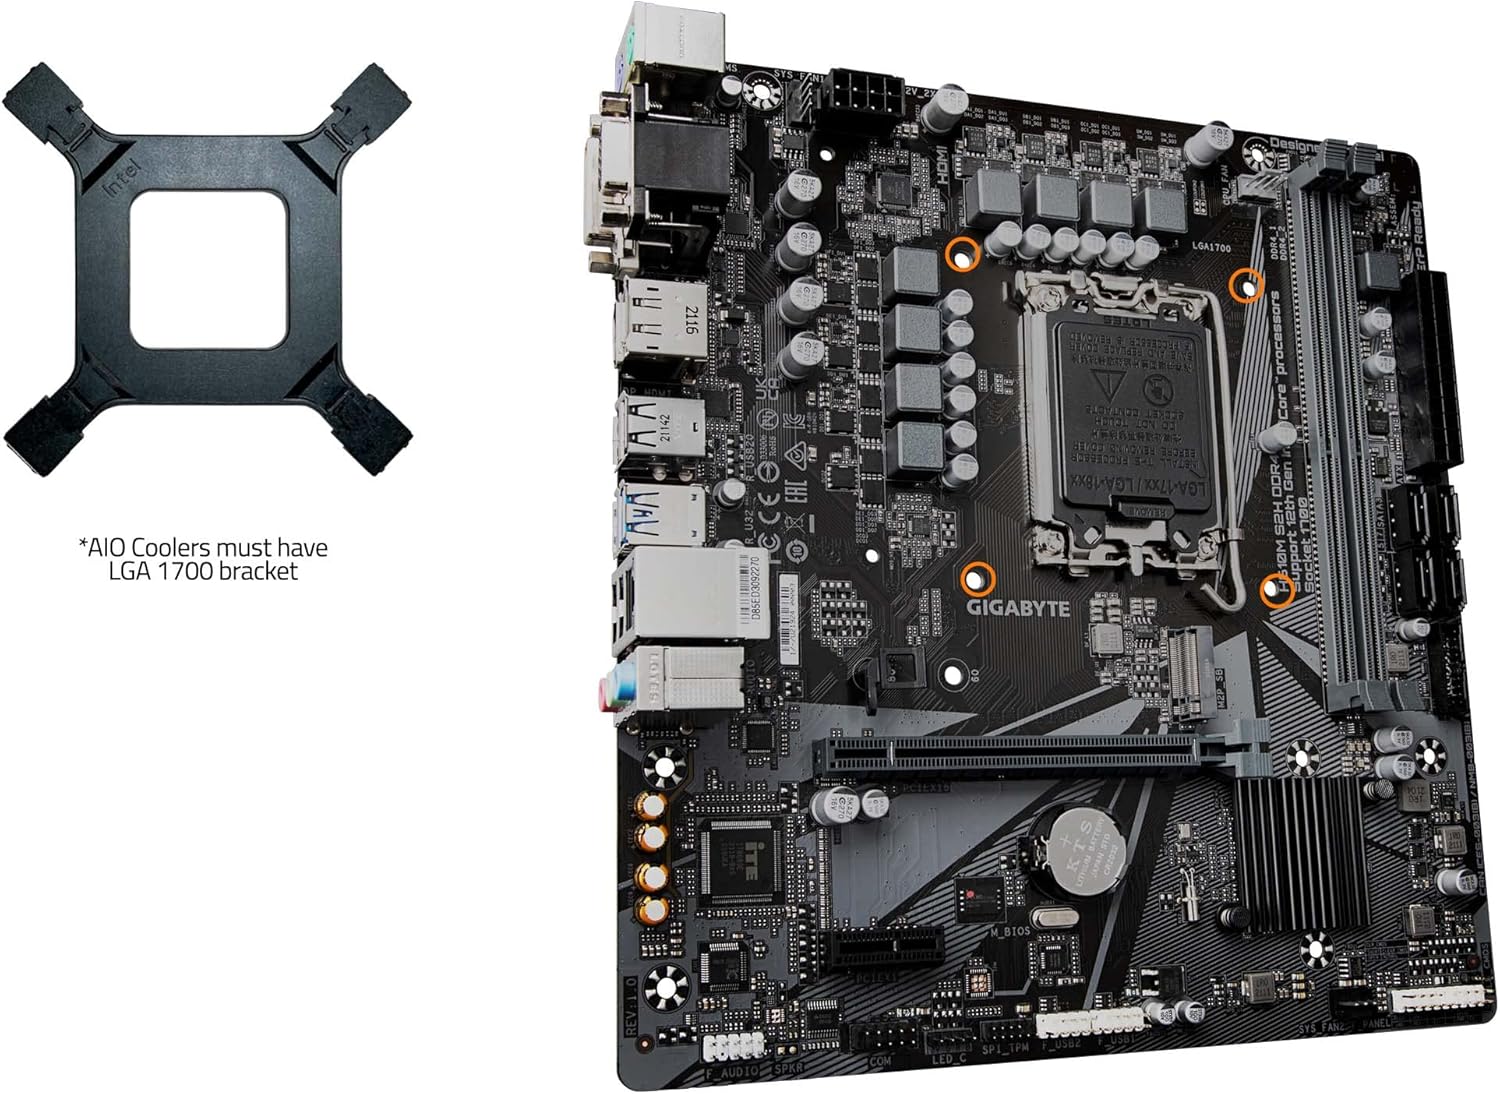
Image: An Intel LGA 1700 CPU bracket, essential for mounting compatible CPU coolers onto the motherboard.
3. RAM Installation
Locate the DDR4 DIMM slots. Open the clips on both ends of the slot. Align the notch on the RAM module with the key in the DIMM slot. Press down firmly on both ends of the RAM module until the clips snap into place.
4. Storage Device Installation
For NVMe M.2 SSDs, locate the M.2 slot. Insert the SSD at an angle and then gently push it down, securing it with the provided screw or latch mechanism. For SATA drives, connect the SATA data cable to the motherboard and the power cable from the power supply.
5. Power Supply Connections
Connect the 24-pin ATX main power connector and the 8-pin CPU power connector from your power supply to the corresponding ports on the motherboard. Connect power cables to your graphics card (if applicable) and storage devices.

Image: A detailed top-down view of the GIGABYTE H610M S2H DDR4 motherboard, showing the CPU socket, RAM slots, PCIe slots, and various headers.
6. Peripheral Connections
Connect your monitor to the appropriate video output port (HDMI, DisplayPort, DVI-D, or D-Sub) on the motherboard's rear I/O panel. Connect USB devices, keyboard, mouse, and Ethernet cable as needed.

Image: The rear input/output panel of the GIGABYTE H610M S2H DDR4 motherboard, displaying various ports including PS/2, D-Sub, DVI-D, HDMI, DisplayPort, USB, Ethernet, and audio jacks.
Operating Instructions
Once all components are installed and connected, you can power on your system. The motherboard will initiate the Power-On Self-Test (POST) process. If an operating system is not yet installed, you will typically be prompted to enter the BIOS/UEFI setup or boot from an installation medium.
BIOS/UEFI Setup
To access the BIOS/UEFI setup, press the designated key (usually DEL or F2) during the initial boot sequence. Within the BIOS/UEFI, you can configure boot order, system time, enable/disable integrated peripherals, and monitor system status. Save changes before exiting.
Driver Installation
After installing your operating system, install the necessary drivers for the motherboard's components (chipset, LAN, audio, USB, etc.). These drivers are typically provided on a support CD/DVD or can be downloaded from the GIGABYTE official website.
Maintenance
Regular maintenance helps ensure the longevity and optimal performance of your motherboard and PC system.
- Dust Removal: Periodically clean dust from inside your PC case, especially from fans and heatsinks, using compressed air. Ensure the system is powered off and unplugged before cleaning.
- BIOS/UEFI Updates: Check the GIGABYTE website for the latest BIOS/UEFI updates. Updates can improve compatibility, stability, and performance. Follow the update instructions carefully to avoid system damage.
- Driver Updates: Keep your motherboard drivers updated to ensure compatibility with new software and hardware, and to benefit from performance improvements and bug fixes.
Troubleshooting
If you encounter issues with your motherboard, refer to the following common troubleshooting steps:
- No Power: Ensure all power cables (24-pin ATX, 8-pin CPU) are securely connected. Check the power supply unit (PSU) and wall outlet.
- No Display: Verify that the monitor is connected to the correct video output port. Reseat the graphics card (if applicable) and RAM modules. Try booting with only one RAM stick.
- System Instability/Crashes: Check for proper CPU cooler installation and thermal paste application. Ensure RAM modules are correctly seated. Update BIOS/UEFI and drivers.
- Peripheral Not Detected: Ensure USB devices are properly connected. Try different USB ports. Install the latest chipset and USB drivers.
- BIOS Reset: If system settings become problematic, you can clear the CMOS by removing the CMOS battery for a few minutes or using the dedicated Clear CMOS jumper (refer to the motherboard diagram).
Technical Specifications
Below are the detailed specifications for the GIGABYTE H610M S2H DDR4 motherboard:

Image: A detailed diagram of the GIGABYTE H610M S2H DDR4 motherboard, highlighting key components and their locations, such as power connectors, DVI-D, D-Sub, HDMI/DisplayPort, USB 3.2 Gen1, Gaming GbE LAN, M.2 Connector, Audio Solutions, 6+1+1 Phases Hybrid Power Design, 12th Gen Intel Core Processor support, 4x SATA 6Gb/s, Dual Channel DDR4 2 DIMMs, and PCIe 4.0 Design.
| Specification | Value |
|---|---|
| Brand | GIGABYTE |
| Series | H610M S2H DDR4 |
| Item Model Number | H610M S2H DDR4 |
| CPU Socket | LGA 1700 |
| Compatible Processors | Intel Core (12th Gen) |
| Chipset Type | Intel H610 |
| RAM Memory Technology | DDR4 |
| Memory Speed | 3200 MHz |
| Memory Storage Capacity | 64 GB (Max) |
| Product Dimensions | 10.43 x 10.43 x 2.12 inches |
| Item Weight | 1.71 pounds |
| First Available Date | January 21, 2021 |
Warranty and Support
For detailed warranty information and technical support, please refer to the official GIGABYTE website or the documentation included with your product.
You can also find the official User Manual in PDF format here: GIGABYTE H610M S2H DDR4 User Manual (PDF)
Visit the official GIGABYTE Store for more products and support: GIGABYTE Store on Amazon