1. Introduction
This manual provides detailed instructions for the assembly, operation, and maintenance of your TAMIYA Sand Scorcher 2010 1/10 Scale 2WD Off-Road Racer (Model TAM58452A). This re-released version faithfully reproduces the unique form of the original buggy, inspired by vehicles from the "Baja 1000" race. The kit features a rear-wheel drive 2WD chassis designed for realistic off-road performance.
Please read this manual thoroughly before beginning assembly or operation to ensure correct usage and to maximize the performance and longevity of your model.
2. Safety Information
Always observe the following safety precautions to prevent injury or damage to the model.
- This product is a model kit and requires assembly. Adult supervision is recommended for users under 14 years of age.
- Keep small parts out of reach of young children to prevent choking hazards.
- Use appropriate tools for assembly and follow all instructions carefully.
- Ensure all electronic components are correctly installed and connected before operation. Incorrect wiring can cause damage or fire.
- Operate the model in open, clear areas away from people, pets, and obstacles.
- Do not operate near public roads or in wet conditions.
- Always disconnect the battery when the model is not in use or during maintenance.
- Refer to the specific instructions for battery charging and handling provided with your battery and charger.
3. Kit Contents
The TAMIYA Sand Scorcher 2010 kit includes the following main components:
- Polystyrene body parts (white, paintable)
- 2mm thick FRP chassis plate with aluminum reinforcing plate
- Die-cast suspension arms and oil dampers
- Clear plastic mechanism box for electronics and battery
- Full ball bearings
- 3-piece center-lock wheels with grooved front tires and ribbed rear tires
- Sealed gearbox with built-in motor and gears
- Metal-plated light covers and side mirrors
- Decal sheet and instruction manual
Note: Additional items such as an RC system (transmitter, receiver, servo), electronic speed controller (ESC), battery pack, charger, and paint are sold separately.
4. Assembly Instructions
Follow the steps below for the assembly of your TAMIYA Sand Scorcher 2010. Refer to the detailed diagrams in the included printed manual for visual guidance.
4.1 Chassis Construction
- Prepare the FRP Chassis: Attach the aluminum reinforcing plate to the 2mm thick FRP chassis plate. This forms the robust foundation for the vehicle.
- Install Suspension Components:
- Front Suspension: Assemble the front double trailing arm setup using the die-cast suspension arms. Ensure all pivot points are free-moving.
- Rear Suspension: Assemble the swing axle rear suspension. This design is crucial for dynamic driving on varied terrains.
- Oil Dampers: Fill and install the oil dampers on both front and rear suspension units. Proper oil viscosity is key for effective damping.
- Mount the Gearbox: Secure the sealed gearbox, which houses the motor and gears, onto the chassis. This unit provides protection against dust and debris.
- Install Ball Bearings: Replace any plastic bushings with the included full ball bearings to reduce friction and improve efficiency.

Figure 4.1: Assembled chassis showing the FRP plate, suspension, and gearbox. This image illustrates the internal components and their layout.
4.2 Wheel and Tire Installation
- Assemble Wheels: Mount the grooved front tires onto the front 3-piece center-lock wheels.
- Assemble Rear Wheels: Mount the ribbed rear tires onto the rear 3-piece center-lock wheels. These tires are designed for optimal traction on sandy surfaces.
- Attach Wheels: Securely attach the assembled wheels to the front and rear axles.

Figure 4.2: Close-up of the rear wheel featuring the unique ribbed tire design, optimized for off-road traction.

Figure 4.3: Close-up of the front wheel with its grooved tire, designed for steering precision.
4.3 Electronics Installation
- Install Servo: Mount the steering servo into its designated position on the chassis. Connect the steering linkages.
- Install Receiver and ESC: Place the receiver and electronic speed controller (ESC) inside the clear plastic mechanism box. This box protects these components from dust and moisture.
- Wiring: Connect the motor to the ESC, the ESC to the receiver, and the steering servo to the receiver according to their respective manuals. Ensure all connections are secure.
- Battery Placement: Secure the battery pack within the mechanism box.
4.4 Body Assembly and Finishing
- Body Preparation: Carefully cut out the polystyrene body parts. Sand any rough edges.
- Painting: Paint the body parts using Tamiya plastic model paints according to your desired scheme. Allow adequate drying time.
- Detailing: Attach metal-plated light covers and side mirrors. Apply the included decals for a realistic finish.
- Final Mounting: Secure the finished body onto the chassis.

Figure 4.4: Front view of the fully assembled TAMIYA Sand Scorcher 2010, showcasing its iconic design and detailed front end.

Figure 4.5: Rear view of the TAMIYA Sand Scorcher 2010, highlighting the rear suspension and engine details.
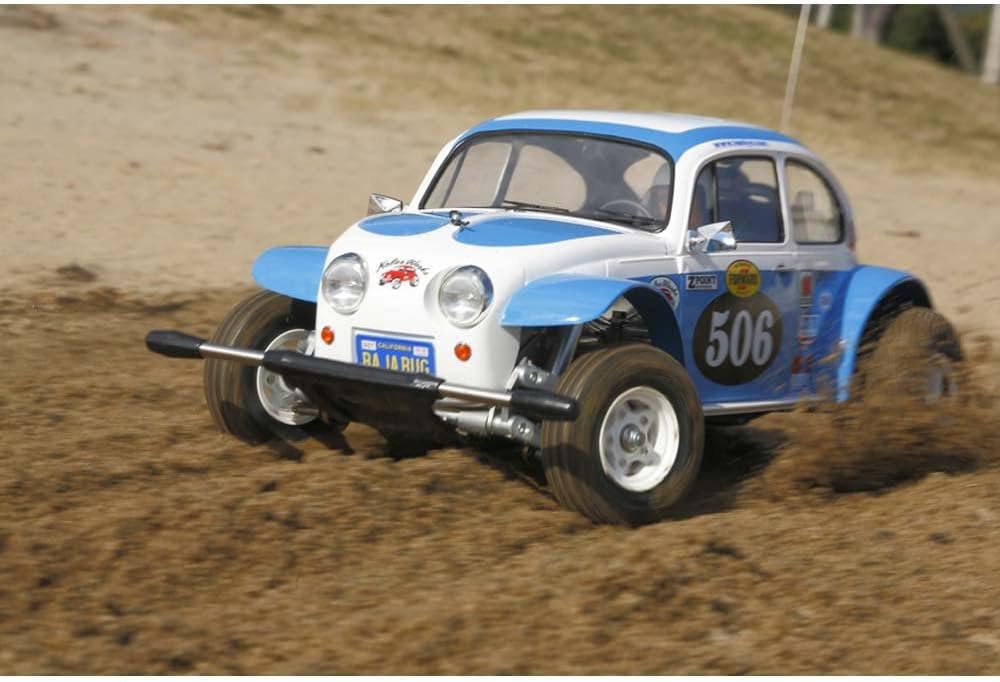
Figure 4.6: The TAMIYA Sand Scorcher 2010 in motion on a sandy surface, demonstrating its off-road capabilities.

Figure 4.7: Side view of the TAMIYA Sand Scorcher 2010 during off-road operation, showcasing its suspension travel.

Figure 4.8: Detailed front view of the TAMIYA Sand Scorcher 2010, highlighting the headlights and front bumper.

Figure 4.9: Close-up of the engine compartment and exhaust details of the TAMIYA Sand Scorcher 2010.
5. Operating Instructions
Once assembled and all electronic components are installed and calibrated, your TAMIYA Sand Scorcher 2010 is ready for operation.
- Charge Battery: Ensure your battery pack is fully charged using a compatible charger.
- Transmitter Setup: Turn on your RC transmitter first.
- Vehicle Power-On: Connect the charged battery to the ESC and turn on the vehicle's power switch.
- Function Check: Before driving, check steering and throttle response. Ensure the steering turns correctly and the throttle responds as expected.
- Driving: Operate the model in a safe, open environment. Start with gentle throttle inputs to get accustomed to the vehicle's handling.
- Power Off: Always turn off the vehicle's power switch first, then turn off the transmitter. Disconnect the battery from the ESC.
6. Maintenance
Regular maintenance will ensure optimal performance and extend the lifespan of your model.
- Cleaning: After each use, especially in dusty or sandy conditions, clean the model thoroughly. Remove dirt and debris from the chassis, suspension, and gearbox. Use a soft brush or compressed air.
- Inspection: Regularly inspect all screws, nuts, and bolts for tightness. Check for any damaged or worn parts, such as suspension arms, gears, or tires.
- Lubrication: Apply appropriate grease or oil to moving parts as recommended in the detailed kit manual. Pay attention to the gearbox and universal joints.
- Dampers: Check oil dampers for leaks and ensure smooth operation. Refill or replace damper oil as needed.
- Electronics: Keep electronic components clean and dry. Ensure all wires are securely connected and free from damage.
- Storage: Store the model in a clean, dry place away from direct sunlight and extreme temperatures. Disconnect the battery during storage.
7. Troubleshooting
This section addresses common issues you might encounter with your TAMIYA Sand Scorcher 2010.
| Problem | Possible Cause | Solution |
|---|---|---|
| Model does not respond to controls. |
|
|
| Poor steering response. |
|
|
| Motor runs but wheels do not turn. |
|
|
8. Specifications
Key specifications for the TAMIYA Sand Scorcher 2010 (Model TAM58452A):
- Product Dimensions: 22.8 x 14.9 x 6.1 inches
- Item Weight: 6.9 pounds
- ASIN: B09S55BBDP
- Manufacturer Recommended Age: 14 months - 9 years (Note: This age range seems unusually low for a model kit; adult supervision is strongly advised for younger users.)
- Manufacturer: Tamiya
- Chassis Type: 2WD Off-Road
- Scale: 1/10
- Body Material: White Polystyrene (paintable)
- Suspension: Front double trailing arm, Rear swing axle
- Bearings: Full ball bearings
9. Warranty and Support
Specific warranty information for the TAMIYA Sand Scorcher 2010 (TAM58452A) is not provided in this document. Please refer to the official TAMIYA website or contact your retailer for detailed warranty terms and conditions.
For technical support, replacement parts, or further assistance, please visit the official TAMIYA website or contact their customer service department.
Official TAMIYA Website: www.tamiya.com


