
VISLONE A3008
Contents
ANENG A3008 Pen Multimeter User Manual
Model: A3008 | Brand: VISLONE
Introduction
The ANENG A3008 Pen Multimeter is a versatile digital instrument designed for accurate and safe electrical measurements. This compact device offers a wide range of functions including voltage, resistance, capacitance, diode, and frequency testing, along with continuity, non-contact voltage (NCV), and temperature measurements. Its pen-type design, LCD display, backlight, and flashlight make it convenient for various applications, from automotive diagnostics to household electrical troubleshooting.
Please read this manual thoroughly before operation to ensure proper use and to maximize the lifespan of your device.
Product Overview

Figure 1: The ANENG A3008 Pen Multimeter shown with its various accessories, including the main unit, test lead, and different probe tips. This image provides a comprehensive view of all components included in the package.

Figure 2: An exploded view of the ANENG A3008 Pen Multimeter, highlighting its internal circuit board, positive red test lead socket, negative black test lead jack, and various function buttons. Labels indicate the LCD backlight, warning light, data retention button, and humanized pen holder.
Safety Information
Always adhere to safety precautions when using electrical testing equipment. Failure to do so may result in injury or damage to the device.
- Do not exceed the maximum input values specified for each measurement range.
- Ensure the test leads are properly connected and in good condition before each use.
- Do not use the multimeter if it appears damaged or if the insulation on the test leads is compromised.
- Exercise extreme caution when working with voltages above 30V AC RMS, 42V peak, or 60V DC. These voltages pose a shock hazard.
- Always disconnect power to the circuit under test before measuring resistance, capacitance, or continuity.
- Replace batteries promptly when the low battery indicator appears to ensure accurate readings.
Setup
Battery Installation
The ANENG A3008 requires AAA 1.5V batteries for operation. The battery is not included with the product.
- Locate the battery compartment cover on the back of the multimeter.
- Open the cover by sliding or unscrewing it, depending on the design.
- Insert the AAA 1.5V batteries, ensuring correct polarity (+ and -).
- Close the battery compartment cover securely.
Attaching Test Leads and Probes
The multimeter comes with a main test lead and various interchangeable probe tips.
- Connect the main test lead to the appropriate input jack on the multimeter. The red lead typically connects to the positive (+) input, and the black lead to the common (COM) input.
- Select the desired probe tip (e.g., sharp needle, alligator clip) and securely screw it onto the end of the test lead. The removable metal pen tip is gold-plated for anti-oxidation and durability.
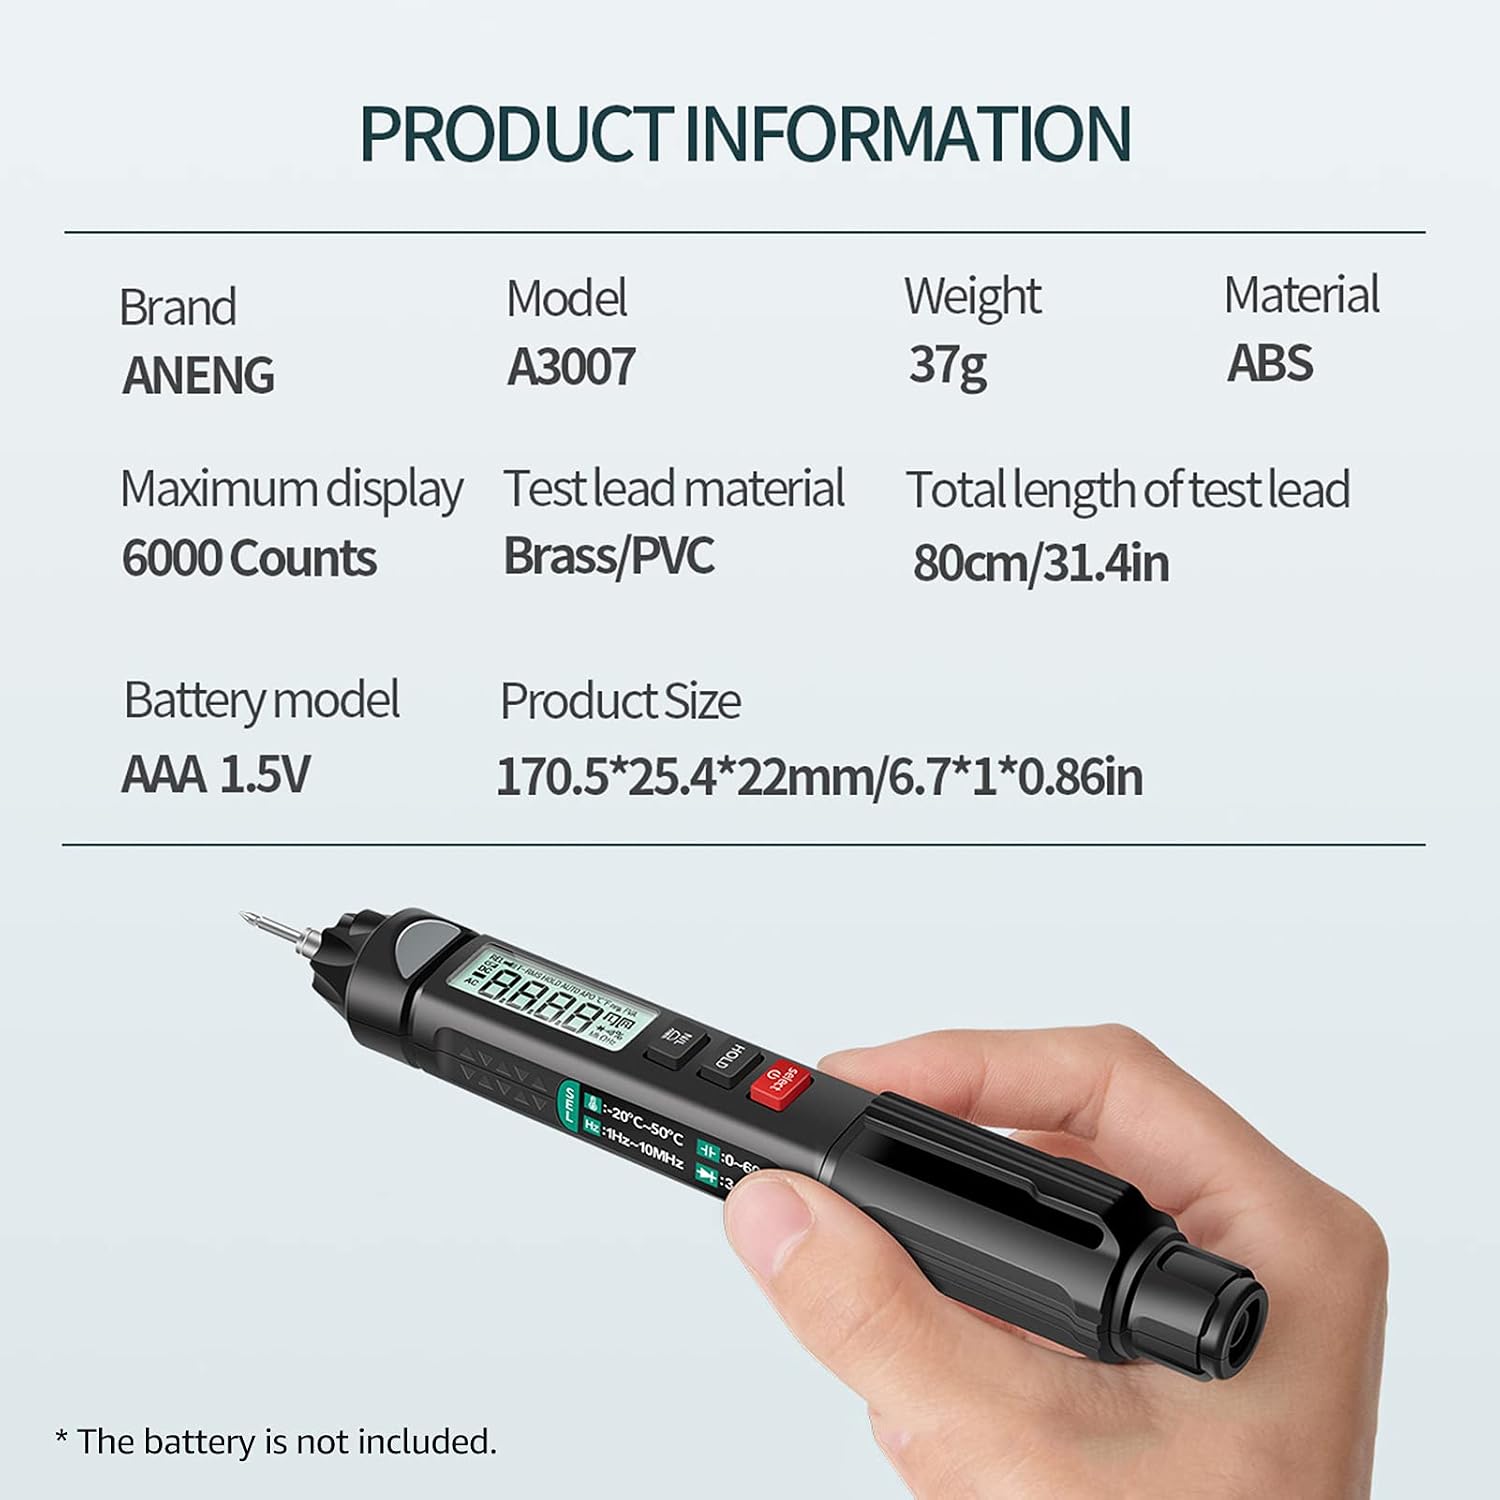
Figure 3: A table detailing key product information for the ANENG A3008, including brand (ANENG), model (A3008), weight (37g), material (ABS), maximum display (6000 Counts), test lead material (Brass/PVC), total length of test lead (80cm/31.4in), battery model (AAA 1.5V), and product size (170.5*25.4*22mm/6.7*1*0.86in). A note indicates that the battery is not included.

Figure 4: This image highlights the multifunctional auxiliary measurement design of the multimeter. It shows the removable metal pen tip, emphasizing its gold-plated anti-oxidation properties, and the data hold button, which allows the measured value to be saved on the screen for easier recording.
Operating Instructions
Power On/Off and Function Selection
- Power On: Press and hold the power button (usually marked with a power symbol) to turn on the multimeter.
- Function Switch: Single press the function button (often labeled "SELECT" or "FUNC") to cycle through different measurement modes (e.g., Voltage, Resistance, Capacitance, Diode, Hz, Temperature).
- Auto Power Off: The device features an auto power-off function to conserve battery life. It will automatically shut down after a period of inactivity.
- Backlight/Flashlight: Long press the flashlight button to activate the built-in flashlight for working in low-light conditions. The LCD display also has a bright backlight for clear readings.
- Data Hold: Press the "HOLD" button to freeze the current reading on the display. Press it again to release.
Measurement Procedures
Below are general steps for common measurements. Always refer to the specific function selected on the device.
DC/AC Voltage Measurement
- Turn on the multimeter and select the DCV (DC Voltage) or ACV (AC Voltage) mode.
- Connect the red test lead to the positive (+) point of the circuit and the black test lead to the negative (-) or common (COM) point.
- Read the voltage value displayed on the LCD screen.
Resistance Measurement
- Ensure the circuit is de-energized before measuring resistance.
- Select the Resistance (Ω) mode.
- Connect the test leads across the component or circuit path you wish to measure.
- Read the resistance value.
Capacitance Measurement
- Ensure the capacitor is fully discharged before measurement to prevent damage to the multimeter.
- Select the Capacitance (F) mode.
- Connect the test leads across the capacitor terminals.
- Read the capacitance value.
Diode Test
- Select the Diode mode.
- Connect the red test lead to the anode and the black test lead to the cathode of the diode.
- The display will show the forward voltage drop. Reverse the leads to check for open circuit (OL) indication.
Continuity Test
- Select the Continuity mode (often indicated by a speaker icon).
- Connect the test leads across the circuit or component.
- If there is continuity (low resistance), the multimeter will emit an audible beep.
Non-Contact Voltage (NCV) Detection
The NCV function allows for safe detection of AC voltage without direct contact.
- Select the NCV mode.
- Bring the tip of the multimeter close to the wire or outlet you want to test.
- If AC voltage is detected, the multimeter will emit an alarm sound, and the LED warning light will turn red. The screen may display "EF" or a similar indicator.

Figure 5: This image demonstrates the non-contact voltage (NCV) detection feature. When the multimeter is brought near an electrical outlet, it detects the nearby voltage, causing the screen to display "----", an alarm to sound, and the LED warning light to turn red, indicating the presence of live voltage.
Maintenance
- Cleaning: Use a soft, damp cloth to clean the multimeter's casing. Do not use abrasive cleaners or solvents.
- Storage: Store the multimeter in a cool, dry place away from direct sunlight and extreme temperatures. If storing for extended periods, remove the batteries to prevent leakage.
- Test Leads: Regularly inspect test leads for any signs of damage, such as cracks in the insulation or exposed wiring. Replace damaged leads immediately.
- Calibration: For professional use, periodic calibration by a qualified technician is recommended to ensure continued accuracy.
Troubleshooting
| Problem | Possible Cause | Solution |
|---|---|---|
| Multimeter does not power on. | Dead or incorrectly installed batteries. | Check battery polarity; replace batteries. |
| "OL" (Overload) displayed. | Measurement range exceeded; open circuit. | Select a higher range; check for open circuit in the component/wire. |
| Inaccurate readings. | Low battery; damaged test leads; environmental interference. | Replace batteries; inspect/replace test leads; move away from strong electromagnetic fields. |
| No continuity beep. | Open circuit; continuity mode not selected. | Check circuit for breaks; ensure continuity mode is active. |
Specifications
The following table outlines the technical specifications of the ANENG A3008 Pen Multimeter.
| Parameter | Value / Range |
|---|---|
| Brand | ANENG |
| Model | A3008 |
| Material | ABS |
| Maximum Display | 5999 (3 5/6) Counts |
| Measurement Method | Double integral A/D conversion |
| Sampling Time | About 3 times / second |
| Over-range Indication | "OL" displayed on highest position |
| DC Voltage | 6V/60V/600V ±(0.5%+4); 1000V ±(0.8%+10) |
| AC Voltage | 6V/60V/600V ±(0.5%+4); 700V ±(0.8%+10) |
| Resistance | 600Ω ±(0.8%+5); 6kΩ/60kΩ/600kΩ/6MΩ ±(0.8%+3); 60MΩ ±(2.5%+3) |
| Capacitance | 10nF/100nF/1uF/10uF/100uF/1mF/10mF ±(3.5%+20); 60mF ±(5%+3) |
| Temperature | -20~50℃ (±1.0%+5); 0~122℉ (±0.75%+5) |
| Test Line Material | Brass / PVC |
| Working Condition | 0~40℃ temperature, <80% relative humidity |
| Power Source | Battery Powered (AAA 1.5V) |
| Product Dimensions | 170.5 x 25.4 x 22mm (6.7 x 1 x 0.86 inches) |
| Weight | 37g (0.08 lbs) |
| Features | DC/AC Voltage Test, Resistance Test, Capacitance Test, Diode Test, Continuity Test, Non-contact Phase Sequence Test, Color Screen, NCV, Neutral / Fire Test, Full Unit Symbol, Backlight, Auto Power Off, True RMS, Data Hold, Temperature (℃/℉), Hz, Flashlight |
Warranty and Support
For warranty information and technical support, please refer to the manufacturer's official website or contact their customer service directly. Details regarding specific warranty periods and support channels are typically provided with your purchase documentation or on the product packaging.
Manufacturer: VISLONE
Ask a question about this manual
Ask about setup, troubleshooting, compatibility, parts, safety, or missing instructions. Manuals+ will review the question and use this page’s manual context to help answer it.