1. Introduction
This manual provides essential information for the safe and efficient operation of your Allto Solar Intelligent 10A MPPT Solar Charge Controller. This device is designed to optimize power harvesting from solar panels and safely charge various 12V battery types, including Wet, Gel, AGM, and Lithium (LiFePO4).
2. Safety Information
Please read and understand all safety instructions before installation and operation. Failure to follow these instructions may result in electric shock, fire, or serious injury.
- Ensure all connections are secure and correct before applying power.
- Do not disassemble or attempt to repair the controller. Contact qualified personnel for service.
- Install the controller in a well-ventilated area, away from flammable materials and moisture.
- Always connect the battery to the controller first, then the solar panel. Disconnect in the reverse order: solar panel first, then battery.
- Verify battery voltage and type compatibility with the controller before connection.
3. Product Features
- MPPT Technology: Maximizes power extraction from solar panels.
- Compact Design: Approximately 25% smaller than regular 10A PWM charge controllers.
- High Efficiency: Up to 95% efficiency, 15-30% higher than PWM controllers.
- Multiple Battery Compatibility: Supports 12V Wet/Gel Cell, Flooded, Maintenance-free, Deep cycle, AGM, and Lithium (LiFePO4) batteries.
- Comprehensive Protections: Includes over-temperature, over-voltage, over-current, short circuit, discharge, and over-charge protection.
- 3-Stage Charging: Improved Bulk-Absorption-Float charging algorithm to extend battery lifespan.
- Zero Discharge: Powered by sunlight, preventing parasitic battery drain.
- Auto Memory: Automatically returns to the last selected battery mode.
4. Package Contents
- Allto Solar Intelligent 10A MPPT Solar Charge Controller
- User Manual (this document)
5. Setup and Installation
Follow these steps for proper installation:
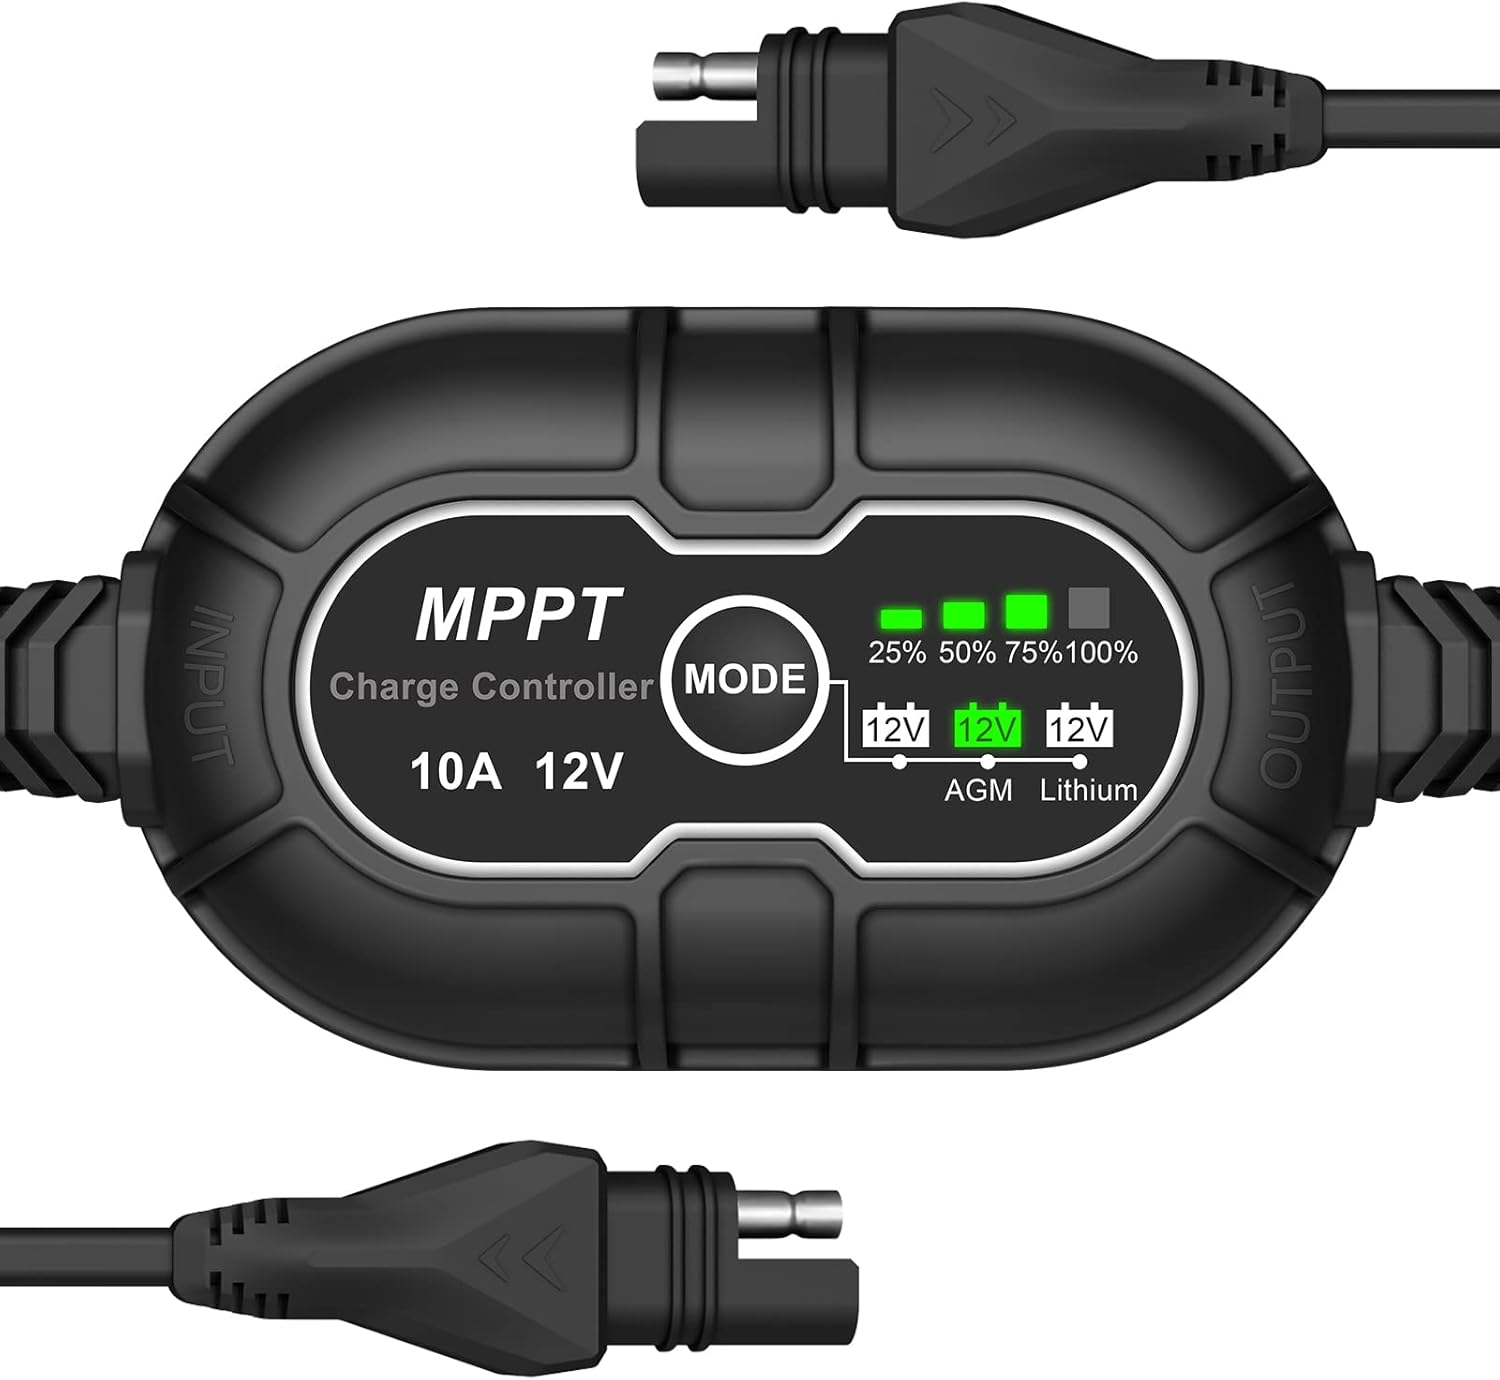
- Connect Battery: Connect the controller's output cable (marked 'OUTPUT') to your 12V battery. Ensure correct polarity. The controller will power on.
- Select Battery Type: Press the 'MODE' button to cycle through the battery types (AGM, Lithium). The corresponding LED will illuminate. Select the type that matches your connected battery.
- Connect Solar Panel: Connect your 12V solar panel to the controller's input cable (marked 'INPUT'). Ensure correct polarity. The controller will begin charging if sufficient sunlight is available.
Important: Always connect the battery first and disconnect the solar panel first to prevent damage to the controller or battery.

6. Operating Instructions
Once connected, the controller operates automatically. It will detect the solar panel input and begin charging the battery according to the selected battery type.
6.1 Battery Type Selection
The controller supports different 12V battery chemistries. To select the appropriate battery type:
- Press the MODE button located on the controller.
- Each press will cycle through the available battery types: AGM and Lithium.
- The corresponding LED indicator (12V AGM or 12V Lithium) will light up to confirm your selection.
- The controller will remember your last selection even after power disconnection (Auto Memory feature).

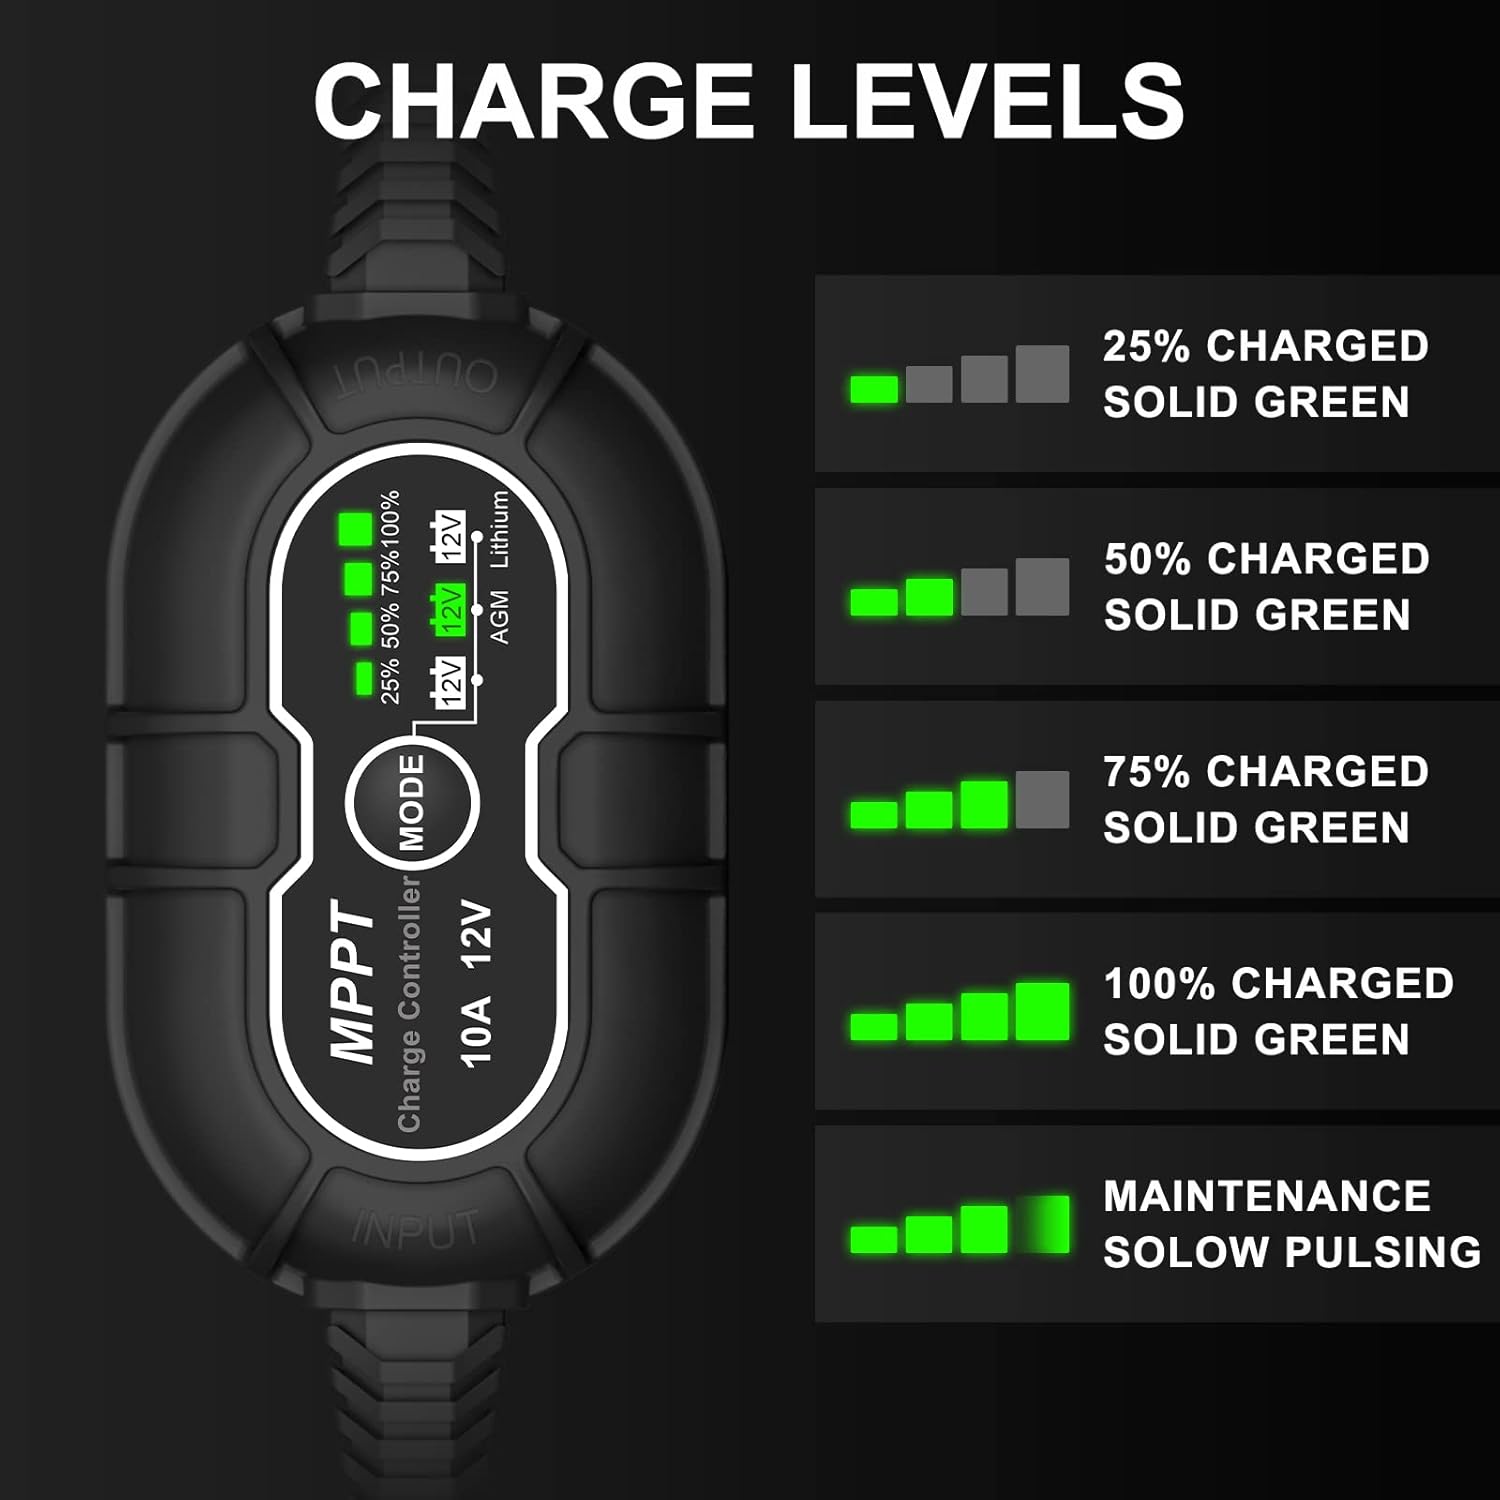
6.2 Charging Level Indicators
The controller features a series of green LEDs to indicate the battery's charge level:
- 25% Charged: First LED solid green.
- 50% Charged: First two LEDs solid green.
- 75% Charged: First three LEDs solid green.
- 100% Charged: All four LEDs solid green.
- Maintenance Mode: All four LEDs slowly pulse green, indicating the battery is fully charged and receiving a maintenance charge.
7. Maintenance
Regular maintenance ensures optimal performance and longevity of your charge controller:
- Keep the controller clean and free from dust and debris.
- Periodically check all cable connections for tightness and corrosion.
- Ensure the installation area remains well-ventilated.
- Inspect cables for any signs of wear or damage. Replace if necessary.
8. Troubleshooting
If you encounter issues, refer to the following common problems and solutions:
| Problem | Possible Cause | Solution |
|---|---|---|
| Controller not powering on | Battery not connected or low voltage | Ensure battery is connected correctly and has sufficient voltage (above 8V for 12V systems). |
| Battery not charging | No solar input, incorrect battery type, or faulty connections | Check solar panel connection and sunlight. Verify correct battery type is selected. Inspect all wiring. |
| Charge level indicators not accurate | Incorrect battery type selected | Press the 'MODE' button to select the correct battery type for your system. |
| Over-temperature protection activated | Poor ventilation or high ambient temperature | Relocate the controller to a cooler, well-ventilated area. Reduce load if possible. |
9. Specifications
| Feature | Specification |
|---|---|
| Brand | Allto Solar |
| Model | 10A MPPT Solar Charge Controller |
| Voltage | 12 Volts |
| Product Dimensions | 5.51 x 1.97 x 0.98 inches |
| Item Weight | 5 ounces |
| Batteries Required | No (for controller operation, but charges external batteries) |
10. Warranty and Support
Allto Solar products are designed for reliability and performance. For warranty information or technical support, please refer to the contact details provided with your purchase or visit the official Allto Solar website. Keep your proof of purchase for warranty claims.


