
1. Introduction
This manual provides detailed instructions for the installation, operation, and maintenance of your OPL5 RV LED Awning Party Light. This 16.4-foot (5-meter) RGB LED strip is designed for outdoor use on RVs, campers, motorhomes, travel trailers, pickups, and boats. It features waterproof construction, smartphone app control, and a remote control for versatile lighting options.
Please read this manual thoroughly before installation and use to ensure proper function and safety.
2. Package Contents
Verify that all items listed below are included in your package:
- 16.4FT (5M) RGB LED Awning Light Strip
- Phone LED Controller (Bluetooth enabled)
- Remote Controller (battery not included)
- Connecting Line (power cable)
- Cable Ties
- Wire Lids
- User Instructions

Figure 2.1: Package Contents. This image displays all components included in the OPL5 RV LED Awning Party Light kit, such as the LED strip, remote control, smartphone LED controller, connecting line, cable ties, wire lids, and user instructions.
3. Features
- High Brightness: Equipped with 300 high-quality SMD 5050 LED chips for vibrant illumination.
- RGB Color & Dimmable: Offers a full spectrum of RGB colors and adjustable brightness levels.
- Waterproof Design: IPX4 ingress protection rating ensures durability against harsh weather conditions like rain and snow.
- Flexible & Cuttable: The LED strip is flexible for easy shaping and can be cut at designated marks (every 3 LEDs) to fit specific lengths.
- Dual Control: Control lights via a smartphone application (Bluetooth connectivity) or the included remote control.
- Stable Signal: Features a smart constant current decoder for stable signal reception and consistent light patterns.
- Easy Installation: Strong self-adhesive backing allows for secure, drill-free installation.

Figure 3.1: Product Features. This image highlights key features such as RGB color options, remote control, ability to cut the strip, waterproof design, dimmability, and the presence of a rubber sealing gasket.
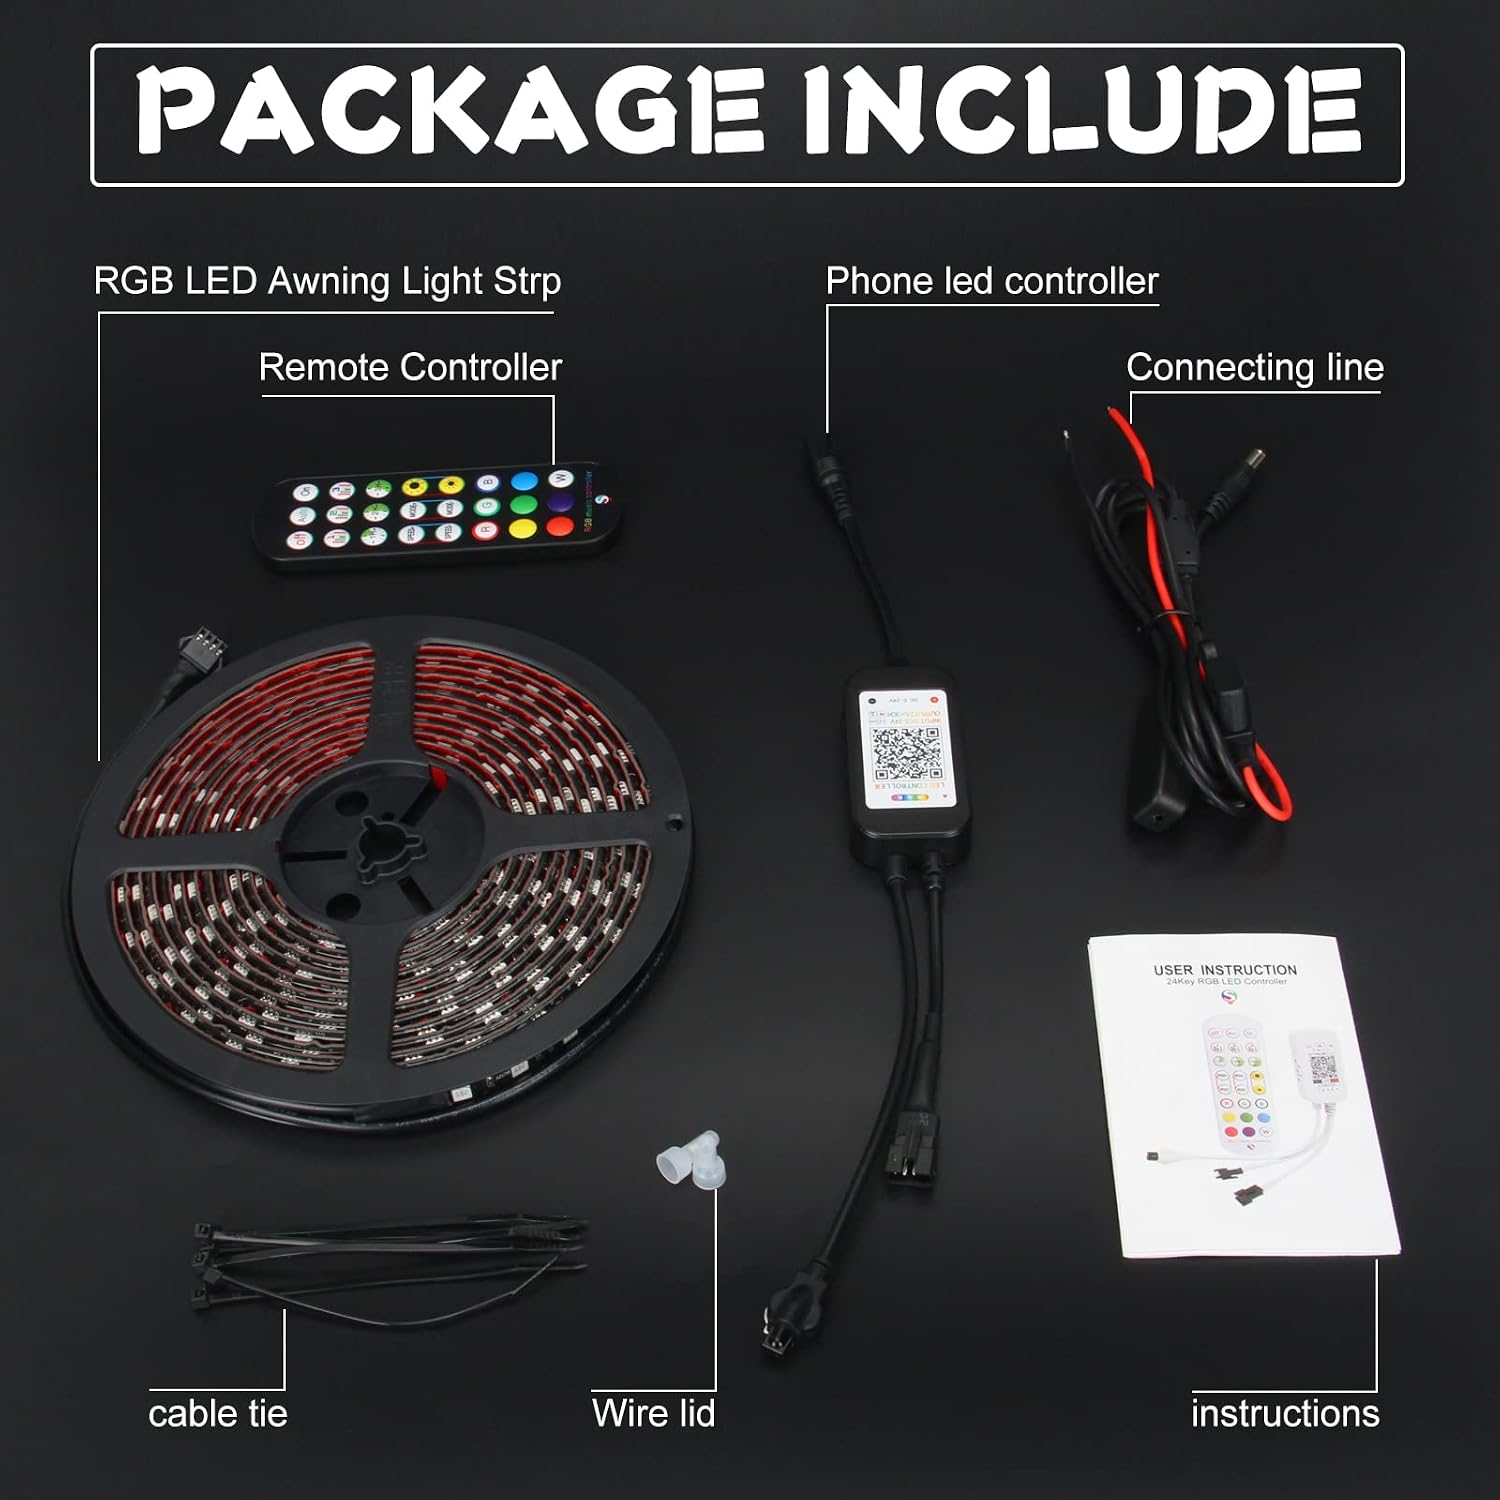
Figure 3.2: Advanced Features. This image details the smart constant current decoder for stable light patterns, the use of double-sided tape for easy installation, the wireless remote control for color changes, and the flexible, durable rubber material.
4. Setup and Installation
Follow these steps for a stable and secure installation:
- Prepare the Surface: Clean the installation position thoroughly. Wipe the surface with an adhesion promoter (if available) to ensure optimal stickiness.
- Apply the Strip: Carefully peel the backing from the light strip's adhesive. Press the strip firmly onto the cleaned surface.
- Connect Power: Tighten the connection port of the lamp to the connecting line, ensuring correct polarity.
- Secure Wiring: Use the provided cable ties and wire lids to manage and secure any loose wiring.
- Optional Cutting: If a shorter length is desired, cut the LED strip only at the designated scissor marks (every 3 LEDs). After cutting, use waterproof adhesive to protect the cut end.

Figure 4.1: Easy Installation Steps. This image illustrates the five main steps for installing the LED strip: cleaning the surface, peeling and sticking the strip, completing the paste, tightening the connection, and scanning the QR code for app control.

Figure 4.2: 12V RV Awning Lights. This image shows a close-up of the LED strip, emphasizing its 12V compatibility for RV use.
5. Operating Instructions
5.1 Remote Control Operation
The included remote control allows for quick adjustments to your LED awning light. Ensure a CR2025 battery is inserted (not included) before use.
- On/Off: Press the 'On' or 'Off' button to power the lights.
- Auto Mode: Activates an automatic color changing sequence.
- Music Activation Mode: Synchronizes light changes with music (requires compatible controller/app).
- Timing Off Mode: Sets a timer for the lights to turn off (1H, 2H, 3H options).
- Speed Increase/Decrease: Adjusts the speed of dynamic lighting modes.
- Dynamic Mode: Cycles through various pre-set lighting effects.
- Brightness Dimming: Adjusts the overall brightness of the lights.
- Static Color Options: Select from 9 static colors (Red, Green, Blue, White, and mixed colors).

Figure 5.1: Remote Control Functions. This image provides a detailed view of the remote control, labeling each button and its corresponding function for controlling the LED awning lights.
5.2 Smartphone APP Control
For advanced control and customization, use the dedicated smartphone application. All operations require your phone's Bluetooth to be enabled.
- Download App: Scan the QR code provided on the controller or in the manual to download the compatible smartphone application. A common app for such controllers is often found at http://www.easytrack.net.cn/download/111SHENZHENSHUANGHONGYUAN.
- Connect via Bluetooth: Open the app and ensure your phone's Bluetooth is active. The app should automatically detect and connect to the LED controller.
- Control Features: The app typically offers:
- 16 Million DIY Colors
- 29 Different Preset Modes
- Music Mode
- Microphone Mode
- Time Set Mode
Video 5.1: 16.4FT RV Awning Light Demonstration. This video demonstrates the various color and mode options available with the OPL5 RV LED Awning Light, showcasing its functionality and visual effects.
Video 5.2: RGB LED Awning Light for RV. This video illustrates the RGB color changing capabilities and how the light strip enhances the ambiance of an RV awning.
Video 5.3: YAYIT 12V RV LED Strip Lights. This video provides a general overview of 12V RV LED strip lights, demonstrating their application and visual impact.
6. Maintenance
- Cleaning: Gently wipe the LED strip with a soft, damp cloth to remove dirt or debris. Avoid using harsh chemicals or abrasive cleaners.
- Adhesive Check: Periodically inspect the adhesive backing to ensure the strip remains securely attached. Reapply or reinforce if necessary.
- Connection Check: Ensure all electrical connections are tight and free from corrosion.
- Storage: If storing the RV for extended periods, consider protecting the LED strip from extreme weather or direct sunlight to prolong its lifespan.
7. Troubleshooting
| Problem | Possible Cause | Solution |
|---|---|---|
| Lights do not turn on. | No power supply; loose connection; remote battery dead; controller malfunction. | Check 12V power source. Ensure all connections are secure. Replace remote battery. Contact customer support if controller is faulty. |
| Remote control not working. | Remote battery is dead or missing; remote not pointed at receiver; interference. | Insert or replace CR2025 battery. Ensure clear line of sight to the controller. Reduce potential interference. |
| Smartphone app cannot connect. | Bluetooth is off; app not installed correctly; controller out of range. | Enable Bluetooth on your phone. Reinstall the app. Move closer to the controller. |
| Lights are flickering or inconsistent. | Unstable power supply; loose wiring; damaged LED segment. | Verify stable 12V power. Check all wiring connections. If a segment is damaged, it may require replacement of the strip. |
8. Specifications
| Specification | Detail |
|---|---|
| Brand | OPL5 |
| Model Number | OPL5 |
| Light Source Type | LED (SMD 5050) |
| Number of Light Sources | 300 |
| Light Color | RGB |
| Length | 16.4 Feet (5 Meters) |
| Voltage | 12 Volts |
| Power Source | Battery Powered (for remote), 12V DC (for strip) |
| Control Method | Remote Control, Smartphone APP (Bluetooth) |
| Water Resistance Level | IPX4 (Water Resistant) |
| Material | Rubber, Silicone |
| Indoor/Outdoor Usage | Outdoor |
9. Warranty and Support
OPL5 offers a Two-Year Warranty for this product. This warranty covers manufacturing defects and ensures the product functions as intended under normal use.
For any concerns, questions, or warranty claims, please contact OPL5 customer service. Our support team is available 24/7 to assist you.
Manufacturer Contact Information: OPL5