1. Introduction
This manual provides essential instructions for the safe and effective use of your WEWATCH V50 5G WiFi Projector and PS101 Adjustable Height Table Projector Tripod Stand. Please read this manual thoroughly before operating the devices and retain it for future reference.
2. Important Safety Instructions
- Do not block ventilation openings. Ensure adequate airflow around the projector.
- Do not expose the projector to rain or moisture to prevent fire or electric shock.
- Avoid looking directly into the projector lens when the lamp is on.
- Use only attachments/accessories specified by the manufacturer.
- Place the tripod on a stable, level surface to prevent tipping.
- Keep the devices away from heat sources, direct sunlight, and extreme temperatures.
3. Package Contents
Verify that all items are present in your package:
- WEWATCH V50 5G WiFi Projector
- PS101 Adjustable Height Table Projector Tripod Stand
- Power Adapter
- Remote Control (batteries not included)
- HDMI Cable
- User Manual
4. WEWATCH V50 Projector Overview
4.1 Projector Components
Familiarize yourself with the main parts of the WEWATCH V50 Projector.

Image: The WEWATCH V50 projector displaying content on a large screen, with a smartphone mirroring its display and the PS101 tripod stand positioned nearby.
- Lens: Projects the image.
- Focus Ring: Adjusts image clarity.
- Keystone Correction Dial: Corrects trapezoidal image distortion.
- Control Panel: Manual buttons for navigation and settings.
- Input Ports: HDMI, USB, AV, Audio Out.
- Power Port: Connects to the power adapter.
5. PS101 Tripod Stand Overview
5.1 Tripod Components and Dimensions
Understand the structure and dimensions of your PS101 Tripod Stand.

Image: Detailed view of the PS101 tripod stand, illustrating its folded dimensions (8.5 x 1.2 inches) and extended dimensions (12 x 9.2 inches), along with its top and bottom components.
- Mounting Screw: Standard 1/4-inch screw for attaching devices.
- Ball Joint: Allows for 360° panorama and 135° up/down adjustment.
- Adjustable Column: Extends to adjust height.
- Folding Legs: Provide stability and compact storage.
6. Setup Guide
6.1 Setting up the PS101 Tripod Stand
- Unfold the tripod legs until they are fully extended and stable.
- Adjust the height of the central column by extending it to your desired level.
- Ensure the tripod is placed on a flat, stable surface.
6.2 Mounting the WEWATCH V50 Projector
- Locate the tripod mounting hole on the bottom of the WEWATCH V50 Projector.
- Align the projector's mounting hole with the 1/4-inch screw on the tripod's ball joint.
- Gently screw the projector onto the tripod until it is securely fastened. Do not overtighten.
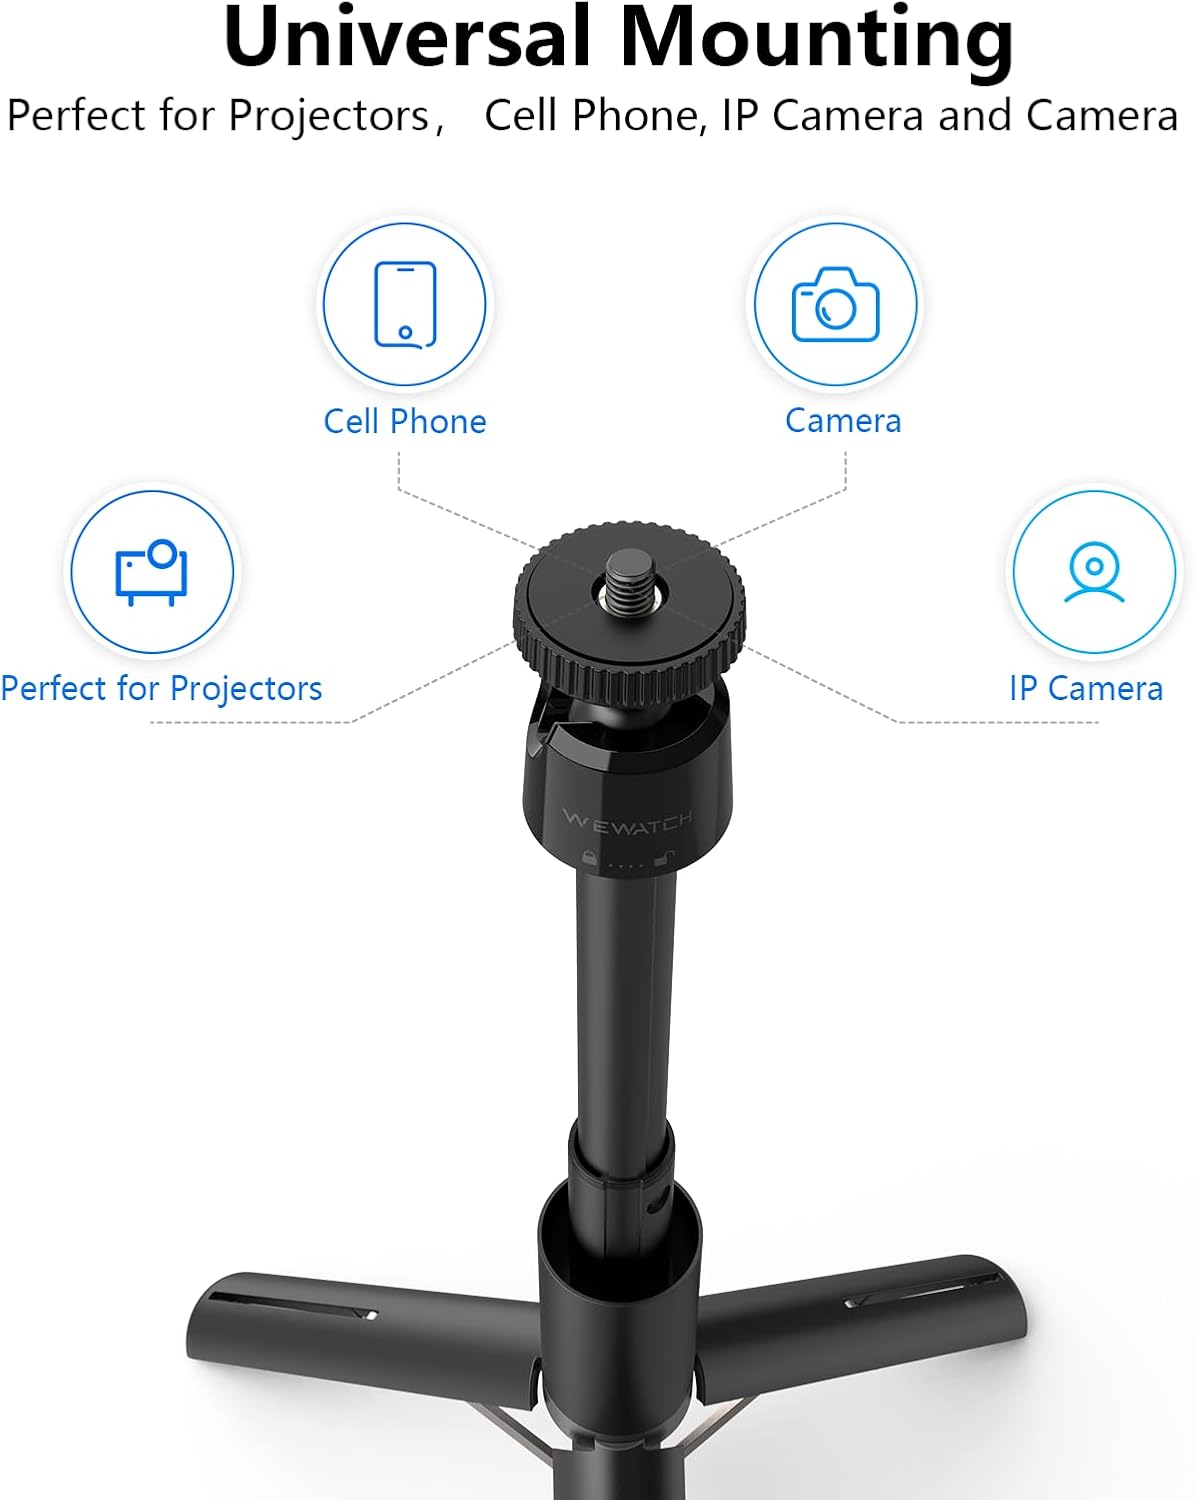
Image: The PS101 tripod stand demonstrating its universal mounting capabilities for projectors, cell phones, IP cameras, and cameras.
6.3 Powering On the Projector
- Connect the power adapter to the projector's power port.
- Plug the power adapter into an electrical outlet.
- Press the power button on the projector or remote control to turn it on.
7. Operating the WEWATCH V50 Projector
7.1 Adjusting Image Focus and Keystone

Image: Close-up of the WEWATCH V50 projector showing the focus ring and the ±15° keystone correction dial for image adjustments.
- Focus: Rotate the focus ring on the projector lens until the image appears clear and sharp.
- Keystone Correction: If the image appears trapezoidal, rotate the keystone correction dial to square the image. The projector supports ±15° correction.
7.2 Screen Size Adjustment
The WEWATCH V50 projector can project screen sizes ranging from 36 to 200 inches, depending on the projection distance.

Image: Illustration showing the WEWATCH V50 projector's capability to project screen sizes from 36 inches up to 200 inches.
7.3 Connecting via WiFi (Screen Mirroring)
The projector supports 5G WiFi for screen mirroring from compatible devices.

Image: The WEWATCH V50 projector demonstrating a WiFi connection, allowing screen mirroring from a smartphone, tablet, or computer.
- Navigate to the 'WiFi' or 'Screen Mirroring' option in the projector's menu.
- Ensure your smartphone, tablet, or computer is connected to the same WiFi network as the projector.
- Select the projector from your device's screen mirroring/cast options.
7.4 Connecting via Bluetooth
Connect external Bluetooth speakers or headphones for enhanced audio.

Image: The WEWATCH V50 projector wirelessly connected via Bluetooth to external speakers, enhancing the audio experience for a home theater setup.
- Go to the 'Bluetooth' settings in the projector's menu.
- Enable Bluetooth on the projector and your external audio device.
- Select your audio device from the list of available devices on the projector to pair.
7.5 Input Sources
The projector supports various input sources:
- HDMI: Connect Blu-ray players, gaming consoles, laptops.
- USB: Play media files directly from a USB drive.
- AV: Connect older devices using an AV cable.
- Audio Out: Connect wired external speakers or headphones.
8. Operating the PS101 Tripod Stand
8.1 Adjusting Angle and Orientation

Image: The PS101 tripod stand illustrating its 360° panoramic rotation and 135° up/down adjustable ball joint for flexible positioning.
The integrated ball joint allows for flexible positioning:
- 360° Panorama: Loosen the ball joint lock to rotate the mounted device horizontally for panoramic views.
- 135° Up/Down Adjustment: Tilt the mounted device up or down within a 135° range to achieve the desired projection angle.
- Tighten the ball joint lock once the desired angle is set.
8.2 Versatile Applications
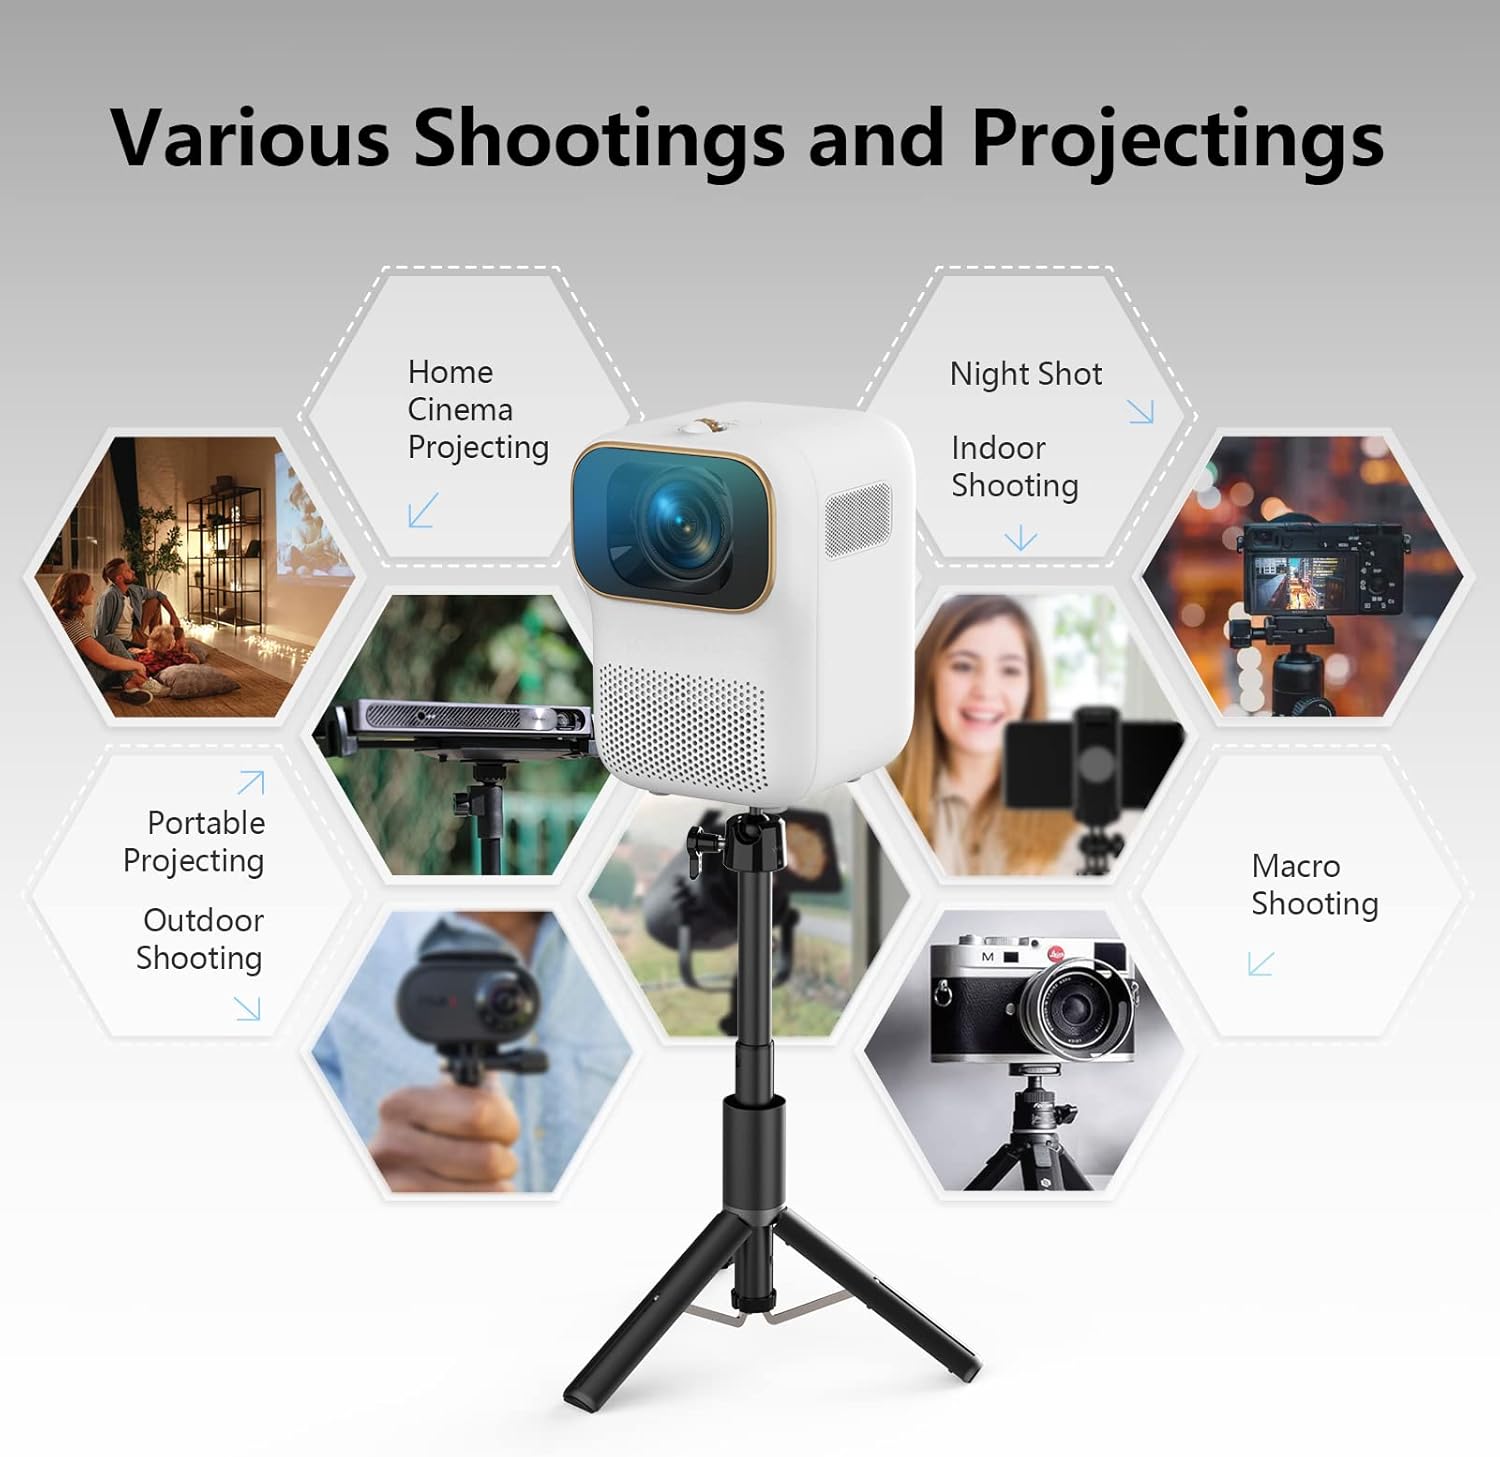
Image: The PS101 tripod stand depicted in various usage scenarios, including home cinema projecting, night shots, indoor shooting, portable projecting, outdoor shooting, and macro shooting.
The PS101 tripod is suitable for various uses beyond just projectors, including:
- Home Cinema Projecting
- Night Shot Photography
- Indoor Shooting
- Portable Projecting
- Outdoor Shooting
- Macro Photography
9. Maintenance
9.1 Cleaning the Projector
- Use a soft, dry cloth to clean the projector's exterior.
- For the lens, use a lens cleaning cloth and specialized lens cleaning solution. Do not use abrasive cleaners.
- Regularly clean the ventilation ports to prevent dust buildup.
9.2 Cleaning the Tripod
- Wipe the tripod with a damp cloth and mild detergent if necessary.
- Ensure all parts are dry before storing.
9.3 Storage
- Store both devices in a cool, dry place away from direct sunlight.
- When not in use, ensure the projector lens cap is on to protect the lens.
- The tripod folds compactly for storage (8.5 x 1.2 inches).
10. Troubleshooting
| Problem | Possible Cause | Solution |
|---|---|---|
| No image displayed | Power not connected; Incorrect input source; Lens cap on | Check power connection; Select correct input source; Remove lens cap |
| Image blurry | Focus not adjusted | Adjust the focus ring on the projector lens |
| Image trapezoidal | Keystone not corrected | Adjust the keystone correction dial |
| No sound | Volume too low; External audio device not connected/paired | Increase volume; Check Bluetooth connection or audio cable |
| WiFi/Bluetooth connection issues | Network issues; Device not in pairing mode | Restart router/devices; Ensure devices are in pairing mode |
| Tripod unstable | Legs not fully extended; Uneven surface | Ensure legs are locked; Move to a flat surface |
11. Specifications
11.1 WEWATCH V50 Projector
- Display Resolution: 1920 x 1080 (Full HD)
- Connectivity: 5G WiFi, Bluetooth, USB, HDMI, AV
- Special Features: Built-In Wi-Fi, Portable, Wireless
- Brand: WEWATCH
11.2 PS101 Tripod Stand
- Storage Dimensions: 8.5 x 1.2 inches
- Extended Dimensions: 12 x 9.2 inches
- Weight: Approximately 200g
- Adjustments: 360° Panorama, 135° Up/Down
- Mounting: Universal 1/4-inch screw (for projectors, cell phones, IP cameras, cameras)
- Brand: WEWATCH
12. Warranty and Support
For warranty information and technical support, please refer to the warranty card included with your product or visit the official WEWATCH website. Keep your purchase receipt as proof of purchase.


