
CubicFun Flying Dutchman
CubicFun LED Flying Dutchman 3D Puzzle Instruction Manual
Model: Flying Dutchman (B09RZXDZCG)
Introduction
This manual provides detailed instructions for the assembly and care of your CubicFun LED Flying Dutchman 3D Puzzle. Designed for enthusiasts aged 12 and up, this 360-piece model allows you to construct a detailed replica of the legendary ghost ship, complete with LED lighting. Please read all instructions carefully before beginning assembly.
Important Safety Information
WARNING: Small parts. Not suitable for children under 3 years due to choking hazards.
Always supervise children during assembly. Keep all packaging materials away from children.
Package Contents
Before starting assembly, please verify that all components are present:
- 360 x EPS foam board and high-definition printed paper puzzle pieces
- 1 x Instruction Manual
- 1 x Green LED light string
- 1 x Punch-out tool (cardboard)
- Additional plastic pieces (e.g., cannons, rigging elements)
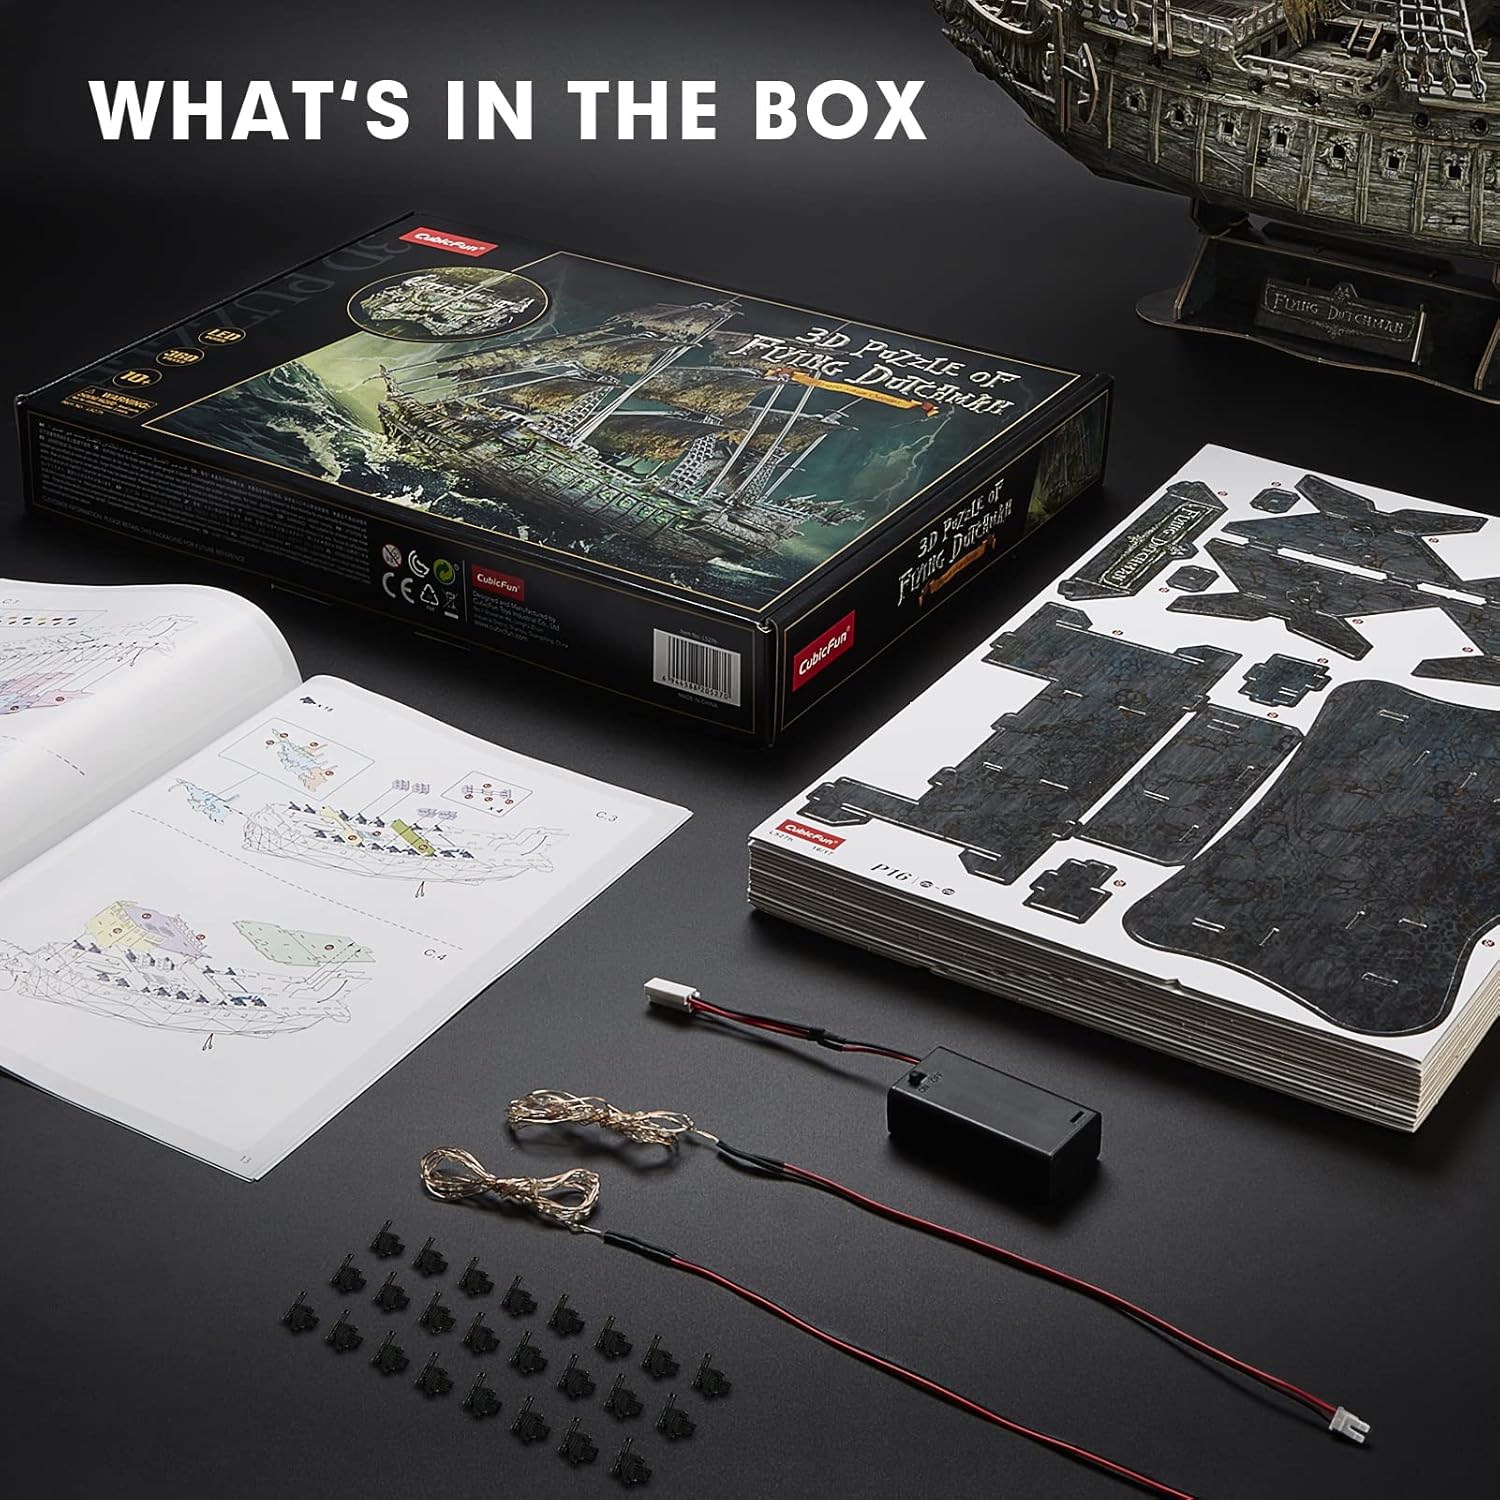
Figure 1: Contents of the package, including puzzle sheets, instruction manual, LED string, and small accessory bags.
Setup and Assembly
The CubicFun LED Flying Dutchman 3D Puzzle is designed for seamless assembly without the need for glue or additional tools. Follow the numbered instructions provided in the manual and on the puzzle sheets. Assembly is estimated to take approximately 4 hours, though individual times may vary based on experience.
Preparation
- Clear a spacious, well-lit work area.
- Organize the puzzle sheets by their designated numbers/letters.
- Familiarize yourself with the instruction booklet.
- Use the provided punch-out tool or a similar blunt object to carefully remove pieces from the sheets.

Figure 2: Pre-cut puzzle sheets with various components ready for assembly. Note the unique irregular shapes and detailed craftsmanship.
Step 1: Constructing the Hull
Begin by assembling the core structure of the ship's hull. Carefully punch out the designated pieces for the base and internal supports. Interlock these pieces according to the numbered diagrams in your instruction manual. Ensure each connection is secure but avoid excessive force to prevent damage to the EPS foam board.

Figure 3: The completed Flying Dutchman model, showcasing its intricate details and ghostly appearance.
Video Guide: Detailed Assembly Process
For a comprehensive visual guide on the assembly process, including hull construction and intricate detailing, please refer to the official video below. This video demonstrates the step-by-step build, offering helpful tips for a smooth experience.
Video 1: Detailed assembly of the CubicFun LED Flying Dutchman 3D Puzzle. This video provides a step-by-step walkthrough of the construction process, from initial pieces to the final model.
Step 2: Integrating LED Lighting
The LED light string is designed to be woven through specific channels within the hull and deck pieces as indicated in the instruction manual. Ensure the wires are not pinched or damaged during assembly. The green LEDs will illuminate the ship, enhancing its ghostly appearance.

Figure 4: The completed model with its ghostly green LED lights activated, creating a striking visual effect.
Step 3: Assembling Decks, Masts, and Sails
Continue by adding the various deck levels, railings, and cannons. The masts and tattered sails are crucial for the ship's iconic look. Carefully attach each mast section and then the sails, ensuring they are aligned correctly. The intricate details, such as the ghost image prow and rottenwood hull, are added in this stage.

Figure 5: Detailed view of the model's features: the ghost image prow, rottenwood and algae mossy hull, corroded and tattered sails, and a three-tiered stern.
Video Guide: Product Overview and Features
This video provides a dynamic overview of the CubicFun LED Flying Dutchman 3D Puzzle, highlighting its key features and the realistic restoration of the movie ghost ship's details. It offers a good perspective on the finished product and its intricate design elements.
Video 2: Overview of the CubicFun LED Flying Dutchman 3D Puzzle, showcasing its detailed design and LED features.
Operating Instructions
Activating LED Lights
To activate the LED lights, locate the battery box (batteries not included) and insert the required batteries as per the instructions. Connect the LED light string to the battery box. There is typically a small switch on the battery box to turn the lights ON or OFF. Ensure all connections are secure for proper functionality.
Display
Once assembled, the Flying Dutchman model can be displayed on its included stand. Choose a stable surface away from direct sunlight or extreme temperatures to preserve the model's integrity and colors.

Figure 6: The approximate dimensions of the completed ship model: 27 inches long, 9.4 inches wide, and 23.6 inches high.
Maintenance
Cleaning
To clean your 3D puzzle model, gently dust it with a soft, dry cloth or a soft-bristled brush. Avoid using liquid cleaners or abrasive materials, as these can damage the printed surfaces and the EPS foam board.
Storage
Store the model in a cool, dry place away from direct sunlight and high humidity to prevent warping or fading. If relocating the model, handle it carefully by its base to avoid damaging delicate parts.
Troubleshooting
- Pieces not fitting: Ensure you are using the correct pieces for the current step by cross-referencing with the instruction manual's diagrams. Do not force pieces; gentle pressure should be sufficient. If a piece is bent, try to carefully straighten it before reattempting assembly.
- LED lights not working:
- Check if batteries are correctly inserted and have sufficient charge.
- Ensure the LED light string is securely connected to the battery box.
- Verify that the ON/OFF switch on the battery box is in the 'ON' position.
- Inspect the wiring for any visible damage or disconnections.
- Model instability: Double-check all connections, especially in the base and main structural components. Ensure all interlocking tabs are fully engaged.
Specifications
| Feature | Detail |
|---|---|
| Product Dimensions | 35 x 12 x 0.1 inches (packaging) |
| Assembled Dimensions | Approximately 27 inches (length) x 9.4 inches (width) x 23.6 inches (height) |
| Item Weight | 3.12 pounds |
| Model Number | Flying Dutchman |
| Manufacturer Recommended Age | 12 years and up |
| Number of Pieces | 360 |
| Material | EPS foam board and high-definition printed paper |
| Special Features | Integrated Green LED lighting |
Warranty and Support
For any inquiries regarding missing parts, assembly assistance, or product defects, please contact CubicFun customer support. Refer to the contact information provided on the product packaging or the official CubicFun website for the most up-to-date support details.
Please retain your purchase receipt as proof of purchase for any warranty claims.
Ask a question about this manual
Ask about setup, troubleshooting, compatibility, parts, safety, or missing instructions. Manuals+ will review the question and use this page’s manual context to help answer it.