
SCREENARAMA GWTN156-7BK
SCREENARAMA Replacement Screen Instruction Manual
For Gateway GWTN156-7BK (FHD 1920x1080, IPS, Matte, LCD LED Display)
1. Introduction
This manual provides essential information and instructions for the installation and maintenance of your new SCREENARAMA 15.6 inch FHD 1920x1080 IPS Matte LCD LED Display replacement screen for the Gateway GWTN156-7BK laptop. Please read all instructions carefully before proceeding with installation.

SCREENARAMA 15.6 inch FHD Matte IPS Laptop Screen Replacement.
2. Product Features
- Display Type: LCD LED Display
- Screen Size: 15.6 inches
- Resolution: Full HD (FHD) 1920x1080 pixels
- Panel Type: IPS (In-Plane Switching) for wide viewing angles and vivid colors
- Surface: Matte finish to reduce glare
- Connector: 30-pin video connector
- Touchscreen: Non-Touchscreen
- Compatibility: Specifically designed for Gateway GWTN156-7BK laptops
- Included: DIY installation tools

Illustration of IPS (In-Plane Switching) technology offering wider viewing angles and more vivid colors compared to TN (Twisted Nematic) screens.
3. Important Compatibility Information
To ensure proper functionality, it is crucial to verify that your original laptop screen matches the specifications of this replacement screen. Incorrect specifications can lead to compatibility issues.
- Resolution: This screen supports 1920x1080 FHD resolution only. It is not compatible with 1366x768, 1600x900, or 3840x2160 resolutions.
- Video Connector: This screen features a 30-pin connector. Confirm your original screen also uses a 30-pin connector.
- Touchscreen: This is a non-touchscreen display. If your laptop requires a touchscreen, this product is not suitable.

Guide on how to select the correct replacement screen by checking screen model or laptop model specifications.

Comparison of 30-pin and 40-pin video connectors. This screen uses a 30-pin connector.
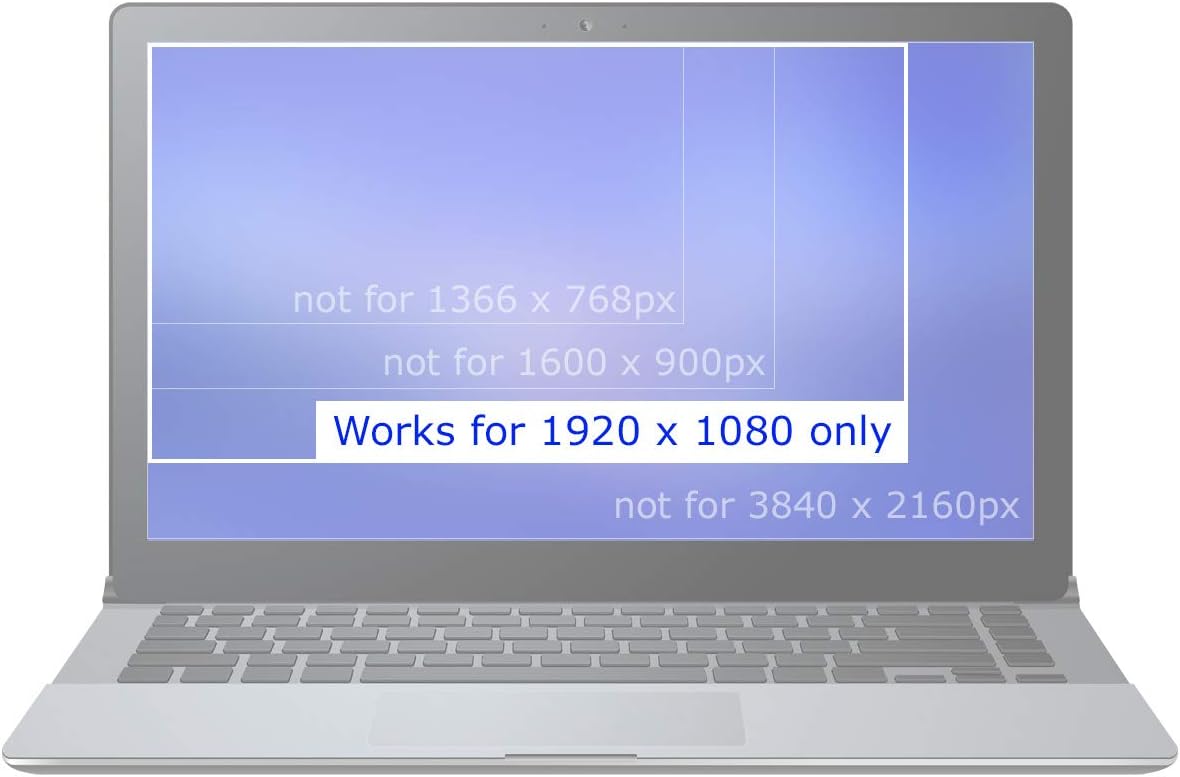
This screen is compatible only with 1920x1080 resolution. Not for 1366x768, 1600x900, or 3840x2160 resolutions.

This product is an LCD screen only and does not include touchscreen functionality.
4. Included Tools
Your SCREENARAMA replacement screen comes with a set of tools designed to assist with the DIY installation process. These tools typically include:
- Precision screwdrivers
- Prying tools (spudgers)
- Tweezers

Essential tools provided for DIY screen replacement, including screwdrivers and prying tools.
5. Installation Guide
While specific laptop models may vary, the general steps for replacing a laptop screen are outlined below. It is highly recommended to search for a detailed video tutorial specific to your Gateway GWTN156-7BK model before beginning the installation.
Safety Precautions:
- Always disconnect the laptop from power and remove the battery before starting.
- Work on a clean, static-free surface.
- Use appropriate tools to avoid damaging components.
- Handle the new screen by its edges to prevent damage to the display surface or internal components.
General Installation Steps:
- Prepare the Laptop: Power off the laptop, disconnect the AC adapter, and remove the battery.
- Remove Bezel: Carefully pry off the plastic bezel surrounding the screen. This may involve removing rubber screw covers and screws first.
- Unscrew Old Screen: Locate and remove the screws holding the old screen in place, usually on the side mounting brackets.
- Disconnect Video Cable: Gently lay the old screen face down on the keyboard. Carefully peel back any tape and disconnect the 30-pin video cable from the back of the screen.
- Install New Screen: Connect the 30-pin video cable to the new SCREENARAMA replacement screen, ensuring it is fully seated and secured with any original tape.
- Mount New Screen: Position the new screen and secure it with the screws removed earlier.
- Test Display: Before reattaching the bezel, temporarily connect the battery and AC adapter to power on the laptop and test the new screen. Check for proper display, brightness, and any anomalies.
- Reassemble: If the screen functions correctly, power off the laptop, disconnect power, and reattach the bezel. Reinstall the battery.
For a visual guide, please refer to the official product video:
Official video demonstrating the key features and specifications of the SCREENARAMA 15.6 inch FHD 30-pin Matte laptop screen replacement.
6. Troubleshooting
If you encounter issues after installing your new screen, follow these troubleshooting steps:
- No Display / Blank Screen:
- Connect an external monitor to confirm the laptop is still operational.
- Ensure the 30-pin video cable is securely connected to both the screen and the motherboard. Disconnect and reconnect it firmly.
- Verify that the number of pins on the original LCD connector matches the new screen (30-pin).
- If the issue persists and the external monitor works, the problem might be with the new screen or the video cable.
- Dim Image:
- Try connecting the old LCD (if it still lights up) to compare brightness.
- Check the backlight fuse on the motherboard, usually located near the video connector. A blown fuse can cause a dim or no backlight.
- Ensure all power-saving settings are disabled and brightness is set to maximum.
- Distorted Image / Lines on Screen:
- Recheck the video cable connection for any loose pins or damage.
- Ensure the cable is not pinched or damaged during reassembly.
- If the issue is the same as with the old LCD, the problem might be with the laptop's graphics card or motherboard.

Troubleshooting steps for common screen replacement issues.
7. Specifications
| Feature | Detail |
|---|---|
| Model | SCREENARAMA Replacement for Gateway GWTN156-7BK |
| Screen Size | 15.6 inches |
| Resolution | FHD 1920x1080 |
| Panel Type | IPS |
| Surface Finish | Matte |
| Video Connector | 30-pin |
| Touchscreen | No |
| Manufacturer | SCREENARAMA |
| Item Weight | 1.46 pounds |
| Package Dimensions | 16.45 x 12.28 x 1.26 inches |
8. Warranty and Support
Your SCREENARAMA replacement screen is backed by a 2-year warranty. For any technical assistance, warranty claims, or further inquiries, please contact SCREENARAMA customer support.
Please retain your proof of purchase for warranty validation.
Ask a question about this manual
Ask about setup, troubleshooting, compatibility, parts, safety, or missing instructions. Manuals+ will review the question and use this page’s manual context to help answer it.