1. Introduction
This instruction manual provides detailed guidance for the Rust-Oleum Home Floor Coating Kit, Model 100806. This all-in-one kit is designed to revitalize various interior floor surfaces, including tile, wood, laminate, concrete, vinyl, and linoleum, offering a durable and cost-effective alternative to floor replacement. The system includes a Base Coat, a Top Coat, and a cleaner for a complete application process. Please read all instructions thoroughly before beginning your project to ensure optimal results and safety.
2. Product Overview
The Rust-Oleum Home Floor Coating Kit is engineered for ease of use and long-lasting performance. It offers a simple two-step system to refresh your floors without the need for extensive preparation like stripping, sanding, or priming.

Figure 2.1: The Rust-Oleum Home Floor Coating Kit packaging, highlighting its key features and contents.
Key Features:
- Easy 2-step system for straightforward application.
- Maximum scratch and stain resistance for enhanced durability.
- Allows foot traffic in one day, with full cure in 7 days.
- No stripping, sanding, or priming required for most surfaces.
- Suitable for various interior surfaces: tile, wood, laminate, concrete, vinyl, and linoleum.

Figure 2.2: Visual representation of the simple three-step process: preparation, base coat application, and top coat application.
3. What's Included
Each Rust-Oleum Home Floor Coating Kit contains the following components:
- Base Coat: 1 Quart (White/Tint Base) - Provides the primary color and adhesion to the surface.
- Top Coat: 1 Quart (Semi-Gloss) - Offers a durable, protective finish and desired sheen.
- Heavy-Duty Cleaner: 4 oz - For preparing the surface before coating.
4. Surface Preparation
Proper surface preparation is crucial for the adhesion and longevity of the coating. Follow these steps carefully:
- Clean the Surface: Thoroughly clean the floor using the included 4 oz Heavy-Duty Cleaner. Mix the cleaner with water according to the instructions on its label. Scrub the floor to remove all dirt, grease, grime, and any loose debris. Rinse thoroughly with clean water.
- Dry Completely: Allow the floor to dry completely. Ensure there is no standing water or dampness before proceeding.
- Repair Imperfections: Fill any cracks, holes, or damaged areas with an appropriate patching compound. Allow it to cure fully and sand smooth if necessary.
- Tape Off Areas: Use painter's tape to mask off baseboards, walls, and any other areas you do not wish to coat.
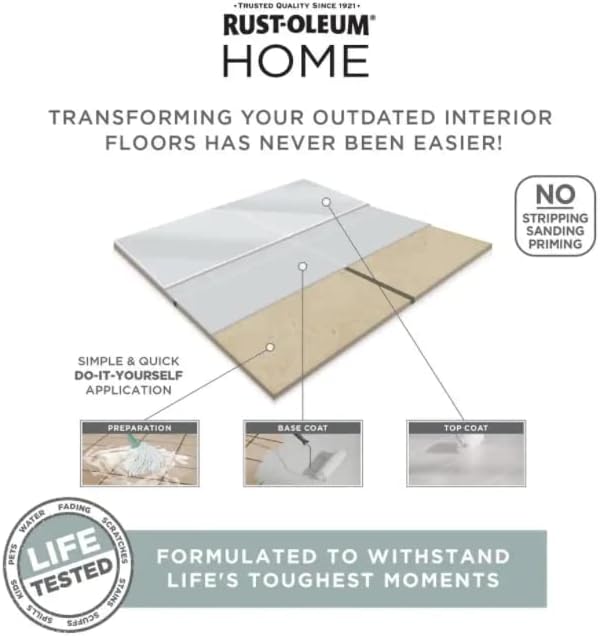
Figure 4.1: An example of thorough floor cleaning, a critical step in preparing the surface for the coating kit.
5. Application Instructions
Apply the coating in a well-ventilated area. Wear appropriate personal protective equipment, including gloves and eye protection.
5.1. Base Coat Application
- Stir Thoroughly: Open the Base Coat can and stir the contents thoroughly for several minutes to ensure all pigments are evenly dispersed.
- Edge Work: Using a high-quality synthetic brush, carefully cut in around the edges of the room, along baseboards, and in corners.
- Roll the Floor: Pour a small amount of Base Coat into a paint tray. Use a 3/8-inch nap roller cover on an extension pole to apply a thin, even coat to the rest of the floor. Work in small sections, maintaining a wet edge to avoid lap marks.
- Second Coat (if needed): For optimal coverage, especially on darker or highly textured surfaces, a second coat of Base Coat may be necessary. Allow the first coat to dry for at least 6 hours before applying the second.

Figure 5.1: Application of the base coat using a roller, ensuring even coverage over the floor tiles.
5.2. Top Coat Application
The Top Coat provides the final protective layer and desired sheen. It is crucial for the durability of the system.
- Wait for Base Coat to Dry: Ensure the Base Coat has dried for at least 24 hours before applying the Top Coat. The surface should be dry to the touch and not tacky.
- Stir Thoroughly: Stir the Top Coat thoroughly before application.
- Apply Top Coat: Using a clean 3/8-inch nap roller cover and a clean paint tray, apply a thin, even coat of the Top Coat over the entire floor. Follow the same technique as with the Base Coat, working in small sections and maintaining a wet edge.
- Remove Tape: Carefully remove painter's tape while the Top Coat is still wet to prevent peeling.
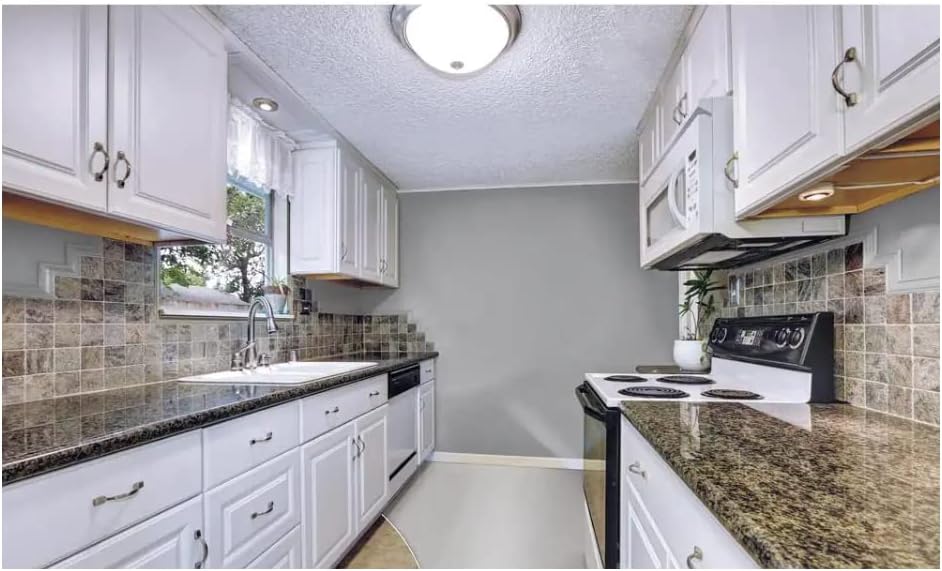
Figure 5.2: A close-up of the top coat being applied, which adds durability and a semi-gloss finish to the floor.
6. Drying and Curing Times
Adhering to the recommended drying and curing times is essential for the performance of the floor coating.
- Dry to Touch: Approximately 2-4 hours per coat.
- Light Foot Traffic: Allow at least 24 hours after the final Top Coat application before light foot traffic.
- Full Cure: The coating will achieve its maximum hardness and durability after 7 days. Avoid heavy furniture, rugs, or harsh cleaning during this period.
7. Maintenance
To maintain the appearance and durability of your Rust-Oleum Home Floor Coating, follow these guidelines:
- Regular Cleaning: Clean regularly with a mild, pH-neutral floor cleaner and a soft mop or cloth. Avoid abrasive cleaners or harsh chemicals.
- Spill Cleanup: Wipe up spills immediately to prevent staining.
- Protect from Scratches: Use felt pads under furniture legs and avoid dragging heavy objects across the floor.
8. Troubleshooting
If you encounter issues during or after application, consider the following common solutions:
- Uneven Finish: Ensure coats are applied thinly and evenly. Over-application or insufficient stirring can lead to unevenness.
- Poor Adhesion: This is often due to inadequate surface preparation. Ensure the floor is thoroughly cleaned, dry, and free of contaminants before application.
- Bubbles/Foaming: Over-rolling or applying too thick a coat can cause bubbles. Use a high-quality roller and apply thin, even coats.
- Long Drying Time: High humidity or low temperatures can extend drying times. Ensure proper ventilation and ideal environmental conditions.
9. Product Specifications
| Feature | Detail |
|---|---|
| Brand | Rust-Oleum |
| Model Name | Home |
| Model Number | 100806 (also referred to as 360099) |
| Color | White |
| Finish Type | Semi-Gloss (Top Coat) |
| Item Volume | 68 Fluid Ounces (total kit) |
| Coverage | Up to 100 Sq. Ft. |
| Paint Type | Watercolor |
| Specific Uses For Product | Interior/Exterior (Note: Product description specifies 'interior' for this kit) |
| Surface Recommendation | Vinyl, Wood, Tile, Laminate, Concrete, Linoleum |
| Special Feature | Stain Resistant |
| Is Waterproof | True |
| Dry Time (per coat) | 24 hours (for Base Coat before Top Coat) |
| Full Cure Time | 7 Days |
| Item Weight | 6.36 pounds |
| Product Dimensions | 8.88 x 5.5 x 5.25 inches |
| UPC | 020066469030 |
10. Warranty and Support
For specific warranty information, product support, or technical assistance, please refer to the contact details provided on the product packaging or visit the official Rust-Oleum website. Keep your purchase receipt for any warranty claims.


