
Enventor EN011R
ENVENTOR Laser Level Instruction Manual
Model: EN011R
1. Introduction
Thank you for choosing the ENVENTOR Laser Level. This self-leveling laser tool is designed for precision tasks such as wall picture hanging, tile laying, and furniture installation. It features horizontal and vertical 2-line laser projection, high visibility, and a durable, waterproof design. Please read this manual thoroughly before operation to ensure safe and efficient use.
2. Package Contents
Verify that all items listed below are included in your package:
- 1 x ENVENTOR Laser Level EN011R
- 1 x Strong Magnetic L-Bracket
- 1 x Carrying Bag
- 2 x AA Batteries
- 1 x User Manual

Image: ENVENTOR Laser Level EN011R with its accessories, including the magnetic L-bracket, carrying bag, and AA batteries.
3. Product Overview
Familiarize yourself with the components of your laser level:
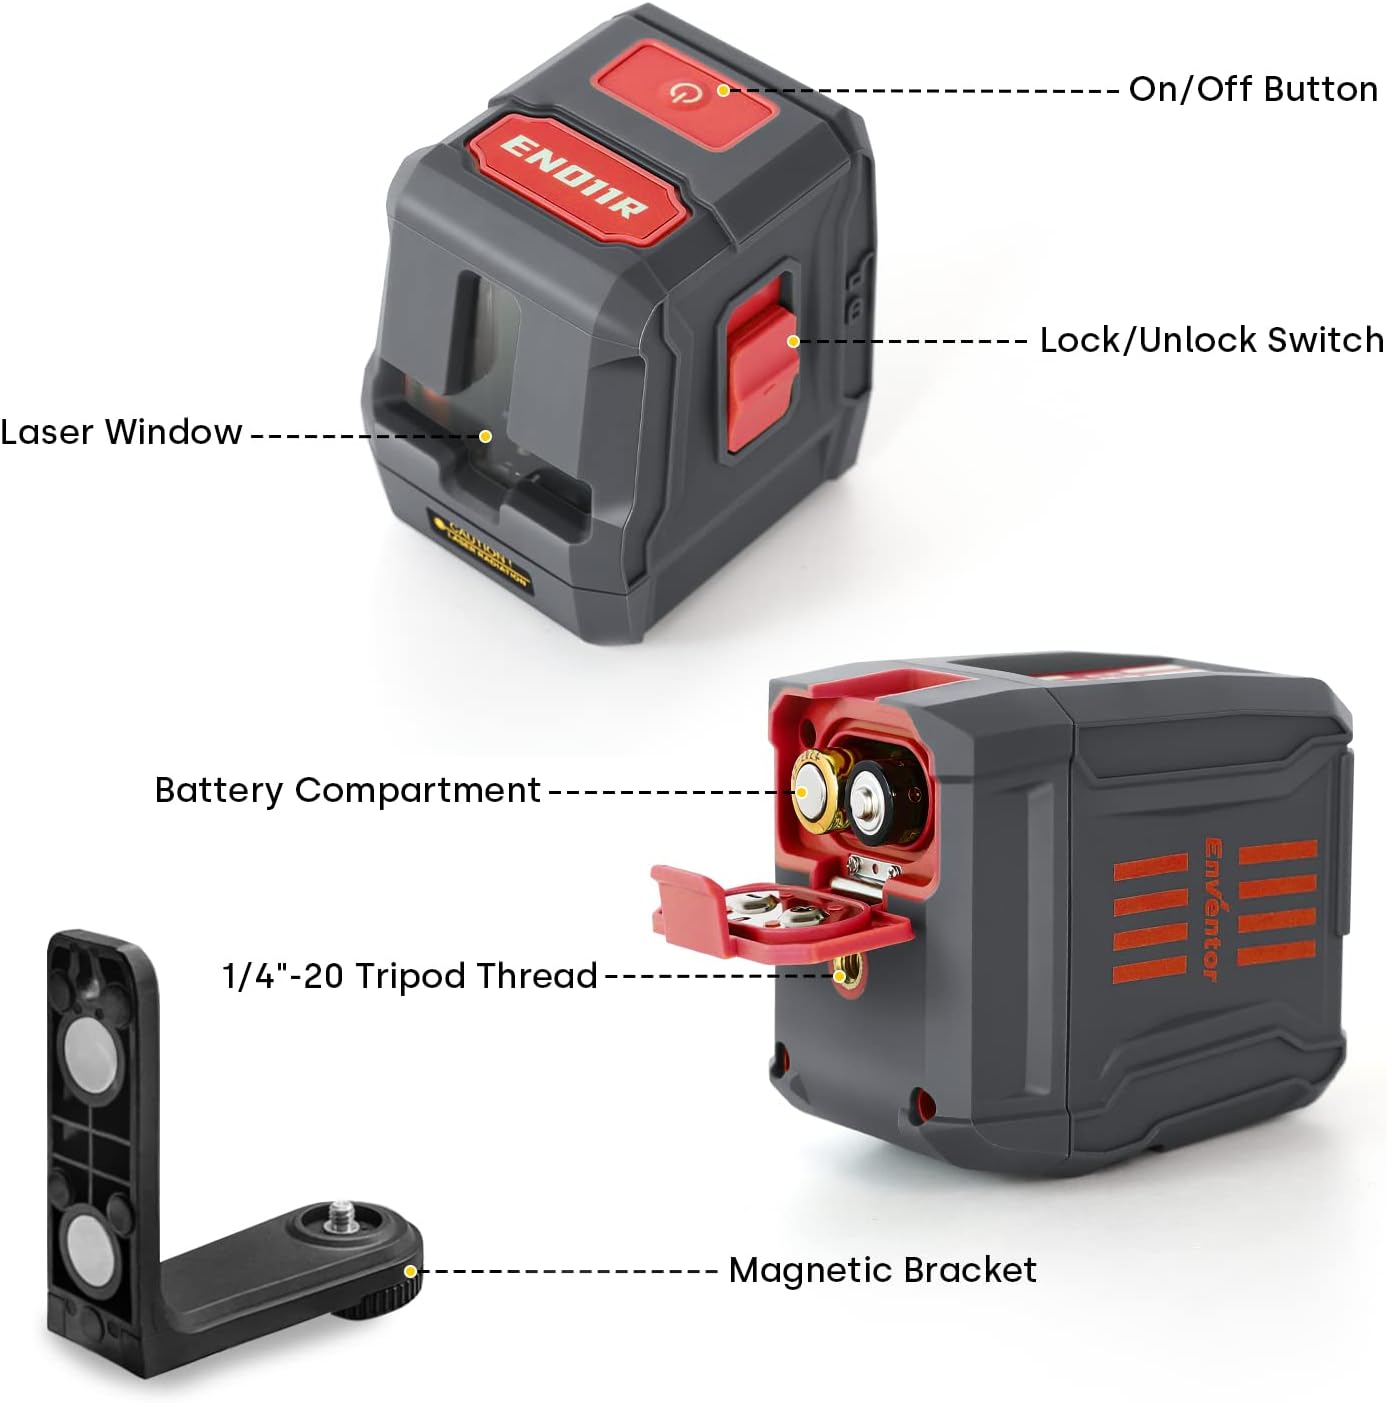
Image: Top and side views of the laser level, highlighting the On/Off Button, Lock/Unlock Switch, and Laser Window.

Image: Bottom view of the laser level, showing the Battery Compartment, 1/4"-20 Tripod Thread, and the Magnetic Bracket.
4. Setup
4.1 Battery Installation
- Open the battery compartment cover located at the bottom of the device.
- Insert the 2 AA batteries, ensuring correct polarity (+/-).
- Close the battery compartment cover securely.
4.2 Mounting the Device
The laser level can be mounted using the included magnetic L-bracket or a standard tripod (not included).
- Magnetic L-Bracket: Attach the laser level to the L-bracket using the 1/4"-20 tripod thread. The magnetic base allows attachment to metal surfaces, and the bracket supports 180-degree rotation for versatile positioning.
- Tripod: Screw the laser level directly onto a tripod using the 1/4"-20 tripod thread.
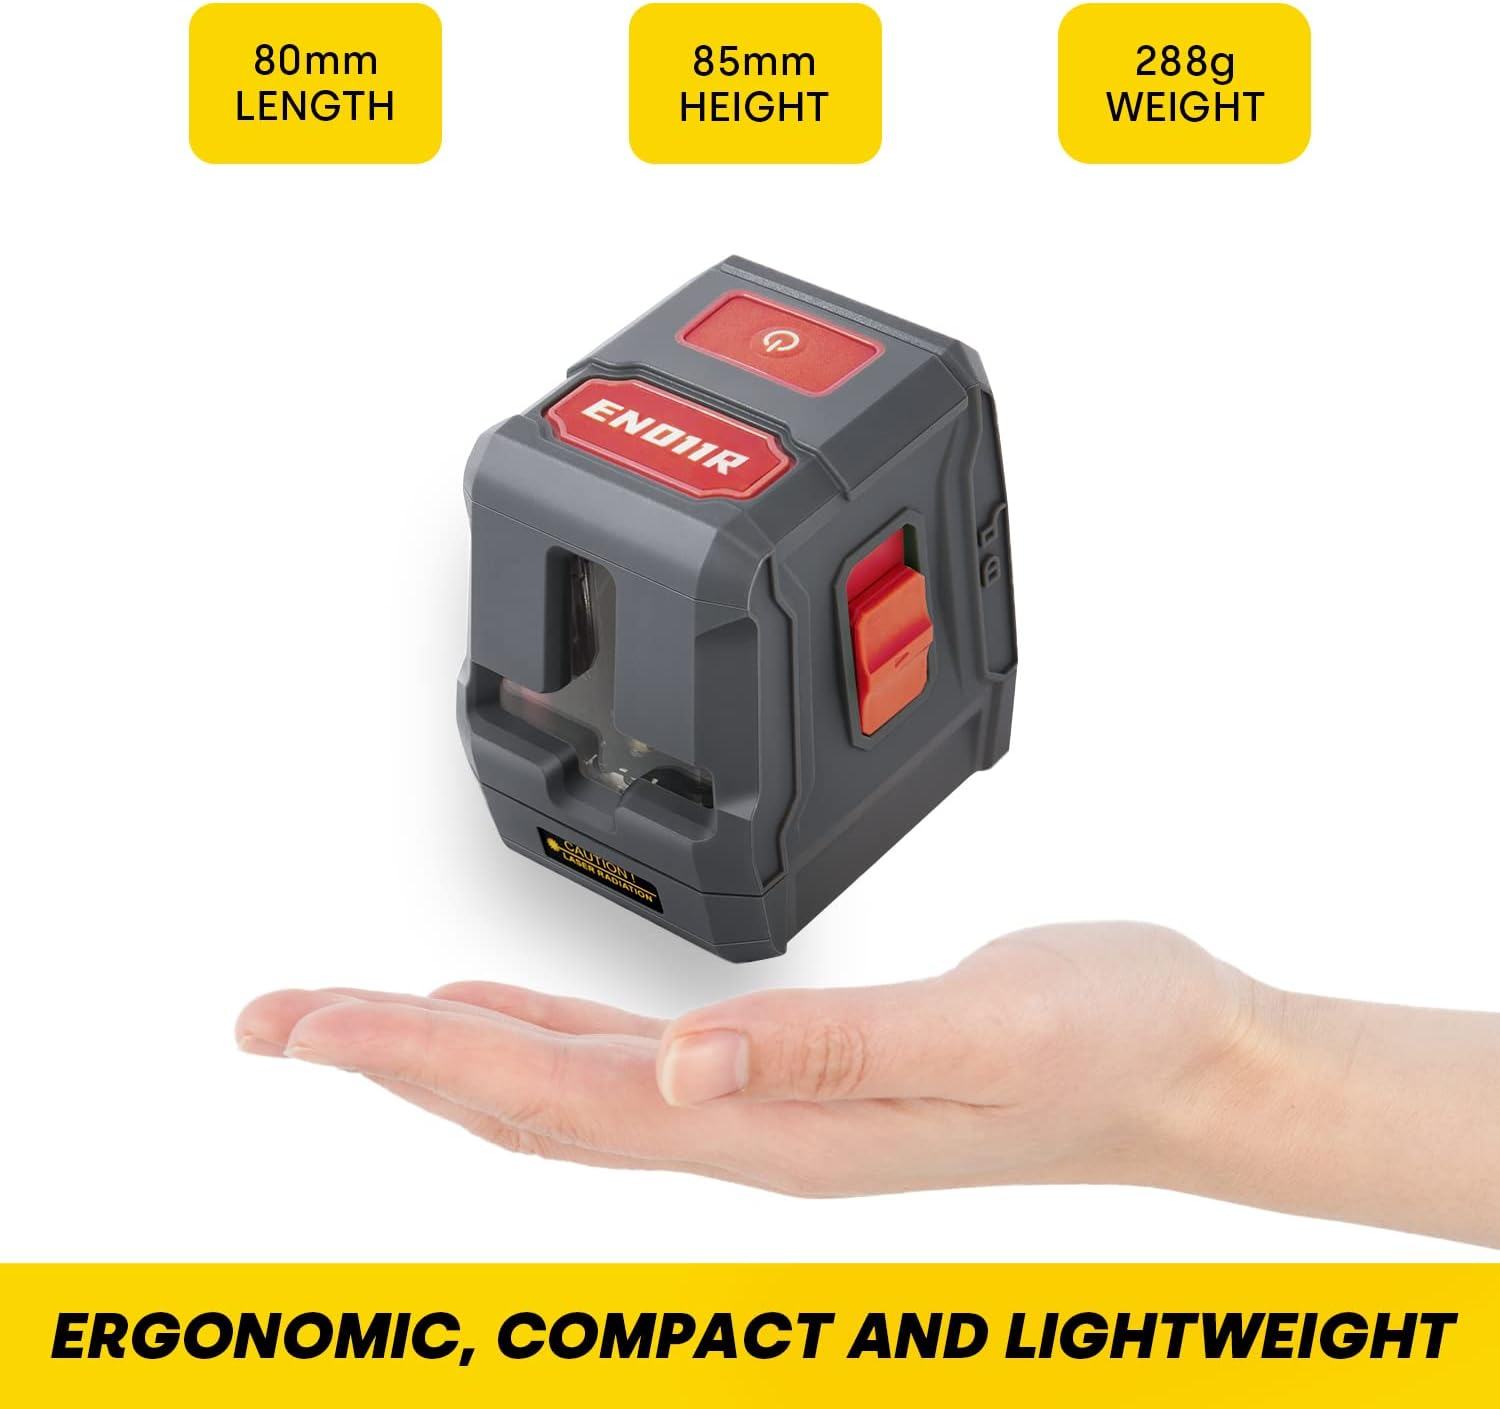
Image: Demonstrates the laser level mounted on a tripod and also attached to a wall using its magnetic L-bracket, showing the 1/4"-20 tripod thread.
5. Operating Instructions
5.1 Power On/Off
Press the On/Off button located on the top of the device to power it on or off.
5.2 Self-Leveling Mode
Slide the Lock/Unlock Switch to the unlocked position. The laser level will automatically self-level within 3 seconds if the surface incline is within 4 degrees. If the incline exceeds 4 degrees, the laser lines will flash rapidly to indicate an out-of-level condition.

Image: The laser level operating in self-leveling mode, projecting horizontal and vertical lines on a wall, suitable for tasks like hanging pictures.
5.3 Manual Mode
Slide the Lock/Unlock Switch to the locked position. In this mode, the laser level can project lines at any angle. The lines will flash every 5 seconds to indicate that it is in manual mode and not self-leveling.
Image: The laser level operating in manual mode, projecting angled lines, useful for tasks like staircase railing installation.
5.4 Switching Laser Lines
With the device powered on, press the On/Off button briefly to cycle through different laser line combinations:
- Horizontal line only
- Vertical line only
- Cross lines (horizontal and vertical)

Image: Examples of the laser level in use for various applications, including wall decoration, shelf installation, door/window alignment, and ceiling work.
6. Specifications
| Feature | Detail |
|---|---|
| Brand | Enventor |
| Model | EN011R |
| Laser Class | Class II, <1mW power output |
| Laser Color | Red |
| Accuracy | ± 1/8 inch at 33 Ft |
| Self-Leveling Range | ± 4° |
| Operation Mode | Manual and Automatic |
| Power Source | 2 x AA Batteries (included) |
| Battery Life | Approximately 8 hours |
| IP Rating | IP54 (Waterproof/Debris resistant) |
| Material | Metal, Rubber, Thermoplastic Elastomers |
| Product Dimensions | 3.78"L x 1.77"W (approx. 9.6cm L x 4.5cm W) |
| Item Weight | 10.2 ounces (approx. 288 grams) |
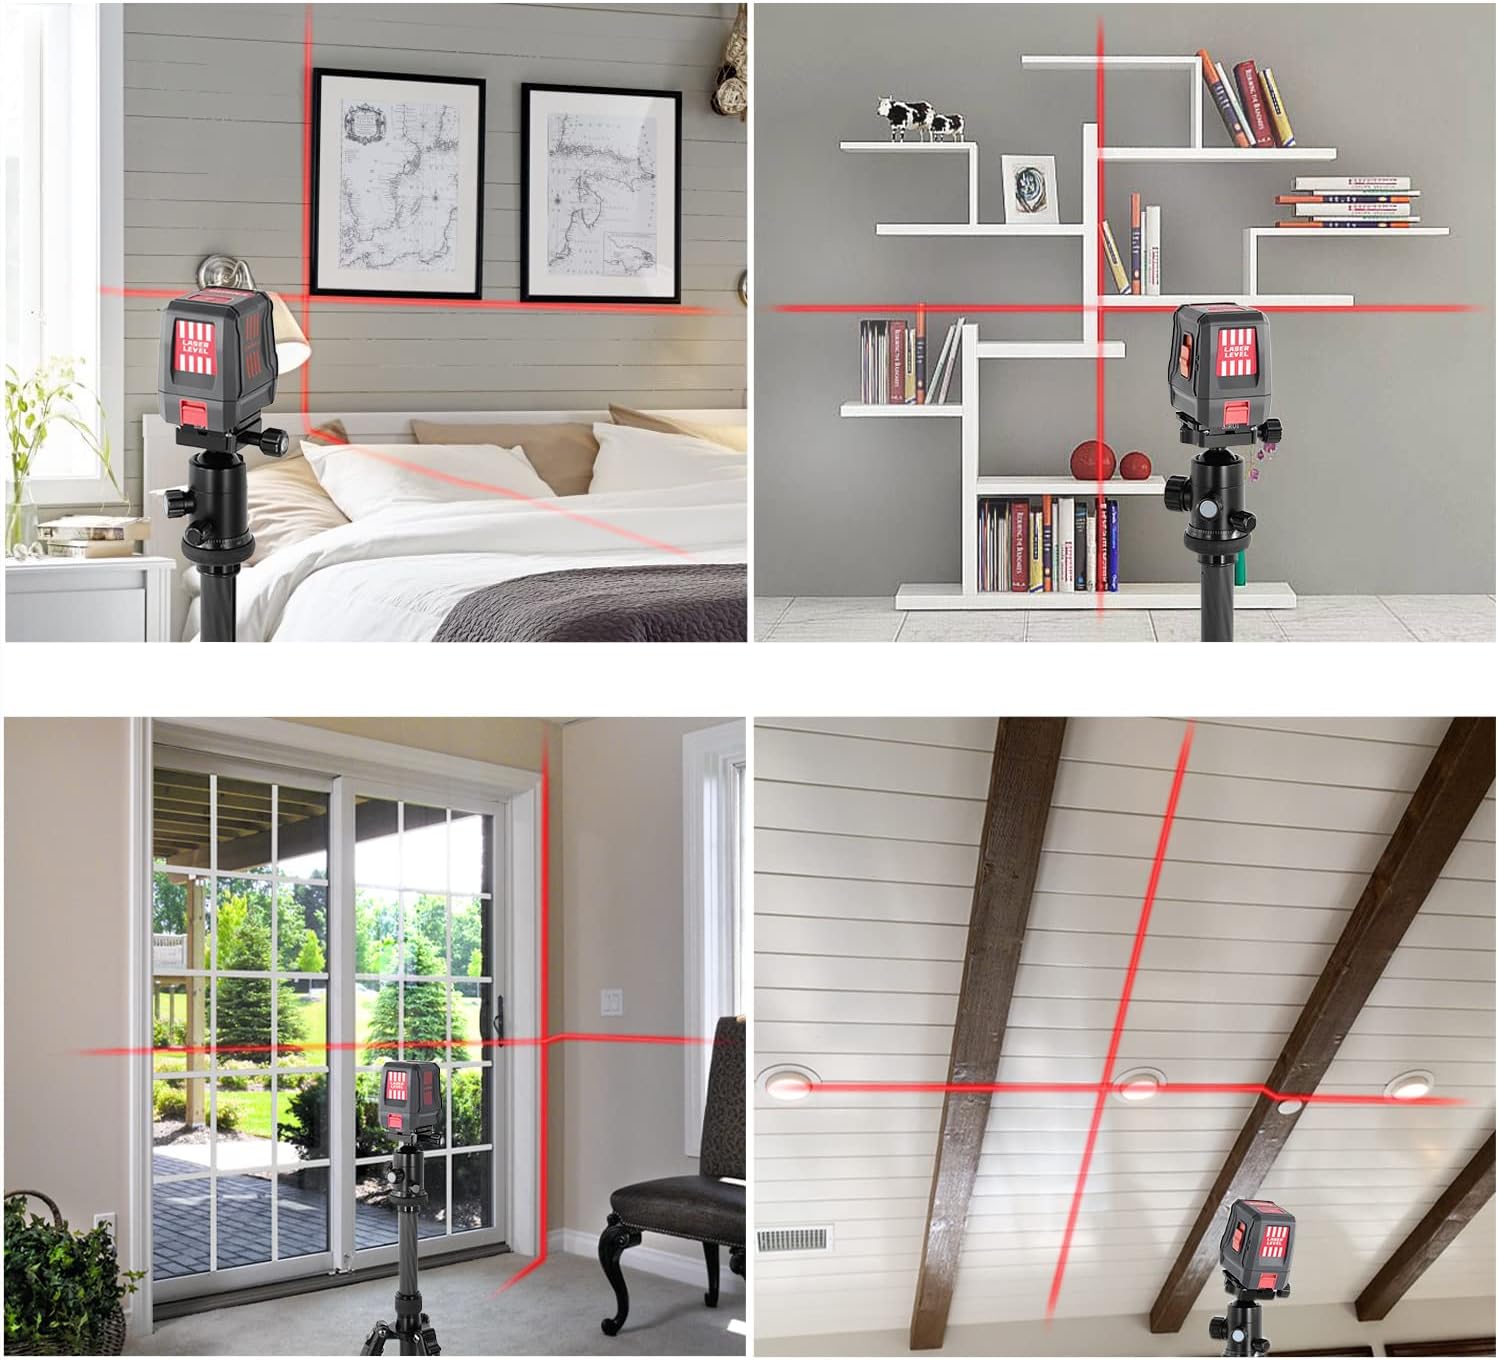
Image: The laser level held in a hand, illustrating its ergonomic, compact, and lightweight design, with dimensions and weight specified.

Image: Visual representation of the laser level's durability, highlighting its waterproof, dustproof, and shock-resistant properties.
7. Maintenance
- Keep the laser level clean and free from dust and debris. Use a soft, dry cloth for cleaning.
- Avoid exposing the device to extreme temperatures or direct sunlight for prolonged periods.
- Remove batteries if the device will not be used for an extended period to prevent leakage.
- Store the laser level in its carrying bag to protect it from impacts and environmental factors.
8. Troubleshooting
| Problem | Possible Cause | Solution |
|---|---|---|
| Laser lines are flashing rapidly in self-leveling mode. | The device is out of its self-leveling range (>4° incline). | Place the laser level on a flatter surface or adjust its position until the flashing stops. |
| Laser lines are flashing every 5 seconds. | The device is in manual mode. | This is normal behavior for manual mode. If self-leveling is desired, slide the Lock/Unlock Switch to the unlocked position. |
| No laser lines are projected. | Batteries are low or incorrectly installed; device is off. | Check battery installation and replace if necessary. Ensure the device is powered on. |
9. Safety Information
WARNING: This is a Class II laser product. Avoid direct eye exposure to the laser beam. Do not stare into the beam or view directly with optical instruments.
- Do not attempt to disassemble or modify the laser level.
- Keep out of reach of children.
- Use only as directed in this manual.
10. Official Product Videos
ENVENTOR Laser Level Overview
Video: An official overview of the ENVENTOR Laser Level, demonstrating its features, components, and basic operation. This video is provided by the seller, Jack Power.
11. Warranty and Support
For warranty information or technical support, please refer to the contact details provided in the packaging or visit the official Enventor website. Enventor aims to provide household solutions and kind service to its customers.
You can also visit the Enventor Store on Amazon for more products and information.
Related documentsEN011R


Ask a question about this manual
Ask about setup, troubleshooting, compatibility, parts, safety, or missing instructions. Manuals+ will review the question and use this page’s manual context to help answer it.