
1. Introduction
This manual provides essential information for the safe and effective operation, maintenance, and setup of your BLACK+DECKER CS1024-B3 Circular Saw and WM125 Workmate Workbench. Please read all instructions carefully before use to ensure personal safety and optimal product performance. Keep this manual for future reference.
2. General Safety Instructions
WARNING: Read all safety warnings, instructions, illustrations, and specifications provided with this power tool and workbench. Failure to follow all instructions listed below may result in electric shock, fire, and/or serious injury.
2.1. Work Area Safety
- Keep the work area clean and well-lit. Cluttered or dark areas invite accidents.
- Do not operate power tools in explosive atmospheres, such as in the presence of flammable liquids, gases, or dust. Power tools create sparks which may ignite the dust or fumes.
- Keep children and bystanders away while operating a power tool. Distractions can cause you to lose control.
2.2. Electrical Safety (Circular Saw)
- Power tool plugs must match the outlet. Never modify the plug in any way.
- Avoid body contact with earthed or grounded surfaces, such as pipes, radiators, ranges, and refrigerators. There is an increased risk of electric shock if your body is earthed or grounded.
- Do not expose power tools to rain or wet conditions. Water entering a power tool will increase the risk of electric shock.
2.3. Personal Safety
- Always wear eye protection. Use safety glasses, goggles, or a face shield.
- Wear appropriate hearing protection when operating power tools.
- Dress properly. Do not wear loose clothing or jewelry. Keep your hair and clothing away from moving parts.
- Stay alert, watch what you are doing, and use common sense when operating a power tool.
2.4. Power Tool Use and Care (Circular Saw)
- Do not force the power tool. Use the correct power tool for your application.
- Disconnect the plug from the power source and/or remove the battery pack, if detachable, from the power tool before making any adjustments, changing accessories, or storing power tools.
- Maintain power tools and accessories. Check for misalignment or binding of moving parts, breakage of parts, and any other condition that may affect the power tool’s operation.
3. Product Overview and Components
3.1. BLACK+DECKER CS1024-B3 Circular Saw
The BLACK+DECKER CS1024-B3 is a 7-1/4 inch circular saw with a 1500W motor, designed for efficient cutting of various wood materials. It features an ergonomic handle for control and adjustments for depth and bevel cutting.

Image 3.1.1: The BLACK+DECKER CS1024-B3 Circular Saw, showcasing its robust design and blade guard.

Image 3.1.2: Key components of the circular saw, including the 1500W motor, quick blade change mechanism, angle and depth adjustment levers, and the parallel guide.
3.2. BLACK+DECKER WM125 Workmate Workbench
The BLACK+DECKER WM125 Workmate Workbench is a versatile and portable work surface designed to securely hold materials for various tasks. It features a sturdy steel frame and adjustable swivel pegs.

Image 3.2.1: The BLACK+DECKER WM125 Workmate Workbench in its upright, ready-to-use position.

Image 3.2.2: Labeled features of the Workmate Workbench, highlighting the adjustable swivel pegs for clamping irregular shapes, the sturdy steel frame, and non-skid feet for stability.
4. Setup
4.1. Circular Saw Setup (CS1024-B3)
- Blade Installation:
- Ensure the saw is unplugged.
- Press the spindle lock button and use the provided wrench to loosen the arbor nut.
- Lift the lower blade guard and remove the outer washer and old blade (if applicable).
- Place the new 7-1/4 inch blade with the teeth pointing in the direction of rotation (usually indicated by an arrow on the guard).
- Replace the outer washer and arbor nut. Tighten securely with the wrench while holding the spindle lock.
- Depth Adjustment:
- Loosen the depth adjustment lever.
- Raise or lower the base plate until the blade extends approximately 1/8 inch (3mm) below the workpiece.
- Tighten the depth adjustment lever firmly.
- Bevel Adjustment:
- Loosen the bevel adjustment lever.
- Tilt the base plate to the desired angle (0-45 degrees).
- Tighten the bevel adjustment lever firmly.
4.2. Workmate Workbench Setup (WM125)
- Unfolding:
- Place the folded workbench on a flat, stable surface.
- Pull the legs outwards until they lock into place, forming a stable A-frame structure.
- Ensure all four feet are firmly on the ground and the workbench is stable before use.
- Adjusting Vise Jaws:
- Turn the handles on the side to open or close the wooden vise jaws.
- Insert the adjustable swivel pegs into the desired holes on the workbench surface to accommodate irregularly shaped workpieces.
5. Operating Instructions
5.1. Operating the Circular Saw (CS1024-B3)
- Secure the Workpiece: Always clamp the material firmly to the Workmate Workbench or another stable surface. Never hold the workpiece by hand.
- Power Connection: Plug the saw into a suitable power outlet.
- Starting the Saw: Depress the trigger switch. Allow the blade to reach full speed before contacting the workpiece.
- Making a Cut:
- Align the saw's base plate with your cut line.
- Gently push the saw forward, maintaining a steady, even pressure. Do not force the saw.
- The lower blade guard will retract automatically as you cut. Ensure it closes properly after the cut is complete.
- For long cuts, use the parallel guide for accuracy.
- Stopping the Saw: Release the trigger switch. Wait for the blade to stop completely before setting the saw down.

Image 5.1.1: The circular saw in action, demonstrating a straight cut through a wooden board. Always ensure the workpiece is securely clamped.
Image 5.1.2: The circular saw blade is capable of performing both longitudinal (rip) and transversal (cross) cuts on various materials.
5.2. Using the Workmate Workbench (WM125)
- Clamping Workpieces:
- Place the workpiece between the vise jaws.
- Turn the handles to tighten the jaws until the workpiece is held securely.
- For larger or irregularly shaped items, utilize the adjustable swivel pegs by inserting them into the appropriate holes to create a custom clamping surface.
- Stability: Ensure the workbench is always on a level, stable surface. The non-skid feet provide additional stability.
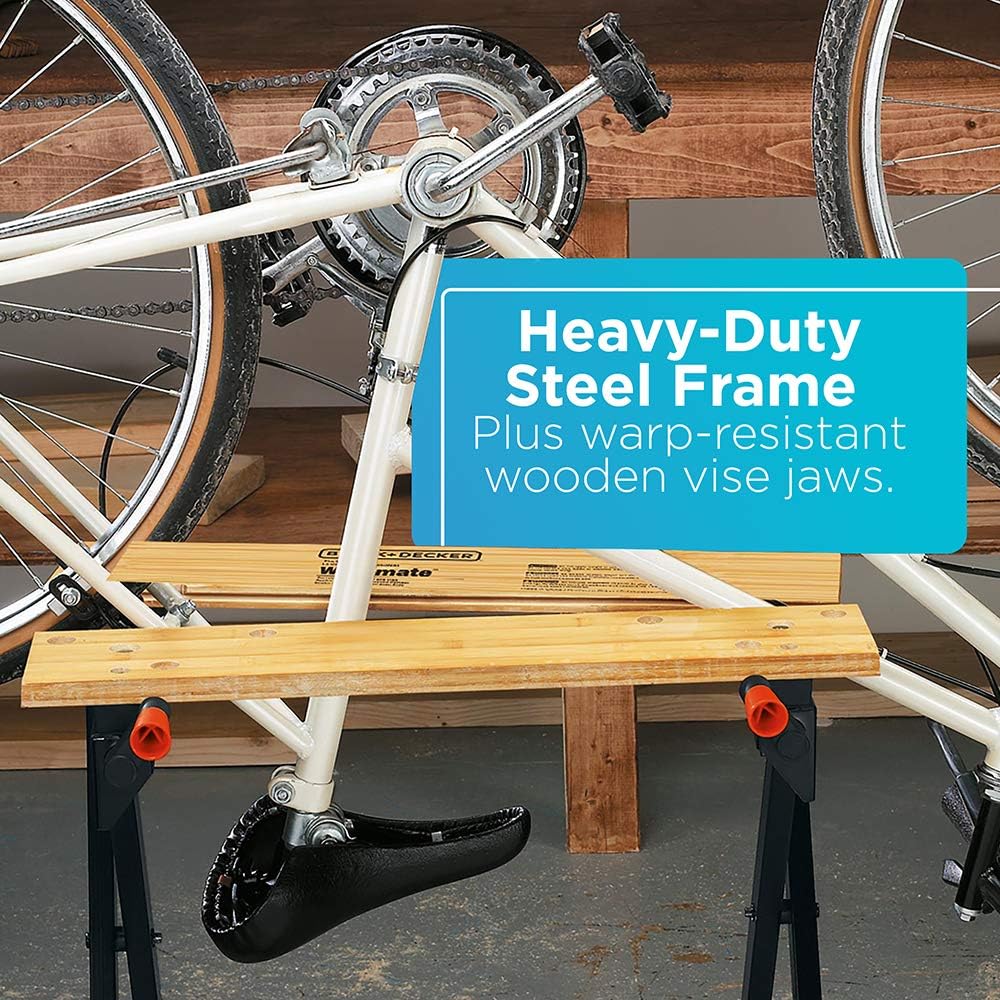
Image 5.2.1: The Workmate Workbench demonstrating its versatility by securely holding a bicycle for maintenance, utilizing its sturdy frame and clamping capabilities.
6. Maintenance
6.1. Circular Saw Maintenance (CS1024-B3)
- Cleaning: Regularly clean the saw's ventilation openings to prevent overheating. Use a soft brush or compressed air. Do not use water or chemical cleaners.
- Blade Care: Inspect the blade before each use for sharpness and damage. Replace dull or damaged blades immediately.
- Cord Inspection: Check the power cord for any damage or fraying. Replace if necessary.
- Lubrication: The saw's internal components are factory-lubricated and generally do not require additional lubrication.
6.2. Workmate Workbench Maintenance (WM125)
- Cleaning: Wipe down the workbench surfaces with a damp cloth. Avoid harsh chemicals that could damage the wood or metal.
- Joints and Fasteners: Periodically check all bolts, screws, and joints for tightness. Tighten as needed to maintain stability.
- Storage: When not in use, fold the workbench for compact storage in a dry place to prevent rust or wood damage.
7. Troubleshooting
| Problem | Possible Cause | Solution |
|---|---|---|
| Circular Saw does not start | No power supply; Damaged cord/plug; Faulty switch | Check power outlet; Inspect cord/plug; Contact service center |
| Saw blade binds or smokes | Dull blade; Incorrect depth setting; Forcing the cut; Workpiece not secured | Replace blade; Adjust depth; Reduce feed rate; Secure workpiece firmly |
| Inaccurate cuts | Blade wobble; Incorrect bevel/depth setting; Loose parallel guide | Check blade installation; Re-adjust settings; Tighten guide |
| Workmate Workbench unstable | Legs not fully extended/locked; Uneven surface; Loose fasteners | Ensure legs are locked; Move to level surface; Tighten all fasteners |
| Vise jaws not clamping securely | Jaws worn; Handles loose; Debris in mechanism | Inspect jaws for wear; Tighten handles; Clean mechanism |
8. Specifications
8.1. BLACK+DECKER CS1024-B3 Circular Saw
- Power: 1500 Watts
- Blade Diameter: 7-1/4 inches
- Blade Teeth: 18 (standard included blade)
- Max RPM: 7000
- Bevel Capacity: 0-45 degrees
- Cutting Angle: 90 Degrees
- Recommended Surface: Wood
- Special Features: Lightweight, Ergonomic Handle
8.2. BLACK+DECKER WM125 Workmate Workbench
- Construction: Durable Steel Frame, Wooden Vise Jaws
- Weight Capacity: Up to 158 kg (350 lbs)
- Features: Adjustable Swivel Pegs, Foldable Design, Non-Skid Feet
- Special Features: Lightweight, Foldable
9. Warranty and Support
BLACK+DECKER products are manufactured to high-quality standards and are guaranteed against defects in materials and workmanship. For specific warranty terms, conditions, and duration, please refer to the warranty card included with your product or visit the official BLACK+DECKER website. For technical support, replacement parts, or service, please contact BLACK+DECKER customer service.
10. Disposal
Do not dispose of power tools or workbenches with household waste. These products contain materials that can be recycled. Please take them to a designated collection point for recycling electrical and electronic equipment. Consult your local authority for recycling advice.


