
1. Introduction
The Labelife E1000 is a portable, handheld label maker designed for efficient and versatile labeling in various environments, including home, office, and industrial settings. Featuring a QWERTY keyboard and a clear display, it allows for easy text input and customization. This manual provides detailed instructions on how to set up, operate, maintain, and troubleshoot your E1000 label maker to ensure optimal performance and longevity.
2. Safety Information
Please read all safety instructions before using the device to prevent injury or damage.
- Do not expose the label maker to extreme temperatures, direct sunlight, or high humidity.
- Avoid dropping the device or subjecting it to strong impacts.
- Use only specified Labelife label tapes and power adapters. Using incompatible accessories may damage the device and void the warranty.
- Keep batteries out of reach of children. If batteries are swallowed, seek immediate medical attention.
- Do not attempt to disassemble or modify the label maker. Refer all servicing to qualified personnel.
- Unplug the AC adapter from the power outlet when not in use for extended periods or during cleaning.
3. Package Contents
Verify that all items are present in your package:
- Labelife E1000 Label Maker Machine
- AC Power Adapter
- 4 x JM-231 Black Print on White Label Tape (12mm / 0.47 inch width x 26.2 feet length each)
- User Manual (this document)
4. Product Overview
The Labelife E1000 features a user-friendly design with a full QWERTY keyboard for efficient typing and a clear LCD screen for text preview and settings adjustment.

Figure 4.1: Front view of the Labelife E1000 Label Maker, showing the QWERTY keyboard, display, and tape output slot.
4.1. Components and Controls
- LCD Display: Shows text, settings, and status icons.
- QWERTY Keyboard: For typing text and numbers.
- Function Keys: Include Menu, OK, Mirror, Clear, Enter, and dedicated keys for Cable Wrap, Cable Flag, Faceplate, and Serialize functions.
- Tape Output Slot: Where the printed label exits.
- Cutter Lever: Manually cuts the printed label.
- Tape Compartment: Located at the back, for inserting label tape cartridges.
- Power Port: For connecting the AC adapter.
- Battery Compartment: For AAA batteries (not included).
5. Setup
5.1. Power Supply
The E1000 label maker can be powered by either the included AC adapter or 6 AAA batteries (not included).
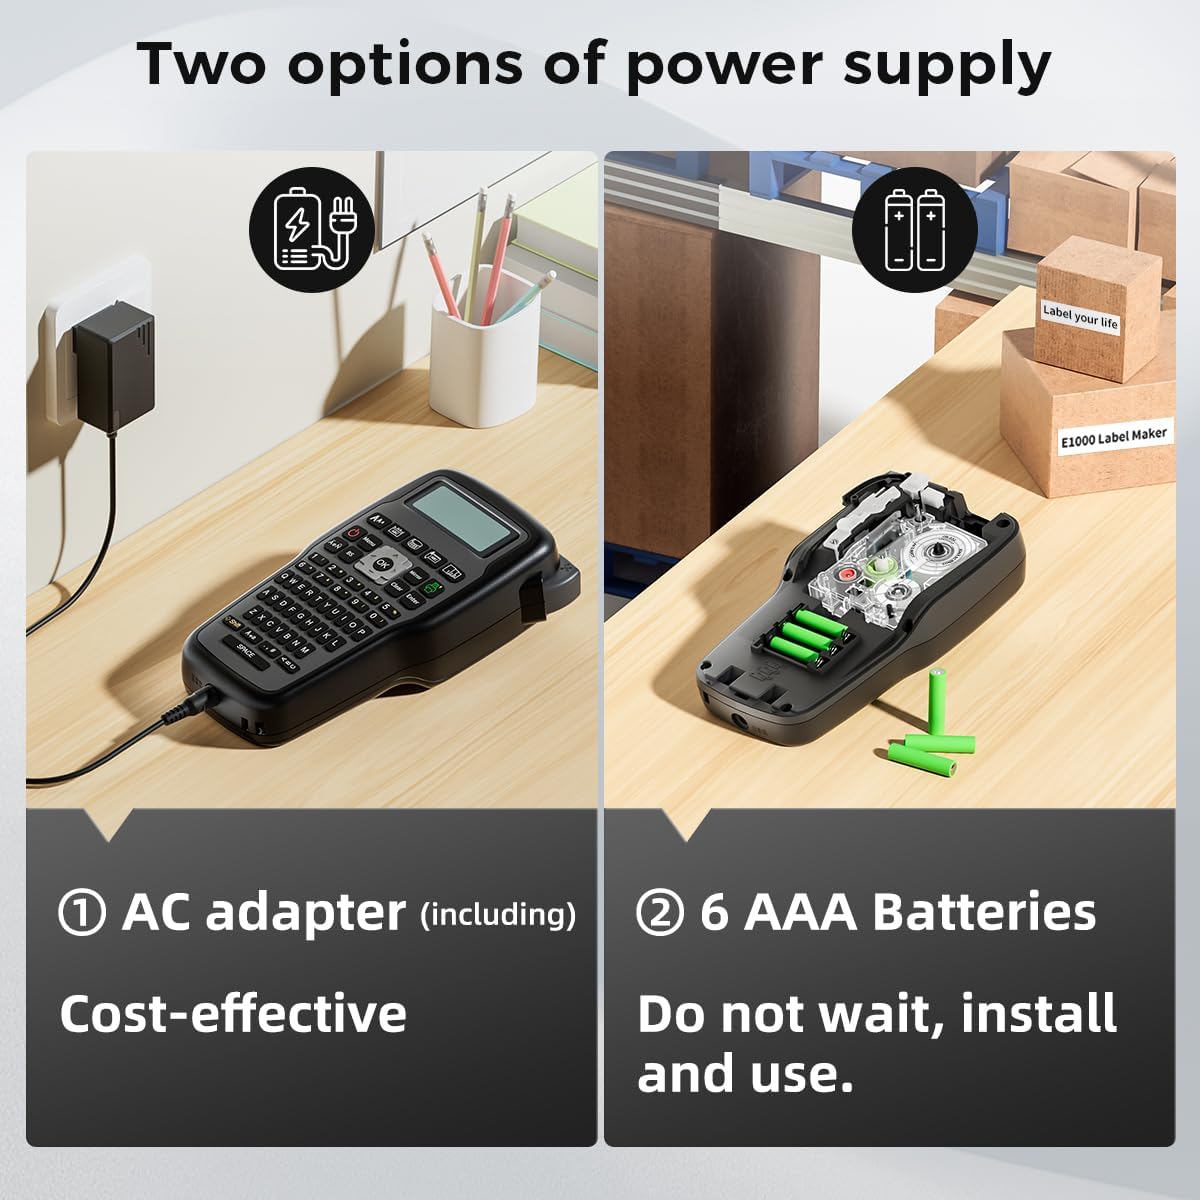
Figure 5.1: Illustration of the two power supply options for the E1000 label maker: AC adapter and AAA battery compartment.
- Using AC Adapter: Insert the AC adapter plug into the power port on the side of the label maker and plug the adapter into a wall outlet. This is the recommended cost-effective power source.
- Using AAA Batteries: Open the battery compartment cover on the back of the device. Insert 6 new AAA alkaline batteries, ensuring correct polarity (+/-). Close the cover securely.
5.2. Loading Label Tape
The E1000 uses Labelife JM series laminated label tapes. The device comes with 12mm wide tapes, and also supports 6mm and 9mm widths.
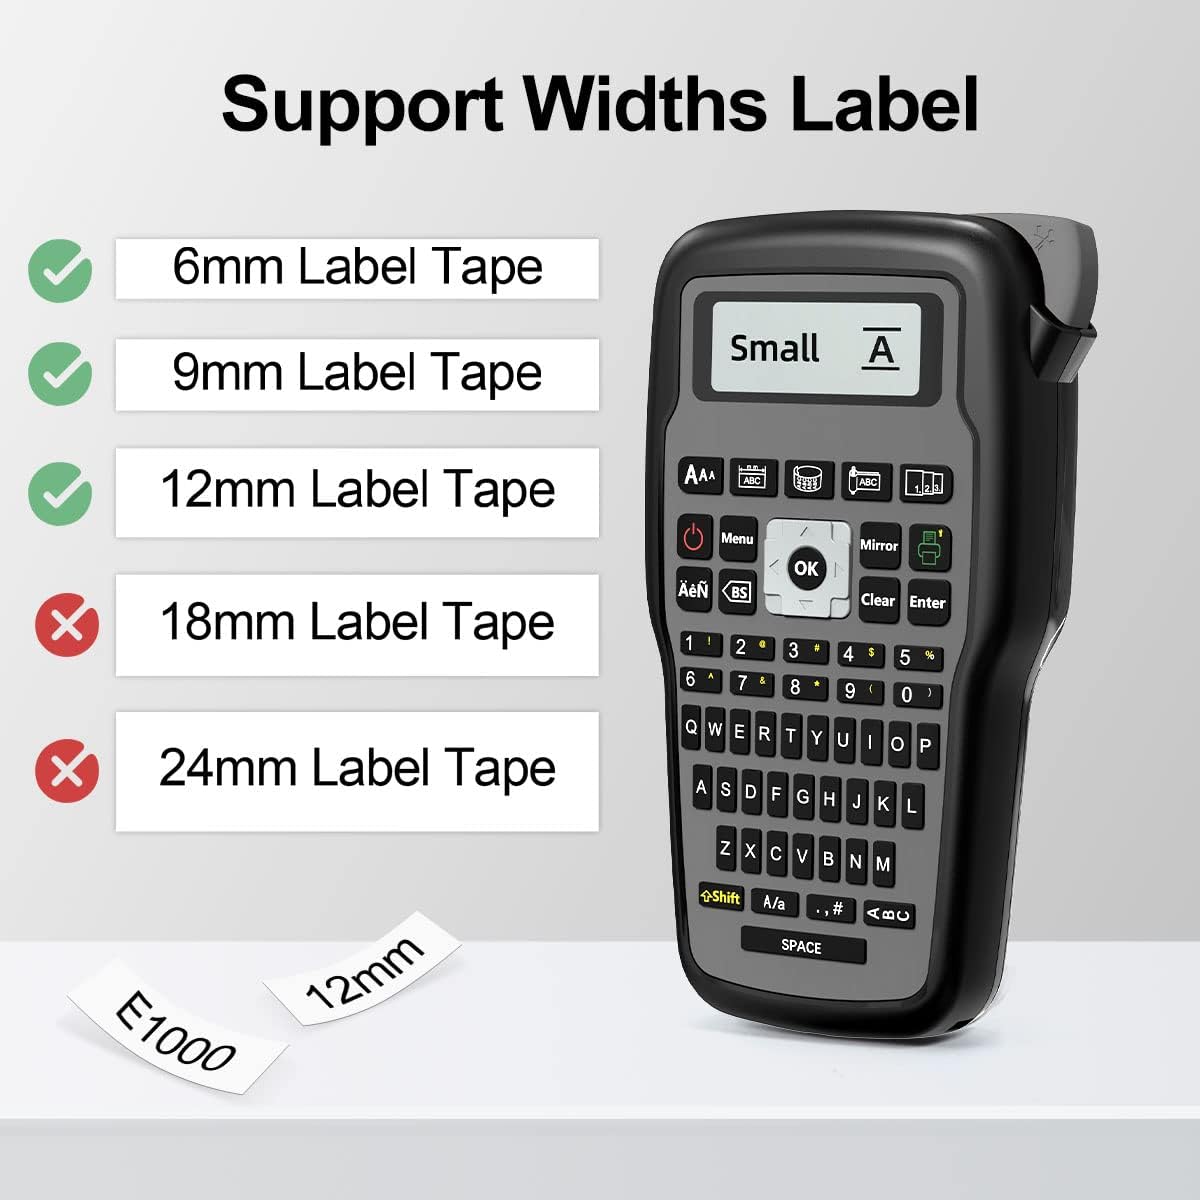
Figure 5.2: A Labelife JM-231 label tape cartridge, showing the laminated tape and internal components.
- Ensure the label maker is turned off.
- Open the tape compartment cover located on the back of the device.
- Insert the label tape cartridge into the compartment, ensuring it clicks firmly into place. The tape should feed smoothly into the printer mechanism.
- Close the tape compartment cover.
6. Operating Instructions
6.1. Basic Label Creation

Figure 6.1: A user demonstrating the handheld use of the Labelife E1000 label maker, highlighting its QWERTY keyboard for easy typing.
- Press the Power button to turn on the label maker.
- Type your desired text using the QWERTY keyboard. The text will appear on the LCD display.
- Use the Shift key for uppercase letters and symbols.
- Press Enter to confirm text or move to the next line for multi-line labels.
- To print, press the Print button (usually indicated by a printer icon).
- After printing, use the cutter lever on the side of the device to cut the label.
6.2. Special Label Functions
The E1000 offers dedicated keys for specialized label types, enhancing organization for various applications.
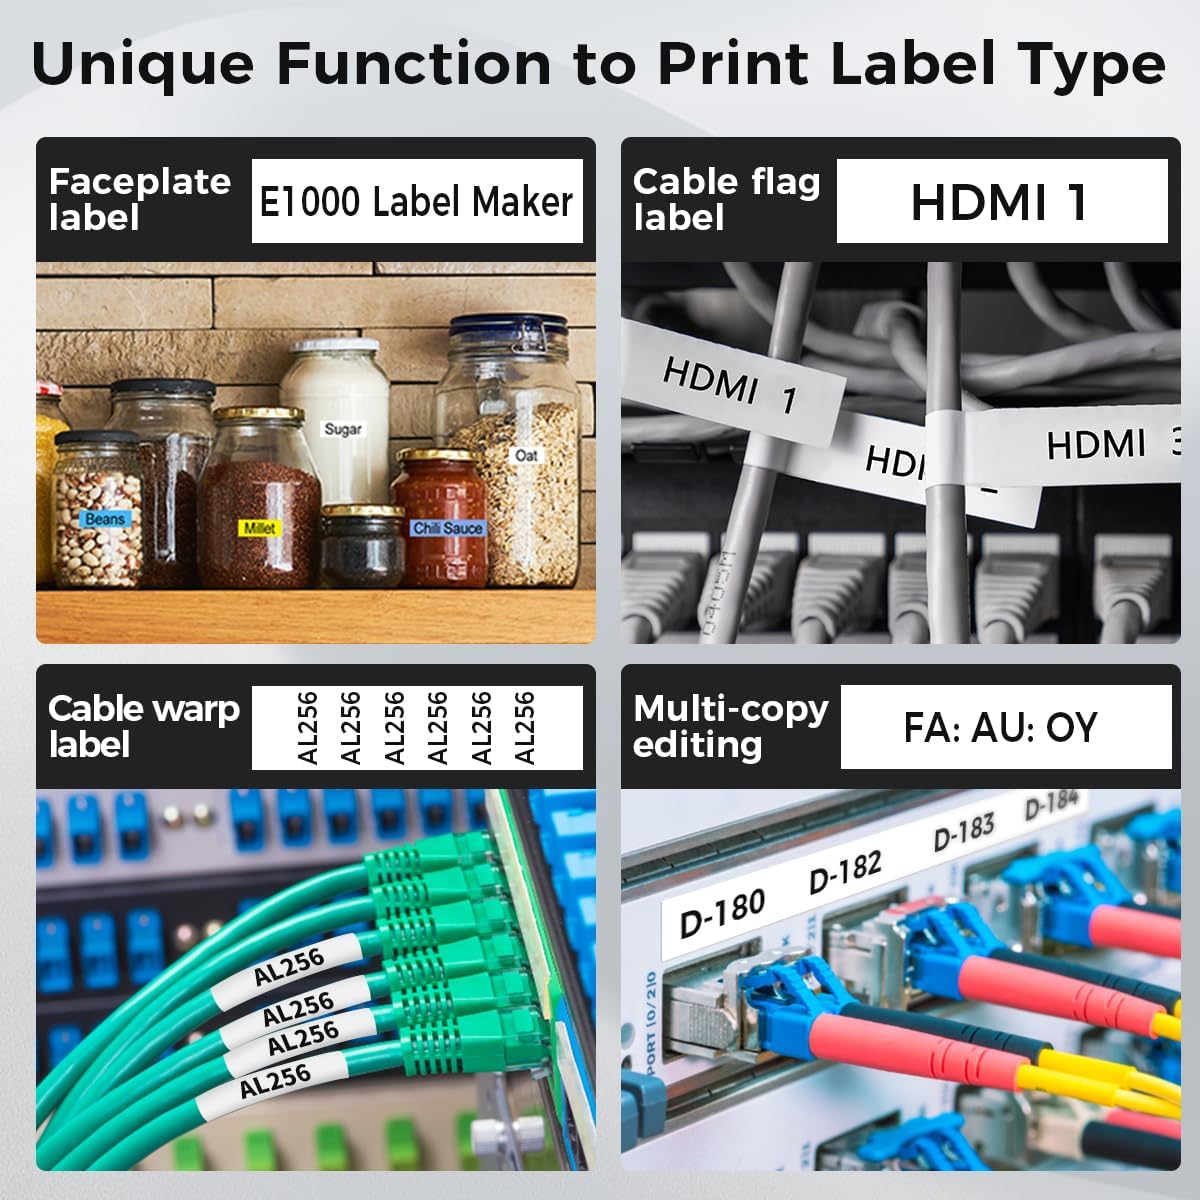
Figure 6.2: Visual examples of different label types that can be created with the E1000, including faceplate labels, cable flag labels, cable wrap labels, and multi-copy editing for serial numbers.
- Cable Wrap: Ideal for labeling cables. The label prints text that wraps around the cable.
- Cable Flag: Creates a flag-style label that extends from the cable.
- Faceplate: Designed for labeling flat surfaces like patch panels or equipment faceplates.
- Serialize: Allows for printing a series of labels with incrementing numbers or letters, useful for inventory or sequential identification.
- Symbols and Frames: Access over 400 symbols and various frames via dedicated keys to enhance your labels.
6.3. Menu Options
Press the Menu button to access various settings, including font size, style, alignment, and other printing preferences. Navigate using the arrow keys and confirm selections with OK.
7. Maintenance
Regular maintenance ensures the longevity and optimal performance of your label maker.
- Cleaning the Print Head: If print quality degrades (e.g., faded lines), the print head may need cleaning. Use a cotton swab lightly dampened with isopropyl alcohol to gently wipe the print head. Allow it to dry completely before use.
- Cleaning the Exterior: Wipe the exterior of the label maker with a soft, dry cloth. Do not use abrasive cleaners or solvents.
- Storage: Store the label maker in a cool, dry place away from direct sunlight and dust. If storing for an extended period, remove the AAA batteries to prevent leakage.
8. Troubleshooting
Refer to this section for common issues and their solutions.
| Problem | Possible Cause | Solution |
|---|---|---|
| Device does not power on. | Low or dead batteries; AC adapter not connected properly. | Replace AAA batteries or ensure AC adapter is securely plugged in. |
| No print or faint print. | Tape cartridge not installed correctly; print head dirty; tape exhausted. | Reinstall tape cartridge; clean print head; replace tape cartridge. |
| Tape jam. | Incorrect tape installation; foreign object in tape path. | Open compartment, remove tape, clear any obstructions, reinstall tape. |
| Keyboard input is slow or unresponsive. | Temporary software lag. | Turn off the device, wait a few seconds, then turn it back on. |
| Label is not cut cleanly. | Cutter blade is dull or dirty. | Clean the cutter area. If issue persists, contact support. |
9. Specifications
| Feature | Detail |
|---|---|
| Model Name | E1000 Label Maker |
| Brand | Labelife |
| Printing Technology | Thermal Transfer Printing |
| Compatible Label Widths | 6mm, 9mm, 12mm |
| Power Source | AC Adapter (included) or 6 x AAA Batteries (not included) |
| Keyboard Layout | QWERTY |
| Item Weight | 1.79 pounds |
| Package Dimensions | 8.7 x 4.96 x 4.53 inches |
| Hardware Interface | USB |
10. Warranty and Support
For warranty information or technical support, please refer to the official Labelife website or contact their customer service. You can also find additional resources and a downloadable PDF user guide here.
