
Tilta TA-T22-FCC-B-V2
Tilta Full Camera Cage for Canon R5/R6 V2 Instruction Manual
Model: TA-T22-FCC-B-V2
Introduction
The Tilta Full Camera Cage for Canon R5/R6 V2 is a custom-fit protective armor designed to enhance the functionality and durability of your Canon R5 or R6 camera. This cage provides multiple mounting points for accessories, ensuring a versatile and secure setup for various filmmaking and photography needs. It is engineered to minimize wear and tear while maintaining full access to camera controls and ports.
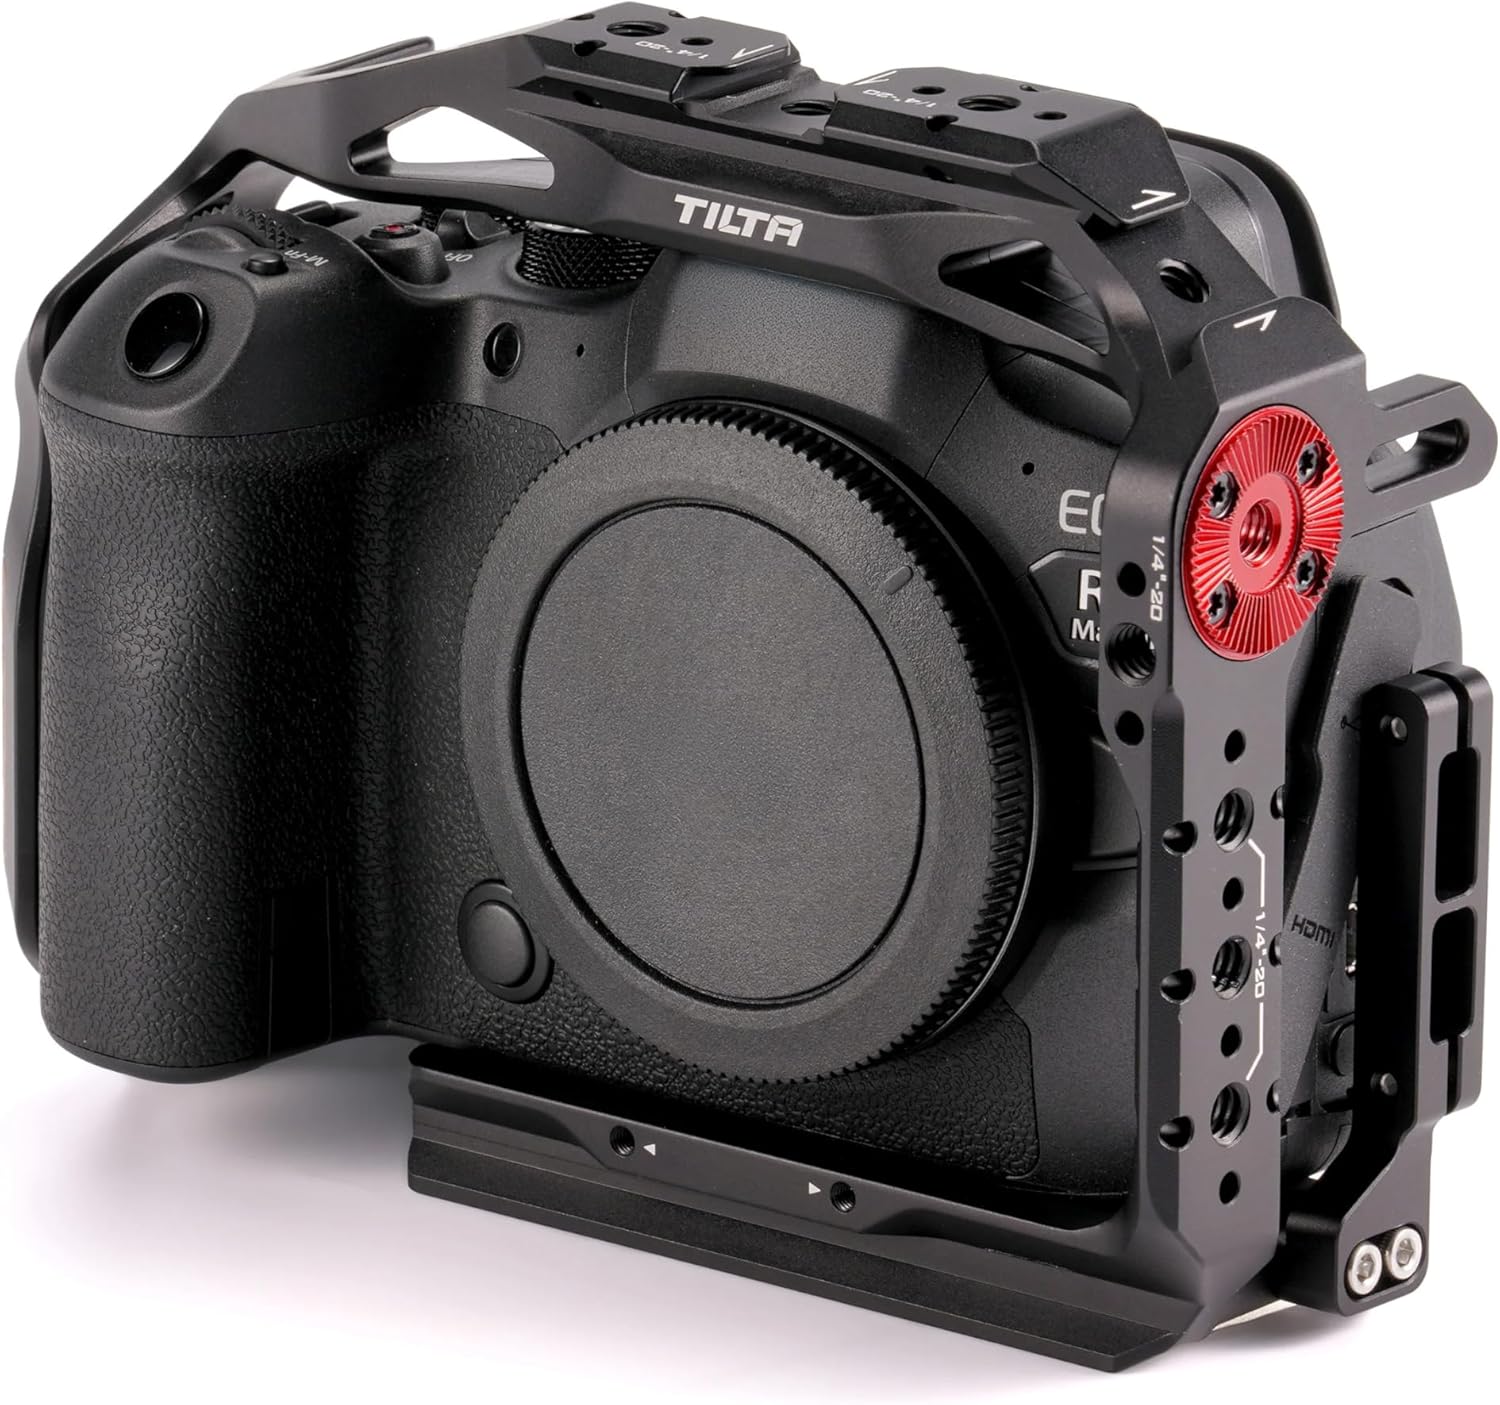
Figure 1: Tilta Full Camera Cage installed on a Canon R5/R6 camera.
What's in the Box
Verify that all components are present before proceeding with assembly.
- 1 x Full Camera Cage for Canon R5/R6 V2 - Black
- 1 x Slotted Screwdriver(4.01.TA-T22-044.00)
Setup and Installation
Follow these steps to properly install the Tilta Full Camera Cage onto your Canon R5 or R6 camera.
- Prepare the Camera: Ensure your Canon R5 or R6 camera is powered off and any attached lenses or accessories are removed for easier installation.
- Align the Cage: Carefully align the camera with the cage, ensuring the 1/4"-20 mounting screw on the bottom of the cage aligns with the camera's tripod socket.
- Secure the Camera: Use the included slotted screwdriver to tighten the 1/4"-20 screw at the bottom of the cage, securing the camera firmly in place. Ensure it is snug but do not overtighten.
- Check Fit: Verify that the camera sits flush within the cage and that all ports, buttons, and the battery compartment remain accessible. The cage is designed for a custom fit, providing unobstructed access.
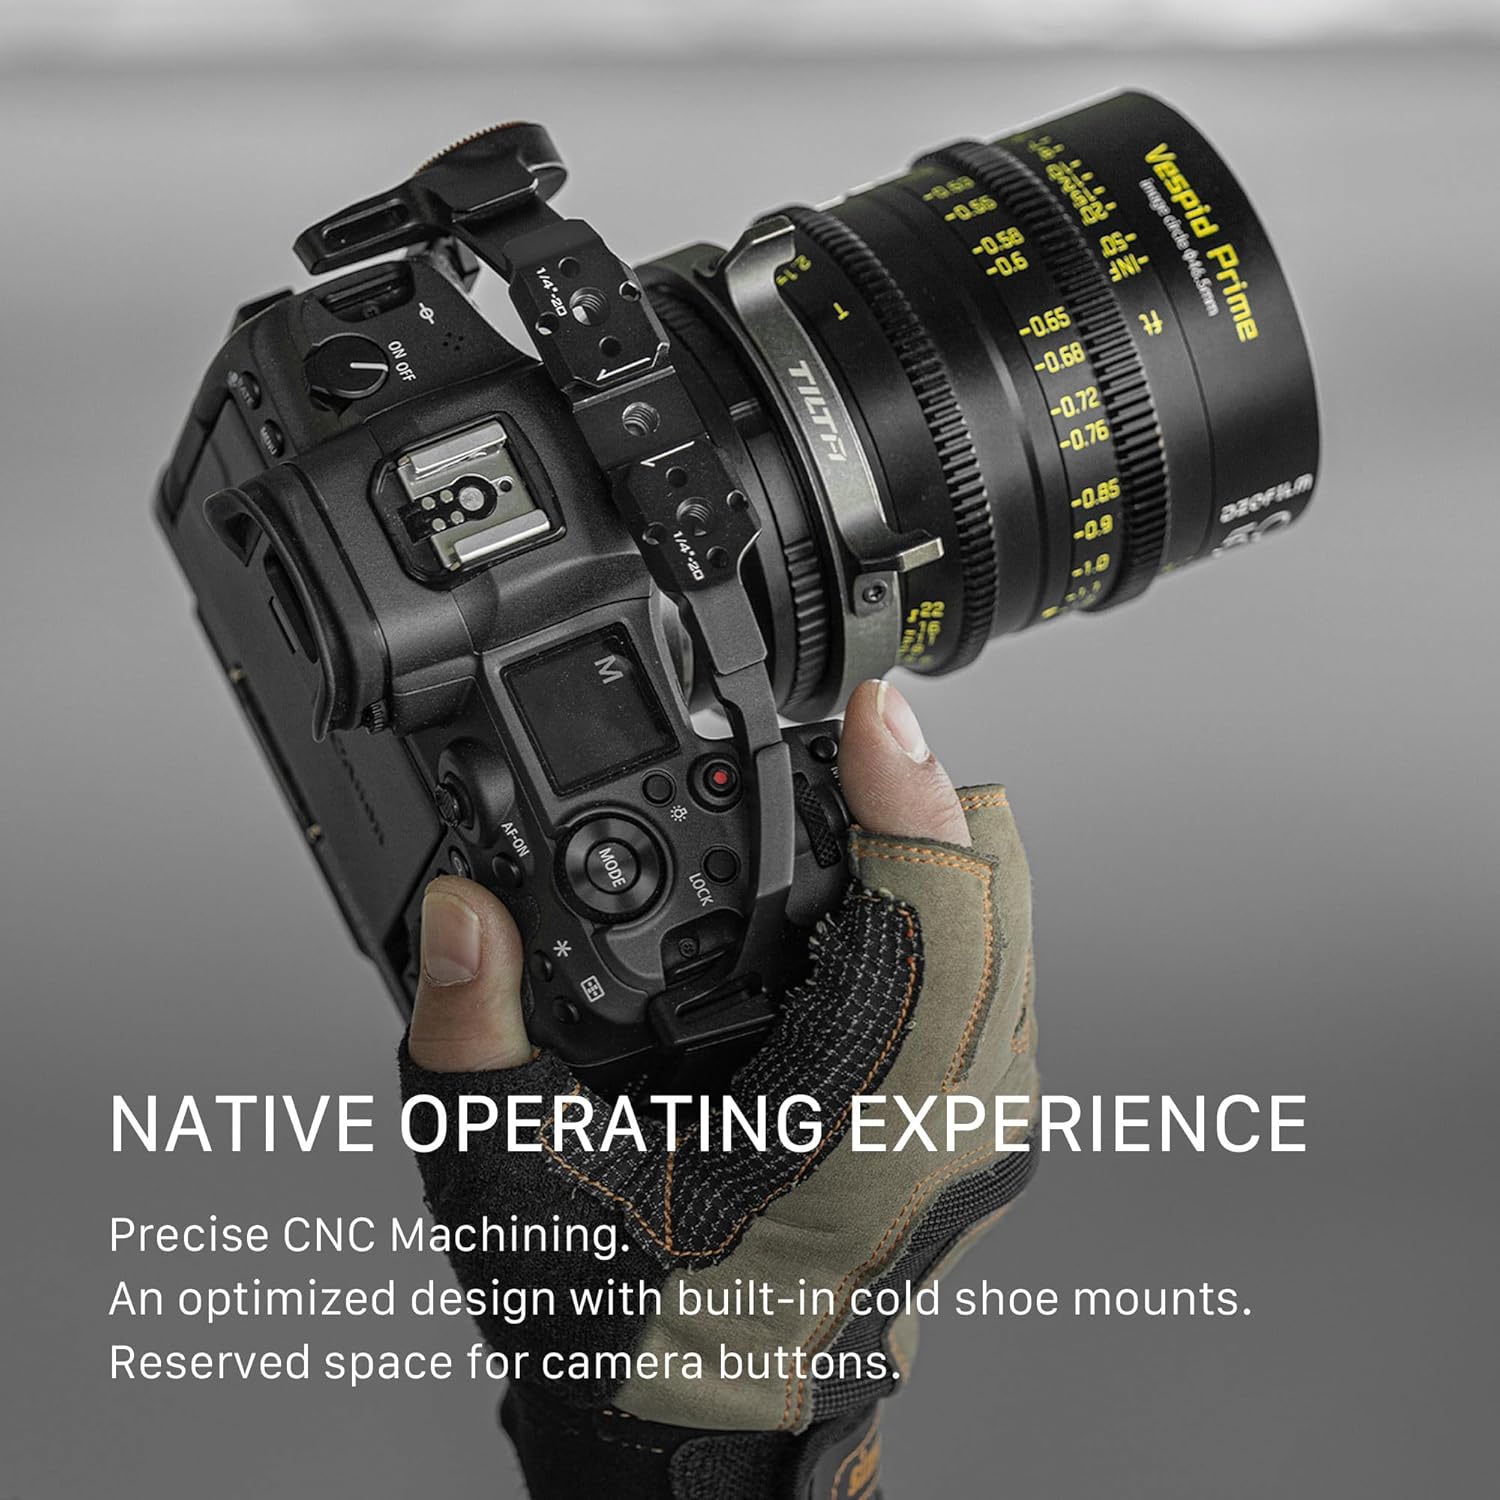
Figure 2: Proper installation ensures native operating experience with full access to camera controls.
Operating the Camera Cage
The Tilta Full Camera Cage offers various mounting options for expanding your camera rig.
Mounting Accessories
- 1/4"-20 Threads: The cage features multiple 1/4"-20 threaded holes with locating points for attaching various accessories such as top handles, monitor mounts, or articulating arms.
- Cold Shoe Mounts: Integrated cold shoe receivers allow for quick attachment of microphones, LED lights, or other cold shoe compatible accessories.
- NATO Rail: A NATO rail is integrated for quick release and attachment of NATO rail compatible accessories.
- Rosette Receiver: A rosette receiver is available for attaching rosette-based accessories, providing secure and flexible mounting options.
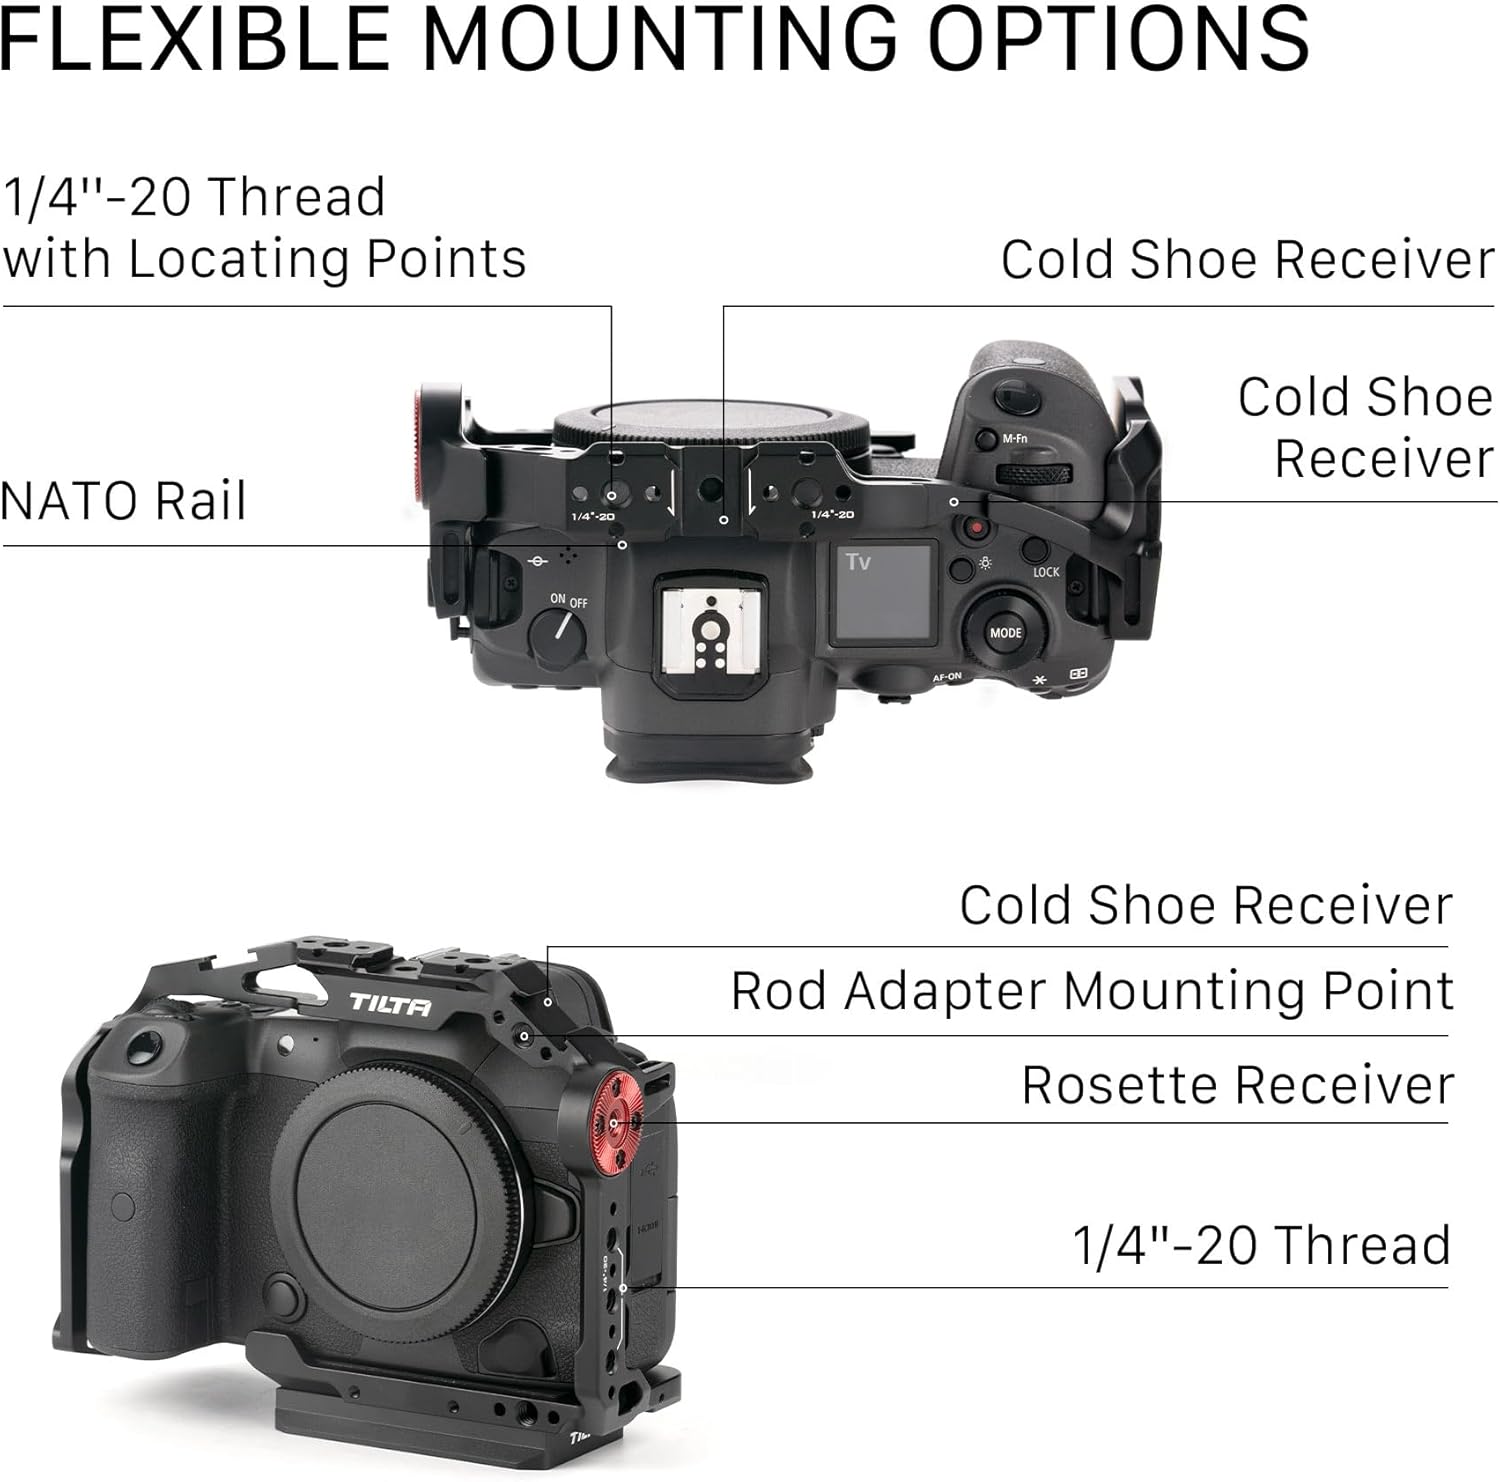
Figure 3: Flexible mounting options on the Tilta Full Camera Cage.
Key Features
- Unobstructed Battery Access: The cage design ensures that the battery compartment remains fully accessible, allowing for quick battery changes without removing the camera from the cage.
- Magnetic Allen Key: A magnetic Allen key is integrated into the cage for convenient adjustments and tightening of screws.
- Shoulder Strap Holder: Dedicated points for attaching a shoulder strap provide comfortable carrying options.
- Vertical Shooting Mode: The cage's design supports vertical shooting configurations, expanding creative possibilities.
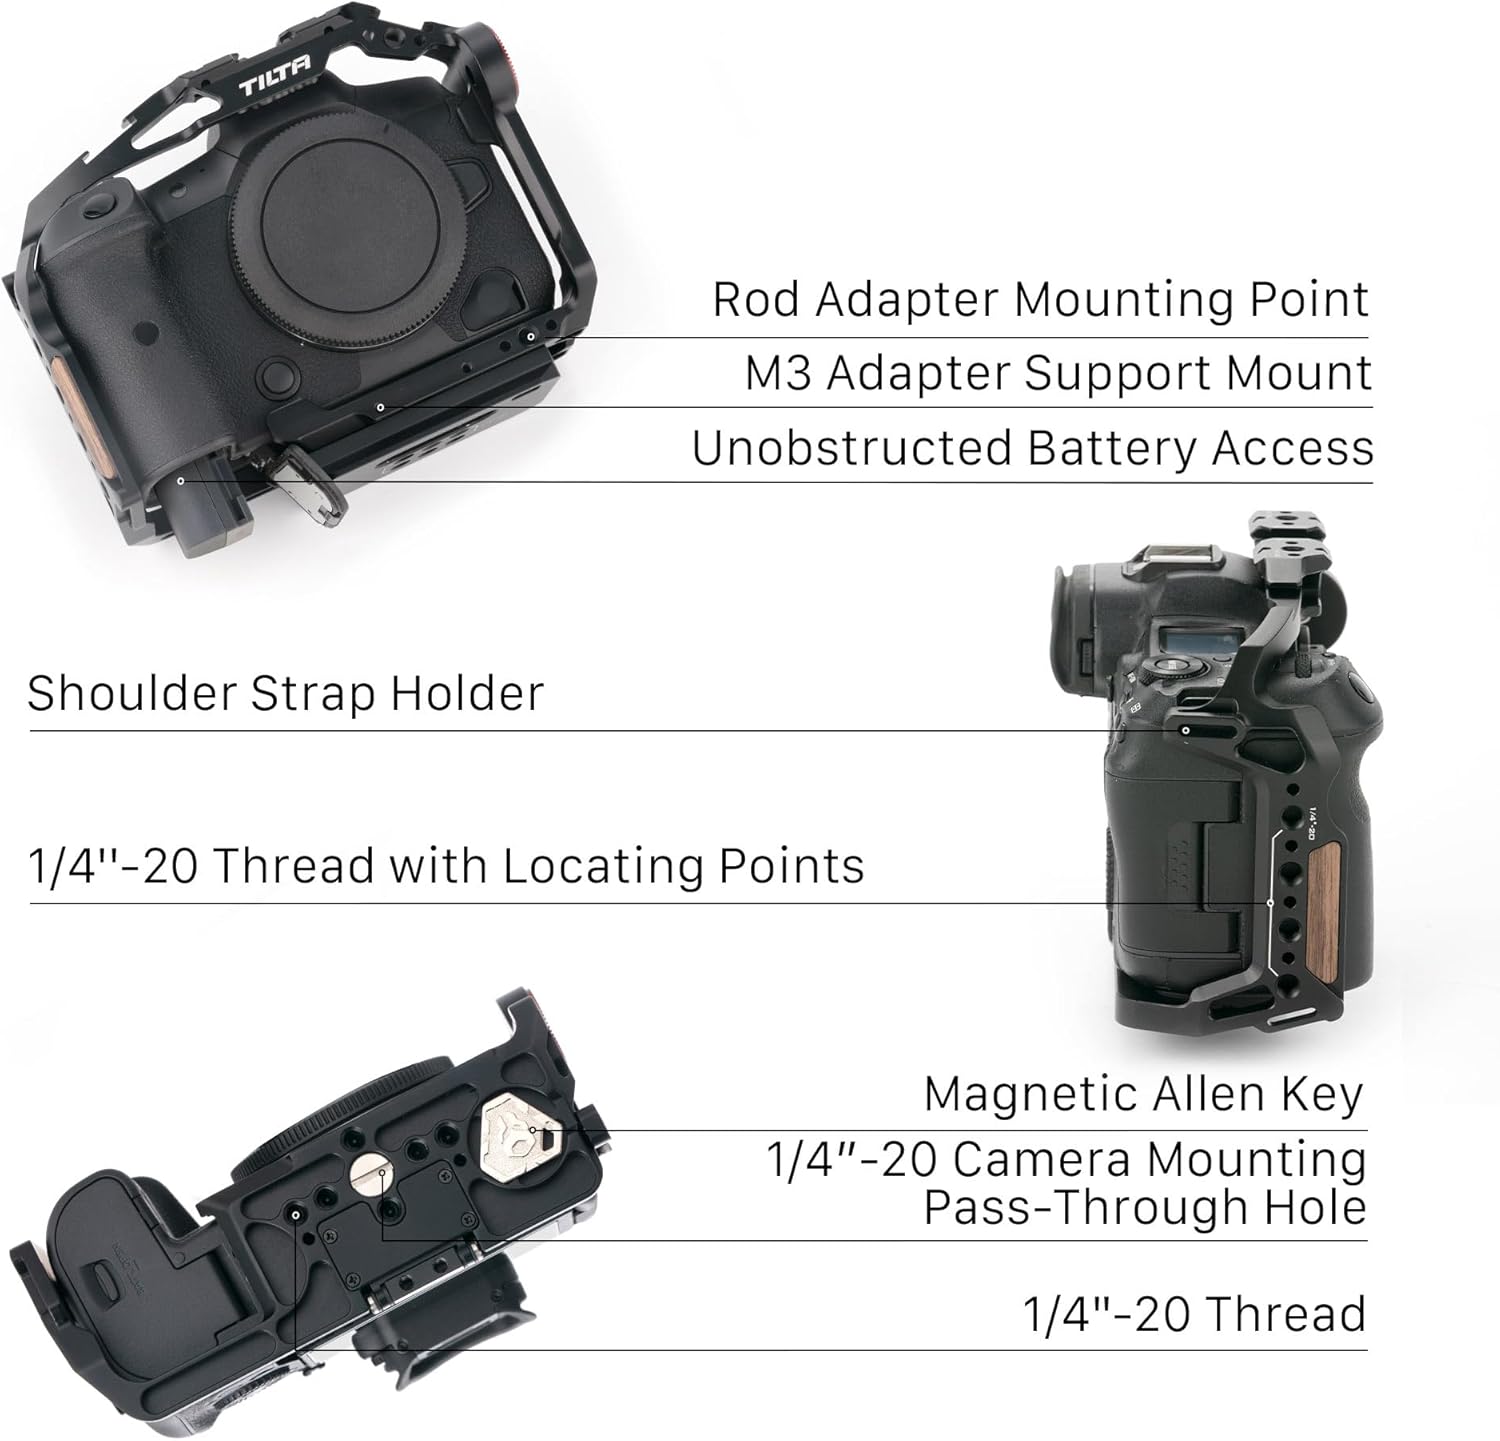
Figure 4: Detailed view of cage features for enhanced usability.
Maintenance
To ensure the longevity and optimal performance of your Tilta Full Camera Cage, follow these maintenance guidelines:
- Cleaning: Wipe the cage regularly with a soft, dry cloth to remove dust and fingerprints. For stubborn dirt, use a slightly damp cloth and dry immediately. Avoid abrasive cleaners or solvents.
- Inspection: Periodically inspect all screws and mounting points for tightness. Retighten any loose screws using the provided Allen key or appropriate tool.
- Storage: Store the cage in a dry, cool environment away from direct sunlight and extreme temperatures when not in use.
- Avoid Impact: While the cage provides protective armor, avoid dropping or subjecting it to severe impacts, which could damage the cage or the camera.
Troubleshooting
This section addresses common issues you might encounter with your Tilta Full Camera Cage.
- Issue: Camera does not fit properly or feels loose.
Solution: Ensure you have the correct cage model for your camera (Canon R5/R6 V2). Double-check that the 1/4"-20 mounting screw at the bottom is fully tightened. Verify no foreign objects are obstructing the camera's seating within the cage.
- Issue: Accessories are difficult to mount or feel unstable.
Solution: Ensure you are using the correct mounting point (e.g., 1/4"-20 screw for threaded holes, cold shoe for cold shoe accessories). Check that the accessory's mounting mechanism is compatible and fully engaged. Tighten all screws securely.
- Issue: Battery door or ports are obstructed.
Solution: The cage is designed for unobstructed access. Re-install the camera, ensuring it is correctly seated and aligned within the cage. If the issue persists, contact Tilta support.
Specifications
| Feature | Detail |
|---|---|
| Product Name | Full Camera Cage for Canon R5/R6 V2 - Black |
| SKU / Model Number | TA-T22-FCC-B-V2 |
| Dimensions (L x W x H) | 6.18 x 2.6 x 4.49 inches (157 x 66 x 114 mm) |
| Item Weight | 8.5 ounces (241.5 grams) |
| Materials | Aluminum Alloy |
| Color | Black |
| Compatible Devices | Canon R5 / R6 Camera (not compatible with Mark II cameras) |
| Mounting Points | 1/4"-20 threads, Cold Shoe, NATO Rail, Rosette Receiver |

Figure 5: Product dimensions and specifications diagram.
Warranty and Support
For detailed warranty information and technical support, please refer to the official Tilta website or contact their customer service directly. Keep your purchase receipt as proof of purchase for any warranty claims.
Tilta Official Website: www.tilta.com
Related documentsTA-T22-FCC-B-V2


Ask a question about this manual
Ask about setup, troubleshooting, compatibility, parts, safety, or missing instructions. Manuals+ will review the question and use this page’s manual context to help answer it.