1. Product Overview
The NICREW HyperReef LED Light Controller N21160 is designed to provide precise control over your aquarium lighting. This controller allows users to customize lighting schedules, adjust intensity, and create gradual lighting effects to simulate natural day-night cycles for aquatic environments.

Image: Front view of the NICREW HyperReef LED Light Controller N21160, displaying its screen and control buttons.
2. Compatibility
This controller is specifically designed for use with NICREW HyperReef LED lights. It is compatible with the following models:
- HyperReef 50
- HyperReef 100
- HyperReef 150
Important Note:
- The HyperReef 30 model is not compatible with this controller. For HyperReef 30, please use a NICREW dual-channel timer.
- For third-party light fixtures, a Type-C cable and a 5V/1A USB power adapter (not included) are required to connect to the controller's USB Type-C slot.

Image: Three different NICREW HyperReef LED lights (50, 100, 150) demonstrating compatibility with the controller.
3. Setup and Installation
3.1 Package Contents

Image: Contents of the NICREW HyperReef Controller package, including the controller, magnetic mounting plate, screws, and connection cables.
3.2 Physical Placement
The controller can be conveniently placed using the included magnetic mounting plate. Install the black magnetic plate on a suitable surface, such as a wall or aquarium stand, using the provided screws. The controller will then attach magnetically to the plate.
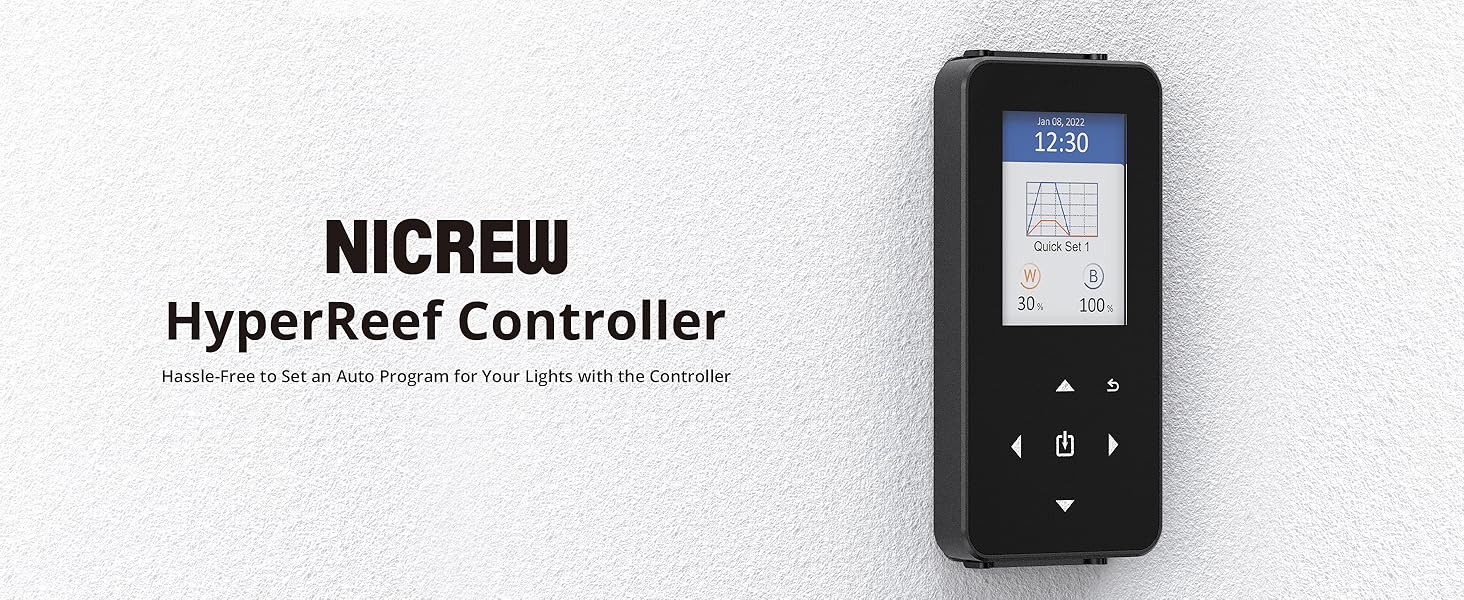
Image: The NICREW HyperReef Controller mounted on a wall using its magnetic plate, next to an aquarium.
3.3 Connecting to HyperReef LED Lights
To connect the controller to your HyperReef LED lights, use the provided 3.5mm TRRS cables.
- Connect one end of the 3.5mm TRRS cable to the controller's output port.
- Connect the other end of the cable to the input port of your first HyperReef light fixture.
- To daisy-chain multiple HyperReef lights, connect an additional 3.5mm TRRS cable from the output port of the first light to the input port of the next light. Repeat this process for all subsequent lights.

Image: Diagram illustrating how to connect the controller to one or more HyperReef LED lights in a daisy-chain configuration.

Image: An aquarium setup showing two NICREW HyperReef lights connected in a daisy-chain to the controller.
3.4 Connecting to Third-Party Lights
For third-party light fixtures, plug a Type-C cable into the USB Type-C slot on the controller and connect it to a 5V/1A USB power adapter (neither the cable nor the adapter are included).
4. Operating Instructions
4.1 Setting Time and Date
Ensure the correct time and date are set on the controller for accurate program execution.
- Navigate to the 'Settings' menu.
- Select 'Time & Date'.
- Adjust the current time and date using the navigation buttons.
- Confirm your settings.
4.2 Manual Mode
Manual mode allows for immediate, real-time adjustment of white and blue light intensities.
- From the main screen, navigate to 'Manual' mode.
- Use the up/down arrows to select either the white (W) or blue (B) channel.
- Use the left/right arrows to adjust the intensity percentage for the selected channel.

Image: An aquarium with a HyperReef light, showing the controller's display with separate intensity bars for white (60%) and blue (80%) channels in manual mode.
4.3 Programming Mode
The programming mode enables you to create custom lighting schedules with gradual changes throughout the day. Up to 4 programs can be saved.
- Navigate to the 'Program' menu.
- Select an empty 'Quick Set' slot or an existing one to edit.
- You can set different spectrums at six time points to create a gradual lighting effect. For each time point, adjust the white and blue light intensities.
- To completely turn off the light at certain times, set the intensity to 0% for both channels at the first and last time points of the desired off period.
- Save your program.

Image: The controller screen displaying the adjustable color spectrum programming interface, showing a graph of light intensity over time for a 'Quick Set 1' program.
4.4 Selecting a Lighting Schedule
After creating programs, you can select which one to run.
- Navigate to the 'Mode Set' menu.
- Choose your desired 'Quick Set' program (e.g., Quick Set 1, Quick Set 2) to activate it.
4.5 Main Screen Information
The main screen provides a timely update of the current lighting status:
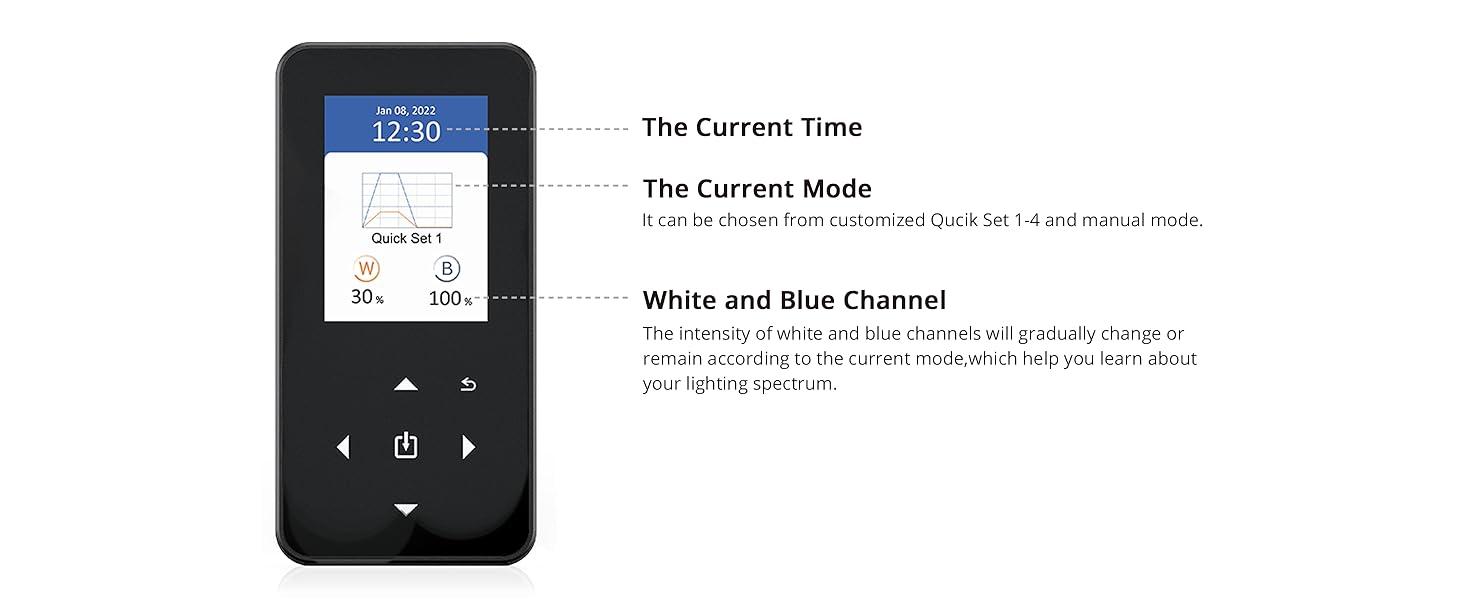
Image: A detailed view of the controller's main screen, highlighting the current time, current mode (e.g., Quick Set 1), and the accurate lighting brightness changes for white and blue channels.
5. Official Product Video
Watch this official video from NICREW for a visual guide on setting up and programming your HyperReef Controller.
Video: An official NICREW video demonstrating the features and programming of the HyperReef Controller, including setting time, manual mode, and creating custom schedules.
6. Maintenance
To ensure optimal performance and longevity of your NICREW HyperReef LED Light Controller, follow these general maintenance guidelines:
- Keep the controller clean and free from dust and moisture. Use a soft, dry cloth for cleaning.
- Avoid exposing the controller to direct sunlight or extreme temperatures.
- Ensure all cable connections are secure and free from damage.
- The controller is not waterproof. Prevent contact with water or high humidity environments to avoid damage.
7. Troubleshooting
If you encounter issues with your NICREW HyperReef LED Light Controller, consider the following common troubleshooting steps:
- Controller Not Responding: Ensure the controller is properly connected to a power source and the light fixture(s). Check all cable connections.
- Lights Not Following Program: Verify that the current time and date are correctly set on the controller. Confirm that the desired 'Quick Set' program is selected and activated in the 'Mode Set' menu.
- Inconsistent Light Output: Check for loose connections between the controller and the lights, or between daisy-chained lights. Ensure the power supply is stable.
- Display Issues: If the screen is unresponsive or displaying incorrectly, try restarting the controller by disconnecting and reconnecting its power.
- Power Outage: In case of a power outage, the controller may lose its current time settings. Reset the time and date as described in Section 4.1.
If problems persist, please contact customer support for further assistance.
8. Specifications
| Feature | Specification |
|---|---|
| Brand | NICREW |
| Model Number | N21160 |
| Product Dimensions | 4.6"D x 2.2"W x 0.5"H |
| Item Weight | 9.6 ounces (0.27 Kilograms) |
| Material | Plastic |
| Color | Black |
| Voltage | 5 Volts |
| Control Method | Remote |
| Water Resistance Level | Not Water Resistant |
9. Warranty and Support
NICREW is committed to providing quality products and customer satisfaction.
- Warranty: This product comes with a hassle-free 12-month warranty.
- Customer Service: For any questions, concerns, or support needs, please contact our friendly customer service team, available 24 hours.
For more information or to contact support, please visit the official NICREW store or refer to your product packaging.


