
GIGABYTE B660M
Contents
GIGABYTE B660M DS3H DDR4 Motherboard User Manual
Model: B660M DS3H DDR4
1. Introduction
This manual provides comprehensive instructions for the installation, operation, and maintenance of your GIGABYTE B660M DS3H DDR4 Motherboard. This motherboard is designed to support 12th Gen Intel Core Series Processors with an LGA 1700 socket, offering robust performance and connectivity for your personal computer build.
Key features include Dual Channel DDR4 memory support, a 6+2+1 Phases Hybrid Power Design for stable power delivery, M.2 Thermal Guard for optimal SSD performance, PCIe 4.0, Dual NVME PCIe 4.0 x4 M.2 slots, USB 3.2 Gen2 Type-C, HDMI 2.0, and 2.5GbE LAN for fast networking. It also incorporates GIGABYTE's RGB FUSION 2.0 for customizable lighting and Smart Fan 6 for advanced cooling control.
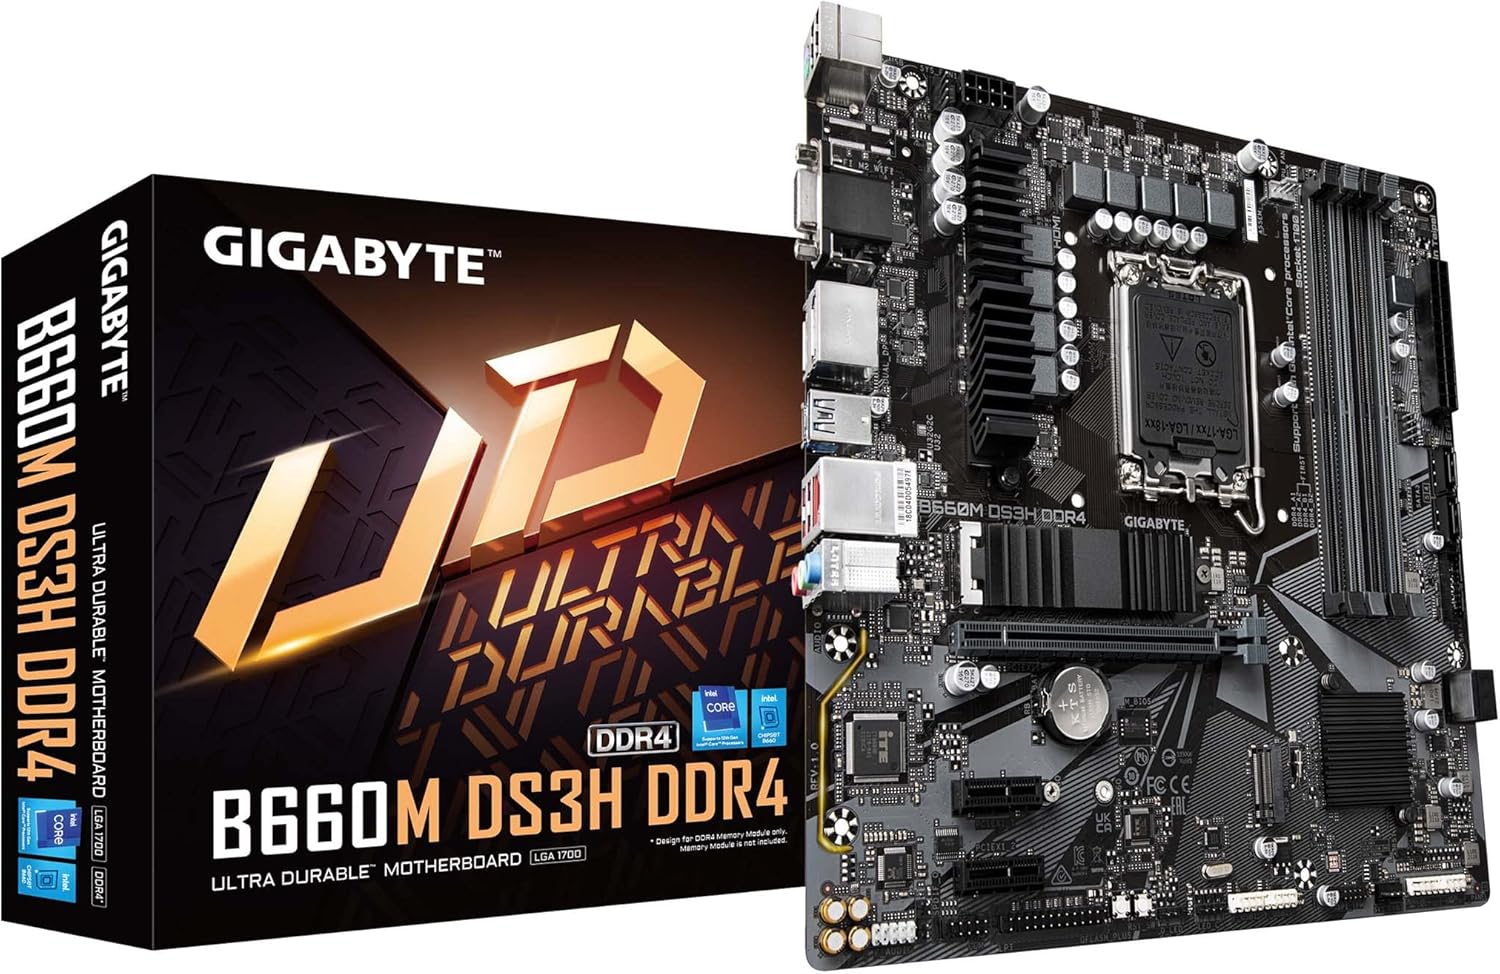
Figure 1.1: GIGABYTE B660M DS3H DDR4 Motherboard and its retail packaging.
2. Setup and Installation
Before beginning installation, ensure your system is powered off and disconnected from the power outlet. Handle the motherboard by its edges to avoid static discharge.
2.1. Preparing the Motherboard
Place the motherboard on a non-conductive surface, such as an anti-static mat or the motherboard's packaging foam, before installing components.

Figure 2.1: Overview of the GIGABYTE B660M DS3H DDR4 Motherboard layout.
2.2. CPU Installation
- Locate the LGA 1700 CPU socket on the motherboard.
- Gently push down the load lever and pull it away from the socket to open the retention frame.
- Carefully align the triangular mark on the CPU with the mark on the socket. Ensure the notches on the CPU align with the keys on the socket.
- Lower the CPU straight down into the socket without forcing it.
- Close the retention frame and push the load lever back into place until it clicks.

Figure 2.2: An Intel LGA 1700 bracket, indicating the required bracket type for compatible CPU coolers.
2.3. CPU Cooler Installation
Install your CPU cooler according to its manufacturer's instructions. Ensure proper thermal paste application and secure mounting for effective heat dissipation.
2.4. Memory (RAM) Installation
This motherboard supports Dual Channel DDR4 memory. For optimal performance, install memory modules in the correct slots to enable dual-channel mode. Refer to the motherboard diagram for specific slot numbering (typically slots 2 and 4, counting away from the CPU socket, for two modules).
- Open the clips at both ends of the DIMM slot.
- Align the notch on the DDR4 memory module with the key in the DIMM slot.
- Press down firmly on both ends of the memory module until the clips snap into place.
2.5. Storage Device Installation (M.2 SSDs and SATA Drives)
The motherboard features Dual NVME PCIe 4.0 x4 M.2 slots and 4 x SATA3 ports.
M.2 SSD Installation:
- Locate the M.2 slots and remove the M.2 Thermal Guard if present.
- Insert the M.2 SSD into the slot at a 30-degree angle.
- Gently push down the SSD and secure it with the provided screw or standoff.
- Reinstall the M.2 Thermal Guard for improved cooling.
SATA Drive Installation:
Connect your SATA hard drives or SSDs to the SATA3 ports using SATA data cables. Ensure your power supply has SATA power connectors for these drives.
2.6. Graphics Card (GPU) Installation
Insert your PCIe graphics card into the primary PCIe 4.0 x16 slot. Ensure it is fully seated and secured with the case's retention mechanism.
2.7. Power Supply Connections
Connect the 24-pin ATX main power connector and the 8-pin CPU power connector from your power supply to the corresponding ports on the motherboard. Ensure all connections are firm.
2.8. Front Panel Connections
Connect the front panel headers (power button, reset button, HDD LED, power LED, USB ports, audio jacks) to the appropriate pins on the motherboard. Refer to the detailed motherboard diagram (Figure 2.3) for pin assignments.

Figure 2.3: Detailed view of the GIGABYTE B660M DS3H DDR4 Motherboard with key components and connectors labeled.

Figure 2.4: Rear I/O panel showing various connectivity options including USB, HDMI, D-Sub, DisplayPort, LAN, and audio ports.
3. Operating Instructions
3.1. First Boot and BIOS Setup
- After all components are installed and connected, connect your monitor, keyboard, and mouse.
- Connect the power cord to your power supply and turn on the power supply switch.
- Press the power button on your PC case.
- During the boot process, repeatedly press the DEL key to enter the BIOS Setup Utility.
- In the BIOS, you can configure boot order, enable XMP for memory, adjust fan curves (Smart Fan 6), and update BIOS (Q-Flash Plus).
Note: If you are using 2 RAM modules, ensure they are installed in the 2nd and 4th RAM slots (counting away from the CPU socket) to enable XMP and dual-channel mode for full JEDEC speed.
3.2. Operating System Installation
Once BIOS settings are configured, save and exit. Insert your operating system installation media (USB drive or DVD) and follow the on-screen prompts to install your preferred operating system (e.g., Windows 10/11 64-bit).
3.3. Driver Installation
After OS installation, install the necessary drivers for your motherboard components (chipset, LAN, audio, USB, etc.). These can typically be found on the GIGABYTE official website for your specific motherboard model. Installing the latest drivers ensures optimal performance and stability.
4. Maintenance
Regular maintenance helps ensure the longevity and stable operation of your motherboard and PC components.
- Dust Removal: Periodically clean dust from inside your PC case, especially from fans, heatsinks, and motherboard surfaces, using compressed air. Ensure the system is powered off and unplugged before cleaning.
- BIOS Updates: Check the GIGABYTE website for the latest BIOS updates. BIOS updates can improve compatibility, stability, and performance. Use the Q-Flash Plus feature for safe BIOS updates without CPU, memory, or GPU installed.
- Driver Updates: Keep your drivers updated to the latest versions from the GIGABYTE website or component manufacturers.
- Cable Management: Ensure cables inside the case are neatly managed to improve airflow and prevent obstruction of components.
- Temperature Monitoring: Use monitoring software to keep an eye on CPU, GPU, and motherboard temperatures to ensure they remain within safe operating limits.
5. Troubleshooting
This section addresses common issues you might encounter.
| Problem | Possible Cause | Solution |
|---|---|---|
| System does not power on. | Loose power connections, faulty PSU, incorrect front panel wiring. | Check 24-pin ATX and 8-pin CPU power connectors. Verify front panel power switch connection. Test PSU. |
| No display output. | GPU not seated correctly, monitor cable issue, incorrect display output selected. | Reseat GPU. Check monitor cable connections. Ensure monitor is on correct input. Test with integrated graphics if available. |
| System powers on but no POST/boot. | RAM not seated correctly, incompatible RAM, CPU issue. | Reseat RAM modules. Try one RAM module at a time. Ensure RAM is compatible (DDR4). Verify CPU installation. |
| Operating System not detected. | Incorrect boot order in BIOS, faulty storage drive, OS corruption. | Check boot order in BIOS. Verify storage drive connections. Reinstall OS if necessary. |
| USB devices not working. | Missing USB drivers, faulty USB port, incorrect front panel USB connection. | Install/update USB drivers. Test different USB ports. Check front panel USB header connection. |
| Slow network speed (2.5GbE LAN). | Outdated LAN driver, cable issue, router/switch limitation. | Update LAN driver. Use a Cat5e/Cat6 cable. Ensure your network hardware supports 2.5GbE. |
For more detailed troubleshooting, refer to the comprehensive user manual available for download on the GIGABYTE support website or contact GIGABYTE technical support.
6. Specifications
Below are the key technical specifications for the GIGABYTE B660M DS3H DDR4 Motherboard:
| Feature | Detail |
|---|---|
| Brand | GIGABYTE |
| Model Name | B660M DS3H DDR4 |
| CPU Socket | LGA 1700 |
| Compatible Processors | 12th Generation Intel Core Series Processors |
| Chipset Type | Intel B660 |
| RAM Memory Technology | DDR4 |
| Memory Slots | 4 DIMMs (Dual Channel) |
| Memory Speed | 2133 MHz (Supports higher via XMP) |
| Storage Interfaces | Dual NVME PCIe 4.0 x4 M.2, 4 x SATA3 |
| PCIe Slots | PCIe 4.0 |
| USB Ports | USB 3.2 Gen2 Type-C, USB 2.0, etc. |
| Video Output | HDMI 2.0, D-Sub, DisplayPort |
| LAN | 2.5GbE LAN |
| Audio | High-End Audio Capacitors, Audio Noise Guard |
| Form Factor | Micro-ATX |
| Dimensions (LxWxH) | 10.43 x 10.43 x 2.12 inches |
| Item Weight | 1.87 pounds |
| Operating System Support | Windows 11 64-bit, Windows 10 64-bit |
7. Warranty and Support
7.1. Warranty Information
GIGABYTE products are covered by a limited warranty. The specific terms and duration of your warranty may vary by region and product type. Please retain your proof of purchase for warranty claims. For detailed warranty information, visit the official GIGABYTE website.
7.2. Technical Support
If you encounter issues that cannot be resolved using this manual or the troubleshooting section, GIGABYTE offers technical support. You can find support resources, including FAQs, driver downloads, and contact information, on the official GIGABYTE support website:
GIGABYTE Official Support Website
Additionally, a PDF version of the user manual is available for download:
Ask a question about this manual
Ask about setup, troubleshooting, compatibility, parts, safety, or missing instructions. Manuals+ will review the question and use this page’s manual context to help answer it.