
Spider Farmer A
Contents
Spider Farmer 8x4 Grow Tent (96"x48"x80") Instruction Manual
Model: A | Brand: Spider Farmer
1. Introduction
Thank you for choosing the Spider Farmer 8x4 Grow Tent. This manual provides essential information for the proper setup, operation, and maintenance of your indoor growing environment. Please read these instructions carefully before assembly and use to ensure optimal performance and longevity of your product.
2. Safety Information
- Ensure the grow tent is assembled on a flat, stable surface to prevent tipping.
- Keep all electrical components, including grow lights and power strips, elevated and away from water sources to prevent electrical hazards.
- Do not overload the tent's hanging bars. The reinforced steel poles support up to 240 lbs.
- Ensure proper ventilation to prevent heat buildup and maintain a healthy environment for plants.
- Regularly inspect zippers and seams for wear and tear to maintain light-proofing.
- Keep children and pets away from the grow tent, especially when electrical equipment is in operation.
3. Setup
3.1. Unpacking Components
Carefully unpack all components from the box. Verify that all parts are present according to the packing list. Separate the poles by their labels (if any) and identify the connectors.
3.2. Frame Assembly
Connect the metal frame poles using the reinforced adapters. Ensure each pole is securely inserted into the connectors. The frame is designed for tool-free assembly, allowing for quick and easy setup.

Figure 3.1: Hassle-Free Frame Assembly
3.3. Tent Cover Installation
Once the frame is assembled, carefully drape the 1680D Oxford canvas tent cover over the frame. Ensure the cover is oriented correctly, aligning the zippers and access points with the frame structure. Zip up the tent completely to secure it around the frame.

Figure 3.2: Assembled Grow Tent Exterior
3.4. Floor Tray and Accessories
Place the waterproof floor tray inside the tent. This tray is removable for easy cleaning. Install the hanging bars for lights and carbon filters. Utilize the included hooks for controllers and power strips, and Velcro straps for cable organization to create a tidy growing environment.

Figure 3.3: Convenient Floor Tray
3.5. Product Overview Video
Video 3.1: An overview of the Spider Farmer Pro-Grade Grow Tent, demonstrating its features and assembly process.
4. Operating the Grow Tent
4.1. Light Management
The grow tent features premium SBS zippers with a double protection zipper flap and dual stitching to effectively lock in light. The interior is lined with diamond reflective mylar, ensuring 100% reflectivity and maximizing light efficiency for your plants.

Figure 4.1: Lightproof Technology

Figure 4.2: Superior Material Layers
4.2. Ventilation and Airflow
The tent includes multiple ducting ports and mesh ventilation ports to ensure proper air circulation. These features help prevent stale air and promote healthy plant growth. Adjust the drawstring openings on the ports to control airflow as needed.

Figure 4.3: Convenient Design for Airflow
4.3. Monitoring and Access
An enlarged view window (11.8"x15.7") allows for easy observation of your plants without disturbing the internal environment. The tent also features hooks for controllers and power strips, along with a tool bag, to keep your growing space organized and accessible.
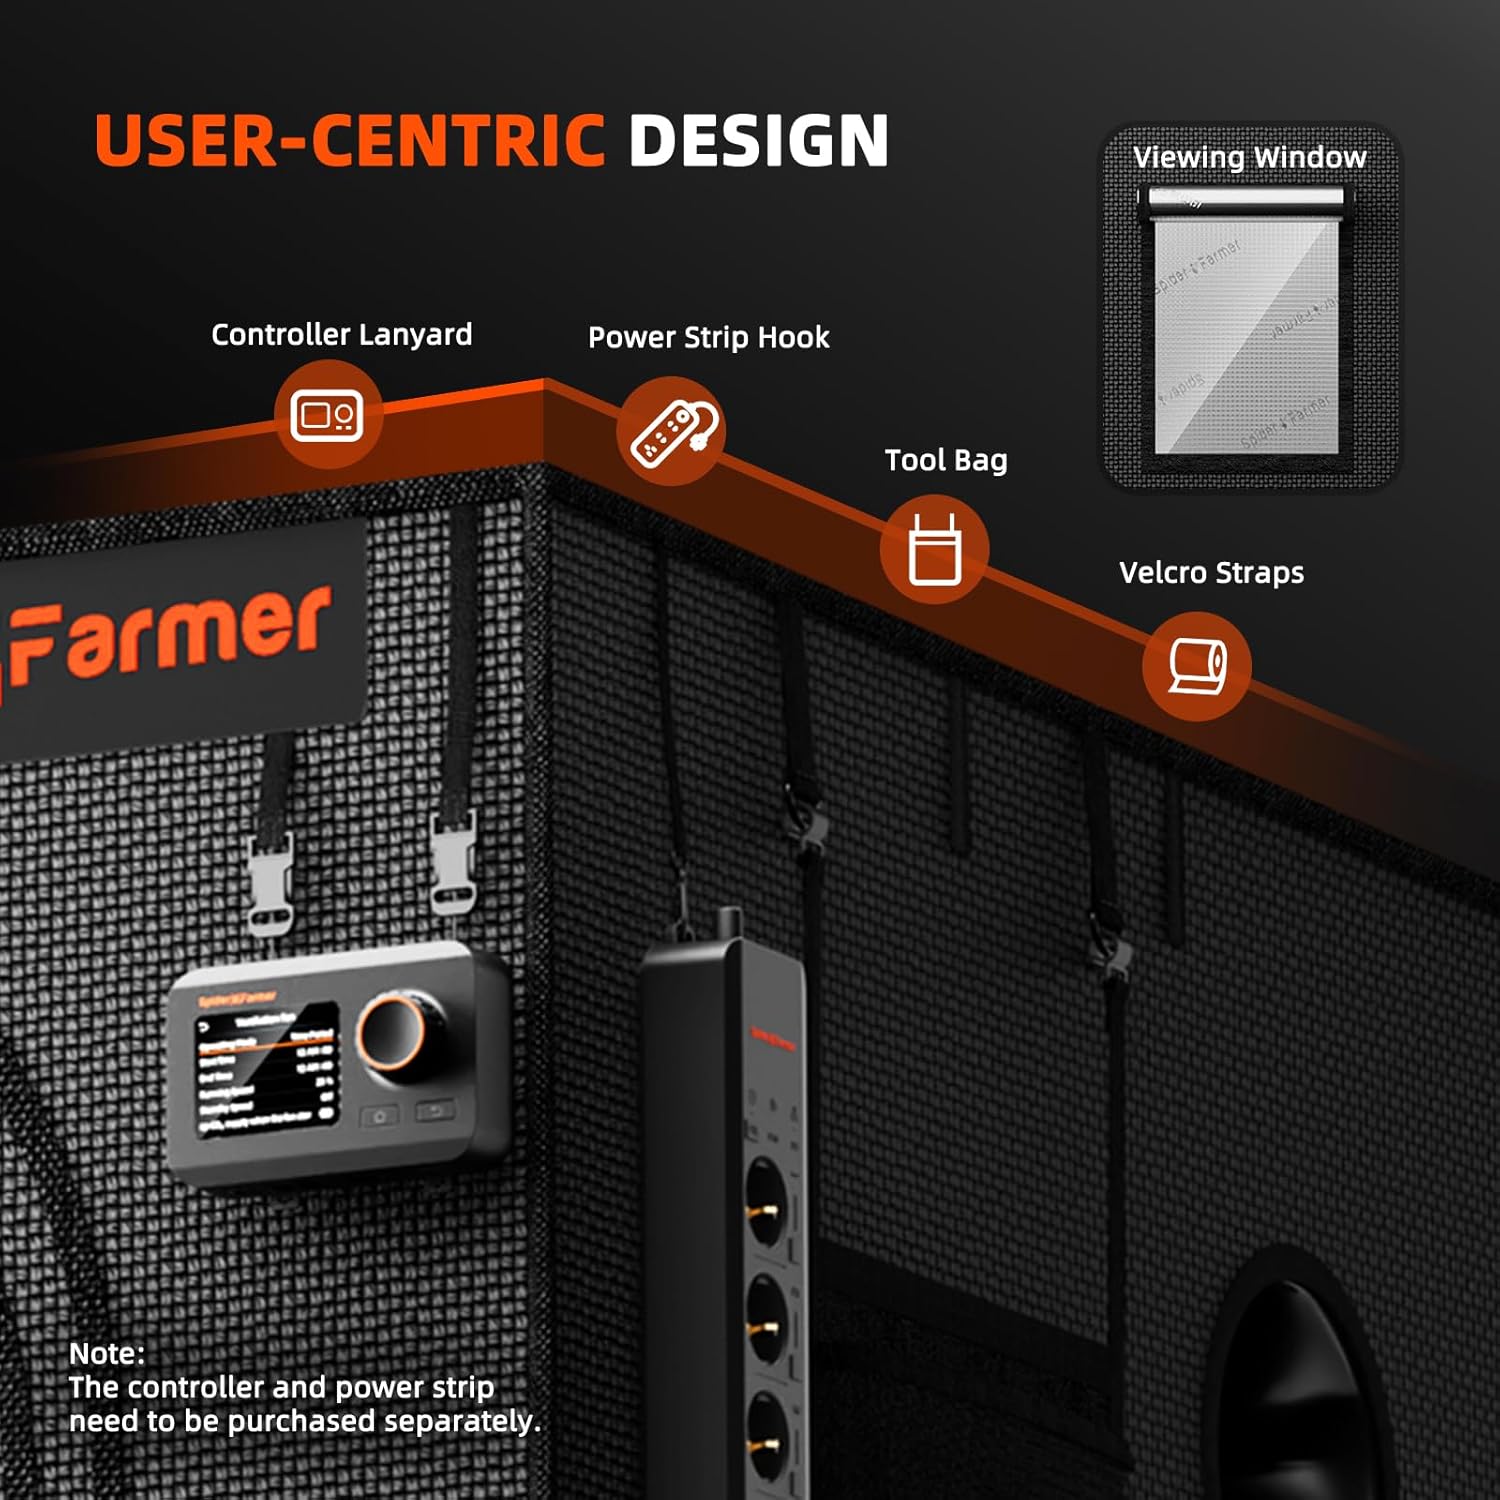
Figure 4.4: User-Centric Design
5. Maintenance
- Cleaning: Regularly wipe down the interior reflective mylar with a damp cloth to maintain maximum reflectivity. The removable floor tray can be easily cleaned with soap and water.
- Inspection: Periodically check all zippers, seams, and pole connections for any signs of wear or damage. Address any issues promptly to maintain the tent's integrity and light-proofing.
- Ventilation Ports: Ensure all ventilation ports are free from obstructions to allow for optimal airflow.
- Storage: If storing the tent, disassemble it carefully and pack it in its original packaging or a suitable storage bag to protect the fabric and frame.
6. Troubleshooting
| Issue | Possible Cause | Solution |
|---|---|---|
| Light Leaks | Zippers not fully closed, zipper flap not secured, or small tears in fabric. | Ensure all zippers are fully closed and the zipper flap is properly covering the zipper. Inspect fabric for tears and repair if necessary. |
| Poor Airflow | Ventilation ports obstructed or improperly adjusted. | Check that all ventilation ports are open and clear. Adjust drawstring openings to optimize airflow. Ensure exhaust fan (if used) is operating correctly. |
| Tent Instability | Frame poles not fully connected or uneven surface. | Verify all frame poles are securely inserted into connectors. Assemble on a flat, level surface. |
| Zippers Sticking | Dirt or debris in zipper teeth, or fabric tension. | Clean zipper teeth with a small brush. Apply a zipper lubricant if needed. Ensure tent fabric is not overly stretched during closing. |
7. Specifications
| Feature | Detail |
|---|---|
| Brand | Spider Farmer |
| Model Number | A |
| Product Dimensions | 96"L x 48"W x 80"H |
| Item Weight | 46.2 pounds (21 Kilograms) |
| Frame Material | Metal, Metal Frame, Steel |
| Inner Material | Alloy Steel |
| Outer Material | 1680D Oxford Canvas with Protective Coating |
| Color | Black |
| Reflective Interior | Diamond Reflective Mylar |
| Zippers | Premium SBS Zippers with double protection |
| Weight Capacity (Hanging) | Up to 240 lbs |
| View Window Size | 11.8"x15.7" |
| Manufacturer | Spider Farmer |
8. Warranty and Support
For warranty information, technical support, or any inquiries regarding your Spider Farmer Grow Tent, please refer to the official Spider Farmer website or contact their customer service directly. Keep your purchase receipt as proof of purchase for warranty claims.
Ask a question about this manual
Ask about setup, troubleshooting, compatibility, parts, safety, or missing instructions. Manuals+ will review the question and use this page’s manual context to help answer it.