1. Introduction
This manual provides detailed instructions for the installation, setup, and operation of your Gnellkoor RFID Cabinet Lock. This electronic lock system is designed to secure cabinets, drawers, and storage boxes, offering a hidden and convenient method of access control using RFID technology and NFC-enabled smartphones.
2. Package Contents
Please verify that all components listed below are included in your package:
- RFID Cabinet Lock Unit (x2)
- Lock Catch (x2)
- RFID Cards (x4)
- Blue Key Fobs (x6)
- USB Power Cords (x2)
- Mounting Screws (various sizes)
- Adhesive Pads
- User Manual (this document)

Image 2.1: Contents of the Gnellkoor RFID Cabinet Lock package.
3. Product Overview
The Gnellkoor RFID Cabinet Lock provides a discreet and secure locking solution for various furniture types. Its hidden design ensures that the locking mechanism is not visible from the exterior, enhancing both aesthetics and security.
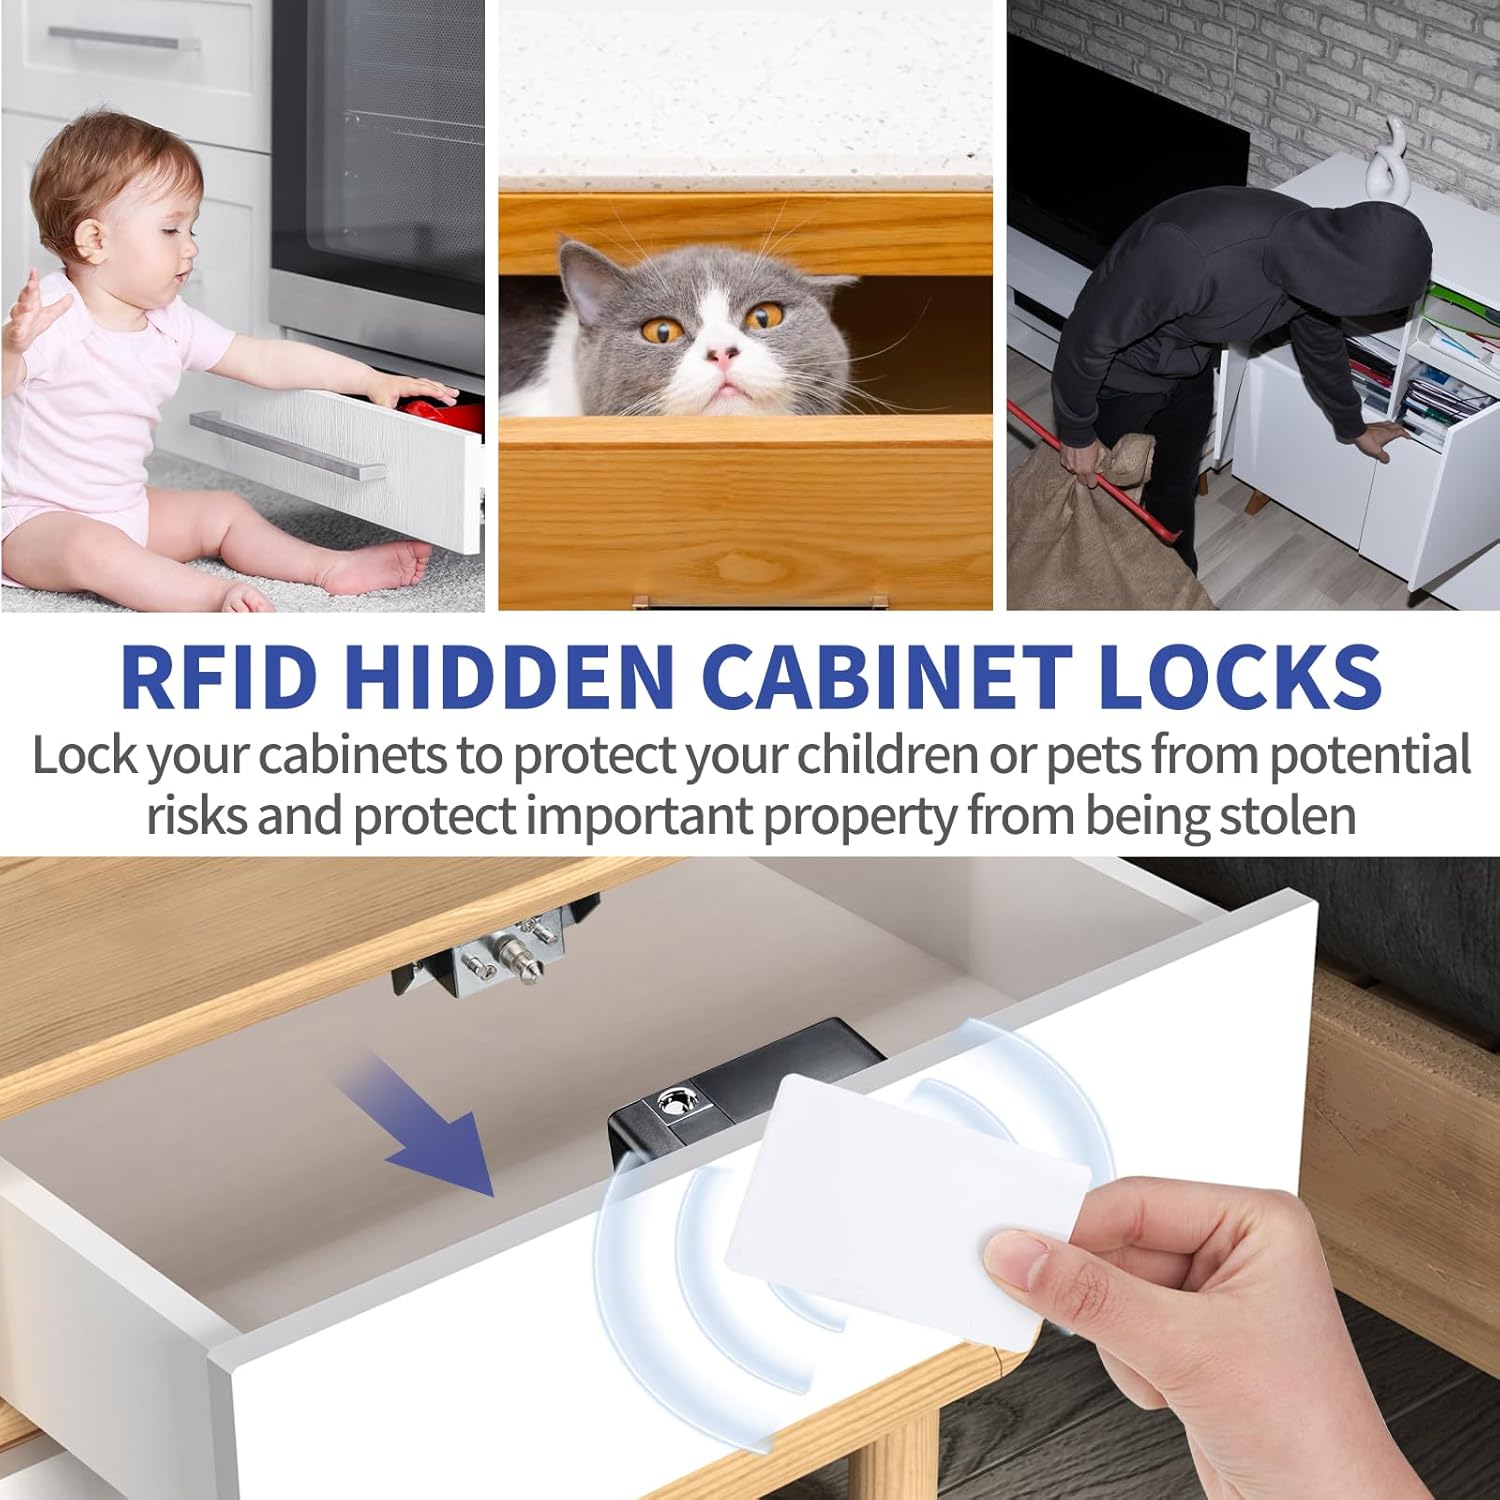
Image 3.1: Illustration of the hidden RFID cabinet lock mechanism.
Key Features:
- Hidden Design: The lock body is installed inside the cabinet or drawer, making it invisible from the outside.
- Multiple Unlocking Methods: Supports RFID cards, blue key fobs, and NFC unlocking via Android and iOS smartphones.
- Multi-Key/Multi-Lock Capability: Program up to 13 key cards per lock, or use a single key card to unlock multiple locks.
- Versatile Application: Suitable for wooden cabinets, drawers, storage boxes, and sliding doors.
- Child Safety & Security: Ideal for securing valuable or hazardous items from children or theft.

Image 3.2: Examples of items that can be secured with the RFID cabinet lock.
4. Installation Guide
Before installation, ensure the surface is clean and dry. The lock can be installed using screws or adhesive pads. For optimal security and longevity, screw installation is recommended.
Important Note on Thickness: The white RFID key cards can penetrate wooden surfaces up to 4.5 cm (1.77 inches) thick. The blue key fobs can penetrate wooden surfaces up to 2.54 cm (1 inch) thick. If the material thickness exceeds these limits, the RFID signal may not be detected, preventing the lock from opening.
4.1. Drawer Installation
For drawers, install the main lock unit on the inside of the cabinet frame and the lock catch on the inside of the drawer itself. Ensure proper alignment for smooth operation.

Image 4.1.1: Drawer installation method.
4.2. Sliding Door Installation
For sliding doors, mount the main lock unit on the fixed part of the cabinet and the lock catch on the edge of the sliding door. Ensure the lock pin can extend and retract freely into the catch when the door is closed.

Image 4.2.1: Sliding door installation method.
4.3. Cabinet Door Installation
For standard cabinet doors, attach the main lock unit to the inside of the cabinet frame and the lock catch to the inside of the cabinet door. Position them so the lock pin engages securely when the door is closed.

Image 4.3.1: Cabinet door installation method.
4.4. Storage Box Installation
For storage boxes, install the main lock unit on the inside of the box body and the lock catch on the underside of the lid. Ensure the lock pin aligns with the catch when the lid is closed.

Image 4.4.1: Storage box installation method.
5. Operation
The Gnellkoor RFID Cabinet Lock offers multiple convenient ways to unlock your secured items.
5.1. Unlocking Methods

Image 5.1.1: Various unlocking methods for the RFID cabinet lock.
- RFID Card/Key Fob: Hold the RFID card or blue key fob against the exterior surface of the cabinet/drawer where the lock is installed. The lock will emit a sound and unlock.
- NFC Unlocking (Android/iOS): For NFC-enabled smartphones, activate the NFC function on your device. Hold the phone near the lock's installation area. The lock will detect the NFC signal and unlock. Refer to your phone's manual for NFC activation.
5.2. Programming Keys
Each lock can be programmed with up to 13 different key cards or fobs. You can also program a single key to unlock multiple locks, or multiple keys to unlock a single lock.
- Add Master Key: (Instructions for adding a master key would go here, typically involving a button press on the lock unit followed by scanning the desired master key).
- Add User Keys: (Instructions for adding user keys, usually by scanning the master key then the new user keys).
- Delete Keys: (Instructions for deleting keys, often by holding a button or using the master key).
Note: Specific programming steps may vary slightly. Please refer to the quick start guide included in your package for precise button sequences.
6. Power Management
The Gnellkoor RFID Cabinet Lock requires 4 AAA alkaline batteries (not included) for operation. It also supports external power via a USB power cord or Type-C connection.

Image 6.1.1: Power options for the RFID cabinet lock.
- Battery Life: A new set of 4 AAA alkaline batteries can power the lock for approximately 6 months or 6000 unlock cycles.
- Battery Replacement: It is recommended to replace the batteries every 4 months to prevent unexpected power loss and ensure continuous operation.
- Low Battery Warning: The lock will typically emit a series of beeps or a specific light indicator when battery power is low. Replace batteries promptly upon this warning.
- External Power: Use the provided USB power cord or a standard Type-C cable to power the lock directly, bypassing battery usage. This is useful for fixed installations or if batteries are depleted.
7. Maintenance
To ensure the longevity and optimal performance of your RFID cabinet lock, follow these maintenance guidelines:
- Cleaning: Wipe the exterior of the lock unit with a soft, dry cloth. Avoid using abrasive cleaners or solvents.
- Battery Check: Regularly check battery levels and replace them as recommended (every 4 months) to prevent the lock from becoming inoperable due to power loss.
- Environmental Conditions: Keep the lock in a dry environment. Avoid exposure to extreme temperatures or high humidity, which can affect electronic components.
- Physical Inspection: Periodically inspect the lock unit and catch for any signs of wear or damage. Ensure all mounting screws are tight.
8. Troubleshooting
| Problem | Possible Cause | Solution |
|---|---|---|
| Lock does not respond to key card/fob/NFC. |
|
|
| Lock makes a sound but does not unlock. |
|
|
| Lock is stuck in a locked position after battery depletion. | Batteries died without warning or were not replaced in time. | Connect the USB power cord to the lock unit to provide temporary power and unlock it. Replace batteries immediately. |
9. Specifications
| Feature | Detail |
|---|---|
| Model Name | Jo-ECL |
| Brand | Gnellkoor |
| Lock Type | Pin Tumbler (Electronic) |
| Special Feature | Anti Drill |
| Material | Alloy Steel, Metal |
| Dimensions (L x W x H) | 4 x 4 x 2 inches |
| Item Weight | 0.49 Kilograms (1.08 pounds) |
| Power Source | 4 AAA Batteries (not included), USB Power Cord, Type-C |
| Connectivity Protocol | RFID |
| Control Method | Touch (via RFID/NFC) |
| Max. Thickness (White Card) | 4.5 cm / 1.77 inches |
| Max. Thickness (Blue Fob) | 2.54 cm / 1 inch |
10. Warranty and Support
Gnellkoor provides product warranty and return services. If you encounter any missing parts, product damage, or other issues, please contact our customer service team promptly. We are committed to providing a satisfactory resolution.
For further assistance or inquiries, please refer to the contact information provided with your purchase or visit the official Gnellkoor support website.


