
VOLTCRAFT VC-11954580
VOLTCRAFT DSO-2154 SE Digital Oscilloscope User Manual
Model: VC-11954580
1. Introduction
This manual provides essential information for the safe and effective operation of the VOLTCRAFT DSO-2154 SE Digital Oscilloscope. This device is a high-performance, 4-channel digital oscilloscope designed for precise signal analysis in various applications. Please read this manual thoroughly before using the device to ensure proper functionality and to prevent damage.
2. Safety Information
Always observe the following safety precautions to prevent electric shock, injury, or damage to the instrument.
- Do not open the instrument casing. There are no user-serviceable parts inside.
- Refer all servicing to qualified service personnel.
- Ensure the power supply voltage matches the requirements specified on the device.
- Do not operate the oscilloscope in wet or damp conditions.
- Avoid exposing the device to direct sunlight or extreme temperatures.
- Use only the probes and accessories supplied or recommended by VOLTCRAFT.
- Disconnect the power cord before cleaning or when the device is not in use for extended periods.
3. Product Overview
The VOLTCRAFT DSO-2154 SE is equipped with a 7-inch LCD display and intuitive controls for efficient operation. Key features include:
- 150 MHz Bandwidth, 4 Channels
- 7" LCD Screen (800 x 480 pixels)
- USB Interface for data transfer and connectivity
- Maximum Sample Rate: 1 GS/s
- Vertical Resolution: 8 bits
3.1 Front Panel Layout
The front panel features the display, control knobs, function buttons, and input connectors.
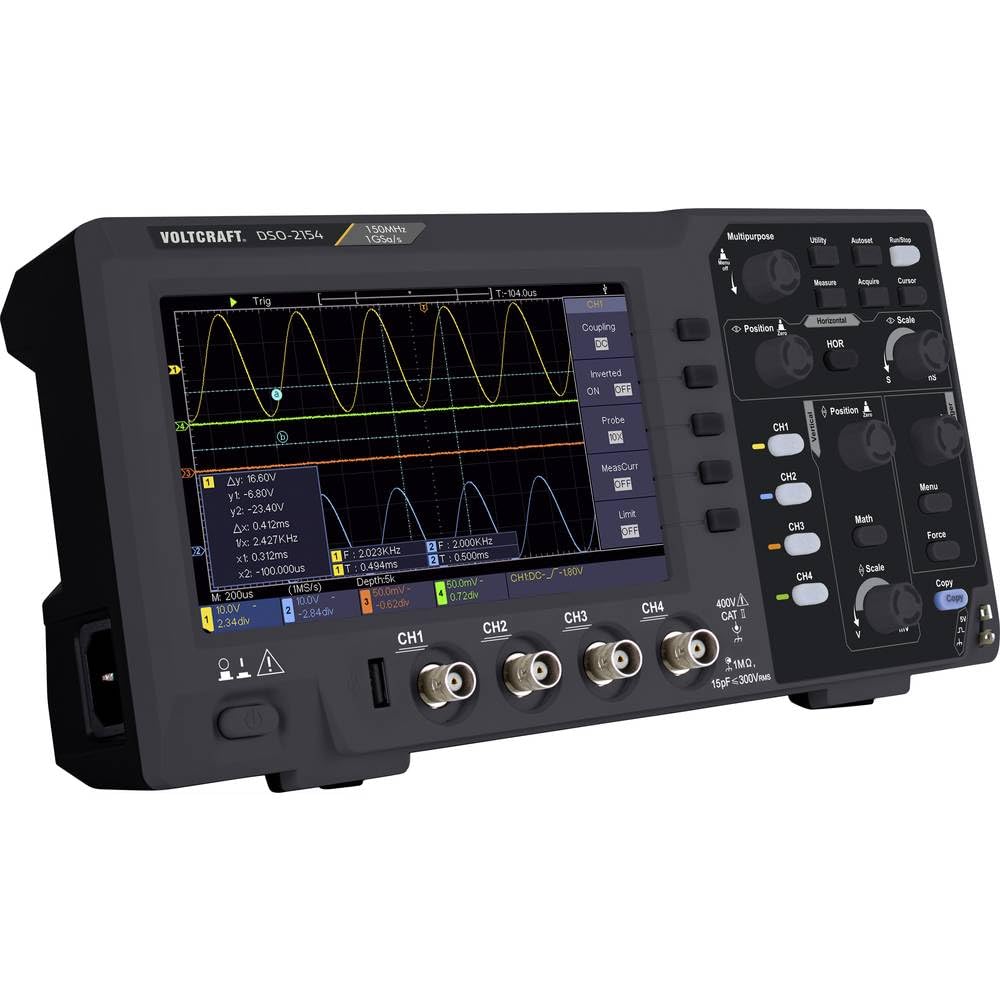
Figure 3.1: Front view of the DSO-2154 SE Oscilloscope, showing the main display, channel inputs (CH1-CH4), USB ports, and control interface.
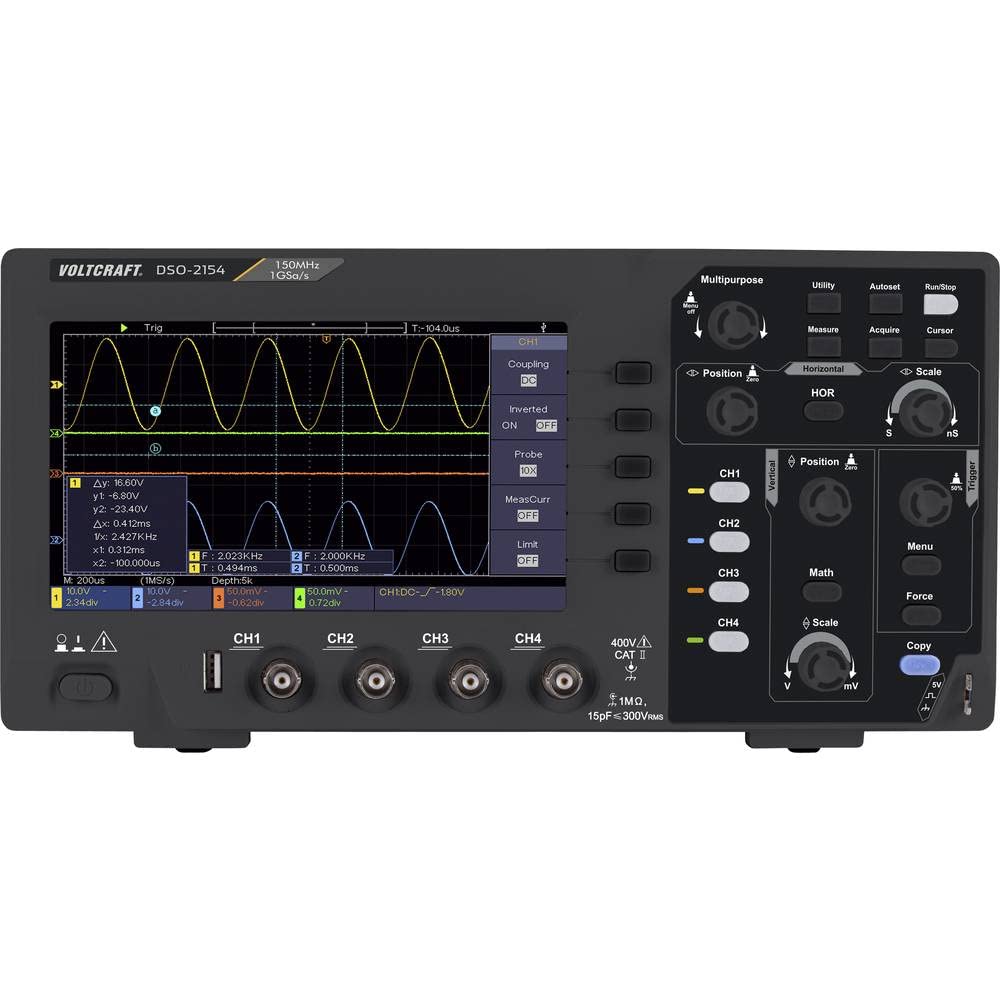
Figure 3.2: Detailed front view, illustrating the screen's measurement display and the layout of the control panel.
3.2 Rear Panel Layout
The rear panel includes the power input and ventilation.

Figure 3.3: Rear view of the oscilloscope, highlighting the power input and cooling vents.
3.3 Side View
The side view shows the ergonomic design and additional ventilation.

Figure 3.4: Side view of the oscilloscope, demonstrating its compact form factor.
4. Setup
- Unpacking: Carefully remove the oscilloscope and all accessories from the packaging. Verify that all components listed in the packing list are present.
- Power Connection: Connect the provided power cord to the power input on the rear panel of the oscilloscope and then to a suitable AC power outlet.
- Probe Connection: Connect the oscilloscope probes to the desired input channels (CH1, CH2, CH3, CH4) on the front panel. Ensure a secure connection.
- Grounding: For accurate measurements and safety, ensure the oscilloscope is properly grounded through the power cord.
- Initial Power On: Press the power button located on the front panel to turn on the device. The system will boot up and display the main interface.
5. Operating Instructions
5.1 Basic Operation
- Power On/Off: Use the power button on the front panel.
- Channel Selection: Press the CH1, CH2, CH3, or CH4 buttons to activate or deactivate specific input channels.
- Vertical Scale (Volts/Div): Use the vertical scale knob for each channel to adjust the voltage sensitivity per division.
- Horizontal Scale (Time/Div): Use the horizontal scale knob to adjust the time base per division.
- Trigger Settings: Use the trigger controls to stabilize repetitive waveforms. Adjust trigger level, source, and mode as needed.
- Autoset: Press the "Autoset" button for automatic adjustment of vertical, horizontal, and trigger settings to display a stable waveform.
5.2 Measurement Functions
The oscilloscope offers various automatic measurement functions. Press the "Measure" button to access these options.
- Voltage Measurements: Vpp, Vmax, Vmin, Vavg, RMS, etc.
- Time Measurements: Frequency, Period, Rise Time, Fall Time, Pulse Width, Duty Cycle, etc.
5.3 USB Connectivity
The USB interface allows for data transfer, waveform storage, and remote control. Refer to the detailed software manual for PC connectivity and data logging.
6. Maintenance
- Cleaning: Disconnect the power before cleaning. Use a soft, dry cloth to wipe the exterior of the oscilloscope. Do not use abrasive cleaners or solvents.
- Storage: When not in use, store the oscilloscope in a dry, dust-free environment, away from direct sunlight and extreme temperatures.
- Probe Care: Handle probes carefully. Avoid bending or stressing the probe tips. Clean probe tips with isopropyl alcohol if necessary.
7. Troubleshooting
| Problem | Possible Cause | Solution |
|---|---|---|
| No display after power on | Power cord not connected; Power outlet faulty; Device fault | Check power cord connection; Test power outlet; Contact support |
| No waveform displayed | Probe not connected; Channel off; Incorrect vertical/horizontal scale; Trigger not set correctly | Connect probe; Activate channel; Adjust scales; Adjust trigger settings or use Autoset |
| Unstable waveform | Incorrect trigger settings; Noise interference | Adjust trigger level/mode; Ensure proper grounding; Reduce external noise sources |
8. Specifications
| Model Number | VC-11954580 |
| Bandwidth | 150 MHz |
| Channels | 4 |
| Sample Rate (Max) | 1 GS/s |
| Vertical Resolution | 8 bits |
| Display | 7" LCD (800 x 480 pixels) |
| Interface | USB |
| Dimensions (L x W x H) | 30.1 x 15.2 x 7 cm |
| Weight | 1.1 kg |
9. Warranty and Support
The VOLTCRAFT DSO-2154 SE Digital Oscilloscope comes with a 1-year warranty on spare parts, effective from the date of purchase.
For technical support, troubleshooting assistance, or warranty claims, please contact VOLTCRAFT customer service or your authorized dealer. Please have your model number (VC-11954580) and purchase information ready when contacting support.
Related documentsVC-11954580


Ask a question about this manual
Ask about setup, troubleshooting, compatibility, parts, safety, or missing instructions. Manuals+ will review the question and use this page’s manual context to help answer it.