1. Overview
The PEMP Linux 12.3" Ultra-Thin Car Screen is designed to upgrade your BMW X5 or X6 (E70/E71, 2010-2012) with CIC original 4PIN LVDS system. It offers a large, high-definition display with capacitive touch functionality, supporting both wired and wireless CarPlay and Android Auto. This unit integrates seamlessly with your vehicle's existing systems, allowing you to retain factory monitor information display and steering wheel button functions.
Key Features:
- Ultra-Thin Design: Features an 82.3% screen-to-body ratio and a 12.3" large display with a metal alloy shell and Non-Airgap process for realistic picture quality.
- CarPlay & Android Auto: Supports both wired and wireless CarPlay and Android Auto for seamless smartphone integration. Answer calls via steering wheel buttons.
- HD Display: 1920x720 HD display with capacitive touch. Compatible with car's knob control for CarPlay/Android Auto interface.
- OEM Integration: Supports factory monitor information display. Long press the Menu button to switch between the factory OEM interface and the CarPlay interface. Retains steering wheel button functionality.
- Camera Support: Supports aftermarket cameras up to 720P AHD format.

Image: Comparison of the BMW X5/X6 dashboard before and after installing the PEMP Linux 12.3" Ultra-Thin Car Screen, showcasing the enhanced display.
2. What's in the Box
Your PEMP Linux 12.3" Ultra-Thin Car Screen package includes the following components:
- Harness

Image: A visual representation of the accessories included with the PEMP Linux 12.3" Ultra-Thin Car Screen, such as wiring harnesses, USB cable, reverse camera, LVDS adapter cable, audio cable, and installation manual.
3. Setup & Installation
Please ensure that the product is installed only when the car is powered off. Refer to the detailed video guide for visual instructions.
3.1. Installation Steps Overview
- Pry and remove the air conditioning decorative panel.
- Disconnect the connecting plugs from the back of the air conditioning decorative panel.
- Use a T20 screwdriver to remove the two fixing screws of the original car monitor.
- Press the LVDS plug buckle on the back of the original car's monitor and take out the LVDS cable.
- Pry and remove the panel below the monitor.
- Disconnect the five connectors on the back of this panel.
- Use a T20 screwdriver to remove the four fixing screws of the original car host.
- Pull the host outwards, pinch the buckle of the harness, pull it back, and take out the power harness.
- Use tweezers to press the small buckle on the original harness, take out the 2PIN green optical fiber cable, and connect it to the Android harness (ensure correct position).
- Install the original host back to its position and fix it with a T20 screwdriver.
- Connect the five connectors on the back of the panel and install the panel back in place.
- Pass the 4G antenna, GPS antenna, and USB cable through the passenger seat storage box to the back of the Android device.
- Pry the side cover of the storage box.
- Tear off the 4G and GPS antenna glue paper, and paste them in the front windshield of the passenger seat side. Place the USB cable at the position of the passenger seat storage box.
- Connect the Android harness, 4G antenna harness, GPS antenna harness, and USB harness to the back of the Android device.
- Connect the original LVDS cable to the Android device.
- Install the Android device to the original car and fix it with a T20 screwdriver.
- Restore the connection plugs on the back of the air conditioner panel, and put the air conditioner panel back in place.
- Start the car and check the Android device functionality (touch, navigation, Bluetooth, audio, video).
3.2. Important Connection Details

Image: Diagram illustrating different OEM display interfaces (10 PIN CCC UI, 4 PIN CIC UI, 6 PIN NBT UI, 6 PIN EVO UI) and highlighting the correct 4 PIN CIC UI for this product.

Image: Detailed diagram showing how to correctly transfer the 2PIN green optical fiber cable from the original ISO plug to the Linux harness to ensure proper sound functionality.
3.3. Installation Video Guide
Video: Step-by-step guide on how to install the PEMP Linux Android screen for BMW X5 E70/E71 models.
4. Operating Instructions
4.1. CarPlay & Android Auto
The unit supports both wired and wireless CarPlay and Android Auto. Connect your smartphone via Bluetooth for wireless functionality or use a USB cable for wired connection.

Image: Demonstrates the wireless CarPlay and Android Auto interfaces on the 12.3" screen, showing phone connectivity via Bluetooth.
4.2. Switching Between OEM and New System
You can easily switch between your BMW's original OEM interface and the new Linux system. Long press the Menu button on your iDrive controller to toggle between the two interfaces.
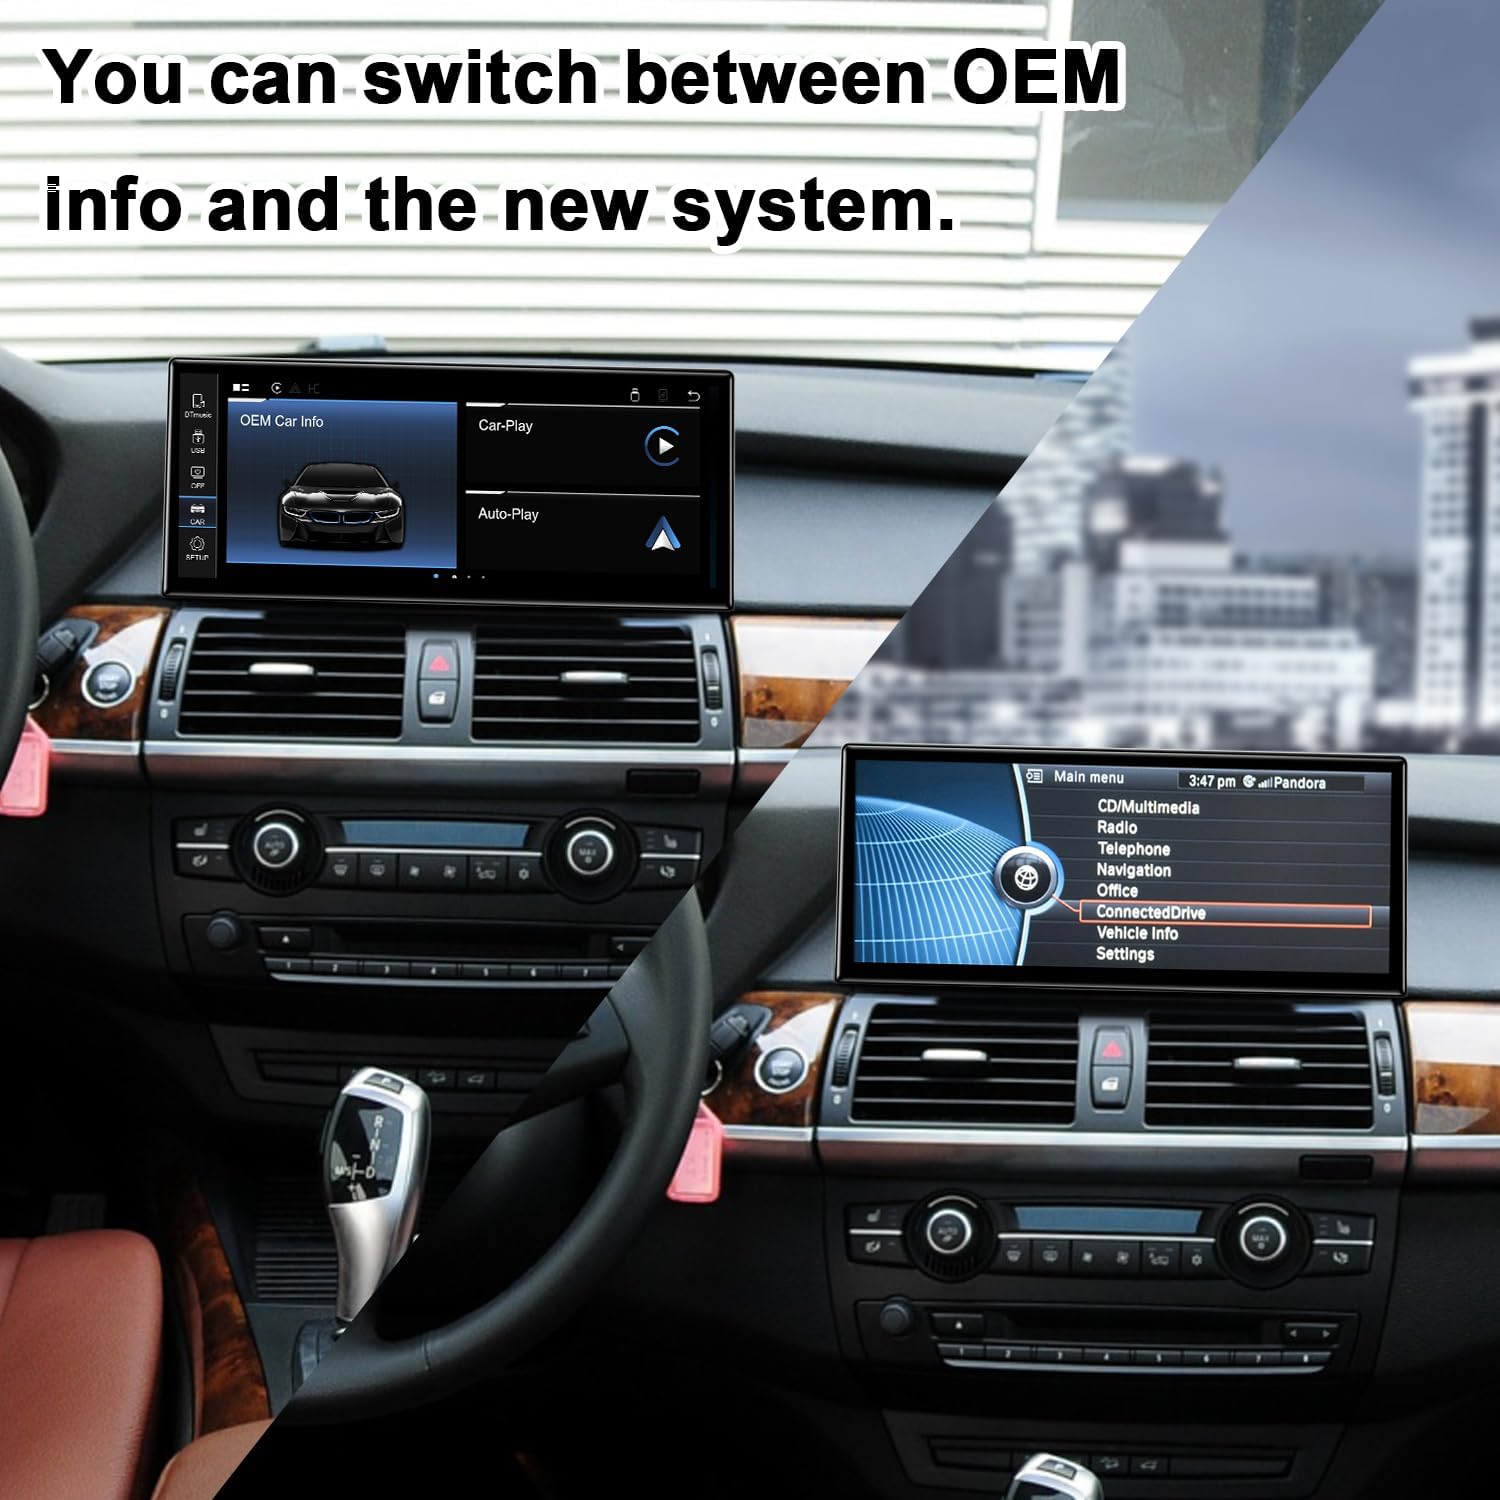
Image: Illustrates the ability to switch between the original BMW interface and the new CarPlay interface by long-pressing the Menu button.
Video: Demonstration of dual system switching between the original BMW screen and the new Linux system.
4.3. Sound Settings (AUX)
For sound output, the unit utilizes the vehicle's AUX input. You can configure automatic or manual AUX switching.
- Automatic AUX Switching: Go to "Car Settings" in "Setup" and find "Automatically switch to AUX". Choose "Harman Head Unit" or "Alpine Head Unit" according to your car.
- Manual AUX Setting: Go to "Main menu", select "Multimedia", then "External devices". Long press the number key "8" until you hear a tone, then press it 8 times before entering the new system to get CarPlay sound.

Image: Instructions for setting up automatic and manual AUX switching methods for audio output.
4.4. OEM Bluetooth for Calls
To use the OEM Bluetooth for calls in CarPlay, ensure your phone is connected to the original BMW Bluetooth system.
Video: Guide on how to use the OEM Bluetooth for making calls within CarPlay.
5. Maintenance
To ensure the longevity and optimal performance of your PEMP Linux Car Screen, follow these general maintenance guidelines:
- Regularly clean the screen with a soft, lint-free cloth. Avoid abrasive cleaners.
- Keep the unit free from dust and debris.
- Avoid exposing the unit to extreme temperatures or direct sunlight for prolonged periods.
- Ensure all cable connections are secure to prevent intermittent issues.
6. Troubleshooting
6.1. No Sound Issue
If you experience no sound from the unit:
- First, press the FM/AM button to confirm if the OEM radio has sound.
- If the OEM radio has sound, you need to set the resolution. The path is: Setup > Car Settings > Original Car's Screen Resolution.
- If there is no sound from the OEM radio, you will need to reconnect the socket on the back of the OEM radio. Refer to the fiber optic cable transfer diagram in the Setup section.
- Ensure the AUX cable is correctly connected to your car's original AUX port.
Video: Detailed guide on how to fix the no sound issue with the car screen.
Video: Instructions on how to transfer fiber optic cables to resolve sound issues.
6.2. OEM Resolution Issues
If the OEM interface appears glitchy or fuzzy, you likely need to adjust the resolution settings.
- Go to "Setup" > "Car Settings" > "Original Car's Screen Resolution".
- Select the correct resolution for your original car's display.
Video: Guide on how to resolve OEM resolution issues for the car screen.
Video: Instructions on how to set the OEM resolution correctly.
Video: Short guide on how to set the resolution for the display.
6.3. Screen Not Coming On / Random Shutdowns
If the screen does not come on or shuts off randomly, ensure all power connections are secure and correctly installed. If issues persist, contact customer support.
7. Specifications
- Display Size: 12.3 Inches
- Display Resolution: 1920x720
- Operating System: Linux
- Connectivity: Bluetooth
- Special Features: Touchscreen, CarPlay, Android Auto, Mirror Link
- Vehicle Service Type: Car (BMW X5 X6 E70 E71 CIC 2010-2012)
- Item Weight: 4.84 pounds
- Audio Output Mode: Stereo
- Mounting Type: Dashboard Mount

Image: Visual representation of the PEMP Linux 12.3" Ultra-Thin Car Screen's physical features, including its ultra-thin profile, metal alloy shell, and heat sink design.
8. Warranty & Support
8.1. Warranty Information
This product comes with a one-year warranty covering non-artificial damage.
8.2. Customer Support
For any questions or assistance, please contact PEMP customer support. They aim to respond to messages within 24 hours.
9. Legal Disclaimer
Please ensure that the product is installed only when the car is powered off!


