Introduction
Thank you for purchasing the iTOMA CKS718-NA Alarm Clock Radio. This manual provides detailed instructions for setting up, operating, and maintaining your new device. Please read this manual thoroughly before use to ensure proper functionality and to maximize your experience with the product.
Key Features
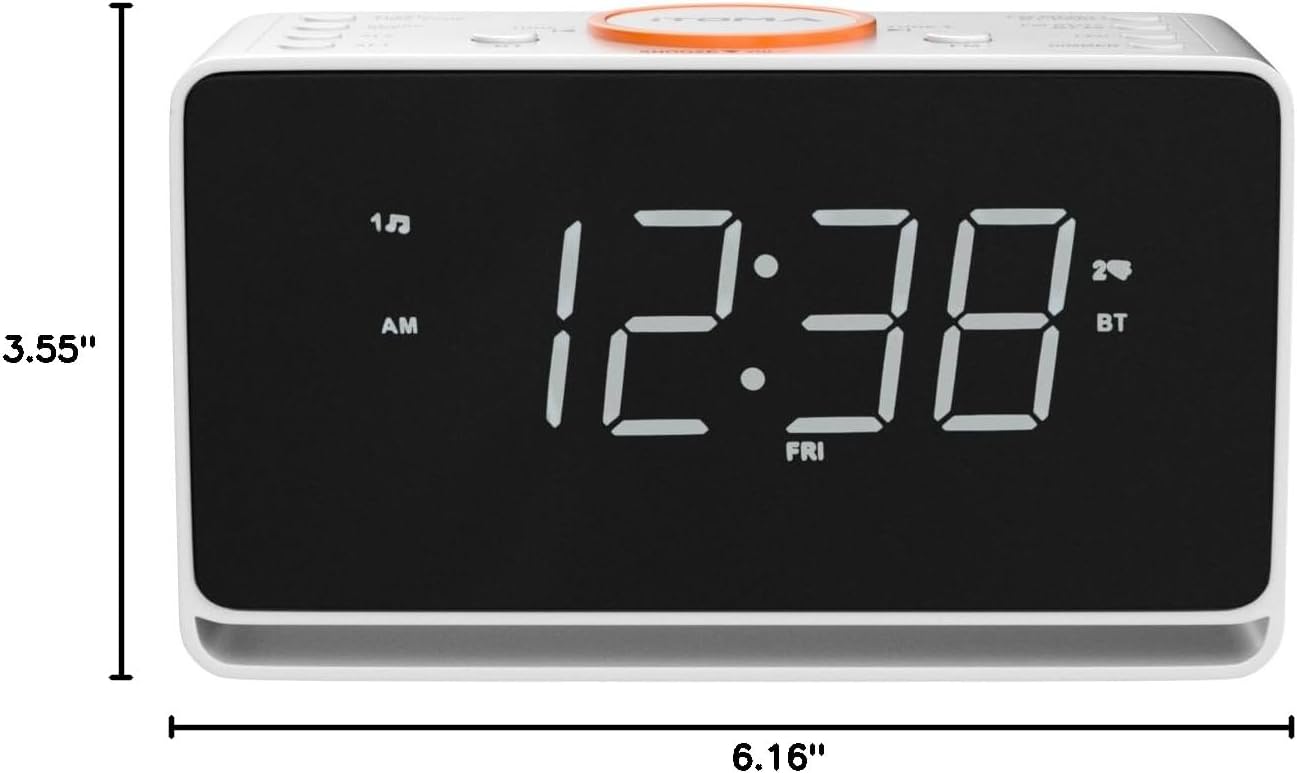
- 1.4-inch White LED Display: Large, clear display for easy readability from a distance. Supports 12/24 hour format.
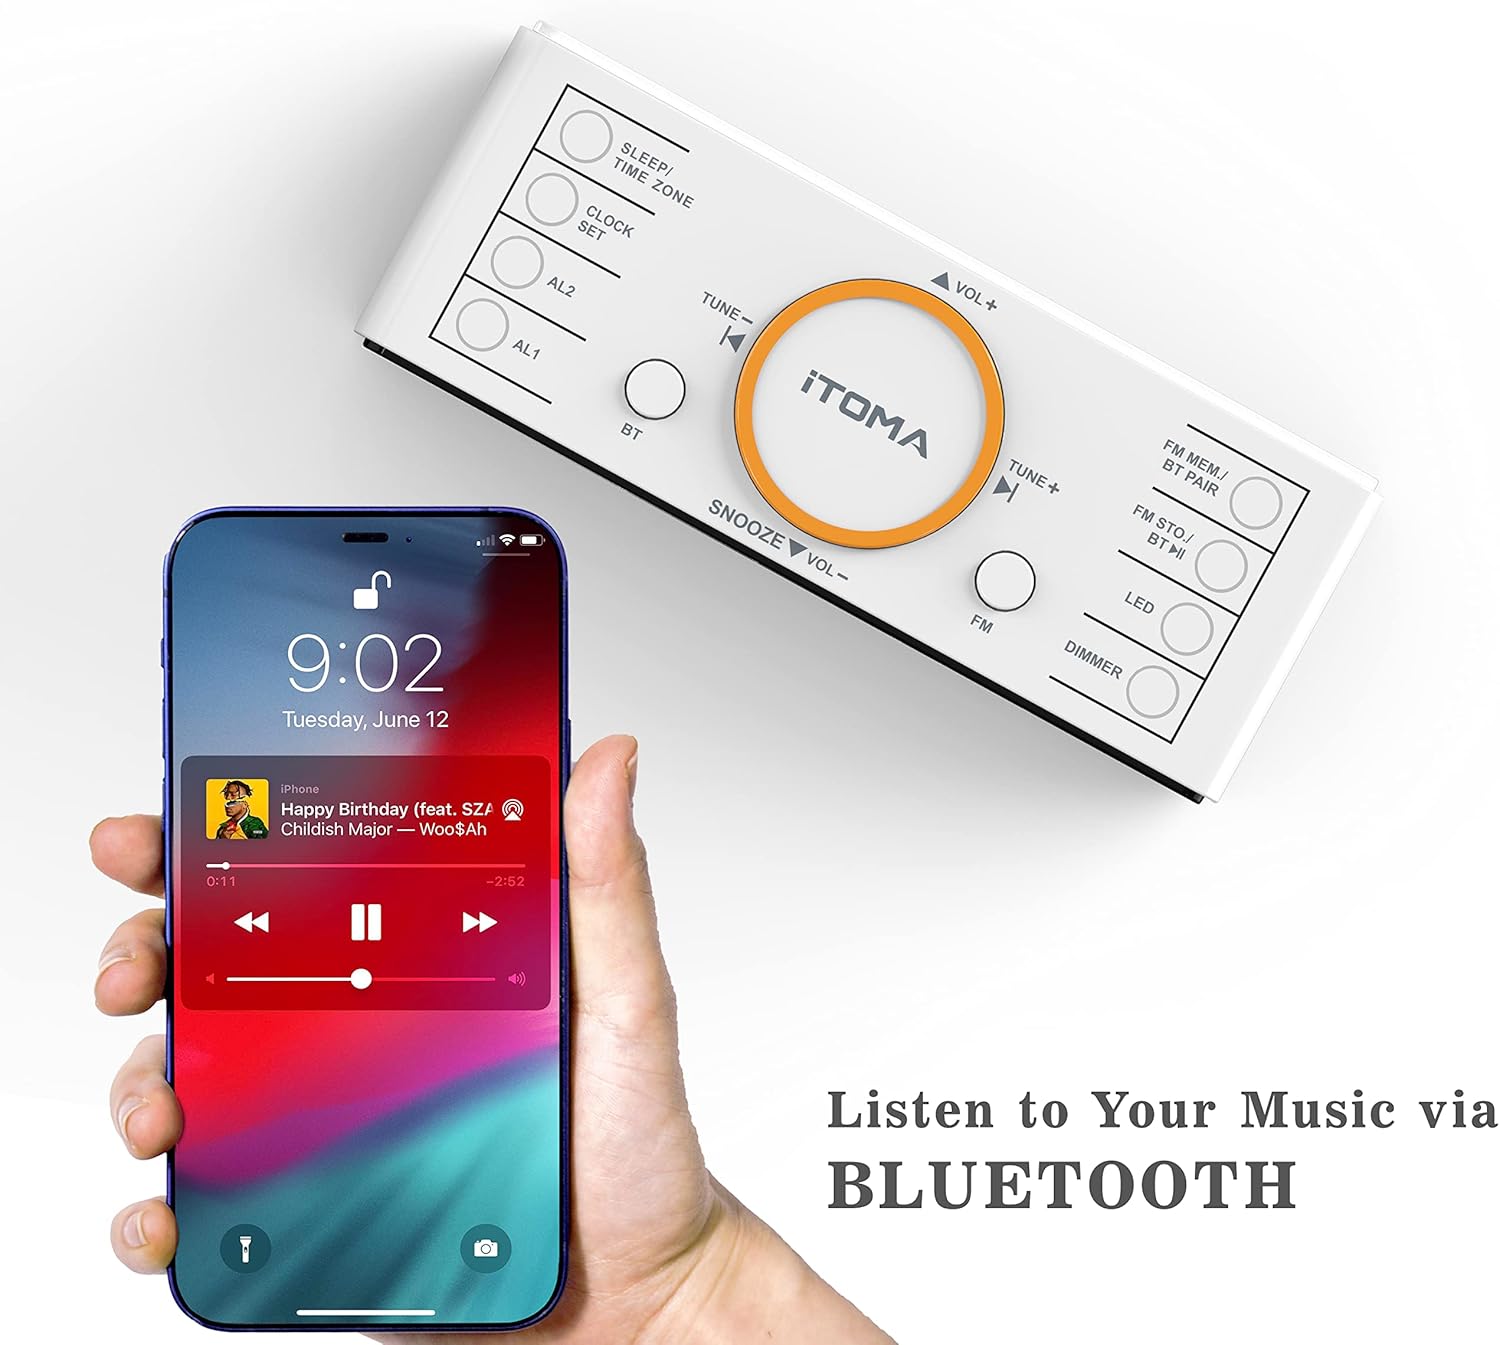
- Bluetooth Connectivity: Seamlessly stream your favorite audio from Bluetooth-enabled devices.
- FM Radio: Enjoy FM radio with 20 programmable preset stations (87.5MHz to 108.0MHz). An external FM wire antenna is included for enhanced reception.
- Dual Alarm System: Set two independent alarms with options to wake up to FM radio or a buzzer. Features snooze and crescendo wake-up control.
- Alarm Week Modes: Choose from four alarm modes: every day, single day only, weekdays only, or weekends only.
- Auto & Manual Dimmer: Adjust the LED display brightness with 3 levels or use the automatic dimmer function.
- Night Light: Integrated 2-level soft orange night light for added convenience.
- USB Charging Port: A 1A 5V USB port allows convenient charging of your smartphone or other smart devices.
- Backup Battery: A CR2032 battery (not included) ensures time and alarm settings are retained during power interruptions.
- Automatic Time Setting: The clock automatically sets itself to the correct year, month, date, day, and time upon initial plug-in and after power interruptions.
Product Overview


Official Product Video
This video provides a visual overview of the iTOMA Alarm Clock Radio, highlighting its features and ease of use, including the USB charging port and display options.
Setup Guide
- Unpacking: Carefully remove the alarm clock radio from its packaging. Ensure all components are present: the main unit, power adapter, and FM wire antenna.
- Power Connection: Plug the power adapter into the DC IN jack on the back of the unit, then plug the adapter into a standard wall outlet. The display will light up, and the clock will automatically set the correct time and date.
- Install Backup Battery (Optional but Recommended): For time and alarm retention during power outages, insert one CR2032 battery (not included) into the battery compartment on the bottom of the unit. Ensure correct polarity (+/-).
- FM Antenna: Uncoil the FM wire antenna and extend it for optimal radio reception. Position it away from other electronic devices for best results.
Operating Instructions
Setting Time and Date
- The clock automatically sets the time and date upon initial power connection.
- To manually adjust, press and hold the CLOCK SET button. Use the TUNE+ or TUNE- buttons to adjust values (Year, Month, Date, Hour, Minute, 12/24H format). Press CLOCK SET to confirm each setting.
- To adjust the Time Zone, press and hold the SLEEP/TIME ZONE button. Use TUNE+ or TUNE- to select your time zone.
Setting Alarms (AL1 / AL2)
- Press and hold AL1 or AL2 button to enter alarm setting mode.
- Use TUNE+ or TUNE- to set the alarm hour and minute. Press the respective alarm button (AL1 or AL2) to confirm.
- Select the alarm source (FM radio or Buzzer) and desired alarm mode (Every Day, Weekdays, Weekends, Single Day).
- To activate/deactivate an alarm, briefly press AL1 or AL2. The alarm indicator will appear/disappear on the display.
- When the alarm sounds, press the SNOOZE button to temporarily silence it. The alarm will sound again after 9 minutes.
- To stop the alarm completely, press any other button (e.g., FM or BT). The alarm will automatically stop after 1 hour if not manually turned off.
FM Radio Operation
- Press the FM button to turn on the radio.
- Use TUNE+ or TUNE- to manually tune to a station. Press and hold to auto-scan for the next available station.
- To save a preset, press and hold FM MEM/BT PAIR. Use TUNE+ or TUNE- to select a preset number (P01-P20), then press FM MEM/BT PAIR again to confirm.
- To recall a preset, briefly press FM STO/BT HI repeatedly to cycle through saved stations.
Bluetooth Operation
- Press the BT button to switch to Bluetooth mode. The Bluetooth indicator will flash.
- On your device, enable Bluetooth and search for "iTOMA CKS718-NA". Select it to pair.
- Once paired, the Bluetooth indicator will stop flashing and remain solid. You can now stream audio from your device.
- Use the VOL+ and VOL- buttons on the clock or your device to adjust volume.
Dimmer Control and Night Light
- Press the DIMMER button to cycle through 3 brightness levels (L-1, L-2, L-3) and an auto-dimmer mode (-AU-).
- Press the LED button to turn the orange night light on/off or adjust its 2 brightness levels.
USB Charging
- Connect your smartphone or other USB-powered device to the USB charging port (1A 5V) on the back of the clock.
- The clock radio will charge your device even when the clock is in standby mode.
Maintenance
- Cleaning: Use a soft, dry cloth to clean the surface of the unit. Do not use abrasive cleaners or solvents, as they may damage the finish.
- Dust Removal: Regularly dust the display and buttons to maintain clear visibility and functionality.
- Battery Replacement: If the backup battery is installed, replace it annually or when the clock fails to retain time during power outages.
Troubleshooting
| Problem | Possible Cause | Solution |
|---|---|---|
| Clock display is blank or not working. | Power adapter not connected or faulty; power outage. | Ensure power adapter is securely plugged in. Check power outlet. If power outage, ensure backup battery is installed. |
| Alarm does not sound. | Alarm not activated; alarm volume too low; incorrect alarm time/mode. | Ensure alarm indicator is visible on display. Increase alarm volume. Verify alarm time and mode settings. |
| Poor FM radio reception. | FM antenna not extended; interference from other devices. | Fully extend and reposition the FM wire antenna. Move the unit away from other electronic devices. |
| Bluetooth device cannot pair. | Bluetooth mode not selected; device too far; interference. | Ensure the clock is in Bluetooth mode. Keep devices within 30 feet. Try restarting both devices. |
| USB charging is slow or not working. | Cable issue; device requires higher current; port overloaded. | Try a different USB cable. Ensure your device is compatible with 1A 5V charging. Avoid charging multiple high-power devices simultaneously if using a multi-port adapter. |
Specifications
| Feature | Detail |
|---|---|
| Brand | iTOMA |
| Model Number | CKS718-NA |
| Display Type | 1.4" White LED |
| Power Source | Corded Electric |
| Product Dimensions | 6.22" W x 3.58" H |
| Item Weight | 1.26 pounds (0.57 kg) |
| Material | Plastic |
| Backup Battery | 1 x CR2032 (not included) |
| USB Charging Output | 1A 5V |
| FM Frequency Range | 87.5MHz - 108.0MHz |
Warranty and Support
For warranty information or technical support, please refer to the product packaging or contact iTOMA customer service directly. You can also visit the official iTOMA Store on Amazon for additional resources and contact details.


