Introduction
Thank you for choosing the hykolity 72-inch 8-blade ceiling fan. This manual provides detailed instructions for the safe installation, efficient operation, and proper maintenance of your new ceiling fan. Please read all instructions carefully before beginning installation or operation to ensure correct usage and to prevent potential hazards. Keep this manual for future reference.
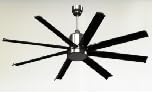
Figure 1: hykolity 72-inch 8-blade ceiling fan installed in a bedroom.
Safety Information
Always disconnect power at the main circuit breaker before attempting any installation, maintenance, or troubleshooting. Ensure all wiring connections comply with local electrical codes and national electrical codes. If you are unsure about wiring procedures, consult a qualified electrician. The fan must be mounted to a ceiling joist or a support structure capable of supporting the fan's weight. Keep hands, clothing, and other objects clear of the fan blades when the fan is in operation. Do not operate the fan if there are any signs of damage or malfunction. This fan is designed for indoor use only.
Package Contents
Verify that all components are present before beginning installation. If any parts are missing or damaged, do not proceed with installation and contact customer support.
- Fan Motor Assembly
- Ceiling Canopy
- Downrod (various lengths may be included)
- Mounting Bracket
- Fan Blades (8 pieces)
- Blade Holders/Brackets
- LED Light Kit
- Remote Control with Receiver
- Hardware Pack (screws, wire nuts, washers, etc.)
- Instruction Manual
Setup and Installation
Professional installation is recommended for safety and optimal performance. Ensure power is disconnected at the circuit breaker before proceeding.
- Mounting Bracket Installation: Secure the mounting bracket to a ceiling joist or a suitable support structure using the provided screws. Ensure the bracket is firmly attached and can support the fan's weight.
- Downrod Assembly: Select the appropriate downrod length for your ceiling height. Thread the fan's electrical wires through the downrod. Attach the downrod to the fan motor assembly, securing it with the provided pin and set screws.
- Hanging the Fan: Carefully lift the fan motor assembly and hang it onto the mounting bracket. Ensure the downrod ball is properly seated in the bracket's opening.
- Wiring Connections: Connect the fan's wiring to the household electrical supply according to the wiring diagram in the manual. Typically, this involves connecting live, neutral, and ground wires. Ensure all connections are secure using wire nuts.
- Canopy Installation: Slide the ceiling canopy up the downrod and secure it to the mounting bracket, covering the wiring connections.
- Blade Attachment: Attach each fan blade to its respective blade holder/bracket using the provided screws. Then, attach the assembled blade and holder to the fan motor housing. Ensure all screws are tightened securely.
- LED Light Kit Installation: Connect the LED light kit wires to the corresponding wires from the fan motor assembly. Secure the LED light kit to the bottom of the fan motor housing.
- Final Checks: Double-check all connections and ensure no wires are pinched. Restore power at the circuit breaker.
Operating Instructions
Your hykolity ceiling fan is operated via the included remote control.
- Power On/Off: Press the power button on the remote to turn the fan on or off.
- Fan Speed Control: Use the speed buttons (1-6) to adjust the fan's rotation speed. Level 1 is the lowest speed, and Level 6 is the highest.
- Light On/Off: Press the light button to turn the integrated LED light on or off.
- Light Color Temperature: Cycle through three different light color temperatures (warm white, natural white, cool white) by pressing the color temperature button.
- Dimming Function: Use the dimming buttons to adjust the brightness of the LED light.
- Reverse Mode: The fan features a reverse mode to change the direction of blade rotation. This is useful for circulating warm air in winter or creating a downdraft in summer. Ensure the fan is completely stopped before activating reverse mode.
- Timer Function: Set the fan to automatically turn off after a specified period (e.g., 1H, 2H, 4H) using the timer buttons.
Maintenance
Regular maintenance ensures the longevity and optimal performance of your ceiling fan. Always disconnect power before performing any maintenance.
- Cleaning: Use a soft, damp cloth to clean the fan blades and motor housing. Do not use abrasive cleaners or solvents.
- Tighten Screws: Periodically check all screws on the fan blades and mounting hardware to ensure they are tight. Loose screws can cause wobbling or noise.
- Blade Balancing: If the fan wobbles, ensure all blades are securely attached and balanced. A balancing kit may be used if necessary.
Troubleshooting
If you encounter any issues with your fan, refer to the following common problems and solutions:
- Fan does not start: Check the circuit breaker and wall switch. Ensure all wiring connections are secure. Verify remote control batteries are functional.
- Fan wobbles: Ensure all blade screws are tight. Check that the mounting bracket is securely fastened to the ceiling. Verify blades are not bent or damaged.
- Light does not work: Check the light switch and circuit breaker. Ensure the LED light kit wires are properly connected.
- Noisy operation: Ensure all screws are tight. Check for any obstructions in the fan's path.
Specifications
- Model Name: WHG-0606
- Size: 72 inches
- Number of Blades: 8
- Electric Fan Design: Ceiling Fan
- Power Source: Corded Electric
- Voltage: 120 Volts
- Wattage: 19 watts
- Number of Power Levels: 6
- Control Method: Remote Control
- Indoor/Outdoor Usage: Indoor
- Item Weight: 30.9 Pounds
- Product Dimensions: 72"D x 72"W x 18.5"H
- Finish Type: Brushed
- Specification Met: ETL
Warranty and Support
For warranty information or technical support, please refer to the contact details provided in your product packaging or visit the hykolity official website. Keep your purchase receipt as proof of purchase for any warranty claims.