1. Introduction
The Dpofirs AK-C211008 Relay Remote Control Switch is a versatile 4-channel relay module designed for industrial control applications. It operates on DC12-36V and utilizes 433MHz RF technology for stable and reliable wireless control. This module supports multiple working modes including Click, Self-Lock, and Interlock, providing flexibility for various control needs. Its advanced RF technology allows for signal transmission through walls, floors, and doors, ensuring control from a distance.
Key features include high security with learning codes, easy setup and operation, and robust interference resistance through non-directional encoding technology. It is commonly used in controlling lamps, electric doors and windows, lifting equipment, gates, elevators, and other industrial and security systems.

Figure 1.1: The AK-C211008 Relay Remote Control Switch module and its accompanying remote controls.
2. Specifications
| Feature | Description |
|---|---|
| Item Type | Remote Control Relay Switch |
| Shell Material | ABS |
| Operating Frequency | 433MHz |
| Working Mode | Click, Self Lock, Interlock Mode |
| Output Mode | Wiring Terminal |
| Demodulation Method | ASK |
| Control Mode | Remote Control |
| Remote Control Battery | 4 x CR2016 Battery (75mah) |
| Input Voltage | DC12-36V |
| Maximum Switching Voltage | 36 Volts |
| Coil Voltage | 36 Volts |
| Operation Mode | Automatic |

Figure 2.1: Bottom view of the relay module displaying technical specifications.
3. Setup and Installation
Before installation, ensure the power supply is disconnected to prevent electrical hazards. The relay module is designed for easy integration into existing systems.
3.1 Wiring the Relay Module
The module features wiring terminals for connecting to your devices. Identify the input power terminals (DC12-36V) and the output control terminals (COM, NO, NC) for each channel. Connect your power source and the device to be controlled according to your application's requirements.

Figure 3.1: Detailed view of the wiring terminals on the relay module.
3.2 Remote Control Battery Installation
The remote controls come with pre-installed CR2016 batteries. If replacement is needed, carefully open the remote control casing and replace the four CR2016 batteries, ensuring correct polarity.

Figure 3.2: The remote control unit.
4. Operating Modes and Pairing
The AK-C211008 relay module supports three distinct working modes: Click, Self-Lock, and Interlock. Understanding these modes is crucial for proper operation.
4.1 Working Modes Explained
- Click Mode (Momentary): The relay activates only while the remote control button is pressed. It deactivates immediately upon release.
- Self-Lock Mode (Toggle): Pressing the remote control button activates the relay, and it remains active after the button is released. Pressing the same button again deactivates the relay.
- Interlock Mode (Latched): In this mode, only one relay can be active at a time. Pressing one button activates its corresponding relay and deactivates any other active relay within the same interlock group.
4.2 Pairing Remote Controls (Code Learning)
The module features a code learning key to pair remote controls. The process involves pressing the learning key a specific number of times to select the desired mode, then pressing a button on the remote.
4.2.1 Two-Point Click Mode (Momentary)
- Press the code learning key on the controller once. The LED indicator will blink once and go off.
- Press any key on the remote control. The LED indicator will blink three consecutive times and go off, indicating successful code matching.
- The remote control is now set to two-point click mode.
4.2.2 Two-Point Self-Lock Mode (Toggle)
- Press the code learning key on the controller twice. The LED indicator will blink twice and go off.
- Press any key on the remote control. The LED indicator will blink three consecutive times and go off, indicating successful code matching.
- The remote control is now set to two-point self-lock mode.
4.2.3 Two-Point Interlock Mode (Latched)
- Press the code learning key on the controller three times. The LED indicator will blink three times and go off.
- Press any key on the remote control. The LED indicator will blink three consecutive times and go off, indicating successful code matching.
- The remote control is now set to two-point interlock mode.
4.2.4 Two-Point Click and Two-Point Self-Lock Mode
- Press the code learning key on the controller five times. The LED indicator will blink five times and go off.
- Press any key on the remote control. The LED indicator will blink three consecutive times and go off, indicating successful code matching.
- The remote control is now set to two-point click mode and two-point self-lock mode.
4.2.5 Double Self-Lock and Double Interlock Mode
- Press the code learning key on the controller six times. The LED indicator will blink six times and go off.
- Press any key on the remote control. The LED indicator will blink three consecutive times and go off, indicating successful code matching.
- The remote control is now set to double self-lock mode and double interlock mode.
4.2.6 Clearing All Paired Codes
To clear all previously paired remote controls from the module, press the code learning key on the controller eight times. The LED indicator will blink eight times and then go off, indicating that all stored codes have been successfully cleared. This is useful for security purposes if a remote control is lost.
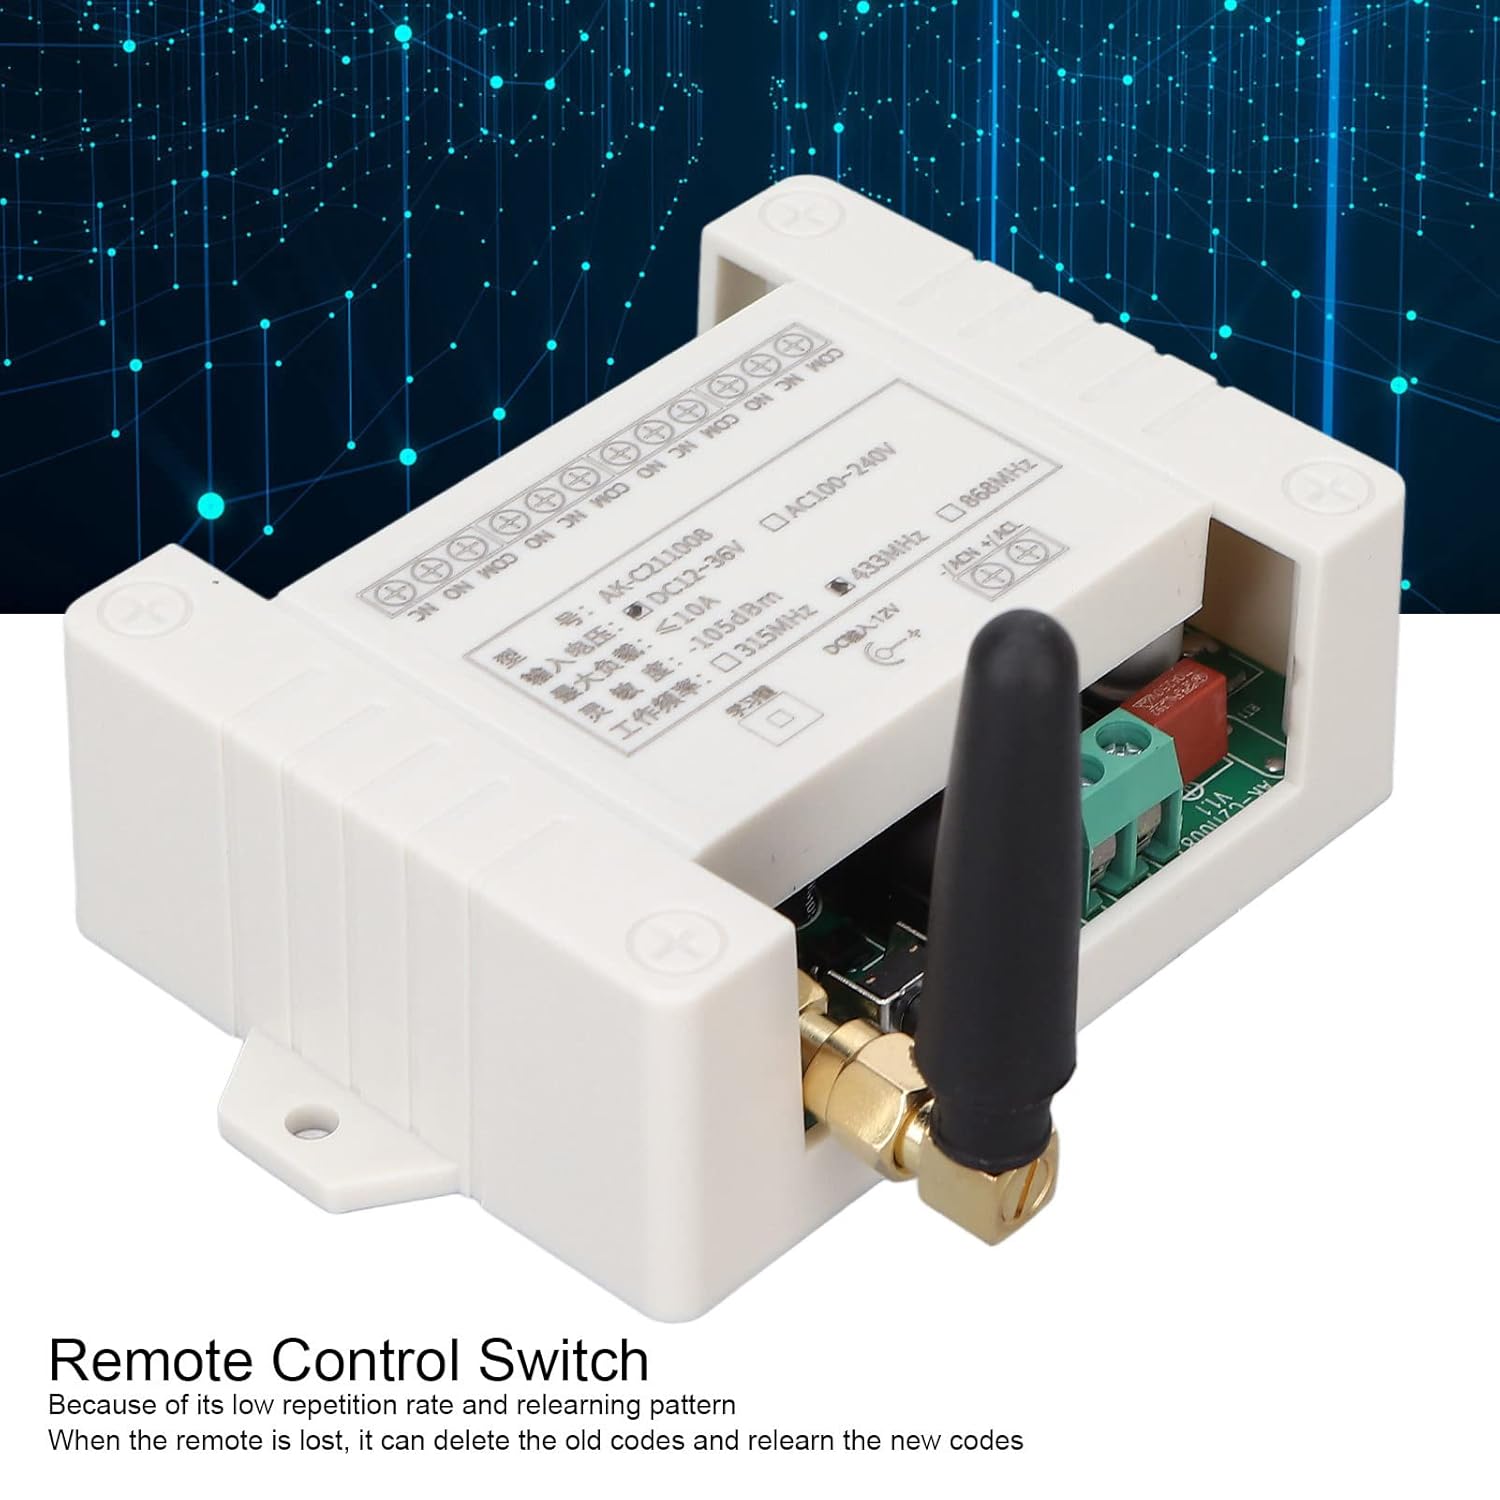
Figure 4.1: The learning button on the relay module, used for pairing remote controls.
5. Applications
The Dpofirs AK-C211008 Relay Remote Control Switch is highly versatile and can be integrated into various industrial and home automation scenarios. Its robust design and reliable RF communication make it suitable for demanding environments.
- Lighting Control: Remotely switch on/off lights in warehouses, factories, or large residential areas.
- Electric Doors and Windows: Control garage doors, automatic gates, and electric windows.
- Lifting Equipment: Operate hoists, cranes, and other lifting machinery.
- Industrial Control: Integrate into automated systems for controlling various machinery and processes.
- Security Systems: Use for remote activation/deactivation of alarms or access control systems.

Figure 5.1: Example application: controlling a garage door with the relay module.
6. Troubleshooting
If you encounter issues with your Dpofirs AK-C211008 Relay Remote Control Switch, refer to the following common problems and solutions:
- Remote Control Not Responding:
- Check the batteries in the remote control. Replace if necessary.
- Ensure the remote control is properly paired with the receiver. Refer to Section 4.2 for pairing instructions.
- Verify that the module is receiving power.
- Limited Range or Intermittent Operation:
- Ensure the antenna on the relay module is properly connected and positioned.
- Minimize obstructions between the remote and the module (e.g., thick walls, metal objects).
- Check for strong electromagnetic interference from other devices operating on similar frequencies.
- Relay Not Activating/Deactivating Correctly:
- Confirm the wiring connections are secure and correct according to your application.
- Verify the working mode (Click, Self-Lock, Interlock) is correctly set for your intended operation. If unsure, clear all codes and re-pair in the desired mode.
- Ensure the load connected to the relay does not exceed the module's maximum current rating (10A).
7. Maintenance
The Dpofirs AK-C211008 Relay Remote Control Switch is designed for durability and requires minimal maintenance. Follow these guidelines to ensure long-term performance:
- Cleaning: Use a soft, dry cloth to clean the module and remote controls. Avoid using harsh chemicals or abrasive cleaners.
- Environment: Operate the module within its specified temperature and humidity ranges. Avoid exposure to excessive moisture, dust, or extreme temperatures.
- Battery Replacement: Replace remote control batteries promptly when performance degrades. Dispose of old batteries responsibly.
- Connection Checks: Periodically inspect wiring connections to ensure they remain secure, especially in environments with vibration or movement.