1. Introduction
The WEEDO Tina2Plus is a high-speed 3D printer designed for ease of use, making it suitable for beginners and children. It features a fully assembled, semi-enclosed design for safety, auto-leveling, a PEI print plate, and filament detection capabilities. Control is available via WiFi and the Poloprint Cloud App.
2. What's in the Box
Upon unboxing your WEEDO Tina2Plus 3D Printer, please ensure all the following items are present:
- WEEDO Tina2Plus 3D Printer
- TF Card and Card Reader
- 100g PLA Filament
- USB Cable
- Power Adapter
- Unpacking Guide
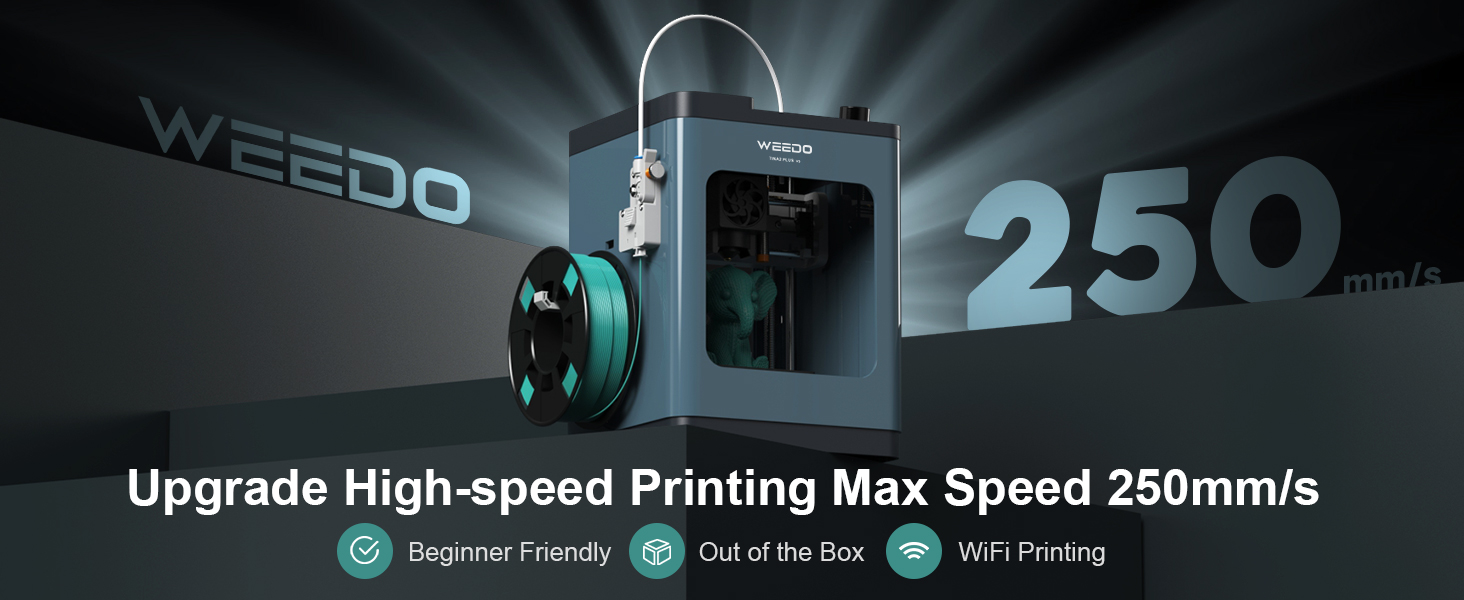
Image: Contents of the WEEDO Tina2Plus 3D Printer package.
3. Setup Guide
3.1 Unboxing and Preparation
- Carefully remove the 3D printer and all accessories from the packaging box.
- Remove all protective packaging materials, including bubble wrap and tapes securing internal components. Ensure the shaft coupling shell is also removed.
- Insert the filament guide tube into the extruder.
- Ensure the TF card is inserted into the printer's slot.
Video: Official unboxing and initial preparation of the Tina2Plus 3D Printer.
3.2 Power Connection and Initial Power On
- Connect the power adapter to the printer and then plug it into a power outlet.
- Switch on the printer using the power button.
3.3 Filament Loading
- Place the filament spool onto the designated holder.
- Cut the end of the filament cleanly to prevent clogs.
- On the printer's display, select your preferred language and then choose the 'Load Filament' option.
- Press the filament lever on the extruder and gently push the filament into the extruder until the printer automatically begins loading it. The printer will heat up and purge a small amount of filament through the nozzle.
Video: Detailed instructions for setting up and loading filament on the WEEDO Tina2 3D Printer.
3.4 WiFi and App Connection
- Download the Poloprint Cloud App on your smartphone or tablet.
- Register an account and log in.
- On the printer's display, navigate to 'Control' -> 'WiFi Network' -> 'WiFi QR Code' to generate a QR code.
- In the Poloprint Cloud App, select 'Add Online Device' and scan the QR code displayed on the printer.
- Follow the app's prompts to connect the printer to your 2.4GHz WiFi network. Ensure Bluetooth is enabled on your mobile device for initial setup.
- Once the app shows the printer as 'online', the connection is complete.
4. Operating Instructions
4.1 Printing via Poloprint Cloud App
- Open the Poloprint Cloud App.
- Browse the library of 500+ ready-to-print models or import your own STL files.
- Select a model and use the one-click slicing and printing feature.
- Monitor print progress directly from the app.
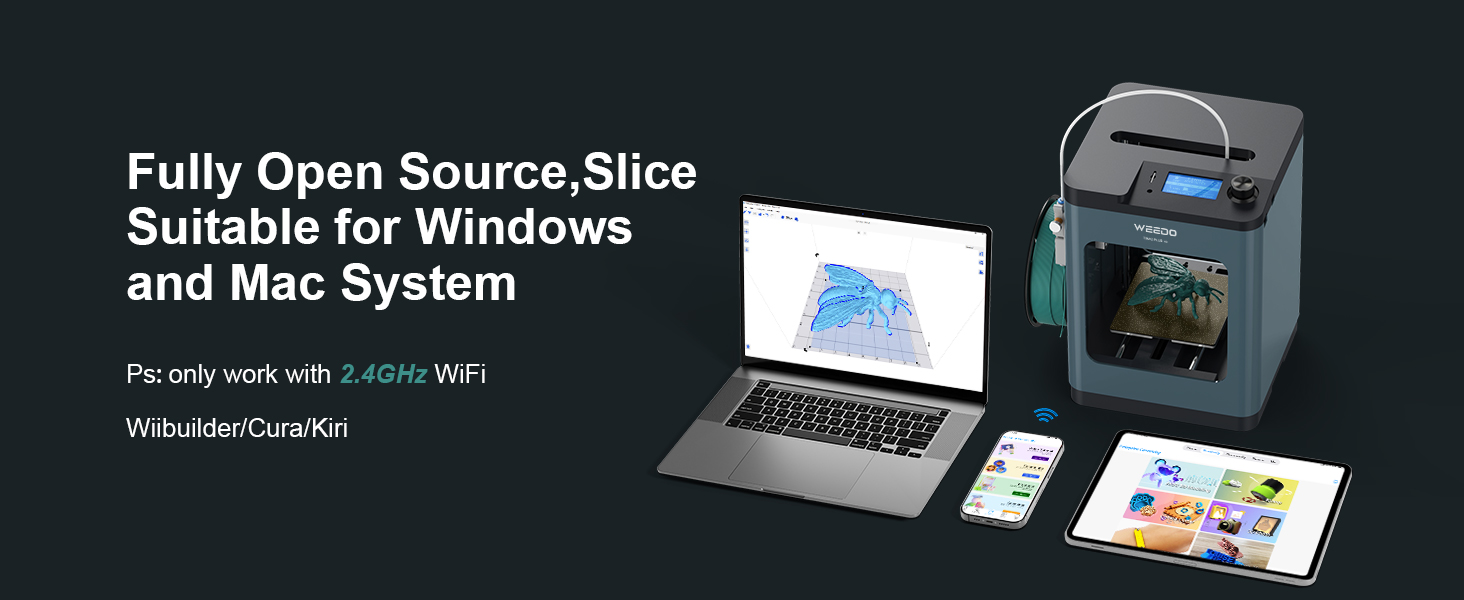
Image: The Poloprint Cloud App allows for remote control and access to a model library.
4.2 Printing from TF Card
- Prepare your 3D model file (.gcode) on a TF card.
- Insert the TF card into the printer's slot.
- On the printer's display, navigate to 'Print from TF' and select your desired file.
- Confirm the print to begin.
4.3 Key Features in Operation
- Auto Leveling: The Tina2Plus features 16-point auto-leveling, eliminating the need for manual bed leveling.
- Filament Detection Sensor: The printer will automatically pause printing if the filament breaks or runs out, preventing wasted material and time.
- PEI Plate: The PEI plate and heated bed (max 80°C) ensure strong adhesion during printing and easy removal of finished models.
- High-Speed Printing: Capable of printing at speeds up to 250mm/s with high-speed PLA filaments.
Image: The automatic filament runout sensor pauses printing and allows for resume printing after an outage.
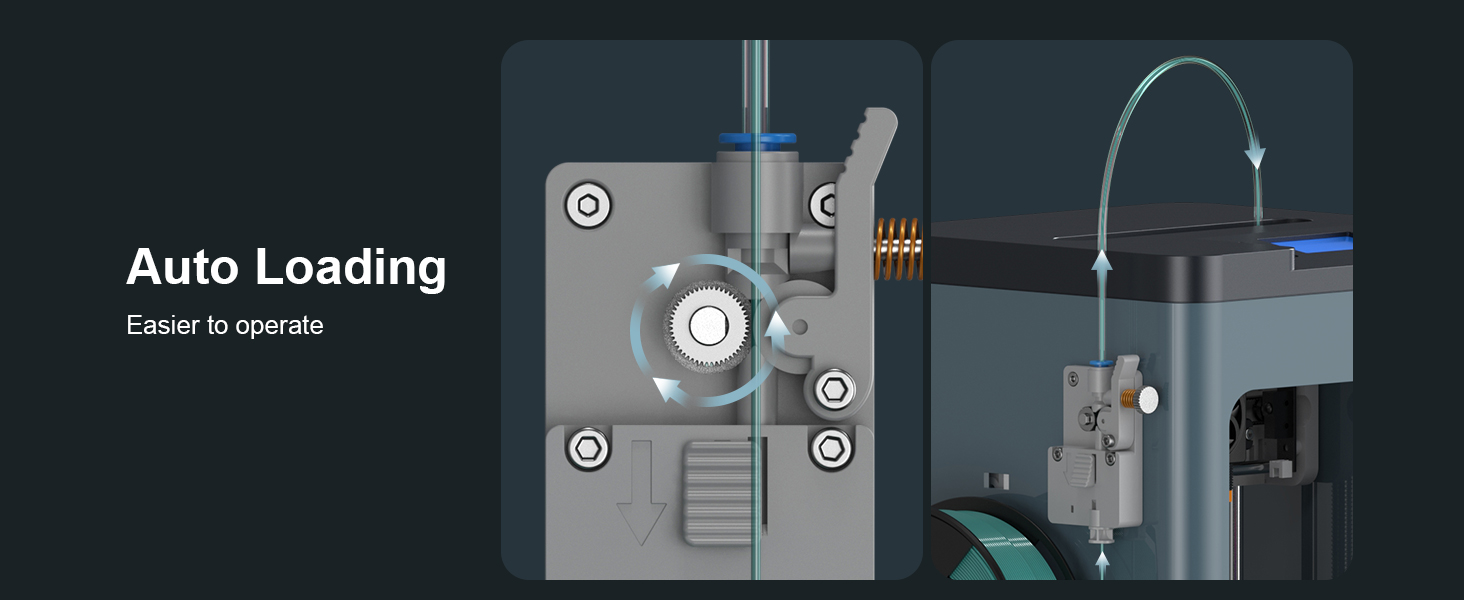
Image: The printer features automatic bed leveling for consistent first layers.
5. Maintenance
- Nozzle Cleaning: Regularly check the nozzle for filament buildup. If clogs occur, gently heat the nozzle and carefully remove any excess material.
- Print Plate Care: Keep the PEI print plate clean. If adhesion issues arise, ensure the plate is free of debris and consider replacing the adhesive surface if necessary.
- Lubrication: Periodically lubricate the Z-axis lead screw and smooth rods to ensure smooth movement.
- Firmware Updates: Check the official WEEDO website or Poloprint Cloud App for any available firmware updates to ensure optimal performance and new features.
6. Troubleshooting
- Print Not Sticking to Bed: Ensure the print bed is clean. Verify the auto-leveling function is working correctly. For PLA, the heated bed (up to 80°C) should aid adhesion.
- Filament Not Extruding: Check if the filament is properly loaded and not tangled. Ensure the nozzle is not clogged. Verify the extruder motor is functioning.
- Poor Print Quality: Ensure the correct filament type is selected in your slicing software. Check for proper bed leveling and nozzle temperature. Reduce print speed for finer details.
- WiFi Connection Issues: Ensure your mobile device's Bluetooth is on during initial setup. Verify the printer is within range of a 2.4GHz WiFi network. Re-scan the QR code or manually input network details if necessary.
- Printer Noise: While generally quiet, some operational sounds are normal. If unusual or excessive noise occurs, check for loose components or obstructions in moving parts.
7. Specifications
| Feature | Specification |
|---|---|
| Model Number | Tina2Plus |
| Brand | WEEDO |
| Product Dimensions | 8.2 x 8.2 x 11.4 inches (20.8 x 20.8 x 29 cm) |
| Item Weight | 6.6 pounds (3 kg) |
| Material | Metal |
| Max Print Speed | 250mm/s |
| Connectivity | WiFi (2.4GHz), Poloprint Cloud App |
| Leveling | 16-point Auto Leveling |
| Print Plate | PEI Plate, Heated Bed (max 80°C) |
| Filament Compatibility | PLA, PLA+, High-speed PLA, TPU |
| Safety Features | Semi-Enclosed, Touch-proof design, Filament Detection Sensor |
8. Safety Information
- The WEEDO Tina2Plus features a semi-enclosed, child-safe design. However, always supervise children during operation.
- Avoid touching the hotend (nozzle) during operation as it reaches high temperatures.
- Keep hands clear of all moving parts during printing.
- Use the printer in a well-ventilated area.
- Only use recommended filament types to prevent damage to the printer and ensure safe operation.

Image: The semi-enclosed design enhances safety, particularly for home and school use.
9. Warranty and Support
For warranty information, technical support, or service inquiries, please refer to the official WEEDO website or contact their customer service directly. Details can often be found in the included 'Unpacking Guide' or on the product's official support pages.

