1. Introduction
Thank you for choosing the Northair 3.5 Cu Ft Low Temperature Chest Freezer. This manual provides essential information for the safe and efficient operation, maintenance, and troubleshooting of your new appliance. Please read it thoroughly before use and retain it for future reference.
2. Safety Information
General Safety Precautions
- Ensure the freezer is placed on a stable, level surface.
- Maintain adequate ventilation around the freezer. Allow at least 5 inches of space around the unit for proper air circulation.
- Do not place the freezer in direct sunlight or near heat sources.
- Do not store explosive substances such as aerosol cans with a flammable propellant in this appliance.
- Unplug the appliance before cleaning or performing maintenance.
- Keep children away from the freezer, especially when the lid is open.
- Do not damage the refrigerant circuit.
Electrical Safety
- Connect the freezer to a grounded electrical outlet.
- Do not use extension cords or ungrounded adapters.
- Ensure the power cord is not damaged or pinched.
3. Product Overview
The Northair 3.5 Cu Ft Chest Freezer is designed for efficient low-temperature storage, featuring precise digital temperature control and a compact design suitable for various spaces.
Key Features
- Digital Temperature Control: Precise temperature adjustment from 14°F to -40°F.
- Optimal Storage: 3.5 Cubic Feet capacity with dimensions of 21.2"(L) x 21.8"(W) x 30.9"(H).
- Removable Baskets: Includes two baskets for organized storage.
- Energy Efficient: Low energy consumption of 0.45 kWh/24h.
- Quiet Operation: Engineered with a whisper-quiet compressor.
- Steady Lid: Lid stays open between 45° and 90° angles for hands-free access.
Components

Figure 3.1: Front view of the Northair 3.5 Cu Ft Chest Freezer. The freezer is red with a digital display on the lower right.

Figure 3.2: Close-up of the digital temperature display and control panel. It shows temperature, lock, freeze indicators, and +/- buttons.
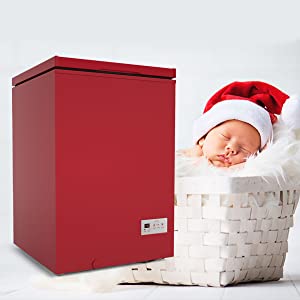
Figure 3.3: Two removable white storage baskets designed to fit inside the freezer for better organization.
4. Setup Instructions
Unpacking and Placement
- Remove all packaging materials, including foam and adhesive tape.
- Inspect the freezer for any shipping damage. Report any damage to the retailer immediately.
- Place the freezer on a firm, level floor in a dry, well-ventilated area.
- Ensure there is at least 5 inches (12.7 cm) of space around the freezer for proper air circulation. Avoid placing it near heat sources or in direct sunlight.
- Allow the freezer to stand upright for at least 4-6 hours before plugging it in. This allows the refrigerant fluids to settle.

Figure 4.1: The chest freezer positioned in a garage, demonstrating suitable placement with adequate surrounding space.
Initial Power-On
- Plug the freezer into a dedicated, grounded electrical outlet.
- The digital display will illuminate, and the compressor will begin to run.
- Allow the freezer to cool for several hours (e.g., 24 hours) before loading it with food.
5. Operating Instructions
Temperature Adjustment
Your Northair freezer features an intelligent digital display for precise temperature control.
- To unlock the control panel, press and hold the + and - buttons simultaneously for approximately 3 seconds until the "Lock" light turns off.
- Use the + and - buttons to adjust the desired temperature. The temperature can be set from 14°F to -40°F.
- After setting the temperature, the "Lock" light will automatically turn back on after about 40 seconds, preventing accidental changes.

Figure 5.1: Detailed view of the digital control panel with temperature display, lock, freeze indicators, and adjustment buttons.
Quick-Freeze Function
The Quick-Freeze function rapidly lowers the internal temperature for faster freezing of newly added items.
- Unlock the control panel as described above.
- Press the "Freeze" button (often indicated by a snowflake icon). The "Freeze" light will illuminate, indicating the function is active.
- The compressor will run continuously to achieve the lowest possible temperature.
- To deactivate, press the "Freeze" button again, or it will automatically turn off after a set period.

Figure 5.2: The freezer interior with items being rapidly frozen, illustrating the quick-freeze function.

Figure 5.3: Various food items such as Alaskan king crab, bluefin tuna, Boston lobster, Dippin' Dots, Norwegian salmon, and Australian Wagyu, which benefit from the freezer's -40°F flash freezing capability.
6. Maintenance
Cleaning the Interior
- Always unplug the freezer before cleaning.
- Remove all food items and store them in another freezer or cooler.
- Wash the interior with a mild detergent and warm water. Do not use abrasive cleaners or sharp objects.
- Rinse thoroughly and dry with a soft cloth.
Defrosting
Defrost the freezer when the frost layer reaches about 0.2 inches (5 mm) thick.
- Unplug the freezer.
- Remove all food and baskets.
- Locate the drain plug on the bottom left side of the freezer exterior. Place a shallow pan or tray beneath the drain to collect water.
- Remove the drain plug from the exterior and the interior drain cap.
- Allow the frost to melt naturally. You can speed up the process by placing bowls of hot water inside (ensure they do not touch the interior walls).
- Once defrosted, clean and dry the interior thoroughly.
- Replace the interior drain cap and exterior drain plug.
- Plug the freezer back in and allow it to cool before returning food.
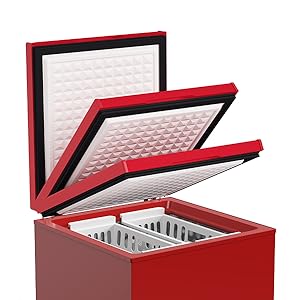
Figure 6.1: Close-up of the exterior drain plug, used for draining water during defrosting.
Video 6.1: A short demonstration of the DEMULLER Chest Freezer, highlighting its interior and removable baskets, which is similar in function to the Northair model for defrosting and organization.
7. Troubleshooting
| Problem | Possible Cause | Solution |
|---|---|---|
| Freezer does not operate. | Not plugged in; Power outage; Circuit breaker tripped. | Ensure plug is secure; Check power supply; Reset circuit breaker. |
| Temperature is not cold enough. | Temperature setting too high; Door not closed properly; Excessive food load; Poor ventilation. | Adjust temperature setting lower; Check door seal; Reduce food load; Ensure proper clearance around freezer. |
| Excessive frost buildup. | Door left open too long; High humidity; Faulty door seal. | Minimize door openings; Defrost the unit; Check and replace door seal if necessary. |
| Unusual noises. | Freezer not level; Objects vibrating against the unit; Normal compressor operation. | Adjust leveling feet; Remove vibrating objects; Some operational sounds are normal. |
8. Specifications
| Feature | Specification |
|---|---|
| Brand | Northair |
| Model Number | 574BG30006N2 |
| Capacity | 3.5 Cubic Feet |
| Temperature Range | 14°F to -40°F |
| Product Dimensions (D x W x H) | 21.8" x 21.2" x 30.9" |
| Installation Type | Freestanding |
| Door Hinges | Top |
| Door Material Type | Stainless Steel |
| Energy Consumption | 0.45 kWh/24h |
| Color | Red |
9. Warranty and Customer Support
For warranty information, please refer to the warranty card included with your product or contact Northair customer service. If you have any questions or require technical assistance, please contact Northair support through their official website or the contact information provided in your product packaging.
Online Support: Visit the Northair Store on Amazon for additional product information and support resources.
