Important Safety Instructions
Please read this entire instruction manual before installation and assembly. If you have any questions regarding any of the instructions or warnings, please contact your local distributor for assistance. Failure to understand the instructions or warnings may result in serious personal injury or property damage.
- This product is designed for installation on wood stud walls and solid concrete/brick walls. Do not install on drywall alone.
- The wall must be capable of supporting five times the weight of the television and the mount combined.
- Do not exceed the maximum weight capacity of 44 lbs (20 kg).
- Use this product only for its intended purpose as described in this manual. Do not use attachments not recommended by the manufacturer.
- If you are unsure about any part of the installation process, consult a qualified professional.
- Always ensure all screws are securely tightened before use. Do not overtighten screws.
- Keep children away from the installation area during assembly.
Package Contents
Verify that all components are present and undamaged before beginning installation. If any parts are missing or defective, contact customer service for replacement.
- Wall Plate Assembly
- TV Bracket Arms (2)
- Mounting Hardware Kit (various screws, washers, spacers, anchors)
- Bubble Level
- Cable Ties (3)
- Instruction Manual
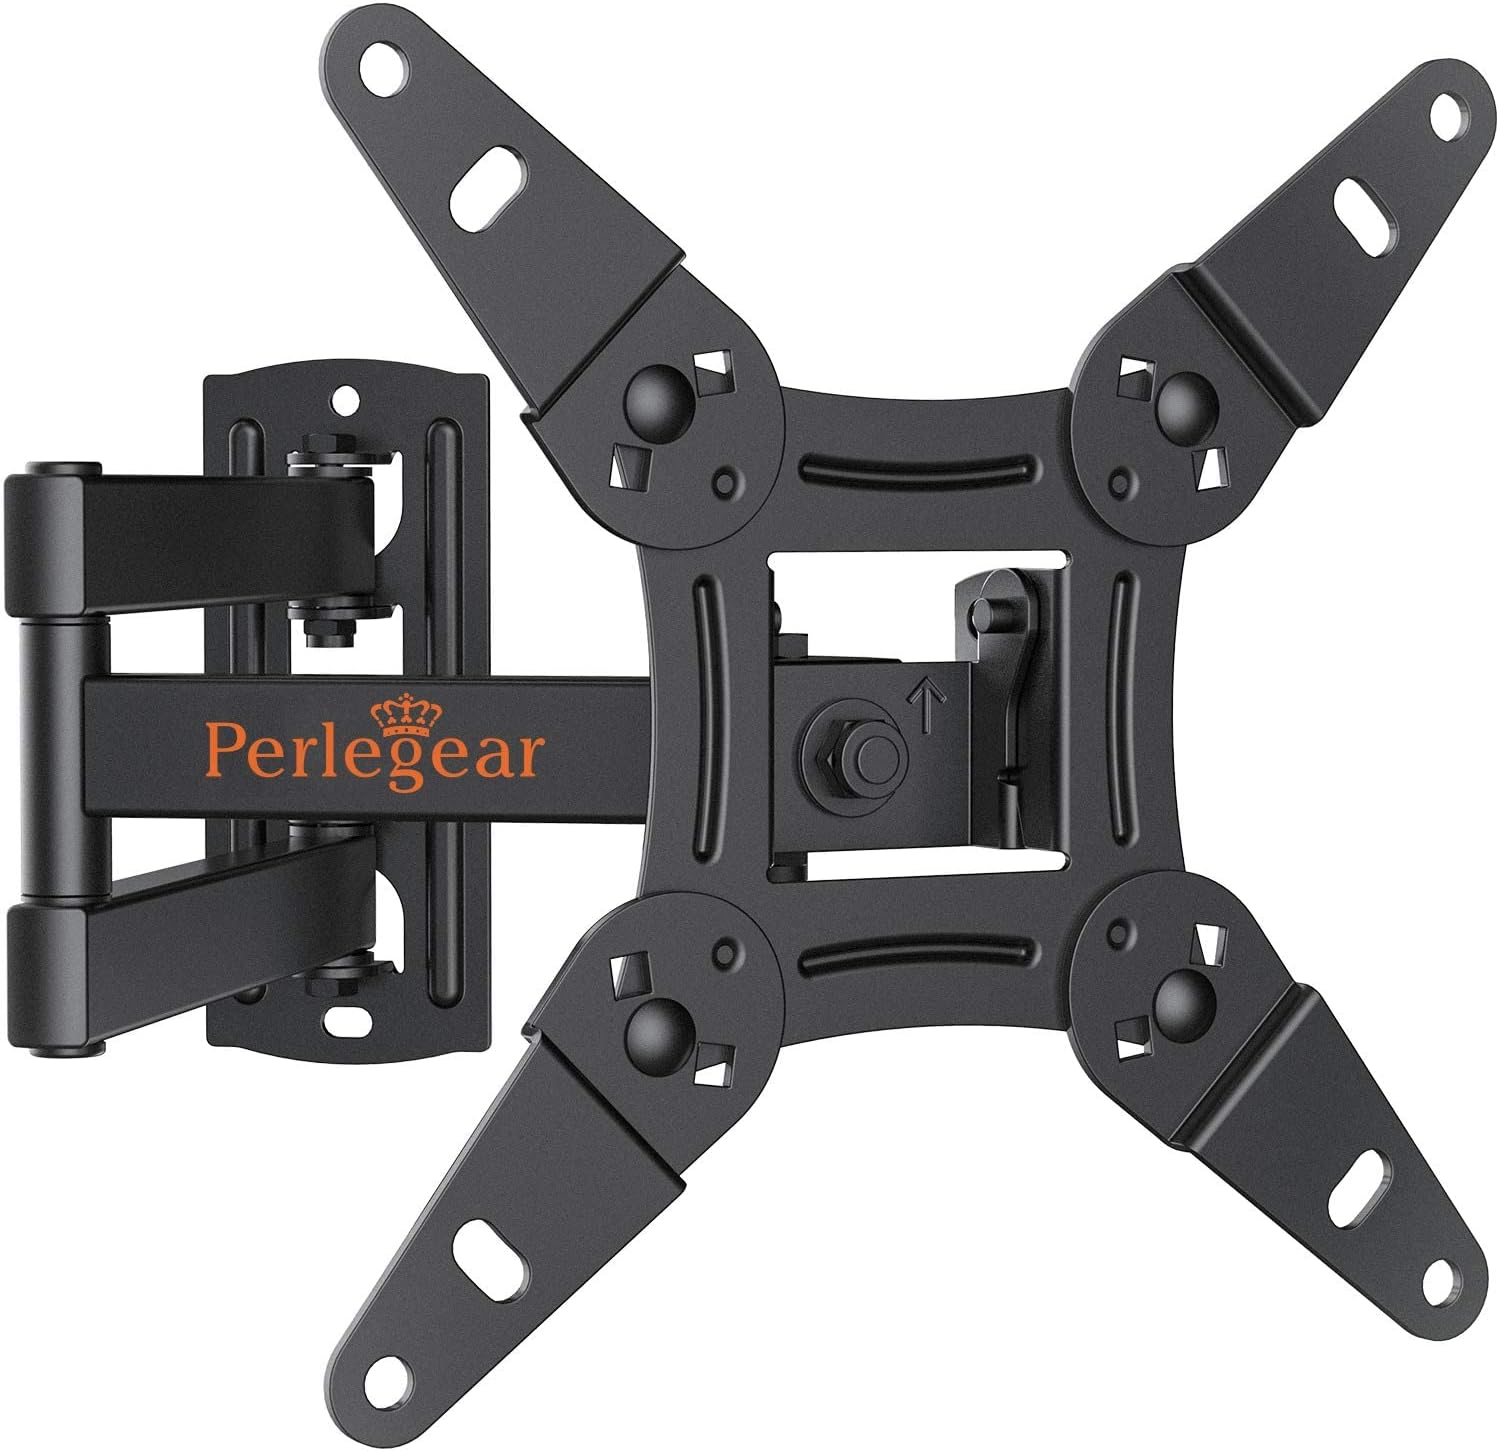
Image: Overview of the Perlegear PGPISF1 Full Motion TV Wall Mount, including the main mount assembly, a bubble level, and cable ties.
Product Specifications
| Model | PGPISF1 |
| Screen Size Compatibility | 13 - 42 inches |
| Weight Capacity | Up to 44 lbs (20 kg) |
| VESA Compatibility | 75x75mm, 100x100mm, 100x200mm, 200x100mm, 200x200mm |
| Tilt Angle | +5° to -15° |
| Swivel Angle | +/- 90° (maximum angle depends on TV size) |
| Rotation | 360° |
| Extension from Wall | 2.2 inches (retracted) to 14.5 inches (extended) |
| Material | Alloy Steel |

Image: Diagram illustrating various VESA mounting patterns (75x75mm, 100x100mm, 100x200mm, 200x100mm, 200x200mm) supported by the mount.
Installation / Setup
This section provides a general guide for installing your Perlegear PGPISF1 TV wall mount. For detailed graphical instructions, please refer to the included installation guide video or the printed manual.
Pre-Installation Checks:
- Check TV VESA Pattern: Ensure your TV's VESA pattern (the spacing of the mounting holes on the back of your TV) matches one of the supported patterns (75x75mm to 200x200mm).
- Check TV Weight: Confirm your TV's weight does not exceed 44 lbs (20 kg).
- Identify Wall Type: Determine if your wall is wood stud or solid concrete/brick. Different hardware is used for each.
Step-by-Step Installation Overview:
- Attach TV Brackets to TV: Secure the two TV bracket arms to the back of your television using the appropriate screws, washers, and spacers from the hardware kit. Ensure they are centered and level.
- Mark and Drill Wall Holes: Position the wall plate assembly on the wall at your desired height. Use the integrated bubble level to ensure it is perfectly horizontal. Mark the drilling points. For wood studs, locate the center of the stud. For concrete/brick, use a masonry drill bit.
- Mount Wall Plate: Secure the wall plate to the wall using the provided lag bolts and washers for wood studs, or concrete anchors and lag bolts for concrete/brick walls. Ensure the wall plate is firmly attached and level.
- Hang TV on Wall Plate: Carefully lift the television with the attached brackets and hook them onto the wall plate. Ensure the TV is securely seated.
- Secure TV to Wall Plate: Tighten the safety screws or locking mechanisms on the TV brackets to prevent the TV from accidentally lifting off the wall plate.
- Adjust Leveling: Use the post-installation leveling adjustment feature (typically +/-3°) to fine-tune the TV's horizontal position if needed.
Operating Instructions
The Perlegear PGPISF1 mount offers various adjustments to optimize your viewing experience.
Adjusting Tilt:
To reduce glare or achieve a better viewing angle, you can tilt your TV. The mount allows for a tilt range of +5° (upward) to -15° (downward). Loosen the tilt adjustment knobs on the TV brackets, adjust the TV to the desired angle, and then securely tighten the knobs.
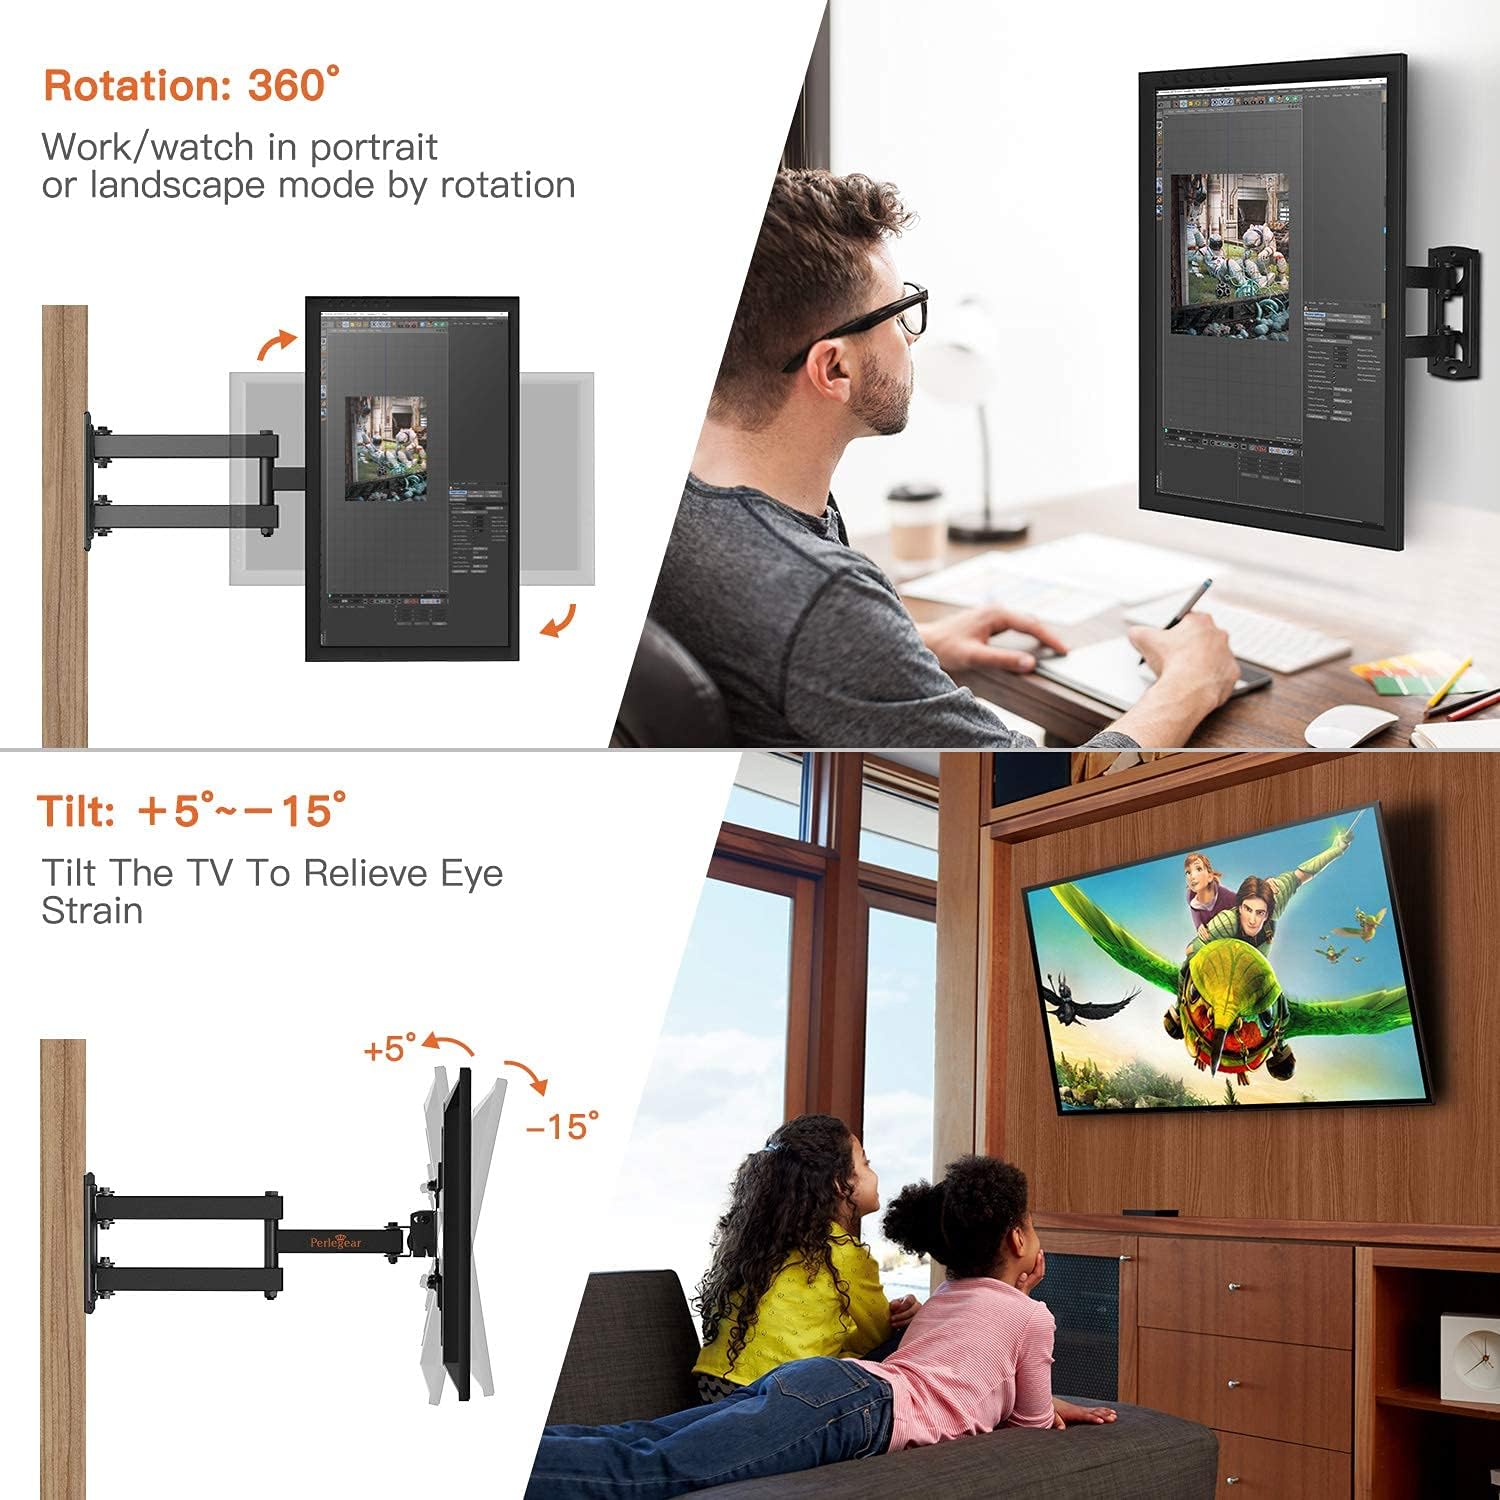
Image: Demonstrates the tilt adjustment range (+5° to -15°) and 360° rotation capability of the TV mount.
Adjusting Swivel and Extension:
The full motion arm allows you to swivel your TV up to +/-90° (left/right) and extend it from the wall. Gently pull the TV forward to extend the arm. Once extended, you can pivot the TV to the desired left or right angle. The maximum swivel angle depends on the size of your television. The mount can extend from 2.2 inches (retracted) to 14.5 inches (extended) from the wall.

Image: Illustrates the swivel functionality (up to 180°) and the extension range (2.2 to 14.5 inches) of the TV from the wall.
Adjusting Rotation:
This mount supports 360° rotation, allowing you to view your TV in either landscape or portrait mode. Gently rotate the TV to achieve the desired orientation.
Maintenance
Regular maintenance helps ensure the longevity and safe operation of your TV wall mount.
- Cleaning: Wipe the mount with a soft, dry cloth to remove dust. Avoid using abrasive cleaners or solvents.
- Check Connections: Periodically check all screws and bolts to ensure they remain tight. Do not overtighten.
- Inspect for Damage: Regularly inspect the mount for any signs of wear, damage, or corrosion. If any issues are found, discontinue use and contact customer support.
Troubleshooting
| Problem | Possible Cause | Solution |
|---|---|---|
| TV is not level after installation. | Wall plate not perfectly level, or TV brackets not adjusted. | Use the post-installation leveling adjustment feature on the mount (+/-3°). If necessary, re-check wall plate level. |
| Difficulty moving the TV (tilt, swivel, extension). | Joints are too tight. | Loosen the relevant adjustment bolts slightly. Do not loosen to the point of instability. |
| TV appears unstable or wobbly. | Screws are loose, or wall mounting is insufficient. | Immediately remove the TV. Re-tighten all screws. Ensure the wall plate is securely fastened to a suitable wall type. If issues persist, consult a professional. |
Warranty and Customer Support
Perlegear provides professional customer service before and after purchase. If you have any questions, concerns, or encounter any problems with your product, please do not hesitate to contact us. Our customer support team is available to assist you.
For assistance, please refer to the contact information provided with your product packaging or visit the official Perlegear website.


