1. Introduction
This manual provides essential instructions for the safe operation, setup, maintenance, and troubleshooting of your CREWORKS 220x750mm Metal Lathe. This miniature lathe is powered by a DC motor and is designed for high-quality precision machining, offering a spindle accuracy of 0.0004 inches (0.01 mm). Its aluminum frame provides a stable base for precise rotation and ensures durability and wear resistance. The 1100W metal lathe can be operated manually or automatically, featuring spindle speeds from 50 to 2250 RPM. The 3-jaw self-centering chuck ensures precise workpiece positioning for symmetrical results. This versatile mini metal lathe is suitable for miniature processing, model making, and general machining tasks.
Please read this manual thoroughly before operating the machine to ensure proper use and to prevent injury or damage.
2. Safety Instructions
Operating any machinery, especially a metal lathe, requires strict adherence to safety protocols to prevent serious injury. Always prioritize safety.
General Safety Rules:
- Always wear appropriate personal protective equipment (PPE), including safety glasses, hearing protection, and suitable clothing. Avoid loose clothing, jewelry, and long hair.
- Ensure the work area is clean, well-lit, and free from obstructions.
- Never operate the lathe under the influence of drugs, alcohol, or medication that may impair judgment.
- Before making any adjustments or maintenance, always disconnect the machine from the power source.
- Keep hands and fingers clear of moving parts, especially the chuck and cutting tools, during operation.
- Securely clamp all workpieces and tools. A loose workpiece can become a dangerous projectile.
- Do not leave the machine unattended while it is running.
- Familiarize yourself with the emergency stop button location and function.
- Ensure proper ventilation to dissipate fumes and dust.
- Read and understand all warning labels on the machine.

Figure 2.1: Overview of the CREWORKS 220x750mm Metal Lathe. Always observe safety warnings displayed on the machine.
3. Product Overview
The CREWORKS 220x750mm Metal Lathe is a robust benchtop machine designed for various metalworking tasks. Key features include a powerful 1100W motor, variable speed control, and a high-precision 3-jaw chuck.
Key Components:
- Headstock: Houses the main spindle, chuck, and gear train.
- Chuck: A 3-jaw self-centering chuck for holding workpieces.
- Bed: The main frame supporting the headstock, tailstock, and carriage. Features double V-shaped guide rails for smooth movement.
- Carriage: Moves along the bed, consisting of the saddle, cross-slide, and compound rest.
- Tool Post: Holds the cutting tools. This model features a 4-way tool post.
- Tailstock: Supports the far end of long workpieces or holds drilling/reaming tools.
- Lead Screw: Used for automatic feeding and thread cutting.
- Control Panel: Includes power switch, emergency stop, speed control, and digital RPM display.
- Splash Guard: Provides protection from chips and coolant.

Figure 3.1: The CREWORKS mini metal lathe is suitable for various applications including metalworking, drilling, internal and external threading, polishing, gyroscopic processing, woodworking, screw turning, and slot turning.

Figure 3.2: Overview of the mini metal lathe, highlighting key specifications such as 29.5 inch (750mm) distance between centers, 8.7 inch (220mm) swing over bed, 1100W motor power, and variable spindle speed of 50-2250 RPM.
Detailed Features:
- 8.7" x 29.5" Metal Lathe: This lathe, with dimensions of 220 x 750 mm (8.7 x 29.5 inches), provides 1.5 HP (1100W) and is ideal for small to medium-sized projects. It has a 750 mm (29.5") distance between centers and a 220 mm swing over the bed.
- 50-2250 RPM Continuous Speed: The machine offers continuous variable speed control, allowing for forward and reverse operation across the entire speed range. It supports both manual and adjustable automatic feed rates to suit various workpiece requirements.
- High Precision: The 3-jaw chuck has undergone extensive precision testing. The spindle is supported by precision tapered roller bearings, ensuring a spindle runout accuracy of 0.01 mm. This granular precision is crucial for tasks requiring high accuracy, such as thread cutting.
- Support and Protection: Features a soft start mechanism and a commutator for clockwise or counter-clockwise spindle rotation. Equipped with all-metal gears for durability. The steady rest (lunetta) provides additional support for long workpieces, ensuring vibration-free operation. A splash guard is included for operator safety.
- Stable Structure: The lathe bed is constructed from high-quality iron. With nylon gears, this lathe is wear-resistant, durable, and provides more precise and professional rotation. A digital screen clearly displays the rotational speed, ensuring precise and smooth operation.

Figure 3.3: The adaptable 3-jaw chuck with a clamping range of 125 mm. Internal jaws (A-A1) clamp from 2.5-40 mm, external jaws (B-B1) clamp from 38-125 mm, and external jaws (C-C1) clamp from 38-110 mm.

Figure 3.4: Granular precision controls with clear display and markings. Includes digital RPM display, handwheels for bed slide, cross slide, compound rest, and tailstock feed.
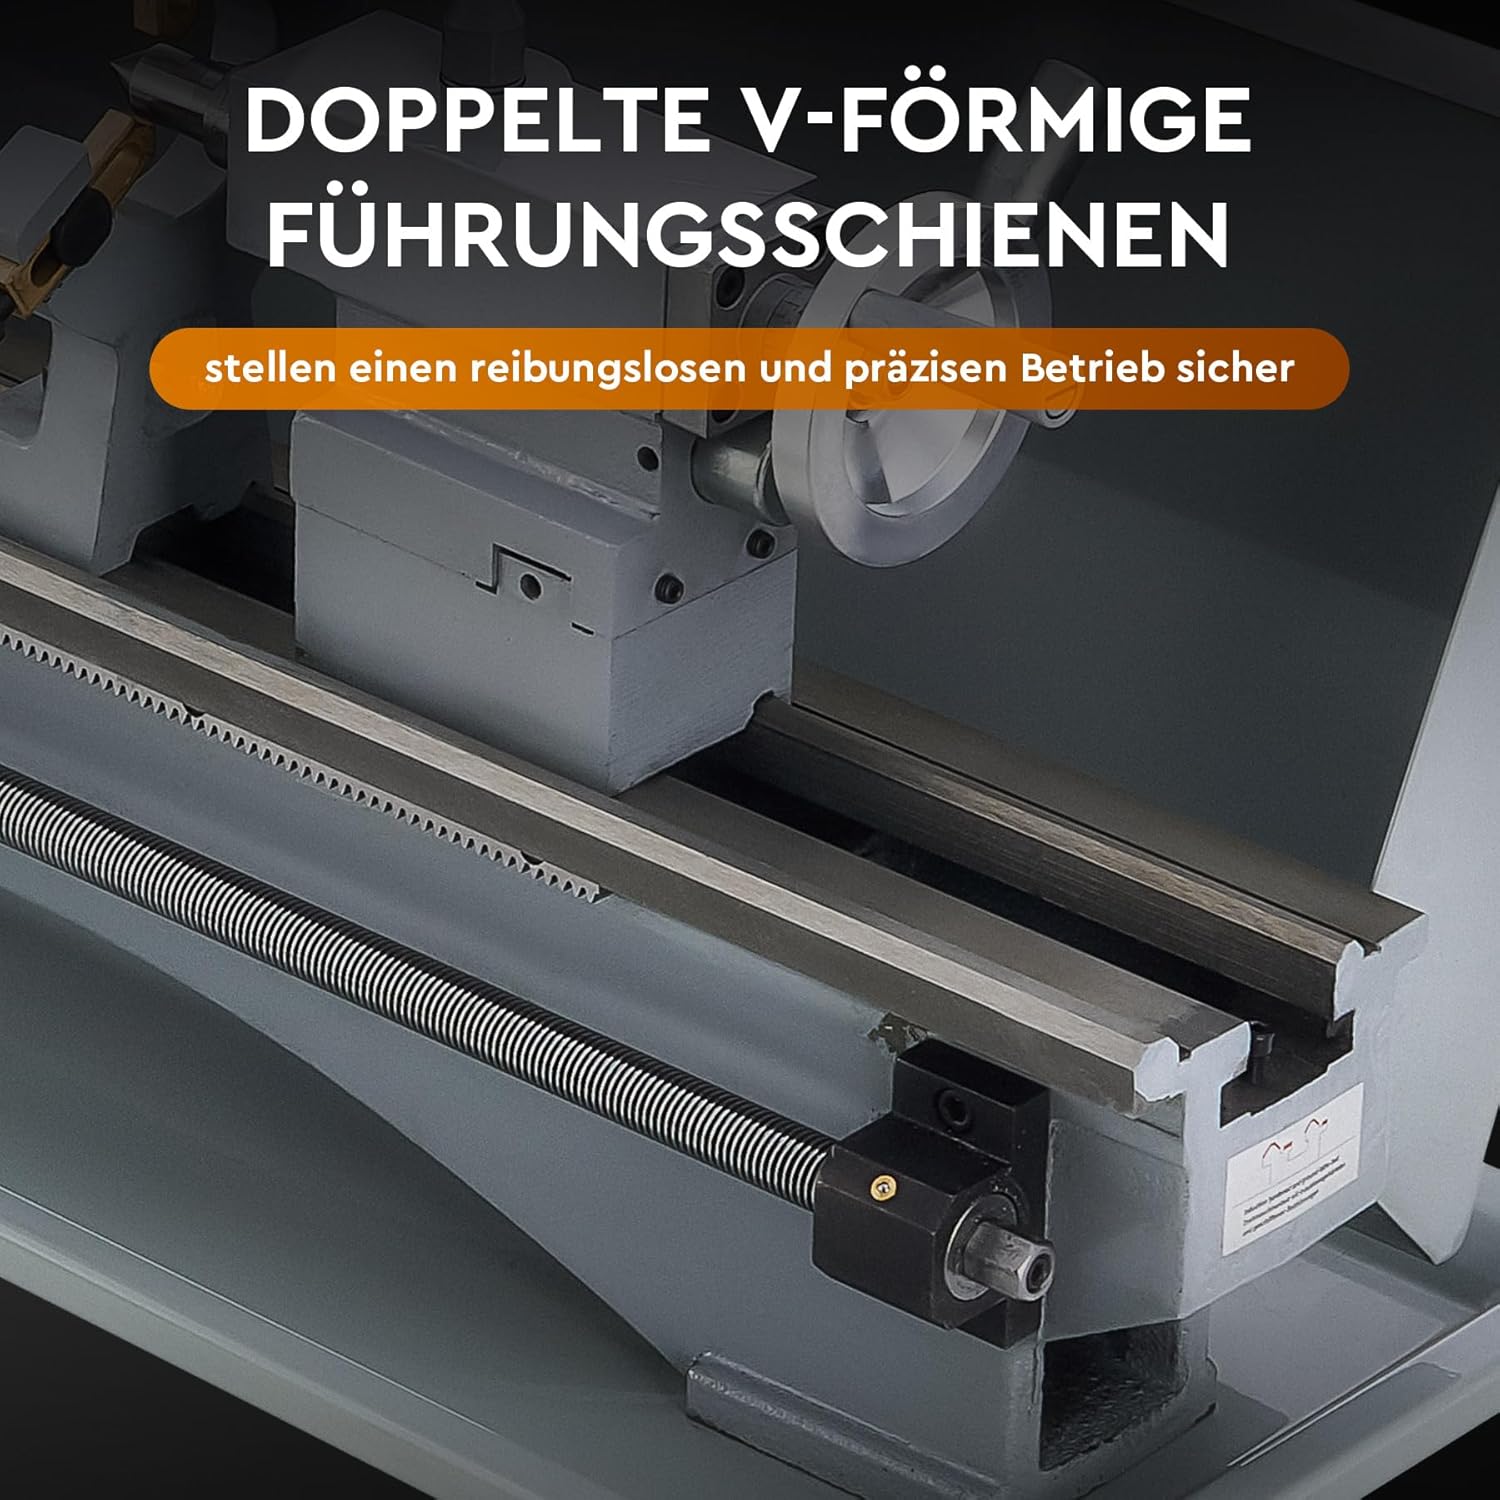
Figure 3.5: Double V-shaped guide rails ensure smooth and precise operation of the carriage and tailstock.

Figure 3.6: Digital display for stepless speed regulation up to 3000 RPM, providing clear and precise speed monitoring.
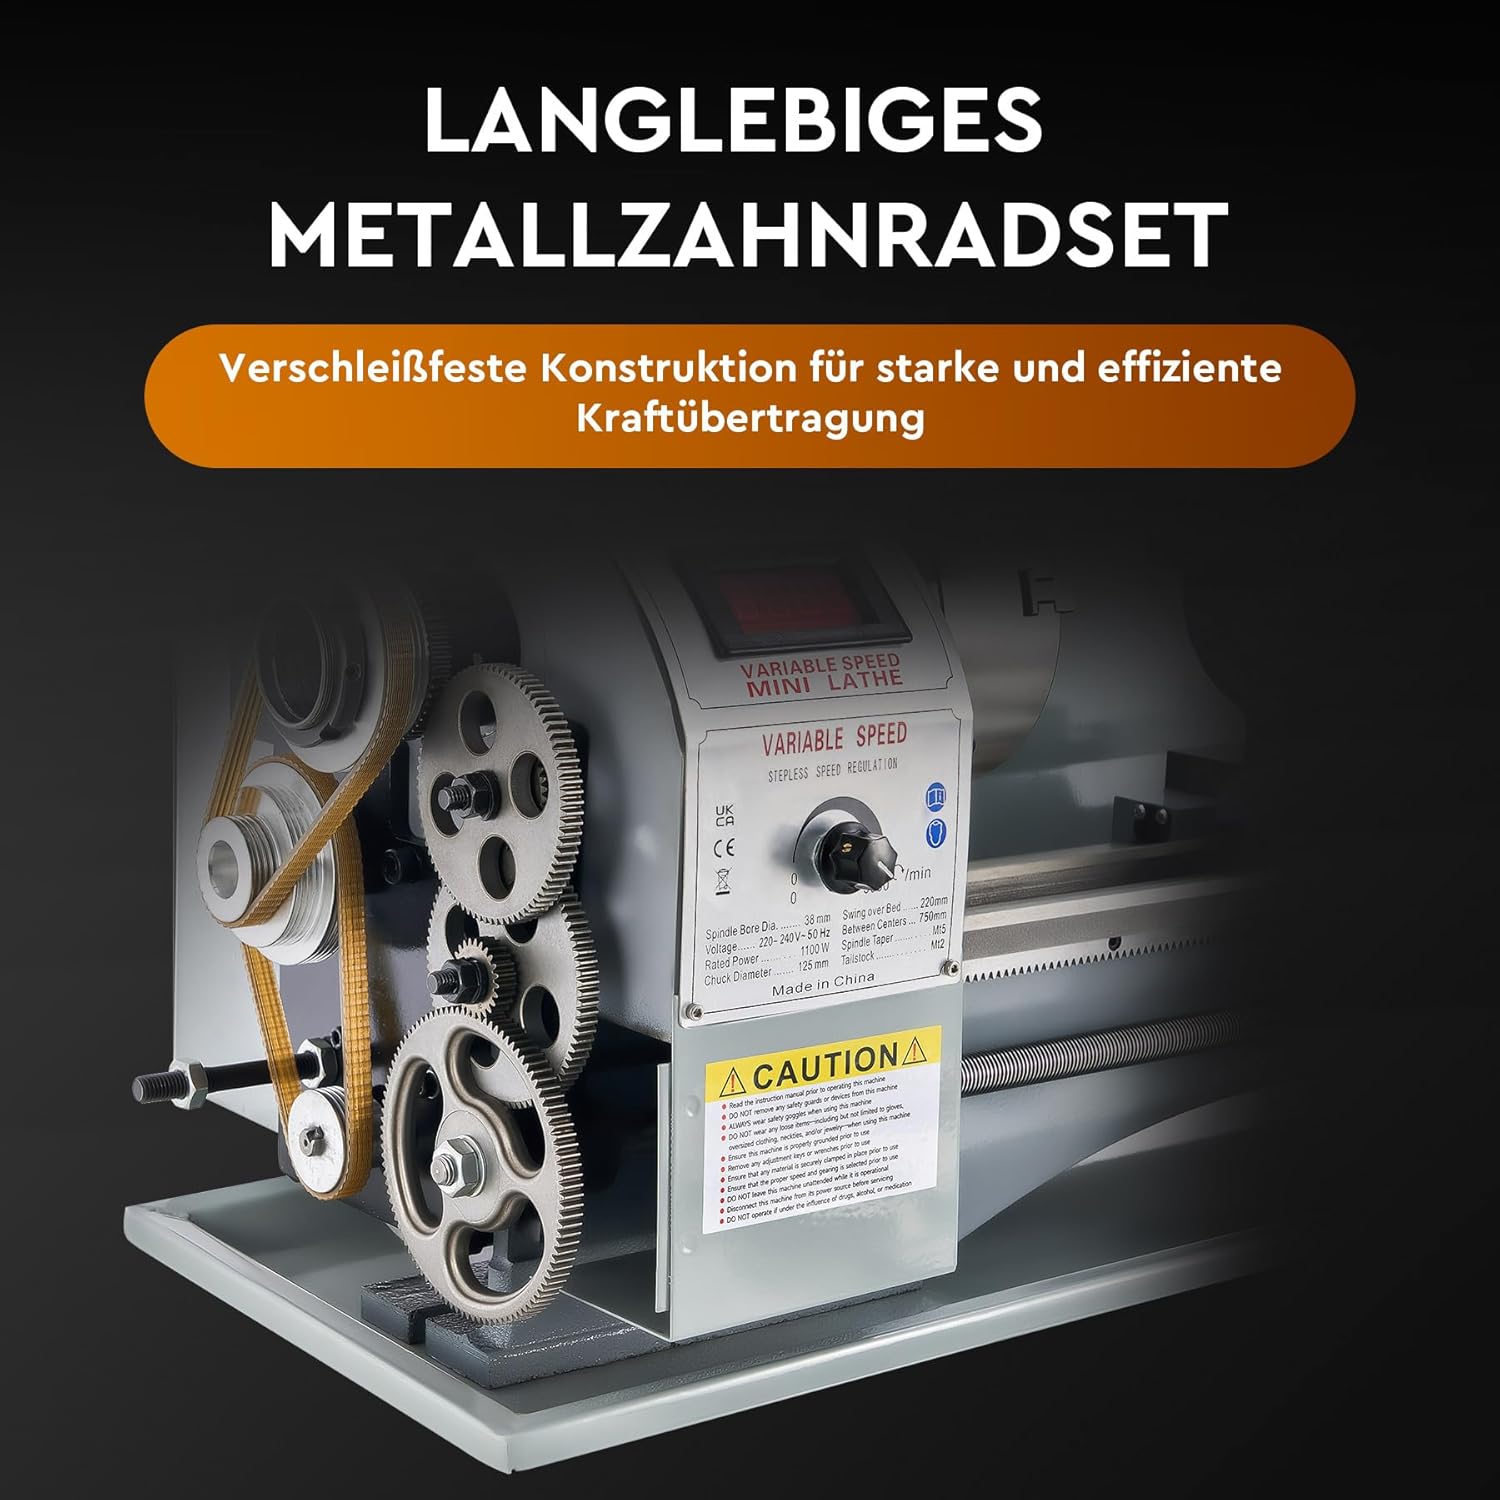
Figure 3.7: Durable metal gear set for wear-resistant construction and strong, efficient power transmission.
4. Setup
Proper setup is crucial for the safe and accurate operation of your lathe. Follow these steps carefully.
Unpacking and Placement:
- Carefully remove the lathe from its packaging. Due to its weight (75 kg), ensure you have adequate assistance or lifting equipment.
- Place the lathe on a sturdy, level workbench or stand capable of supporting its weight and resisting vibrations during operation.
- Ensure there is sufficient clear space around the lathe for safe operation and material handling.
Initial Cleaning and Lubrication:
- Clean all protective grease and rust-preventative coatings from the machine surfaces, especially the bedways, chuck, and tool post, using a suitable degreaser.
- Apply a thin layer of machine oil to all unpainted metal surfaces, particularly the bedways and lead screw, to prevent rust and ensure smooth movement.
- Lubricate all moving parts as indicated in the maintenance section.
Electrical Connection:
- Ensure the power supply matches the lathe's requirements (220V DC, 1100W).
- Connect the lathe to a grounded electrical outlet.
- Verify all electrical connections are secure before powering on.
5. Operating Instructions
This section details the basic steps for operating your CREWORKS metal lathe for various machining operations.
Basic Operation Steps:
- Power On: Ensure the emergency stop button is disengaged (pulled out). Turn the main power switch to the "ON" position.
- Workpiece Mounting:
- Open the 3-jaw chuck jaws using the chuck key.
- Insert the workpiece and tighten the jaws securely using the chuck key. Ensure the workpiece is centered and firmly held.
- Never leave the chuck key in the chuck.
- Tool Mounting:
- Loosen the tool post locking mechanism.
- Insert the appropriate cutting tool into one of the 4-way tool post slots.
- Adjust the tool height so that the cutting edge is precisely on the center line of the workpiece.
- Securely tighten the tool post locking mechanism.
- Speed Selection: Use the variable speed control knob to set the desired spindle RPM. The digital display will show the current speed. Refer to material guidelines for appropriate cutting speeds.
- Feed Adjustment: Select manual or automatic feed. For automatic feed, engage the lead screw and adjust the feed rate as needed.
- Start Machining: With all adjustments made and safety precautions observed, press the start button. Slowly bring the cutting tool into contact with the workpiece using the handwheels for the cross-slide and compound rest.
- Monitoring: Continuously monitor the cutting process, chip formation, and tool wear. Apply cutting fluid if necessary.
- Stop Operation: When finished, retract the tool, disengage the feed, and press the stop button. For emergencies, press the emergency stop button.

Figure 5.1: Overview of granular control features including the digital display, 4-way tool post, tailstock quill, and tailstock control handle.
Thread Cutting:
The lathe is capable of cutting both metric (0.5-3 mm pitch) and imperial (8-44 T.P.I.) threads. Refer to the thread cutting table on the machine's control panel for specific gear settings required for different thread pitches.

Figure 5.2: The control panel features a thread cutting table, providing guidance on gear configurations for various thread pitches.
6. Maintenance
Regular maintenance ensures the longevity and optimal performance of your CREWORKS metal lathe. Always disconnect power before performing maintenance.
Daily Maintenance:
- Clean all chips and debris from the lathe bed, carriage, and chuck using a brush or shop vacuum.
- Wipe down all exposed metal surfaces to prevent rust.
- Check and lubricate the bedways and lead screw with a light machine oil.
Weekly/Monthly Maintenance:
- Inspect the chuck jaws for wear or damage.
- Check the tightness of all fasteners and adjust as necessary.
- Lubricate all gears and moving parts as per the lubrication points indicated in the manual (if provided by manufacturer).
- Inspect the drive belts for tension and wear. Adjust or replace if needed.
- Clean the motor and electrical components, ensuring no dust or metal particles accumulate.
Long-Term Storage:
- Thoroughly clean and lubricate the entire machine.
- Apply a rust-preventative coating to all unpainted metal surfaces.
- Cover the lathe with a protective cover to shield it from dust and moisture.
7. Troubleshooting
This section provides solutions to common issues you might encounter with your metal lathe.
| Problem | Possible Cause | Solution |
|---|---|---|
| Lathe does not power on. |
|
|
| Spindle does not rotate or rotates intermittently. |
|
|
| Poor surface finish on workpiece. |
|
|
| Excessive noise during operation. |
|
|
8. Specifications
Technical specifications for the CREWORKS 220x750mm Metal Lathe.

Figure 8.1: Visual representation of key technical data and dimensions.
| Parameter | Value |
|---|---|
| Brand | CREWORKS |
| Model Number | 220x750mm (Internal: 8c6f99e3-700e-40bb-b789-b2b36e181e77) |
| Material | Iron, Metal |
| Rated Power | 1100 W (1.5 HP) |
| Voltage | 220 V (DC) |
| Swing Over Bed | 220 mm (8.7 inches) |
| Distance Between Centers | 750 mm (29.5 inches) |
| Spindle Bore | 38 mm |
| Spindle Taper | MK#5 |
| Tailstock Quill Taper | MK#2 |
| Chuck Diameter | 125 mm |
| Spindle Speed Range | 50-2250 RPM (Variable) |
| Metric Thread Pitch Range | 0.5-3 mm |
| Imperial Thread Pitch Range | 8-44 T.P.I. |
| Product Dimensions (L x W x H) | 111 x 43 x 34.5 cm |
| Net Weight | 75 kg |
9. Warranty and Support
For warranty information, technical support, or service inquiries, please contact CREWORKS customer service. Keep your purchase receipt and product model number handy when contacting support.
Contact Information:
- Refer to your product packaging or the official CREWORKS website for the most current contact details.
- Online Support: Visit the CREWORKS Store on Amazon