1. Introduction
The ALONEFIRE X37 Tactical 4-in-1 LED Flashlight is a versatile and durable lighting tool designed for various outdoor activities and emergency situations. It features multiple light colors, adjustable focus, and a power bank function for charging other devices. This manual provides detailed instructions for its setup, operation, and maintenance to ensure optimal performance and longevity.

Figure 1: ALONEFIRE X37 Tactical 4-in-1 LED Flashlight
2. Product Features
- 4-in-1 Multicolor LED: Equipped with individual Red, Green, Blue, and White LED light sources, offering high brightness and a beam distance of 100-200 meters.
- Adjustable Focus (Zoomable): Allows users to switch between a focused spotlight for long-range illumination and a wide floodlight for broader area coverage.
- Durable Aluminum Alloy Shell: Constructed from high-quality aluminum alloy for enhanced heat dissipation, reliability, and durability.
- USB Rechargeable: Features a high-capacity rechargeable battery with USB charging support and overcharge protection. A charging indicator displays the power status.
- Reverse Charging (Power Bank Function): Can be used as an improvised power bank via its USB-A output port to charge other devices.
- 1/4 Inch Threaded Hole: Designed for mounting the flashlight on a stand, providing stable illumination for photography or other activities.

Figure 2: Key components of the X37 Flashlight, including the Micro USB Charging Port, USB A Reverse Charging Port, Lamp Head, Power Switch/Charging Indicator, RGBW 4PCS Individual LED, Brass Contactor, and Non-slip Handle.
3. Package Contents
Verify that all items are present in the package:
- ALONEFIRE X37 Flashlight Unit
- High-Capacity Rechargeable Battery (Nonstandard Battery)
- USB Charging Cable (USB-A to USB-C)
- Lanyard
- User Manual (this document)

Figure 3: Included accessories: flashlight, lanyard, USB charging cable, and battery.
4. Setup and Installation
4.1 Battery Installation
- Unscrew the tail cap of the flashlight.
- Insert the provided rechargeable battery with the positive (+) pole facing towards the flashlight head (lamp head).
- Securely screw the tail cap back onto the flashlight.
4.2 Initial Charging
Before first use, fully charge the flashlight battery. Refer to Section 6 for detailed charging instructions.
5. Operating Instructions
5.1 Power On/Off and White Light Modes
- Press the power switch button once to turn on the flashlight in White Light mode.
- Subsequent presses of the power switch button will cycle through the White Light modes: High → Medium → Low → Strobe → SOS.
- To turn off the flashlight, press and hold the power switch button for approximately 2 seconds in any mode.
5.2 Multicolor Light Modes (Red, Green, Blue)
- From the OFF state, double-press the power switch button to activate the Multicolor Light mode.
- Each subsequent press of the power switch button will cycle through the colors: Red → Green → Blue.
- To turn off the flashlight, press and hold the power switch button for approximately 2 seconds in any mode.
Video 1: Demonstration of the ALONEFIRE X004 Multicolor Flashlight, showcasing Red, Green, and Blue light modes. Note: This video features a similar model (X004) and demonstrates the multi-color functionality.
Video 2: ALONEFIRE SV96 RGB Flashlight showcasing White, Green, and Blue light modes. This video demonstrates the color output of a similar ALONEFIRE RGB flashlight.
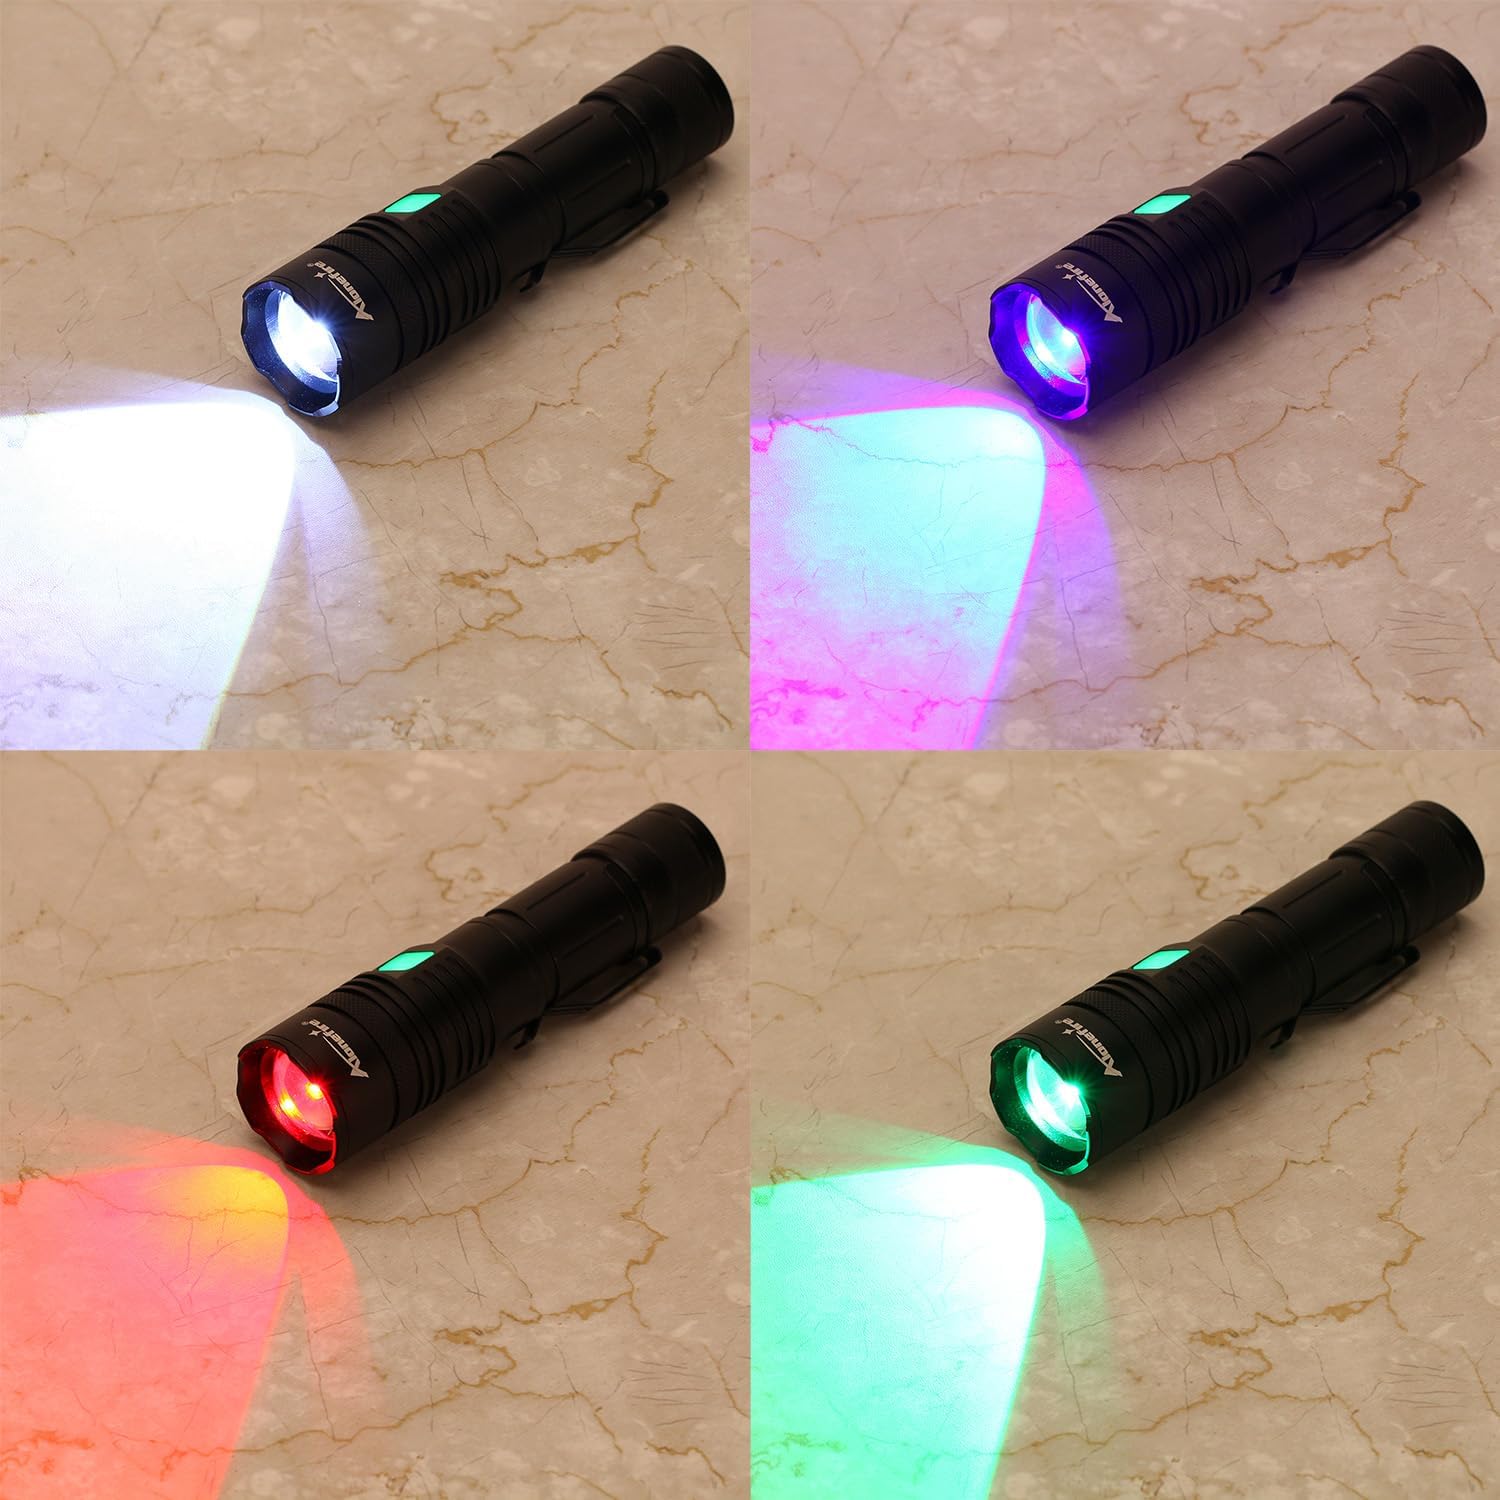
Figure 4: The X37 Flashlight demonstrating its four distinct light colors: White, Blue, Green, and Red.
5.3 Adjustable Focus (Zoom)
To adjust the focus of the light beam, gently slide the head of the flashlight forward or backward. Sliding forward will narrow the beam into a spotlight, while sliding backward will widen it into a floodlight.

Figure 5: The zoomable feature allows adjustment from a focused beam (zoom in) to a wide floodlight (zoom out).
5.4 Side Light Operation
Some versions of this flashlight may include a side COB light. If present, typically a quick double-press or a long press of the power button (depending on the specific model variant) will activate the side light. Cycle through its modes (e.g., White High, White Low, Red, Red Strobe) with single presses.
Video 3: A seller video demonstrating the basic usage and mode switching of a similar flashlight model, including the side light function.
6. Charging and Power Bank Function
6.1 Charging the Flashlight
- Locate the Micro USB charging port on the flashlight body, usually protected by a rubber cover.
- Connect the provided USB charging cable to the flashlight's charging port and to a compatible USB power source (e.g., wall adapter, computer USB port).
- The charging indicator will typically show red during charging and turn green when fully charged.
- Charging time is approximately 3-5 hours for a full charge.

Figure 6: The flashlight being charged via USB. The indicator light shows red for charging and green for fully charged.
6.2 Using as a Power Bank (Reverse Charging)
The flashlight supports reverse charging, allowing it to act as a power bank for other devices.
- Locate the USB-A output port on the flashlight body, usually next to the charging port.
- Connect your device's charging cable to the flashlight's USB-A output port.
- The flashlight will begin charging your device. This feature is useful for emergencies or when away from a power source.

Figure 7: The flashlight's reverse charging function in use, providing power to a smartphone.
Video 4: A seller video demonstrating the charging capabilities of a rechargeable flashlight, including its use as a power bank.
7. Maintenance
- Cleaning: Wipe the flashlight body with a soft, damp cloth. Do not use abrasive cleaners or solvents.
- Battery Care: For optimal battery life, avoid fully discharging the battery frequently. Recharge it regularly, especially if stored for extended periods.
- Storage: Store the flashlight in a cool, dry place away from direct sunlight and extreme temperatures. If storing for a long time, remove the battery.
- Water Resistance: The flashlight has a waterproof rating (refer to specifications). Ensure all caps and covers are securely closed before exposure to water.
8. Troubleshooting
- Flashlight not turning on:
- Ensure the battery is correctly installed with the correct polarity.
- Check if the battery is charged. Recharge if necessary.
- Ensure the tail cap is fully tightened.
- Flashlight not charging:
- Verify the USB cable is securely connected to both the flashlight and the power source.
- Try a different USB cable or power source.
- Check the charging indicator for status.
- Light output is dim:
- The battery may be low. Recharge the flashlight.
- Ensure the lens is clean and free from obstructions.
9. Specifications
| Feature | Specification |
|---|---|
| Light Source Type | LED (Red, Green, Blue, White) |
| Power Source | Battery Powered |
| Battery Type | 1 Nonstandard Battery (included) |
| Battery Cell Composition | Lithium Ion |
| Voltage | 5 Volts |
| Material | Aluminum Alloy |
| Water Resistance Level | Waterproof |
| Included Components | Charger |
| Manufacturer | Alonefire |
| Country of Origin | China |
10. Warranty and Support
For warranty information or technical support, please refer to the documentation included with your purchase or contact the seller directly. Keep your purchase receipt as proof of purchase.


