
JieSuDa a8827aca-a1cf-4f45-bfe3-1be15646abcc
Contents
JieSuDa N9 Body Camera User Manual
Model: a8827aca-a1cf-4f45-bfe3-1be15646abcc
Introduction
This manual provides comprehensive instructions for the operation, maintenance, and troubleshooting of your JieSuDa N9 Body Camera. Designed for versatility and reliability, this compact device offers high-definition video recording, clear night vision, and extended battery life, making it suitable for various applications including law enforcement, outdoor activities, and personal security.

Figure 1: Front and back view of the JieSuDa N9 Body Camera.
Product Features
- High-Definition Video & Night Vision: Records 2304x1296p 30MP HD video and audio. Equipped with high-intensity infrared LEDs for clear footage up to 30 ft in darkness.
- Long Battery Life: Features a powerful 2600mAh battery, providing up to 10 hours of continuous recording.
- Large Memory Capacity: Built-in 128GB storage for videos, audio, and pictures. Supports expansion up to 512GB. Includes automatic memory clearing for loop recording.
- Ultra-Wide Angle Lens: A 165° ultra-wide angle lens captures a broad view with detailed environmental information.
- One-Button Design: Simplifies operation with a single button for Police Panic Mode, activating a loud audio siren.
- Lightweight & Portable: Compact design (2.68 x 1.69 x 1.34 inches, 4.8 ounces) with stable 180° rotation clips for versatile attachment to clothing or belts.
- 1.54-inch LCD Monitor: Allows instant playback of recorded footage.
Package Contents
Upon unboxing, please verify that all items listed below are included in your package:
- JieSuDa N9 Body Camera
- USB Charging Cable
- Two Rotatable Clips (one short, one long)
- Micro SD Card Reader
- User Manual (this document)
- Built-in Battery
Video 1: Unboxing and overview of the JieSuDa N9 Body Camera and its accessories. This video demonstrates the physical components included in the package and provides a brief look at the camera's design and features.
Setup
1. Attaching the Clip
The N9 Body Camera comes with two rotatable clips for flexible attachment. Choose the clip that best suits your needs (e.g., for a shirt pocket, belt, or backpack strap). Align the clip with the slot on the back of the camera and push firmly until it clicks into place. The clip can rotate 180 degrees for optimal positioning.

Figure 2: The N9 Body Camera with its rotatable clips, demonstrating how it can be attached to a shirt or belt for hands-free recording.
2. Inserting/Upgrading Memory Card
The camera has built-in 128GB storage. For additional storage, you can insert a Micro SD card (up to 512GB). Locate the Micro SD card slot on the side of the camera, gently insert the card until it clicks. Ensure the card is inserted correctly to avoid damage.
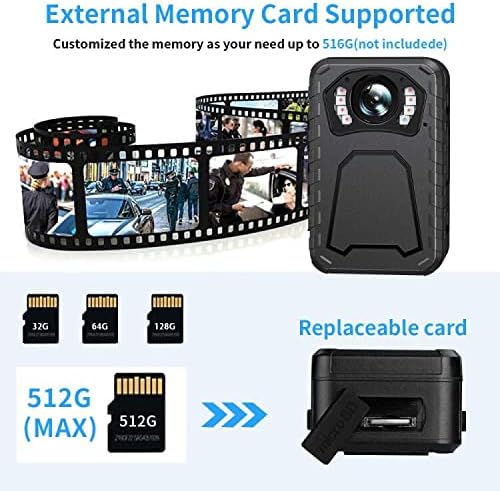
Figure 3: Illustration of the external memory card slot on the N9 Body Camera, showing compatibility with various Micro SD card sizes up to 512GB.
3. Charging the Device
Before first use, fully charge the camera. Connect the supplied USB cable to the camera's USB port and the other end to a power source (e.g., computer USB port, wall adapter). The charging indicator light will show the charging status. A full charge provides up to 10 hours of working time.
Operating Instructions
Familiarize yourself with the camera's buttons and functions:

Figure 4: Diagram illustrating the key functions and button layout of the N9 Body Camera, including indicator light, night vision light, sound hole, alarm, lens, trumpet, return key, enter key, menu key, video key, USB interface, reset hole, power ON/OFF, camera key, and audio key.
1. Power ON/OFF
- To Power ON: Press and hold the Power ON/OFF button until the device powers on.
- To Power OFF: Press and hold the Power ON/OFF button until the device powers off.
2. Recording Video
- Press the Video key to start video recording.
- Press the Video key again to stop recording.
- The camera supports loop recording, automatically clearing older files if storage is full.
3. Taking Photos
- Press the Camera key to take a still photo.
4. Recording Audio
- Press and hold the Audio key for 3 seconds to start audio recording.
- Press the Audio key again to stop audio recording.
5. Night Vision Mode
The N9 Body Camera is equipped with high-intensity infrared LEDs for clear night vision up to 30 feet. To activate/deactivate night vision, short press the Audio key.

Figure 5: The N9 Body Camera's IR Night Vision capability, showing clear black and white footage in low-light conditions.
6. Motion Detection
When enabled, the camera will automatically begin recording video when a moving object enters its shooting range, conserving battery and storage space.
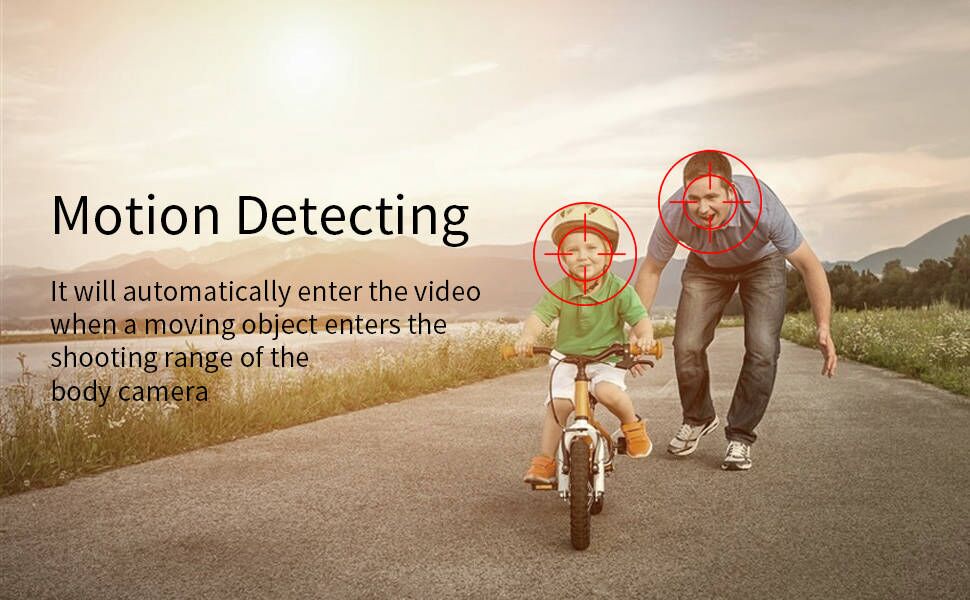
Figure 6: Illustration of the motion detection feature, highlighting how the camera automatically records when movement is detected.
7. Playback
Use the 1.54-inch LCD monitor to instantly review recorded videos and photos. Navigate through files using the menu buttons.

Figure 7: The 1.54-inch LCD screen on the N9 Body Camera, used for playback and menu settings.
8. Transferring Files to Computer
To transfer files, connect the camera to your computer using the USB cable. Alternatively, remove the Micro SD card and insert it into the provided Micro SD to USB 2.0 adapter, then plug the adapter into your computer's USB port. Your computer should recognize the device as a removable drive, allowing you to access and transfer files.
Maintenance
- Cleaning: Use a soft, dry cloth to clean the camera body. For the lens, use a specialized lens cleaning cloth and solution. Avoid harsh chemicals.
- Storage: Store the camera in a cool, dry place away from direct sunlight and extreme temperatures.
- Battery Care: For optimal battery life, avoid fully discharging the battery frequently. Charge the camera regularly, even if not in use, to maintain battery health.
- Software Updates: Check the manufacturer's website periodically for any firmware updates that may improve performance or add new features.
Troubleshooting
| Problem | Possible Cause | Solution |
|---|---|---|
| Camera does not power on. | Low battery; device malfunction. | Charge the camera fully. If problem persists, perform a reset using the reset hole. |
| Poor night vision quality. | IR LEDs not activating; environmental factors. | Ensure night vision mode is activated. Clean the lens. Test in completely dark conditions. |
| Recorded files are corrupted or missing. | Faulty Micro SD card; improper shutdown. | Use a high-quality, reputable brand Micro SD card (e.g., SanDisk). Always power off the camera correctly before removing the card. Format the card regularly. |
| Camera not recognized by computer. | Faulty USB cable; driver issue; incorrect connection. | Try a different USB cable or USB port. Ensure the camera is powered on when connected. Use the provided card reader for direct access to the SD card. |
| Clip detaches easily. | Improper attachment; worn clip. | Ensure the clip is securely attached and clicks into place. If the clip is worn, contact customer support for a replacement. |
Specifications
| Feature | Detail |
|---|---|
| Brand | JieSuDa |
| Model Number | a8827aca-a1cf-4f45-bfe3-1be15646abcc |
| Video Capture Resolution | 1296p (2304x1296p) |
| Photo Resolution | 30MP |
| Lens Angle | 165° Ultra Wide Angle |
| Night Vision Range | Up to 30 ft (with High-Intensity Infrared LEDs) |
| Battery Capacity | 2600mAh Lithium Polymer |
| Battery Life | Up to 10 hours (recording) |
| Internal Storage | 128GB |
| External Memory Support | Micro SD up to 512GB |
| Screen Size | 1.54 Inches LCD |
| Dimensions | 2.68 x 1.69 x 1.34 inches |
| Weight | 4.8 ounces |
| Connectivity Technology | Wireless |
| Photo Sensor Technology | CMOS |
| Video Capture Format | MPEG 4 |
| Supported Audio Format | AAC |
Warranty and Support
For warranty information and technical support, please refer to the official JieSuDa Store or contact their customer service. Protection plans are available for purchase separately to extend coverage for your device.
Official User Guide (PDF): Download Here
Ask a question about this manual
Ask about setup, troubleshooting, compatibility, parts, safety, or missing instructions. Manuals+ will review the question and use this page’s manual context to help answer it.