FROSAB FHSM-201
ZOKOP FHSM-201 Sewing Machine User Manual
Model: FHSM-201 | Brand: FROSAB
1. Introduction
This manual provides comprehensive instructions for the safe and efficient operation of your FROSAB FHSM-201 Portable Household Electric Sewing Machine. Designed for DIY projects and everyday sewing tasks, this compact and stable machine offers ease of use and reliable performance.

Figure 1.1: FROSAB FHSM-201 Sewing Machine with Extension Table.
This image shows the FROSAB FHSM-201 sewing machine in white and purple, featuring its extension table attached, providing a larger work surface for various sewing projects. The machine's compact design is evident.
2. Key Features
- Stable and Quiet Operation: Engineered for smooth performance with minimal noise.
- Portable Design: Compact and lightweight, suitable for various users and spaces.
- Extension Table: Includes a large extension table for enhanced stability and convenience when working on larger projects.
- Dual Power Modes: Can be powered by a DC 6V 1200mA adapter or 4 AA batteries (not included) for versatile use.
- Integrated Thread Cutter: A convenient cutter located on the machine head for quick thread trimming.
- LED Lighting: Built-in LED light illuminates the sewing area for improved visibility, especially in low light conditions.
- Automatic Winding Function: Features an auxiliary bobbin winder for easy and efficient bobbin winding.
- Dual Control Modes: Operate the machine using either the electric switch or the included foot pedal.
- Powerful Motor: High-quality motor capable of sewing various fabric types.
- Convenient Locking Function: Simple operation to improve work efficiency.

Figure 2.1: Side view of the FHSM-201 showing the control buttons and handwheel.
This image provides a side view of the FROSAB FHSM-201 sewing machine, highlighting the purple control buttons for speed selection and power, as well as the handwheel and thread tension dial. The compact form factor is clearly visible.
3. Package Contents
Please check the package carefully to ensure all items are present and in good condition:
- 4 x Bobbins (often referred to as "X-ray ring" in some translations)
- 1 x Threader
- 1 x Sewing Needle
- 1 x Foot Pedal
- 1 x Power Cord (American Standard Plug)
- 1 x FHSM-201 Sewing Machine
- 1 x Extension Table
4. Setup
4.1 Powering the Machine
The FHSM-201 can be powered in two ways:
- AC/DC Adapter: Connect the provided power cord to the DC 6V 1200mA input port on the machine and plug it into a standard American wall outlet.
- Batteries: For portable use, insert 4 AA batteries (not included) into the battery compartment located on the bottom of the machine. Ensure correct polarity.

Figure 4.1: Power input and foot pedal port location.
This image displays the side of the FROSAB FHSM-201 sewing machine where the power cord and foot pedal are connected. The ports are clearly labeled for easy identification.

Figure 4.2: Battery compartment on the underside of the machine.
This image shows the underside of the FROSAB FHSM-201 sewing machine, revealing the battery compartment. The cover is removed, showing the slots for four AA batteries, indicating its portability feature.
4.2 Attaching the Extension Table
To attach the extension table, align the pegs on the table with the corresponding holes on the front base of the sewing machine. Gently push until it clicks into place, ensuring a stable and expanded work surface.

Figure 4.3: FHSM-201 without the extension table.
This image presents the FROSAB FHSM-201 sewing machine without its extension table attached, showcasing its compact base. This view highlights the machine's design when used in a more confined space or for smaller projects.
4.3 Threading the Machine
Proper threading is crucial for smooth operation and good stitch quality.
- Upper Thread:
- Place a spool of thread on the spool pin.
- Guide the thread through the upper thread guide (refer to Figure 4.4).
- Pass the thread through the tension disc.
- Thread the take-up lever from right to left.
- Guide the thread down to the needle bar thread guide.
- Finally, thread the needle from front to back. Use the included threader for ease.
- Bobbin Thread:
- Open the bobbin cover plate located on the sewing bed.
- Insert a wound bobbin into the bobbin case, ensuring the thread unwinds in the correct direction (refer to Figure 4.5).
- Pull the bobbin thread through the tension spring in the bobbin case.
- Close the bobbin cover plate.

Figure 4.4: Upper thread guide detail.
This close-up image focuses on the upper thread guide of the FROSAB FHSM-201 sewing machine, showing the path the thread takes before reaching the needle. The metal hook ensures proper thread tension and guidance.

Figure 4.5: Bobbin compartment.
This image provides a detailed view of the bobbin compartment on the FROSAB FHSM-201 sewing machine. The clear cover is open, revealing the bobbin and its housing, illustrating where the lower thread is installed.
5. Operating Instructions
5.1 Basic Sewing
- Ensure the machine is properly threaded (both upper and bobbin threads).
- Place the fabric under the presser foot.
- Lower the presser foot lever.
- Select your desired speed using the speed control switch (usually High/Low).
- Start sewing by pressing the hand switch or the foot pedal. Guide the fabric gently.
- When finished, lift the presser foot and pull the fabric away. Use the built-in thread cutter (Figure 5.1) to trim the threads.
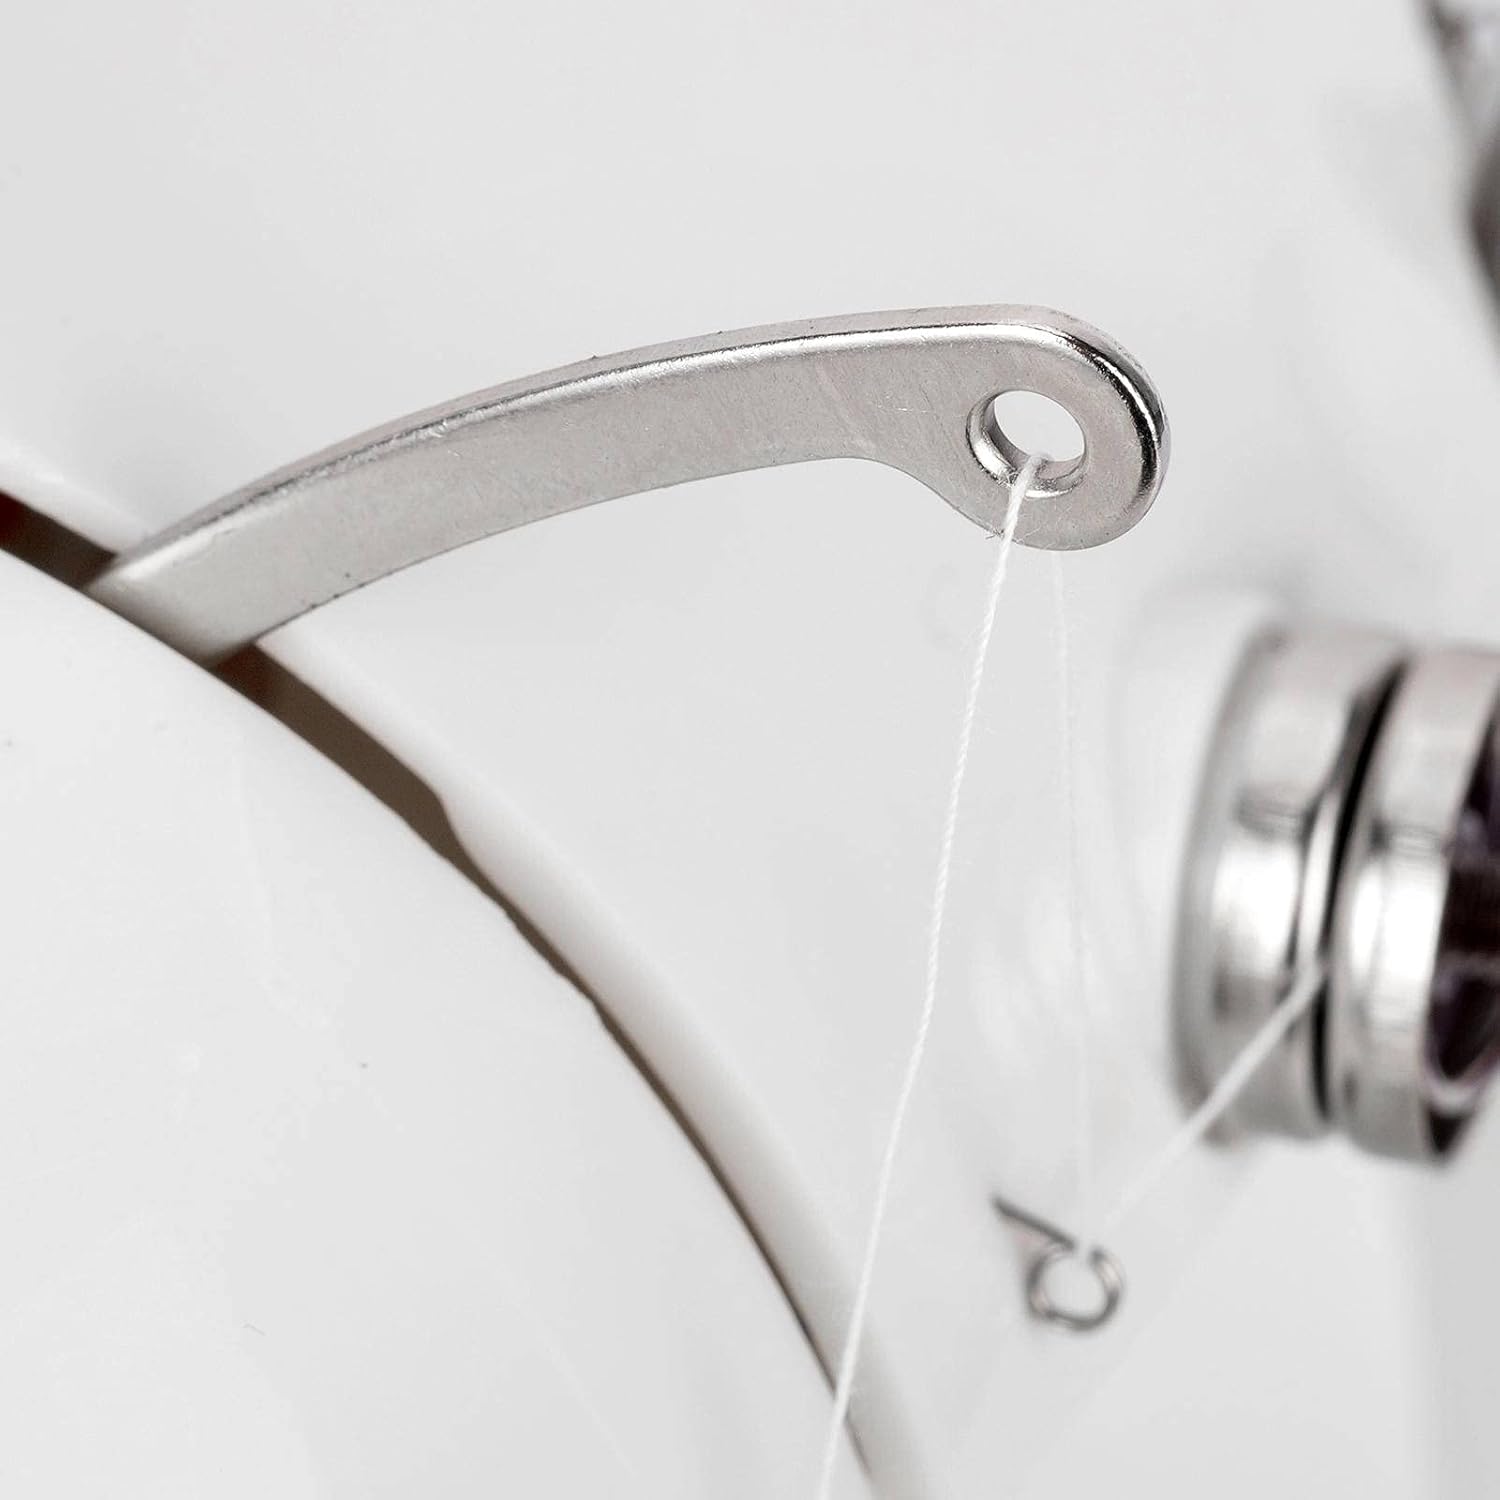
Figure 5.1: Integrated thread cutter.
This close-up image highlights the integrated thread cutter on the FROSAB FHSM-201 sewing machine. The small metal blade is positioned conveniently for quickly trimming threads after completing a stitch, enhancing user efficiency.
5.2 Automatic Bobbin Winding
To wind a new bobbin:
- Place an empty bobbin onto the bobbin winder spindle.
- Guide the thread from the spool pin through the bobbin winding tension disc.
- Wrap the thread a few times around the empty bobbin.
- Push the bobbin winder spindle to the right (towards the handwheel).
- Start the machine (using the hand switch or foot pedal) to begin winding. The machine will stop automatically or you can stop it manually when the bobbin is full.
- Cut the thread and remove the wound bobbin.
5.3 LED Lighting
The machine is equipped with an LED light to illuminate the sewing area. This light automatically turns on when the machine is operating, providing better visibility for your sewing projects.
6. Maintenance
- Cleaning: Regularly clean lint and dust from the bobbin area and feed dogs using a small brush. Unplug the machine before cleaning.
- Needle Replacement: Replace the needle regularly, especially if it becomes bent, dull, or if you experience skipped stitches. Ensure the flat side of the needle faces the back of the machine when inserting.
- Storage: Store the machine in a dry, dust-free environment when not in use.
7. Troubleshooting
| Problem | Possible Cause | Solution |
|---|---|---|
| Machine not starting | No power, batteries dead, power cord loose. | Check power connection, replace batteries, ensure power switch is ON. |
| Skipped stitches | Incorrect needle, bent needle, improper threading. | Replace needle, re-thread machine correctly. |
| Thread breaking | Incorrect tension, poor quality thread, improperly threaded. | Adjust tension, use good quality thread, re-thread machine. |
| Fabric not feeding | Presser foot not lowered, lint in feed dogs. | Lower presser foot, clean feed dogs. |
8. Specifications
| Feature | Detail |
|---|---|
| Model | FHSM-201 |
| Brand | FROSAB |
| Color | White & Purple |
| Dimensions (L x W x H) | 7.68" x 4.92" x 7.87" (19.5 x 12.5 x 20 cm) |
| Weight | 2.97 pounds (1.35 kg) |
| Power Supply | DC 6V 1200mA Adapter or 4 x AA Batteries (not included) |
| Material | Plastic |
| UPC | 721512685454 |

Figure 8.1: Product dimensions.
This image provides a clear diagram of the FROSAB FHSM-201 sewing machine's dimensions, indicating its length (7.68"), depth (4.92"), and height (7.87"). This visual aid helps users understand the compact size of the machine.
9. Warranty and Support
Specific warranty information is not provided in the product details. Please refer to your purchase receipt or contact the retailer/manufacturer directly for warranty terms and conditions.
For technical support or inquiries, please contact FROSAB customer service through the contact information provided with your purchase or on the official FROSAB website.
Related Documents - FHSM-201
 |
Mini Multifunctional Household Sewing Machine FHSM-505 Instruction Manual Comprehensive instruction manual for the FHSM-505 mini multifunctional household sewing machine. Covers setup, operation, features, troubleshooting, and maintenance for domestic use. |
 |
FHSM-505 Mini Multifunctional Household Sewing Machine Instruction Manual Comprehensive instruction manual for the FHSM-505 Mini Multifunctional Household Sewing Machine, covering setup, operation, maintenance, troubleshooting, and features. |
 |
FHSM-505 Mini Multifunctional Household Sewing Machine Instruction Manual Comprehensive instruction manual for the FHSM-505 Mini Multifunctional Household Sewing Machine, covering setup, operation, maintenance, and troubleshooting. |
 |
Sunsky FHSM-505 Mini Multifunctional Household Sewing Machine: Instruction Manual Comprehensive instruction manual for the Sunsky FHSM-505 Mini Multifunctional Household Sewing Machine. This guide details setup, operation, stitch selection, safety precautions, troubleshooting, and maintenance for domestic use. |
 |
Mini Multi-Purpose Sewing Machine Instruction Manual - Model FHSM-505 Instruction manual for the Mini Multi-Purpose Sewing Machine, Model FHSM-505. Covers setup, operation, features, troubleshooting, and maintenance for household use. |
 |
QuikSew FHSM-505G Mini Multifunction Household Sewing Machine User Manual Comprehensive user manual for the QuikSew FHSM-505G mini multifunction household sewing machine. Learn how to set up, operate, thread, replace parts, adjust stitching, sew buttonholes, and understand warranty information. Essential guide for home sewers. |