
1. Important Safety Instructions
Read all instructions carefully before operating this heat press machine. Failure to follow these instructions may result in electric shock, fire, or serious injury.
- Always connect the machine to a grounded power outlet with the correct voltage (110 Volts).
- Do not operate the machine with wet hands or in damp conditions.
- Keep children and pets away from the machine during operation.
- The heating platen reaches high temperatures (up to 482°F / 250°C). Avoid direct contact with hot surfaces. Use the swing-away design to prevent accidental burns.
- Ensure adequate ventilation in the work area.
- Do not leave the machine unattended while it is powered on or operating.
- In case of malfunction or unusual noise, immediately turn off the power and unplug the machine.
- The machine is equipped with a built-in circuit breaker for electrical safety. Do not bypass or modify safety features.
- Only use attachments and accessories approved by CREWORKS.
2. Product Overview and Components
The CREWORKS 8-in-1 Heat Press Machine is designed for transferring designs onto various items. It features a 12x15 inch main platen and includes multiple attachments for diverse applications.

Image 2.1: The CREWORKS 8-in-1 Heat Press Machine shown with all included attachments, including various mug presses, plate presses, and a cap press.
Included Components:
- Main Heat Press Unit (12x15 inch platen)
- Cap Press Attachment
- Mug Press Attachments (9 oz., 11 oz., 12 oz., 17 oz.)
- Mug Press Holder
- Plate Press Attachments (5 inch, 6 inch)
- 2 T-shirts (one-size-fits-most)
- 4 Transfer Sheets
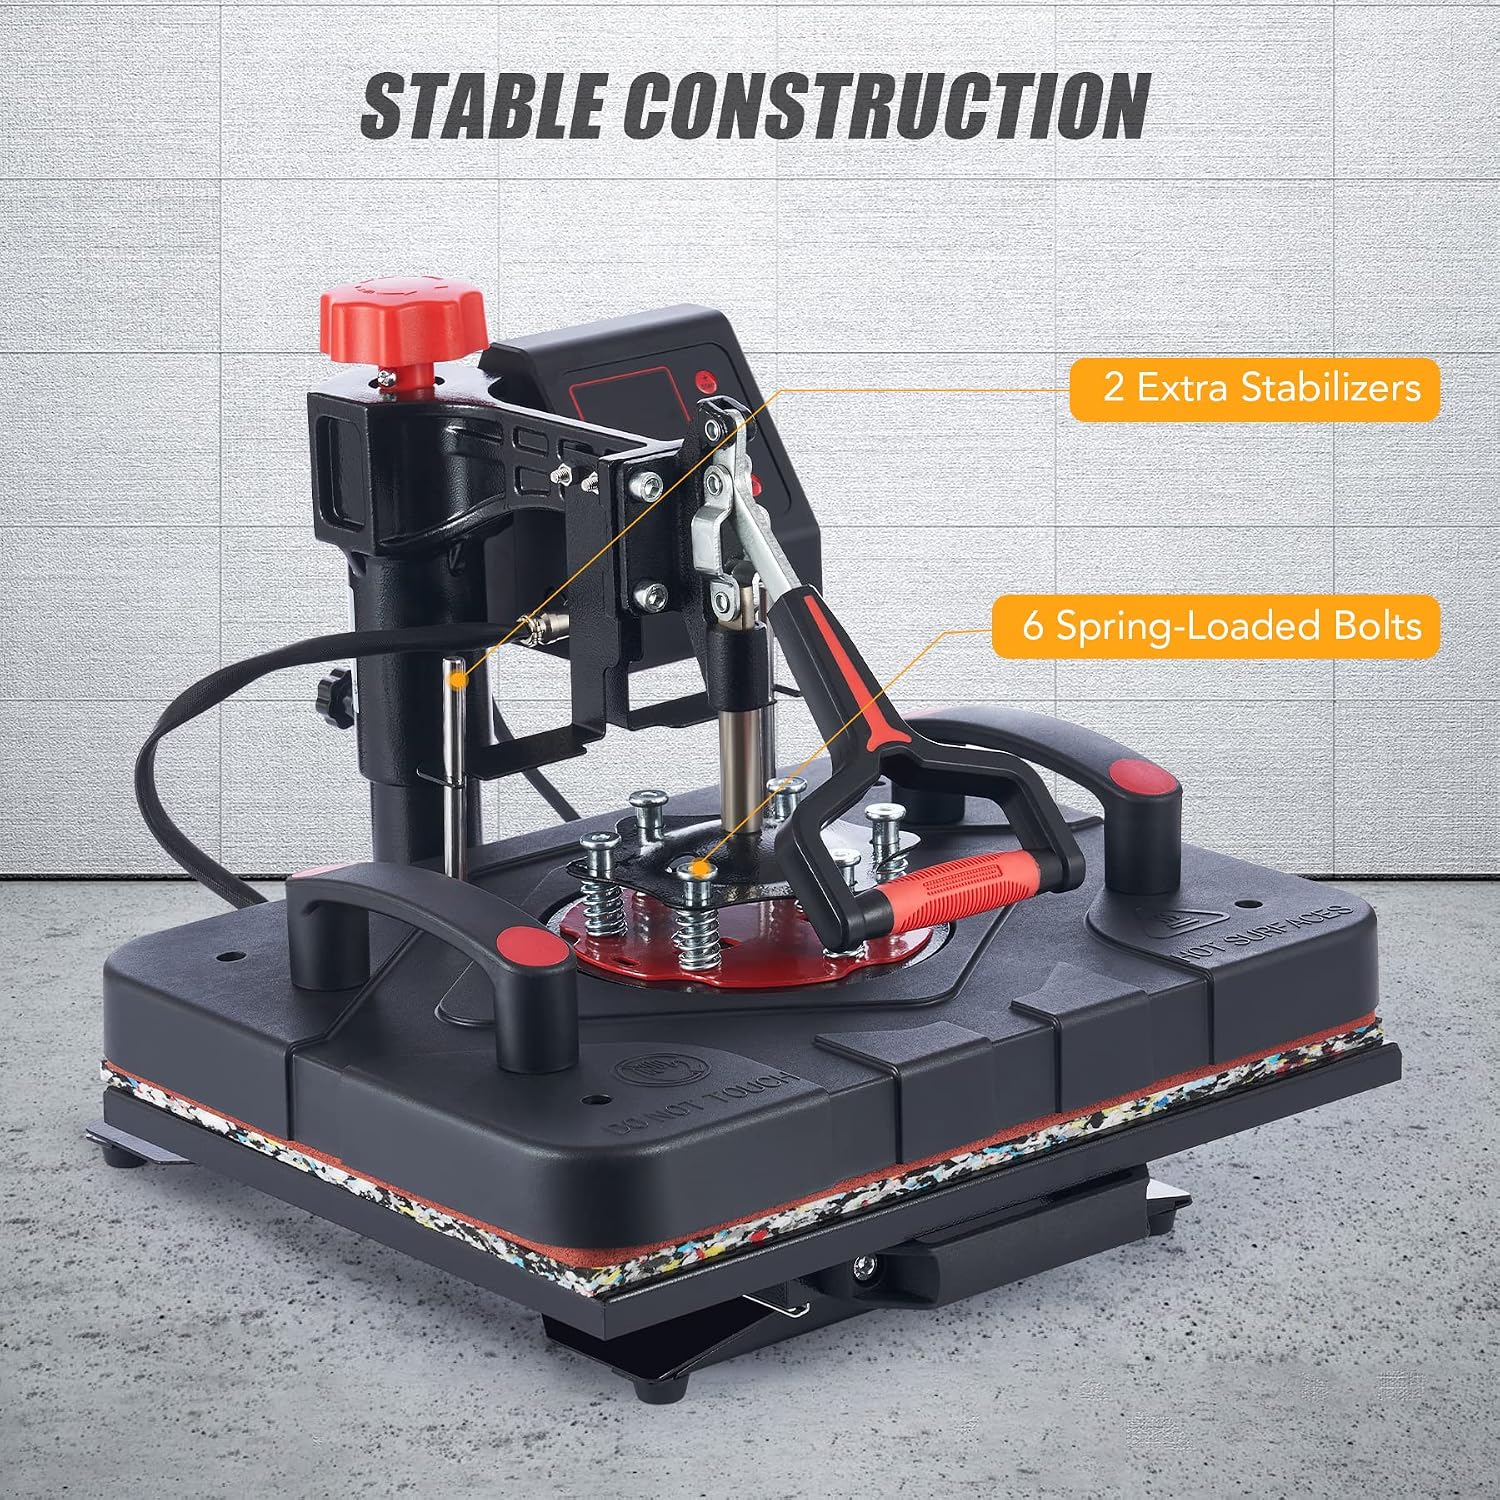
Image 2.2: Close-up view of the machine's stable construction, highlighting the two extra stabilizers and six spring-loaded bolts that ensure even pressure distribution.
3. Setup
Before first use, ensure all packaging materials are removed and the machine is placed on a stable, heat-resistant surface.
3.1 Initial Assembly
- Carefully remove the heat press from its packaging.
- Place the main unit on a sturdy workbench or table.
- Attach the desired press attachment (e.g., mug press, cap press) if not using the main platen. Refer to the specific attachment's instructions for secure installation.
- Ensure all connections are secure and the power cord is not damaged.
3.2 Power Connection
Plug the power cord into a standard 110V grounded electrical outlet. The machine is rated at 1000W.
4. Operating Instructions
This section details the general operation of the heat press machine for various applications.

Image 4.1: A user demonstrating the operation of the heat press machine with a T-shirt, showcasing the 12x15 inch work area.
4.1 Control Panel Overview
The intelligent LCD control box allows for precise temperature and time settings.

Image 4.2: Detailed view of the LCD control box, displaying temperature, timer, and preset mode buttons.
- Temperature Range: Max. 482°F (250°C)
- Timer Range: 0-999 seconds (16.7 minutes)
- Preset Modes: Three preset modes are available for common materials:
- 302°F for Silicone Fiber Fabrics
- 356°F for Cotton Clothing
- 392°F for Ceramic Mugs & Plates
4.2 Basic Operation Steps
- Power On: Flip the main power switch to the 'ON' position.
- Set Temperature and Time: Use the control panel to set the desired temperature and time according to your transfer material's requirements. You may use one of the preset modes or manually adjust.
- Preheat: Allow the platen to reach the set temperature. The LCD will indicate when the temperature is stable. The thick platen features a doubled heating element for faster and more even heating.
- Prepare Item: Place your item (e.g., T-shirt, mug, cap) on the appropriate platen or attachment. Position your design or transfer sheet on the item.
- Positioning: Utilize the 360-degree swing-away feature to move the heating platen away from the lower platen for safe and easy placement of your item. The slide-out design also aids in positioning.
- Apply Pressure: Swing the heating platen back over the item. Lower the handle to apply pressure. Adjust the pressure knob on top of the machine to achieve the required pressure for your transfer.
- Start Timer: Once pressure is applied, the timer will begin counting down.
- Complete Transfer: When the timer reaches zero, lift the handle and swing the heating platen away from the item. Carefully remove the transferred item.

Image 4.3: The heat press demonstrating its 360-degree swing-away motion and the convenient slide-out lower platen for easy item placement.
4.3 Even Heating Technology
The machine incorporates a doubled tube design within the heating platen to ensure consistent and even heat distribution across the entire surface, which is crucial for flawless transfers.

Image 4.4: An internal diagram illustrating the doubled tube heating element design, ensuring uniform temperature across the platen for optimal transfer results.
4.4 Material Heat Resistance
The aluminum platen is coated with a temperature-resistant nylon fiberglass composite, enhancing safety and durability.

Image 4.5: A cross-section diagram detailing the heat-resistant casing of the platen, made from nylon and fiberglass composite, designed to withstand high temperatures.
5. Maintenance
Proper maintenance ensures the longevity and optimal performance of your heat press machine.
5.1 Cleaning
- Always unplug the machine and allow it to cool completely before cleaning.
- Wipe down exterior surfaces with a soft, damp cloth. Do not use abrasive cleaners or solvents.
- For the heating platen, use a non-abrasive cloth and a specialized platen cleaner if necessary. Ensure no residue is left behind.
- Clean the silicone pad on the lower platen regularly to remove any debris or adhesive residue.
5.2 Storage
When not in use, store the heat press machine in a dry, dust-free environment. Ensure the platen is in the open position to prevent prolonged compression of the silicone pad.
6. Troubleshooting
This section addresses common issues you might encounter during operation.
6.1 Uneven Heating
- Symptom: Transfers appear inconsistent, with some areas lighter or darker than others.
- Possible Cause: Insufficient preheating time, incorrect temperature setting, or uneven pressure.
- Solution: Ensure the machine is fully preheated. Verify the temperature setting is appropriate for your material. Adjust the pressure knob to ensure even contact across the entire platen.
6.2 Attachments Not Functioning Correctly
- Symptom: Specific attachments (e.g., cap press, mug press) do not heat or apply pressure effectively.
- Possible Cause: Incorrect installation of the attachment, loose connections, or a faulty attachment.
- Solution: Double-check that the attachment is securely installed and all electrical connections are firm. If the issue persists, contact customer support.
6.3 Slide Rail Issues
- Symptom: The lower platen does not slide in and out smoothly or is stuck.
- Possible Cause: Debris in the rail, damage to the rail mechanism, or lack of lubrication.
- Solution: Inspect the slide rail for any obstructions and carefully remove them. If the rail appears damaged, discontinue use and contact customer support.
6.4 Machine Not Powering On
- Symptom: The machine does not turn on when the power switch is flipped.
- Possible Cause: No power from the outlet, tripped circuit breaker (either in the machine or your home), or a faulty power cord.
- Solution: Check the power outlet with another device. Inspect the machine's circuit breaker (if accessible) and reset if tripped. Examine the power cord for damage. If the problem persists, contact customer support.
7. Specifications
| Specification | Value |
|---|---|
| Brand | CREWORKS |
| Model Number | SXHPM-8H12-US |
| Rated Power | 1000 Watts |
| Voltage | 110 Volts |
| Platen Area | 12 x 15 Inches |
| Maximum Temperature | 482°F (250°C) |
| Timer Range | 0-999 Seconds |
| Product Dimensions | 15 x 12 x 19.5 Inches |
| Item Weight | 35.6 Pounds |
| Material | Metal, Plastic |
| Color | Black |
8. Warranty and Support
For warranty information, technical support, or to inquire about replacement parts, please contact CREWORKS customer service directly. Refer to your purchase documentation for specific contact details or visit the official CREWORKS website.


