1. Introduction
This manual provides detailed instructions for the installation, operation, and maintenance of your APPS2Car Upgraded Tablet Car Mount. This device is designed to securely hold tablets and smartphones ranging from 4.7 to 13 inches, offering flexible viewing angles for navigation and entertainment in vehicles.
2. Product Components
- Tablet/Phone Holder Clamp
- Flexible Long Arm (Gooseneck)
- Strong Adhesive Suction Cup Base
- Sticky Stabilizer (optional, for dashboard mounting)

Figure 2.1: An overview of the APPS2Car Tablet Car Mount, showing the device holder, flexible arm, and suction cup base.
3. Setup Instructions
3.1. Step 1: Choose a Mounting Location
Select a clean, flat surface on your windshield or dashboard. Ensure the chosen location does not obstruct your view of the road or interfere with vehicle controls.
3.2. Step 2: Prepare the Suction Cup
Ensure the suction cup and the mounting surface are clean and dry. For optimal adhesion, especially on textured dashboards, consider using the included sticky stabilizer pad.
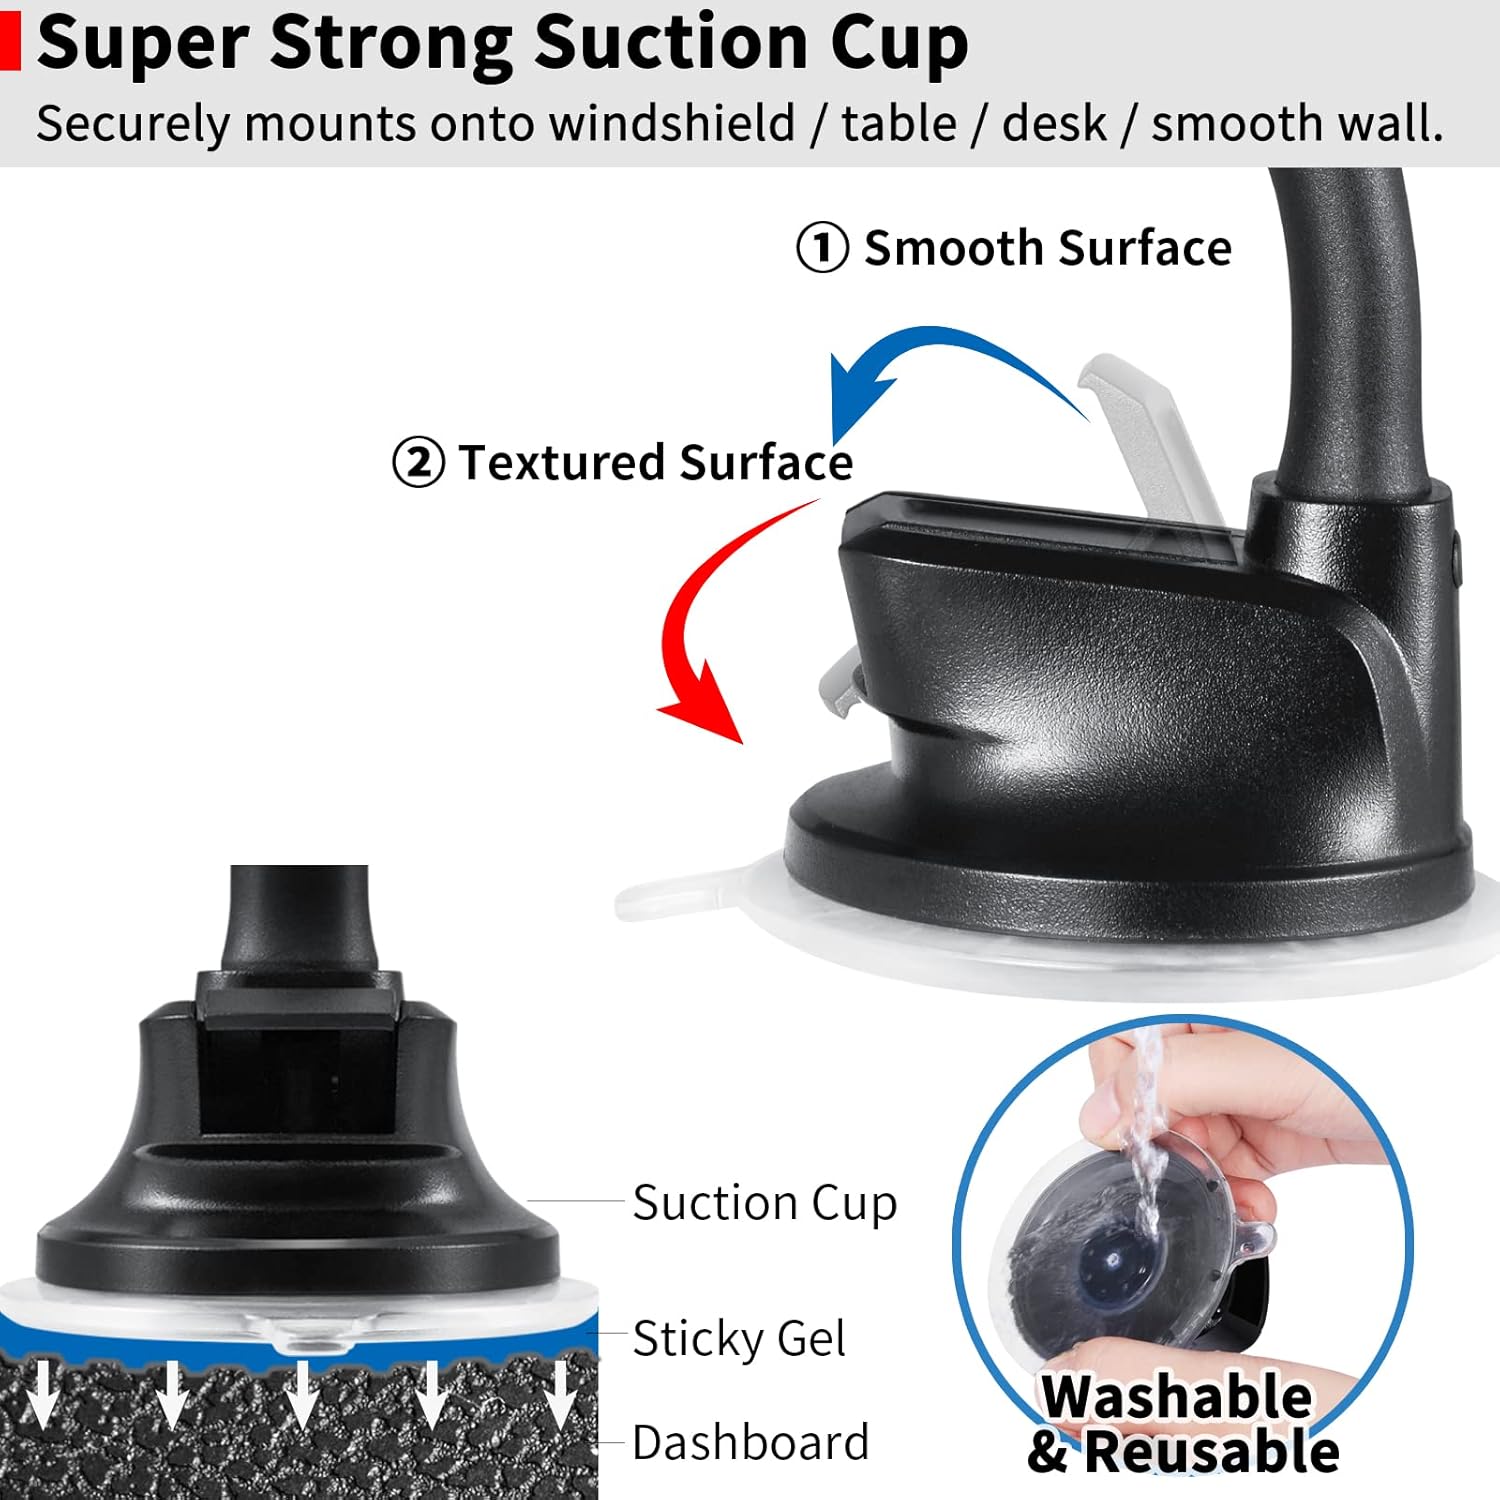
Figure 3.1: This image illustrates the strong suction cup mechanism, detailing its sticky gel pad for secure attachment to both smooth windshields and textured dashboards. It also shows how to wash and reuse the suction cup.
3.3. Step 3: Attach the Mount
Press the suction cup firmly against the chosen surface. While maintaining pressure, push down the locking lever on the suction cup base to create a vacuum seal.
If mounting on a dashboard, attach the sticky stabilizer to the dashboard first, then attach the suction cup to the stabilizer.
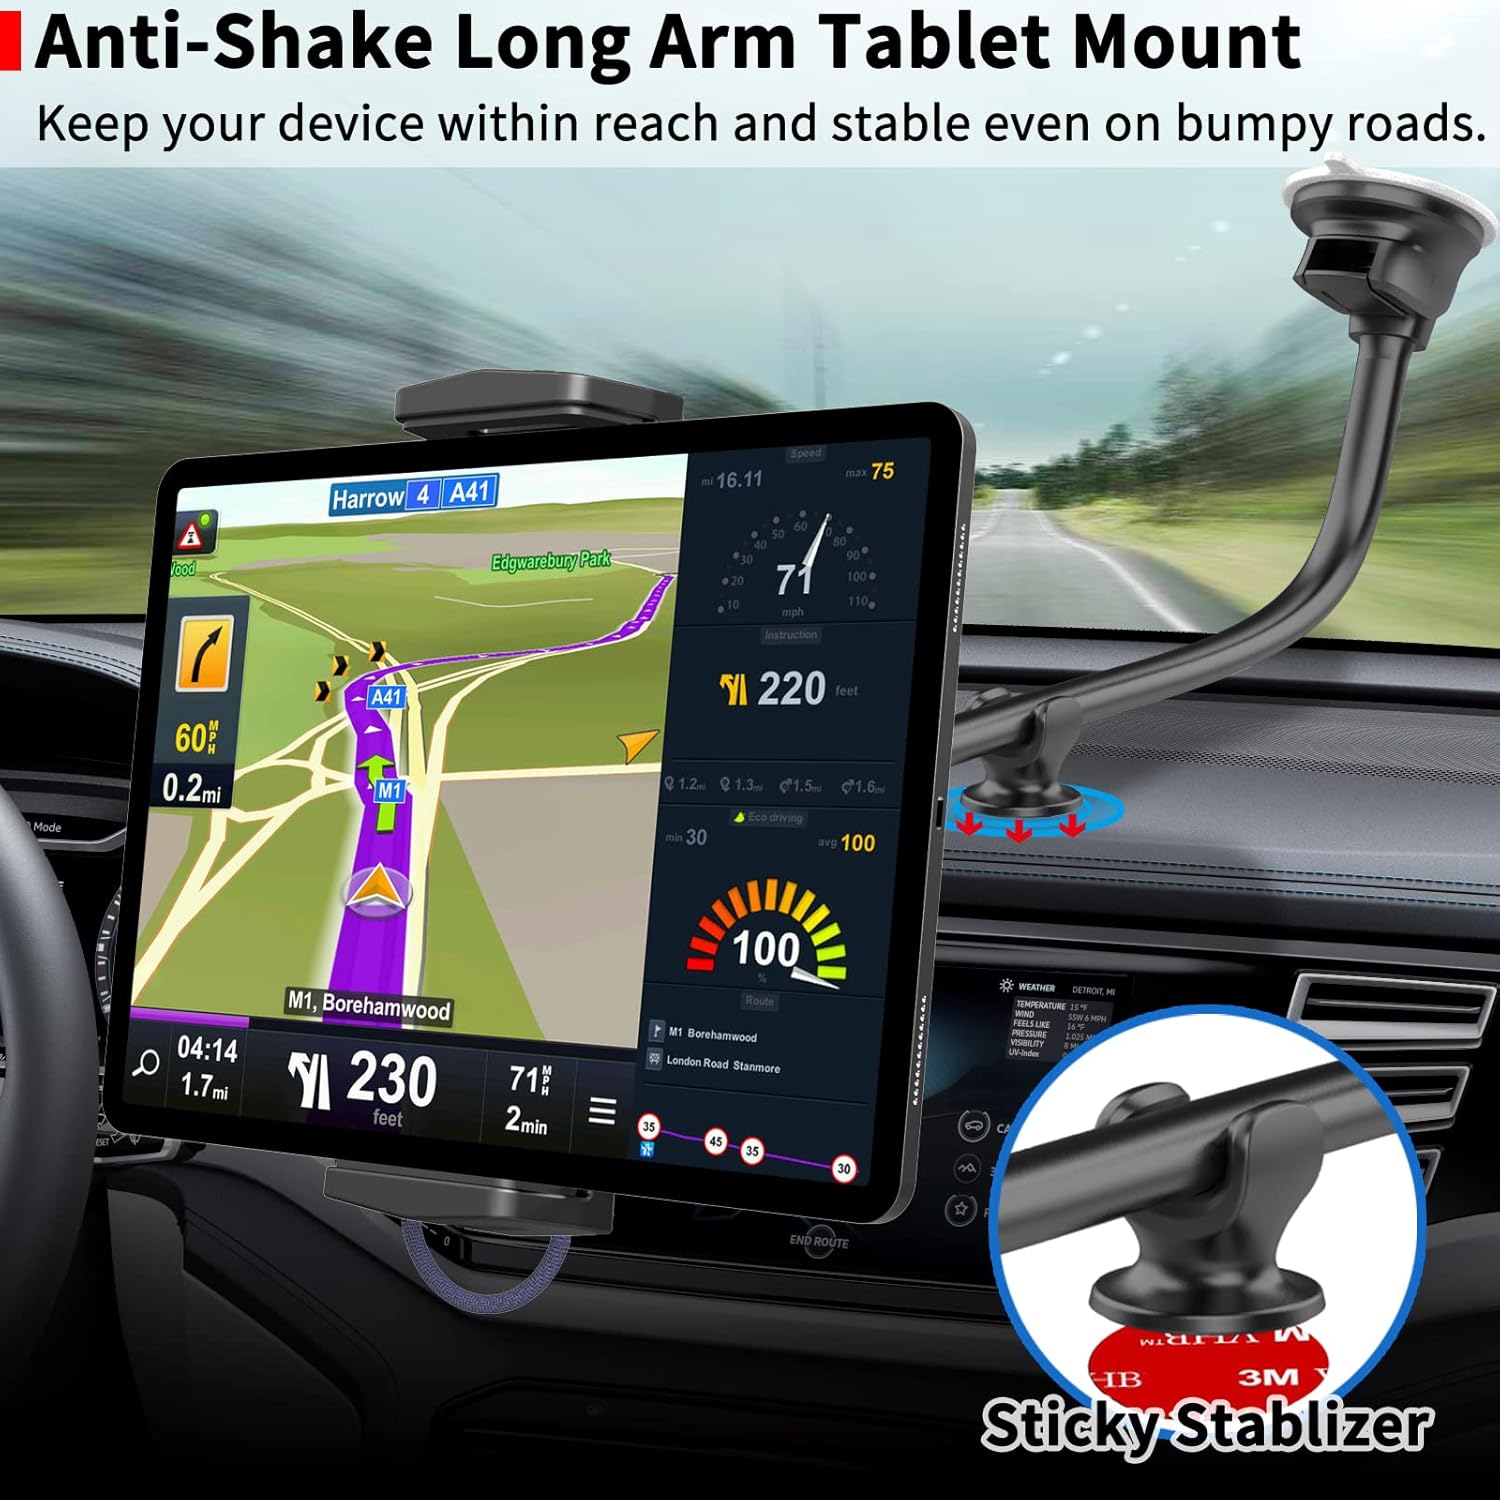
Figure 3.2: This image demonstrates the tablet mount installed in a car, highlighting the use of a sticky stabilizer on the dashboard to reduce shaking and enhance stability for the long arm.
4. Operating Instructions
4.1. Inserting Your Device
Gently pull apart the adjustable clamps of the holder. Place your tablet or smartphone into the holder, ensuring it is securely gripped by the clamps.
For tablets, grip the device by its left and right edges. For phones, grip by the long side for a secure hold.
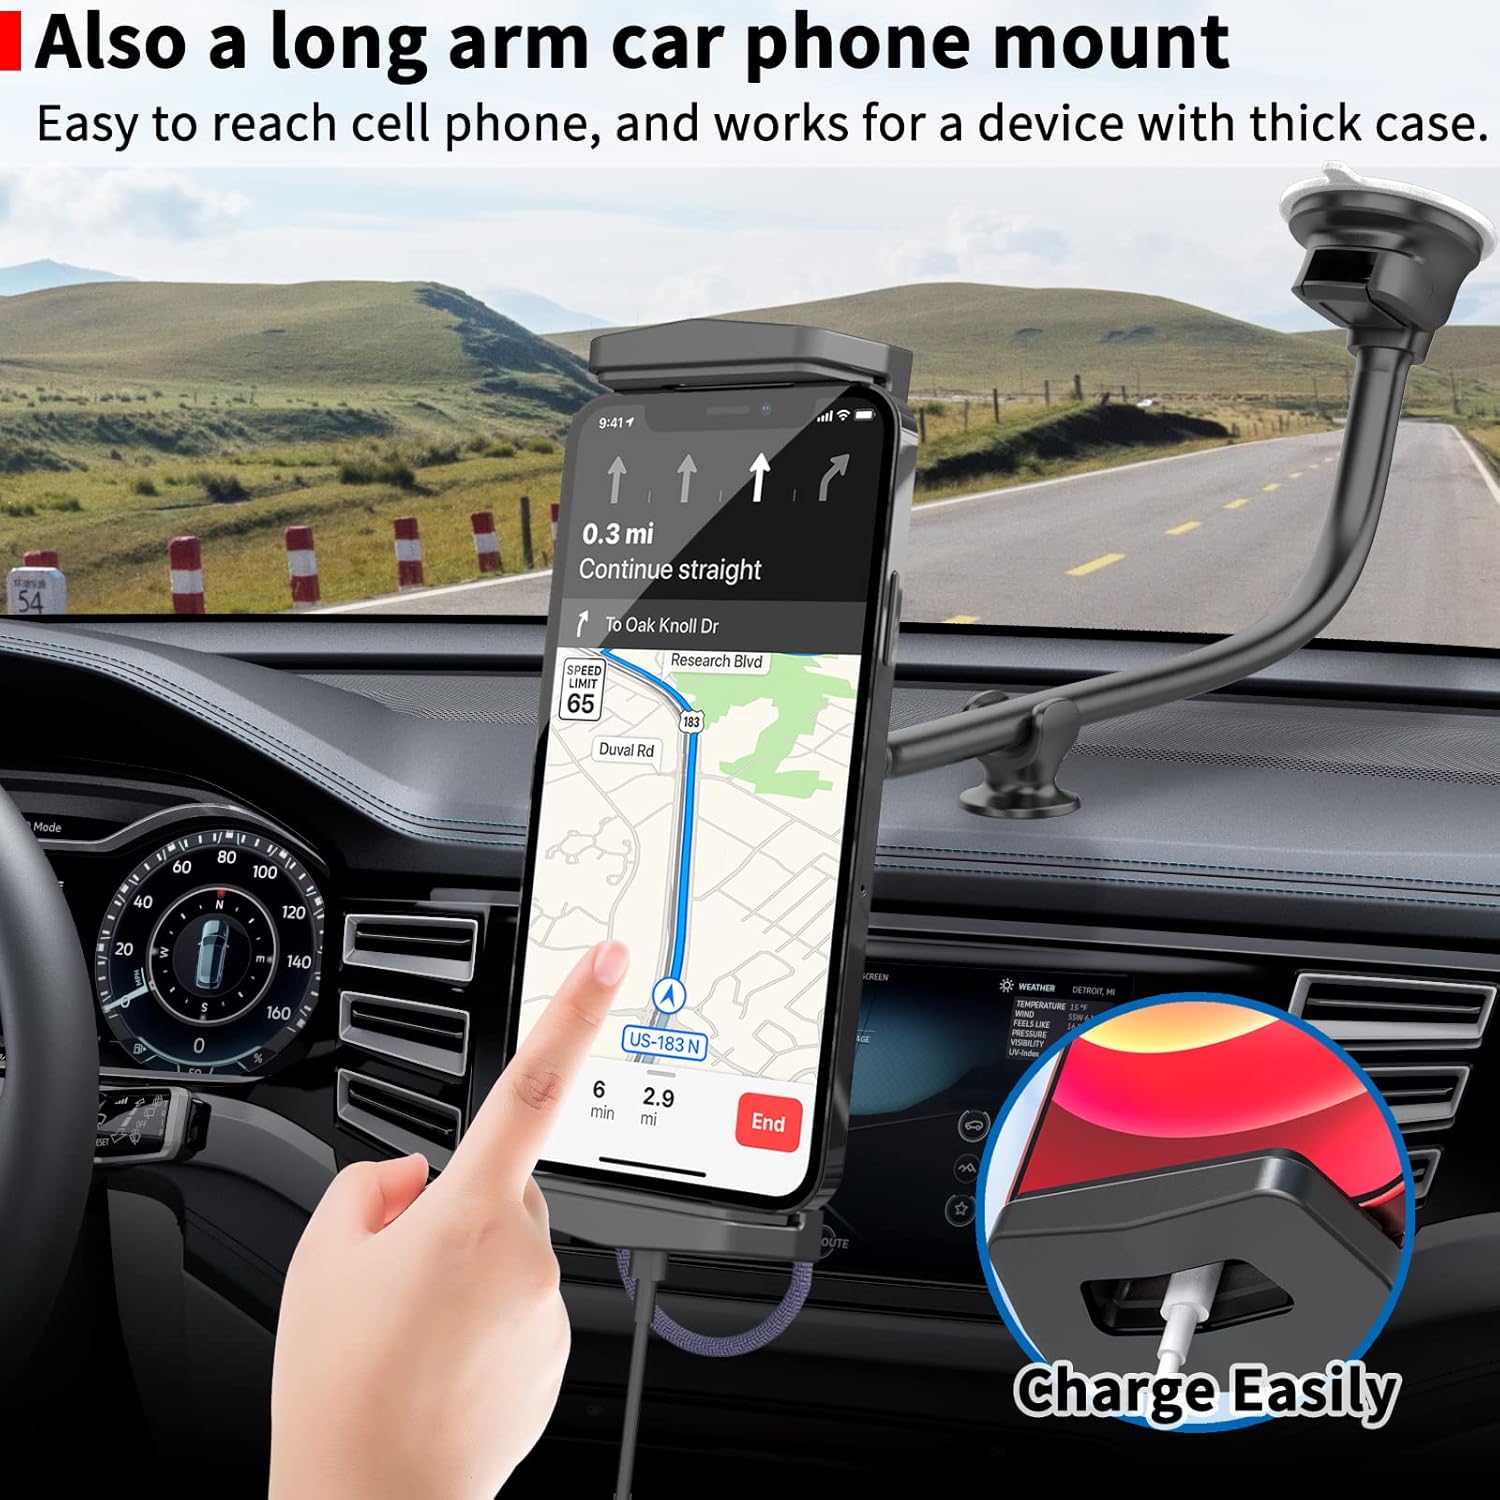
Figure 4.1: This image shows a smartphone mounted vertically in the holder, demonstrating how the design allows for easy charging with a dedicated cable hole at the bottom.
4.2. Adjusting the Viewing Angle
The flexible long arm (gooseneck) allows for precise positioning. Bend the arm to achieve your desired viewing height and distance.
The device holder features 240-degree tiltability and 360-degree rotation. Adjust these features to switch between landscape and portrait orientations or to find the optimal viewing angle.

Figure 4.2: This image highlights the robust 17mm thick aluminum gooseneck arm, emphasizing its durability and flexibility for positioning devices. It also contrasts it with thinner, less stable arms.
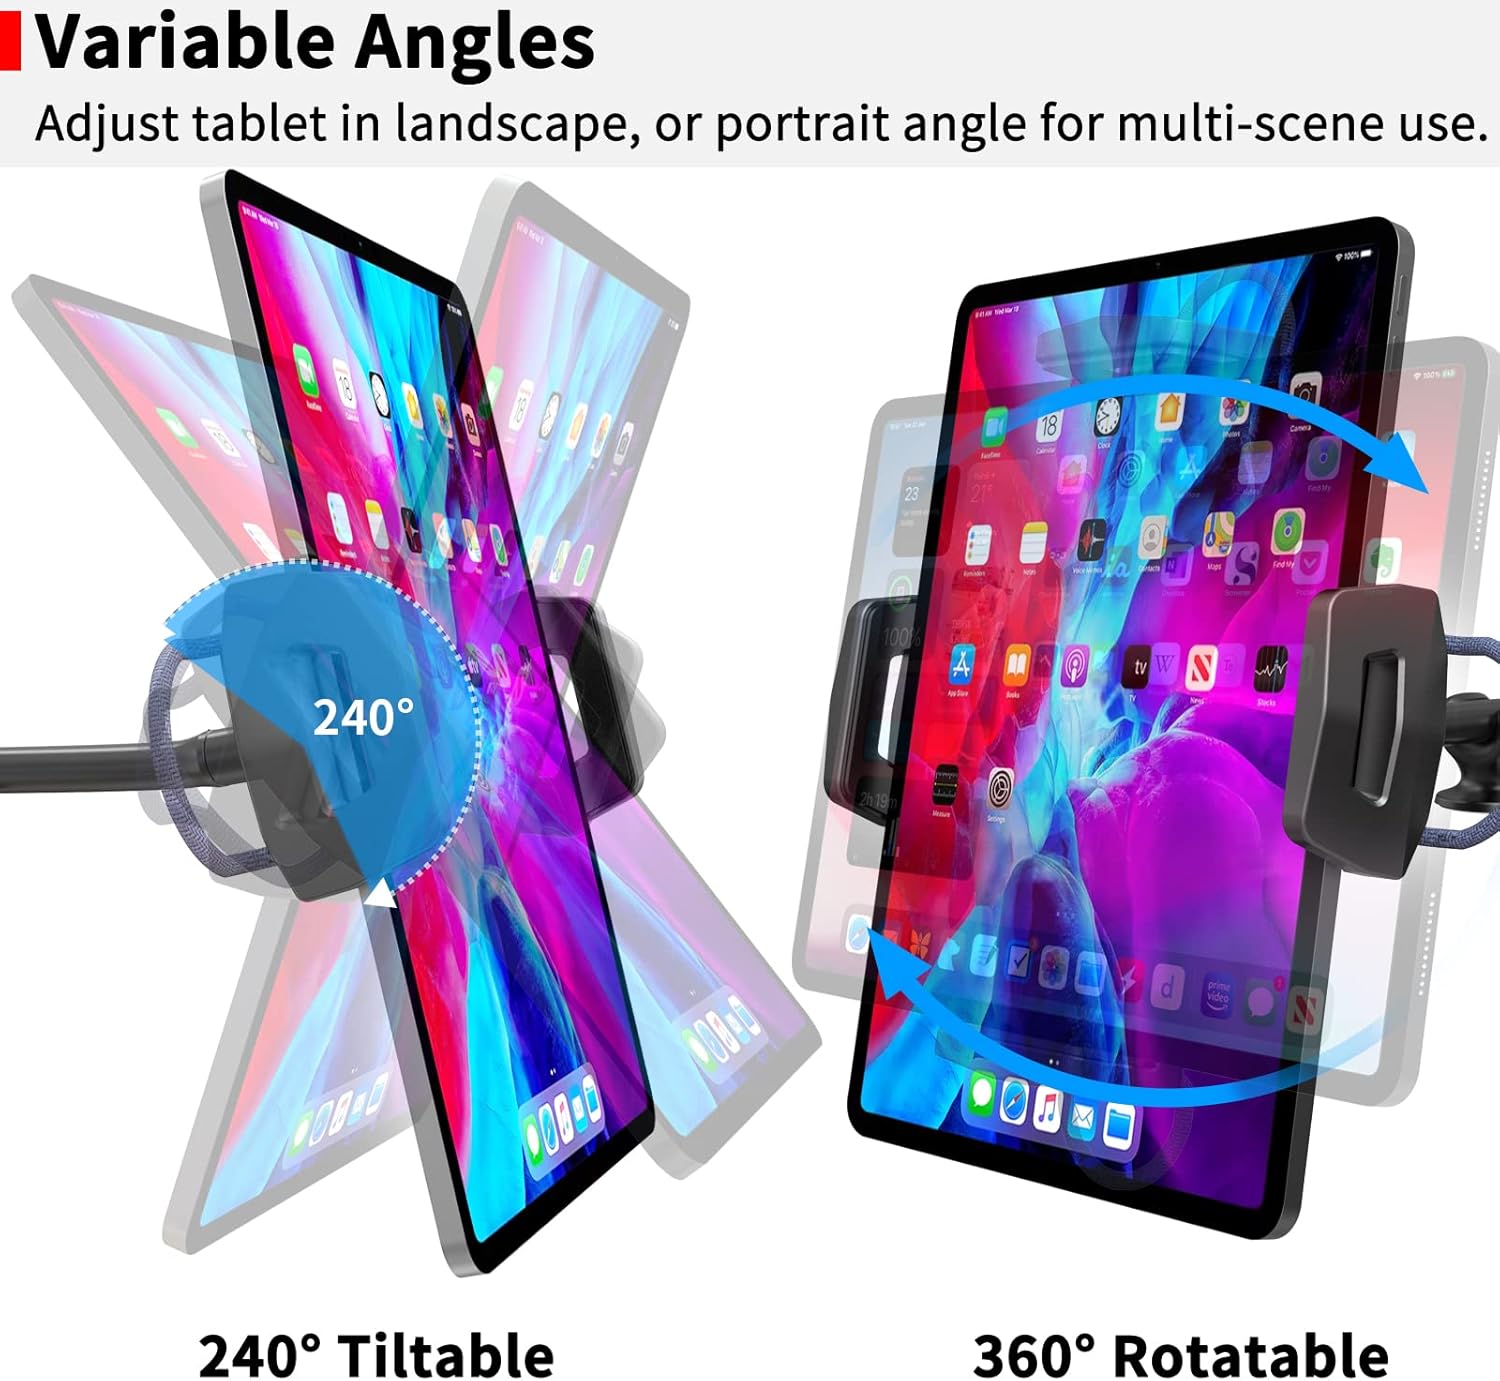
Figure 4.3: This image visually explains the adjustable features of the holder, including its 240-degree tilt range and full 360-degree rotation, allowing for versatile viewing angles in both landscape and portrait modes.
5. Compatibility
The APPS2Car Tablet Car Mount is compatible with most tablets and smartphones with screen sizes ranging from 4.7 to 13 inches.
- Tablets: iPad Pro (9.7, 10.5, 11, 12.9, 13 inches), iPad mini (all generations), iPad Air (all generations), iPad (all generations), Fire Tablets, Samsung Tablets, and similar devices.
- Smartphones: All iPhone models, Samsung Galaxy Z Fold series, Samsung Galaxy S series, Samsung Galaxy Note series, Google Pixel phones, and similar devices.
Important Note: The holder clamp opens up to 220 mm (8.66 inches) wide and has a depth of 20 mm (0.79 inches). It is not compatible with iPad Pro 12.9-inch or 13-inch models when used with a thick protective case. It does not work for laptops, portable carplay, or car tablets.

Figure 5.1: This image illustrates the upgraded design of the holder clamp, showing its wider and deeper dimensions (Min: 120mm - Max: 220mm, Depth: 20mm) for enhanced stability and compatibility with a broader range of devices from 4.7 to 12.9 inches, including case-friendly designs.
6. Maintenance
6.1. Cleaning the Suction Cup
If the suction cup loses its stickiness, rinse it with warm water and allow it to air dry completely. This will restore its adhesive properties.
6.2. General Cleaning
Wipe the mount with a soft, damp cloth to remove dust and debris. Avoid using harsh chemicals or abrasive cleaners.
7. Troubleshooting
- Issue: Mount is not sticking securely.
Solution: Ensure the mounting surface and suction cup are clean and dry. Re-apply the suction cup, pressing firmly and engaging the locking lever. If on a textured dashboard, ensure the sticky stabilizer is properly applied. Rinse the suction cup with warm water and air dry if it has lost stickiness. - Issue: Device feels unstable or shakes excessively.
Solution: Ensure the device is centered and securely clamped. Verify the suction cup is firmly attached. If using on a dashboard, ensure the sticky stabilizer is used and properly adhered. Adjust the flexible arm to a more stable position, avoiding extreme extensions if possible. - Issue: Device does not fit in the holder.
Solution: Check the compatibility section. The holder supports devices from 4.7 to 13 inches, with a maximum clamp opening of 220mm and depth of 20mm. Large tablets with thick cases may not fit.
8. Specifications
- Model Number: IP2S-S3L
- Compatible Device Sizes: 4.7 to 13 inches (smartphones and tablets)
- Holder Clamp Opening: Minimum 120 mm (4.72 in) to Maximum 220 mm (8.66 in)
- Holder Clamp Depth: 20 mm (0.79 in)
- Arm Length: 13 inches (flexible gooseneck)
- Total Length: 15 inches
- Arm Thickness: 17 mm
- Mounting Type: Windshield, Dashboard (with sticky stabilizer)
- Rotation: 360 degrees
- Tilt: 240 degrees
- Item Weight: 9.9 ounces
- Package Dimensions: 6.18 x 4.06 x 2.87 inches
- Special Features: Adjustable, Hands-Free, Rotatable, Scratch Resistant, Tilt Head
9. Warranty and Support
For warranty information or technical support, please refer to the official APPS2Car website or contact their customer service directly. Contact details are typically provided with your product packaging or on the manufacturer's website.


