1. Introduction
The SVBONY SV905C is a compact and highly sensitive 1.23-megapixel color camera designed for both autoguiding and planetary imaging. Featuring a 1/3” CMOS 1280x960 sensor with small 3.75-micron pixels, it offers high peak QE of 80% and low read noise, enabling precise tracking of faint guide stars. This manual provides detailed instructions for the setup, operation, and maintenance of your SV905C camera.

Figure 1: SVBONY SV905C Guide Camera
2. Package Contents
Please verify that all items listed below are included in your package:
- 1x SV905C Guide Camera
- 1x Type-C Cable
- 1x ST4 6PIN Guiding Cable
- 1x 1.25 inches Extension Tube
- 1x CS-C Adapter Ring
- 1x Snap Ring
- 1x M28.5-CS Adapter Ring
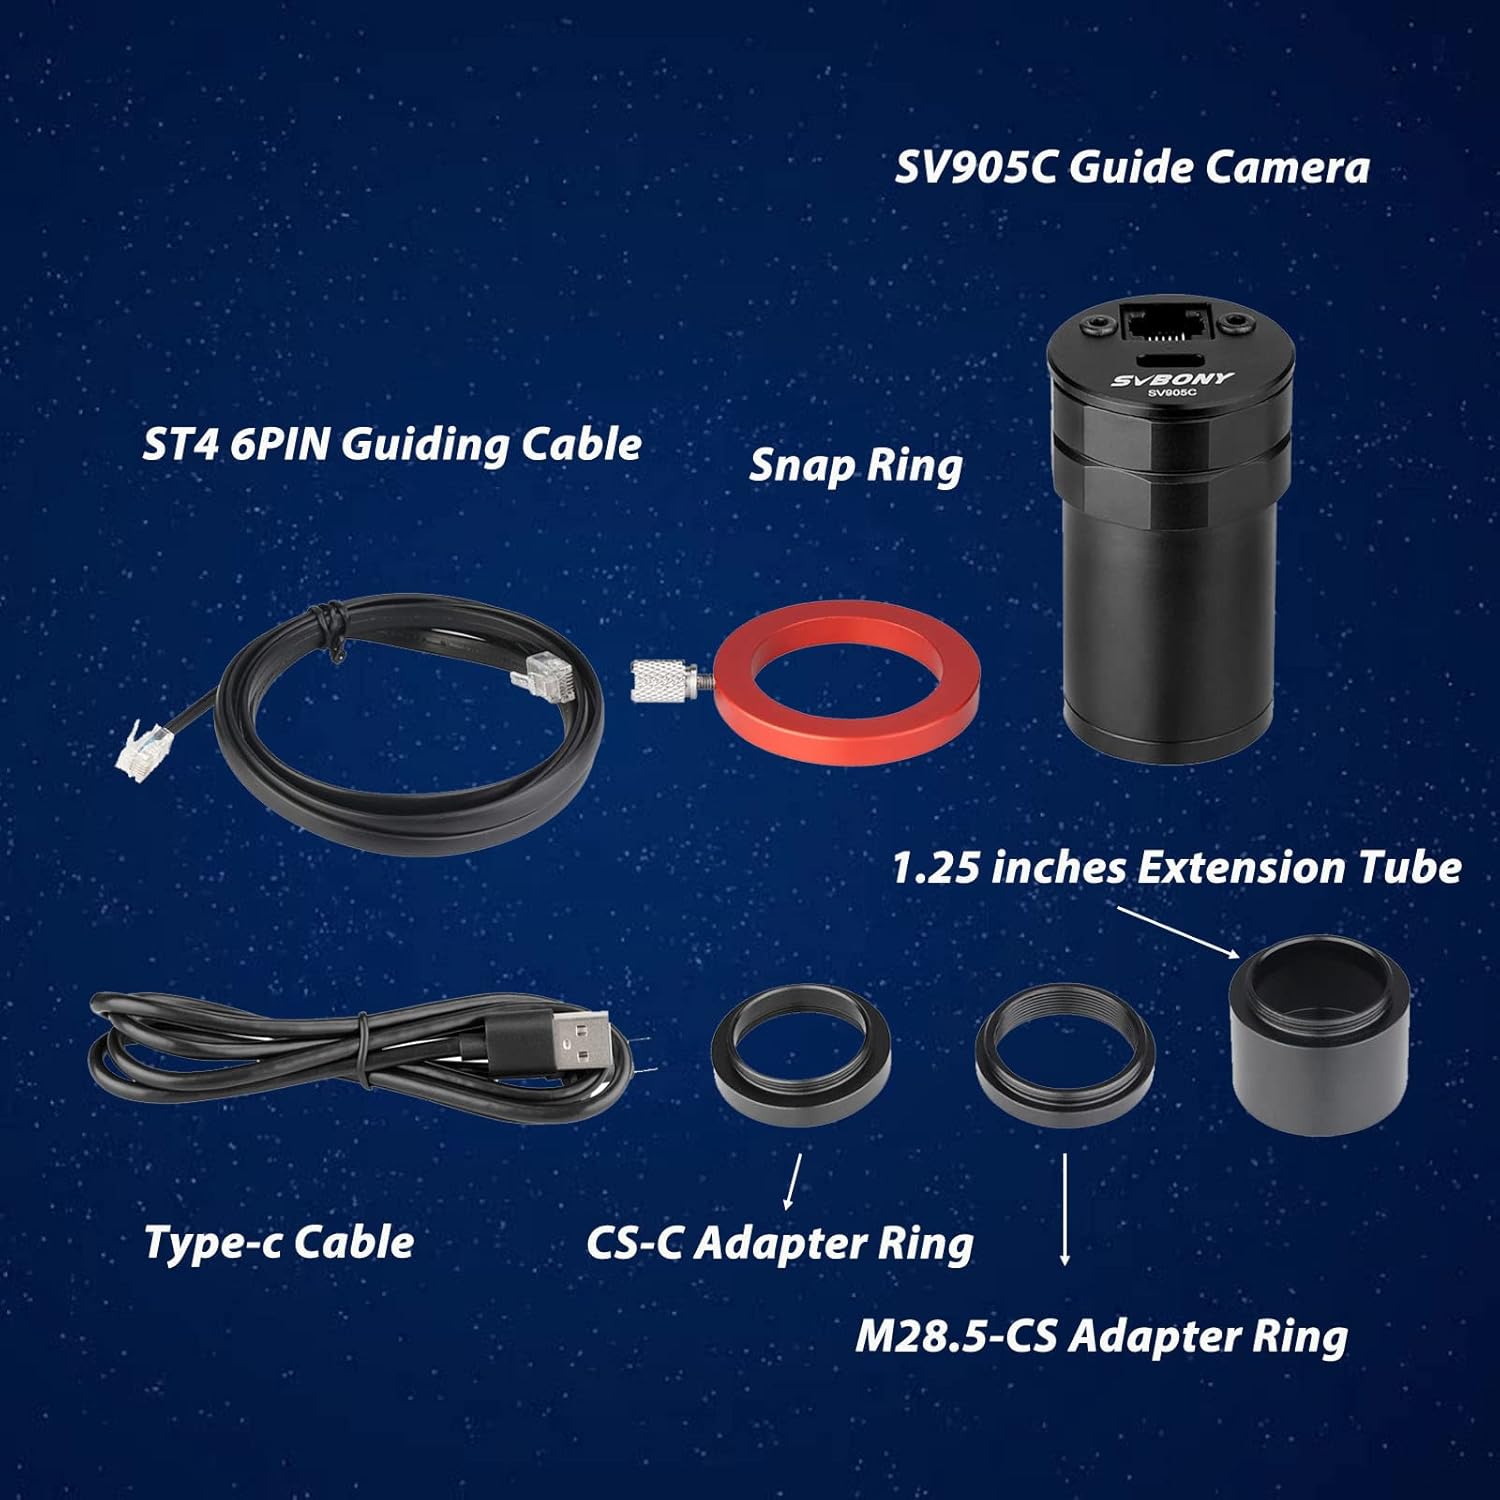
Figure 2: All components included with the SV905C Guide Camera.
3. Key Features
- High-Sensitivity CMOS Sensor: 1.23-megapixel color camera with 1/3” CMOS 1280x960 sensor, 3.75-micron pixels, 80% peak QE, and low read noise for effective autoguiding and planetary imaging.
- Versatile Connectivity: USB 2.0 interface output and ST4 guide star interface. Compatible with popular software like PHD2, MDL, NINA, and SKY-X.
- Flexible Lens Compatibility: Equipped with a CS interface and a CS-C adapter ring, allowing use with CS lenses or C-mount lenses.
- Standard 1.25-inch Diameter: Designed to adapt to various focal length guide lenses and Off-Axis Guiders (OAG).
- Focusing and Positioning Aids: Features a snap ring and scale mark for consistent focusing and positioning with guide lenses.
- AR-Coated Protective Window: Maximizes light transmittance and protects the sensor.
- Operating Temperature: Designed to operate within -5°C to 45°C.

Figure 3: Close-up view of the SV905C's 1.23MP CMOS sensor.

Figure 4: Illustration of HCG (High Conversion Gain) mode for improved image quality.
4. Setup and Installation
4.1 Physical Installation
The SV905C camera is designed for easy integration with your telescope setup.
- Attaching to a Guide Scope: Insert the 1.25-inch barrel of the SV905C camera into the focuser of your guide scope. Secure it with the thumbscrew on the focuser.
- Using Extension Tubes/Adapters: Depending on your setup and desired back focus, you may need to use the included 1.25-inch extension tube or CS-C/M28.5-CS adapter rings.
- Snap Ring and Scale Mark: Utilize the snap ring and scale mark on the camera body to achieve and maintain precise focus.
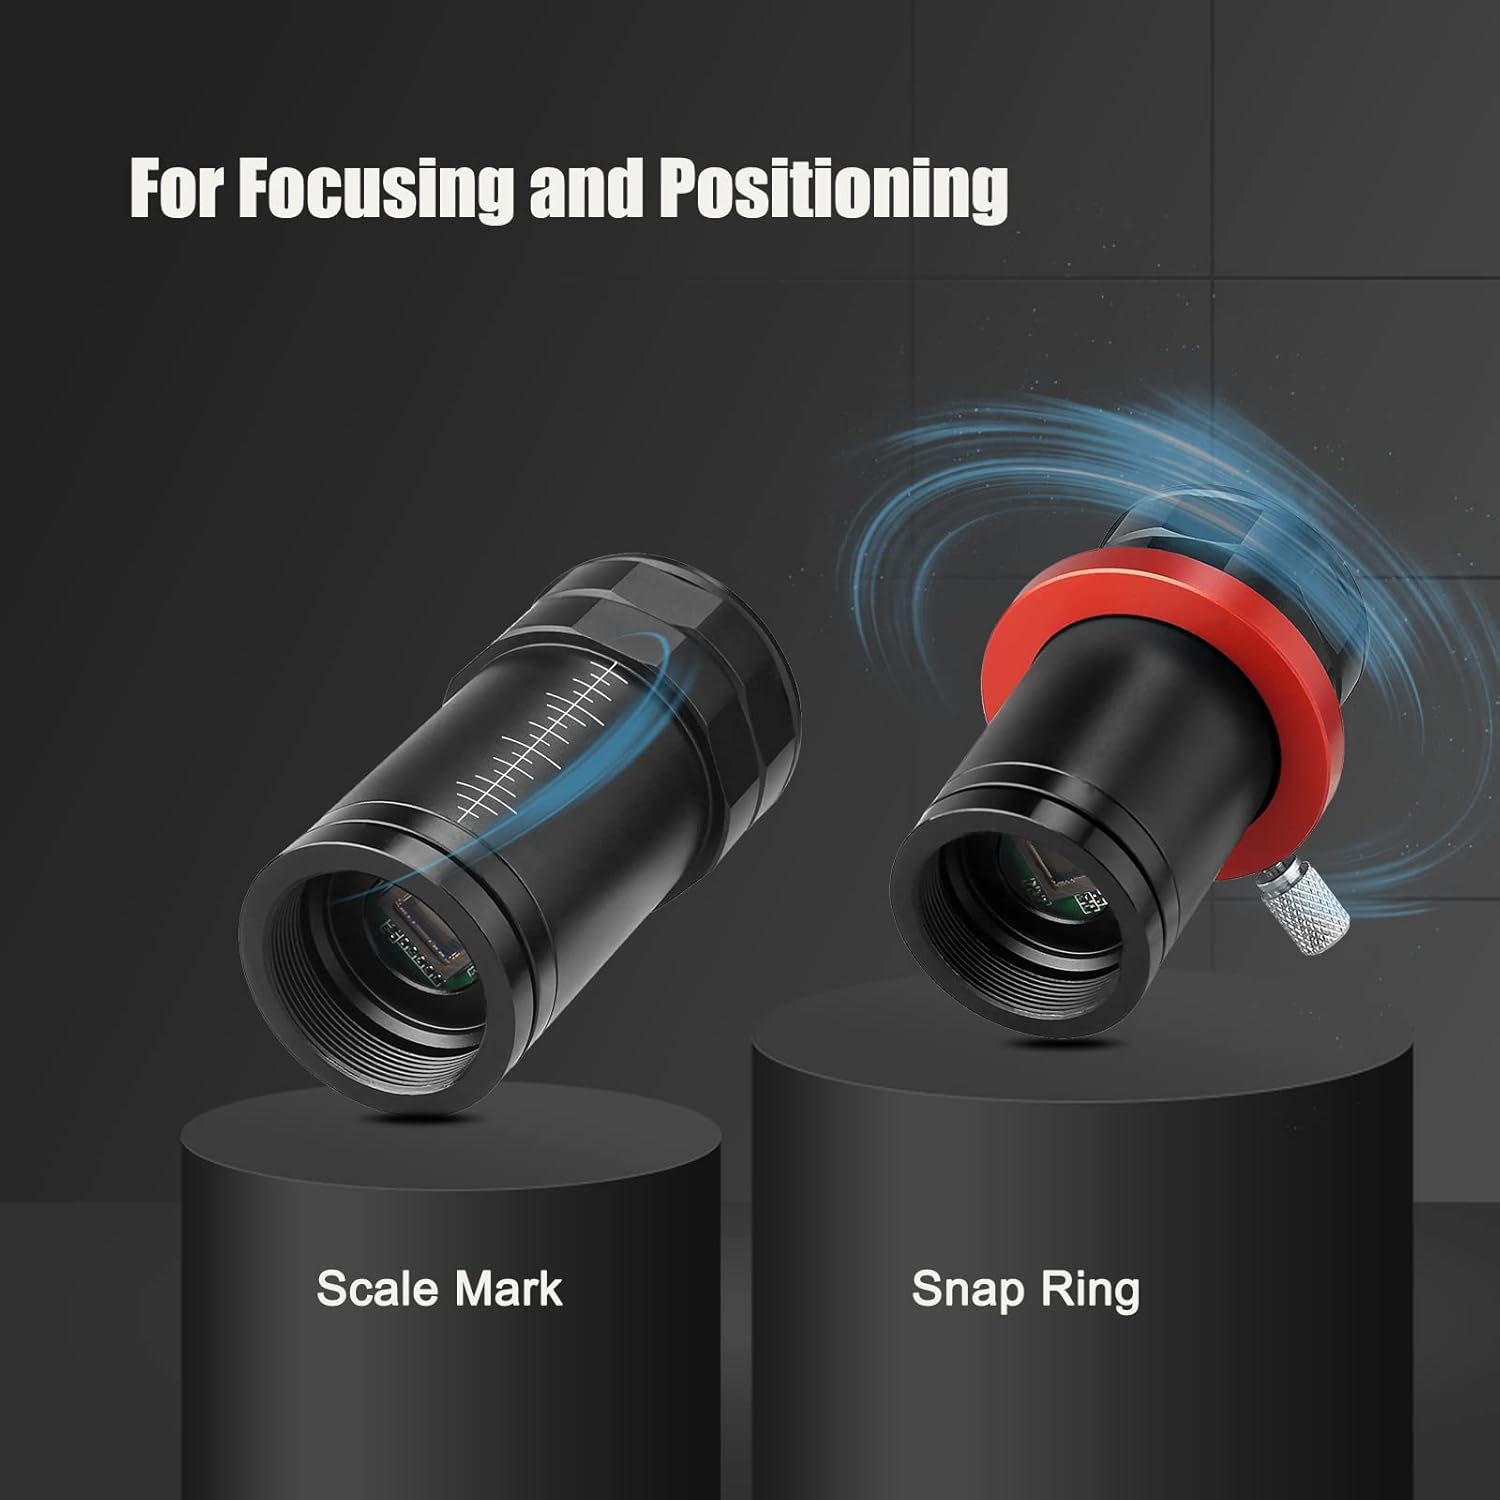
Figure 5: The snap ring and scale mark assist in precise focusing and positioning.
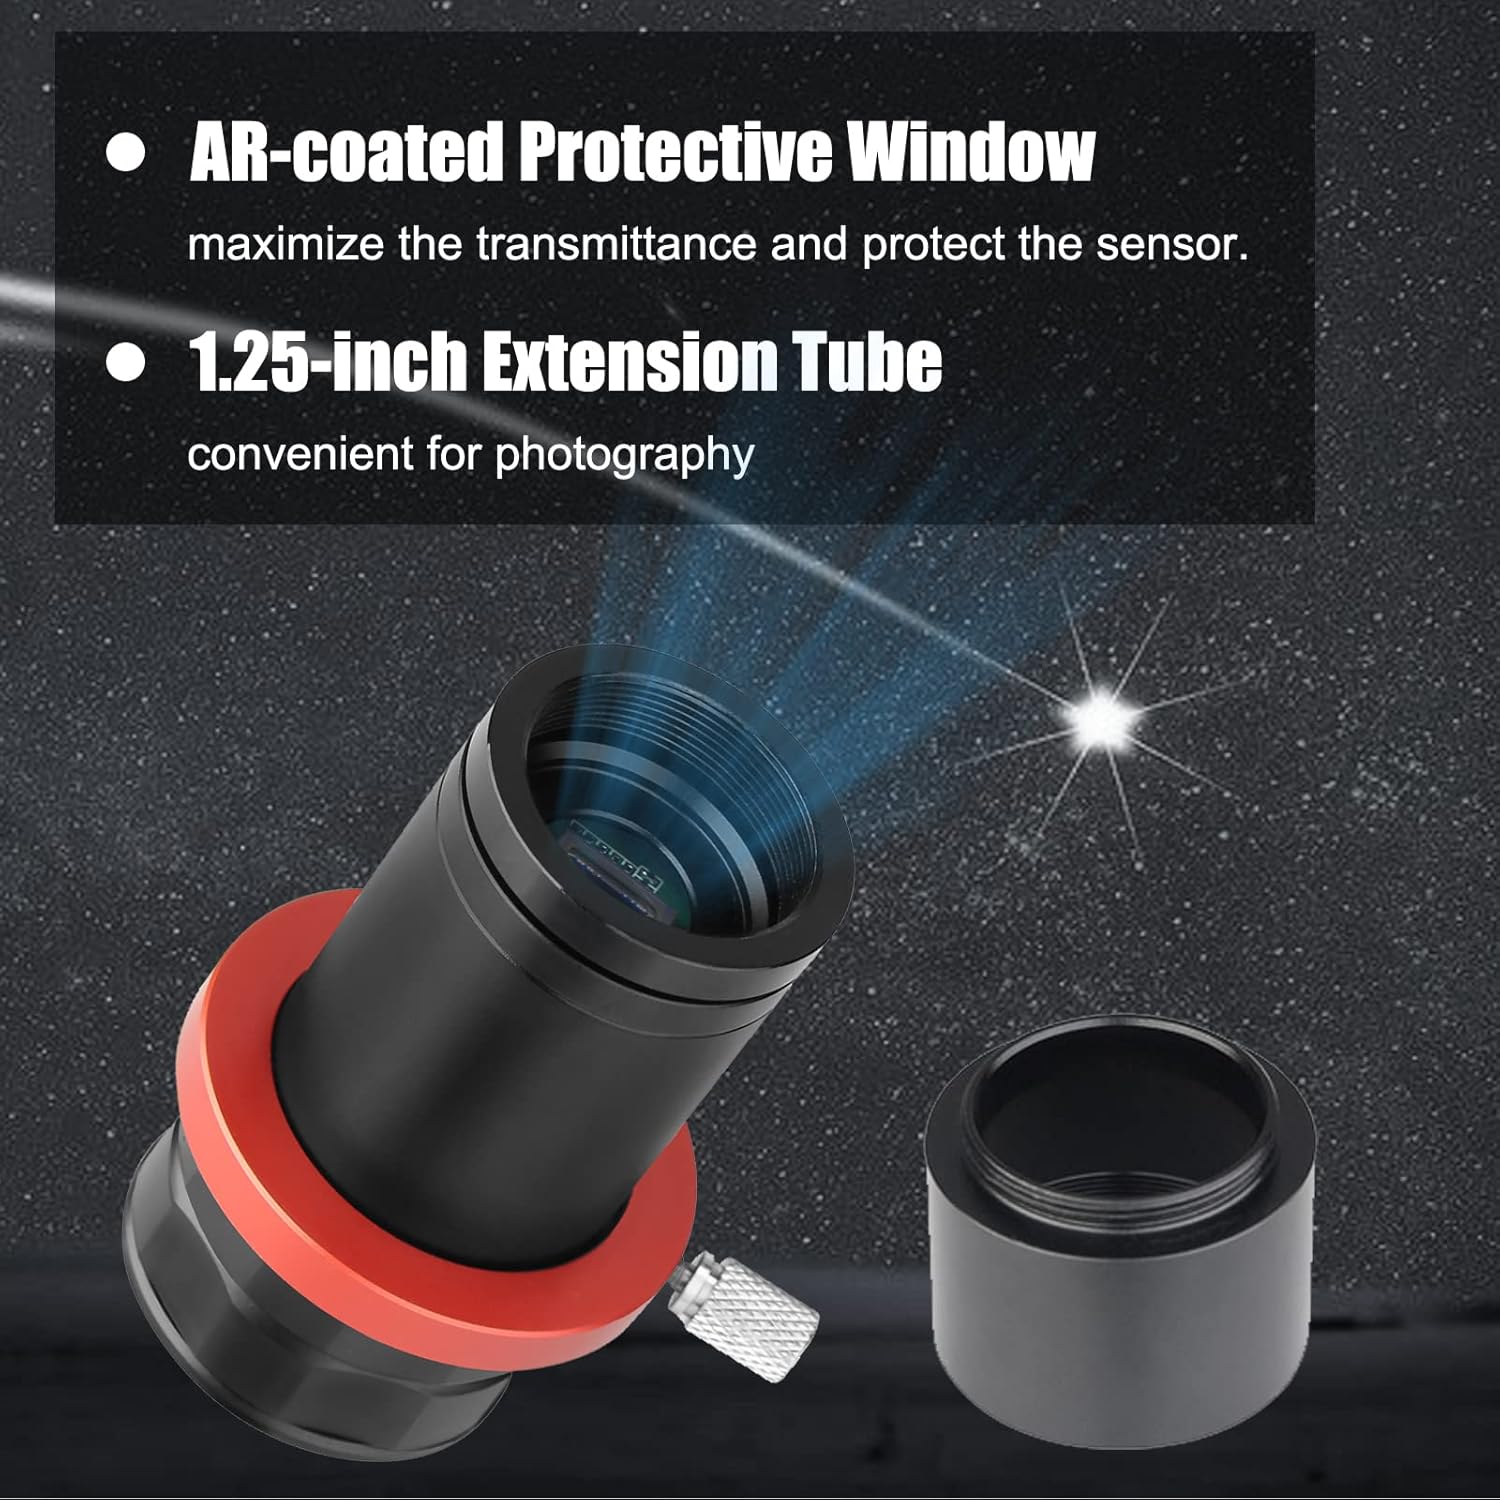
Figure 6: The camera features an AR-coated protective window and can be used with a 1.25-inch extension tube.
Video 1: This video demonstrates the physical installation of the SV905C camera onto a telescope, including attaching it to the focuser and connecting the USB cable.
4.2 Software and Driver Installation
Before connecting the camera to your computer, ensure you have the necessary drivers and software installed. Drivers are typically available on the SVBONY official website. The camera is compatible with various astrophotography software. For example, PHD2 is commonly used for autoguiding, and SharpCap can be used for planetary imaging and live stacking.
Video 2: This video provides a general guide on how to set up and use an SVBONY telescope camera with software, including driver installation and basic software operation.
5. Operating Instructions
5.1 Connecting to a Computer
Connect the SV905C camera to your computer using the provided USB 2.0 Type-C cable. The camera features a USB 2.0 interface for data transfer. For autoguiding, connect the ST4 6PIN guiding cable from the camera's ST4 port to your equatorial mount's autoguider port.

Figure 7: The SV905C features a USB 2.0 Type-C interface and an ST4 Automatic Guide Port.
Video 3: This video illustrates the connection process of a guide camera to a guide scope and computer, which is applicable to the SV905C.
5.2 Using with Astrophotography Software
Launch your preferred astrophotography software (e.g., PHD2, SharpCap, NINA). Select the SV905C camera from the list of available cameras within the software. Adjust camera settings such as exposure time, gain, and resolution to suit your imaging or guiding needs. For autoguiding, calibrate your guide scope and mount through the software to ensure accurate tracking.
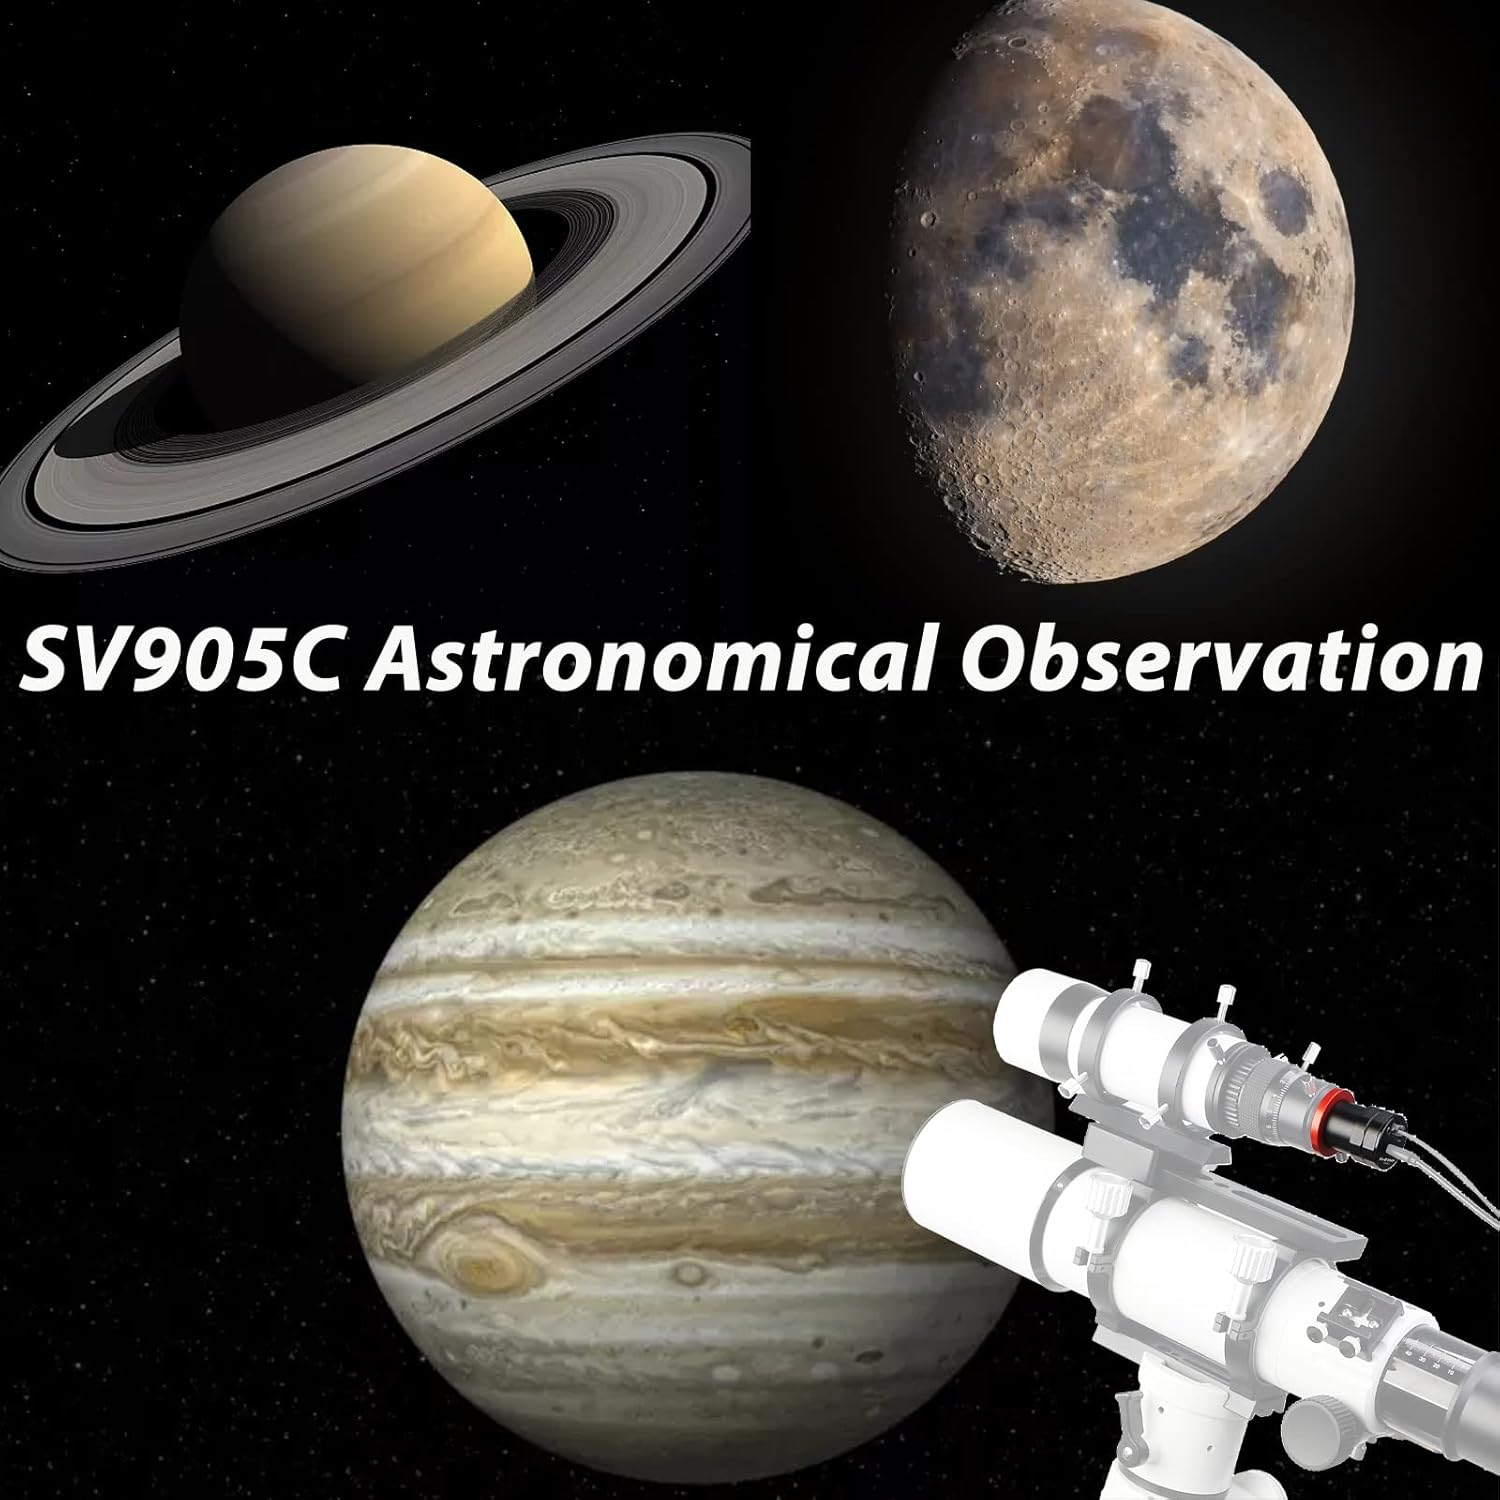
Figure 8: Examples of astronomical observations possible with the SV905C camera.
Video 4: This video demonstrates a complete astrophotography setup, including camera connection and software interaction for capturing celestial objects.
5.3 WiFi Connection
The SV905C camera supports WiFi connectivity for remote control and live view via a smartphone application.
- Download the App: Scan the QR code provided in the product documentation or search for the official SVBONY app on your smartphone's app store.
- Power On and Turn on WiFi: Power on the camera. Press and hold the WiFi button until the indicator light activates.
- Connect to WiFi: On your smartphone, go to WiFi settings and connect to the camera's WiFi network (e.g., "ZHENYI-XXXX"). The default password is typically "12345678".
- Launch App: Open the SVBONY app and add the camera. You should now see a live view from the camera.
Video 5: This video provides step-by-step instructions on how to connect the telescope camera to a smartphone via WiFi for remote operation and viewing.
6. Technical Specifications
| Feature | Specification |
|---|---|
| Product Dimensions | 1.42 x 1.42 x 2.56 inches |
| Item Weight | 8 ounces |
| ASIN | B09NM111TD |
| Item Model Number | FCAF9198G |
| Manufacturer | SVBONY |
| Date First Available | December 14, 2021 |
| Sensor | 1.23MP CMOS (1280x960) |
| Pixel Size | 3.75 microns |
| Peak QE | 80% |
| Interface | USB 2.0, ST4 Guiding Port |
| Optical Interface | 1.25-inch, CS-mount, C-mount (with adapters) |
| Filter Threads | M28.5x0.6 (internal) |
| Operating Temperature | -5°C to 45°C |
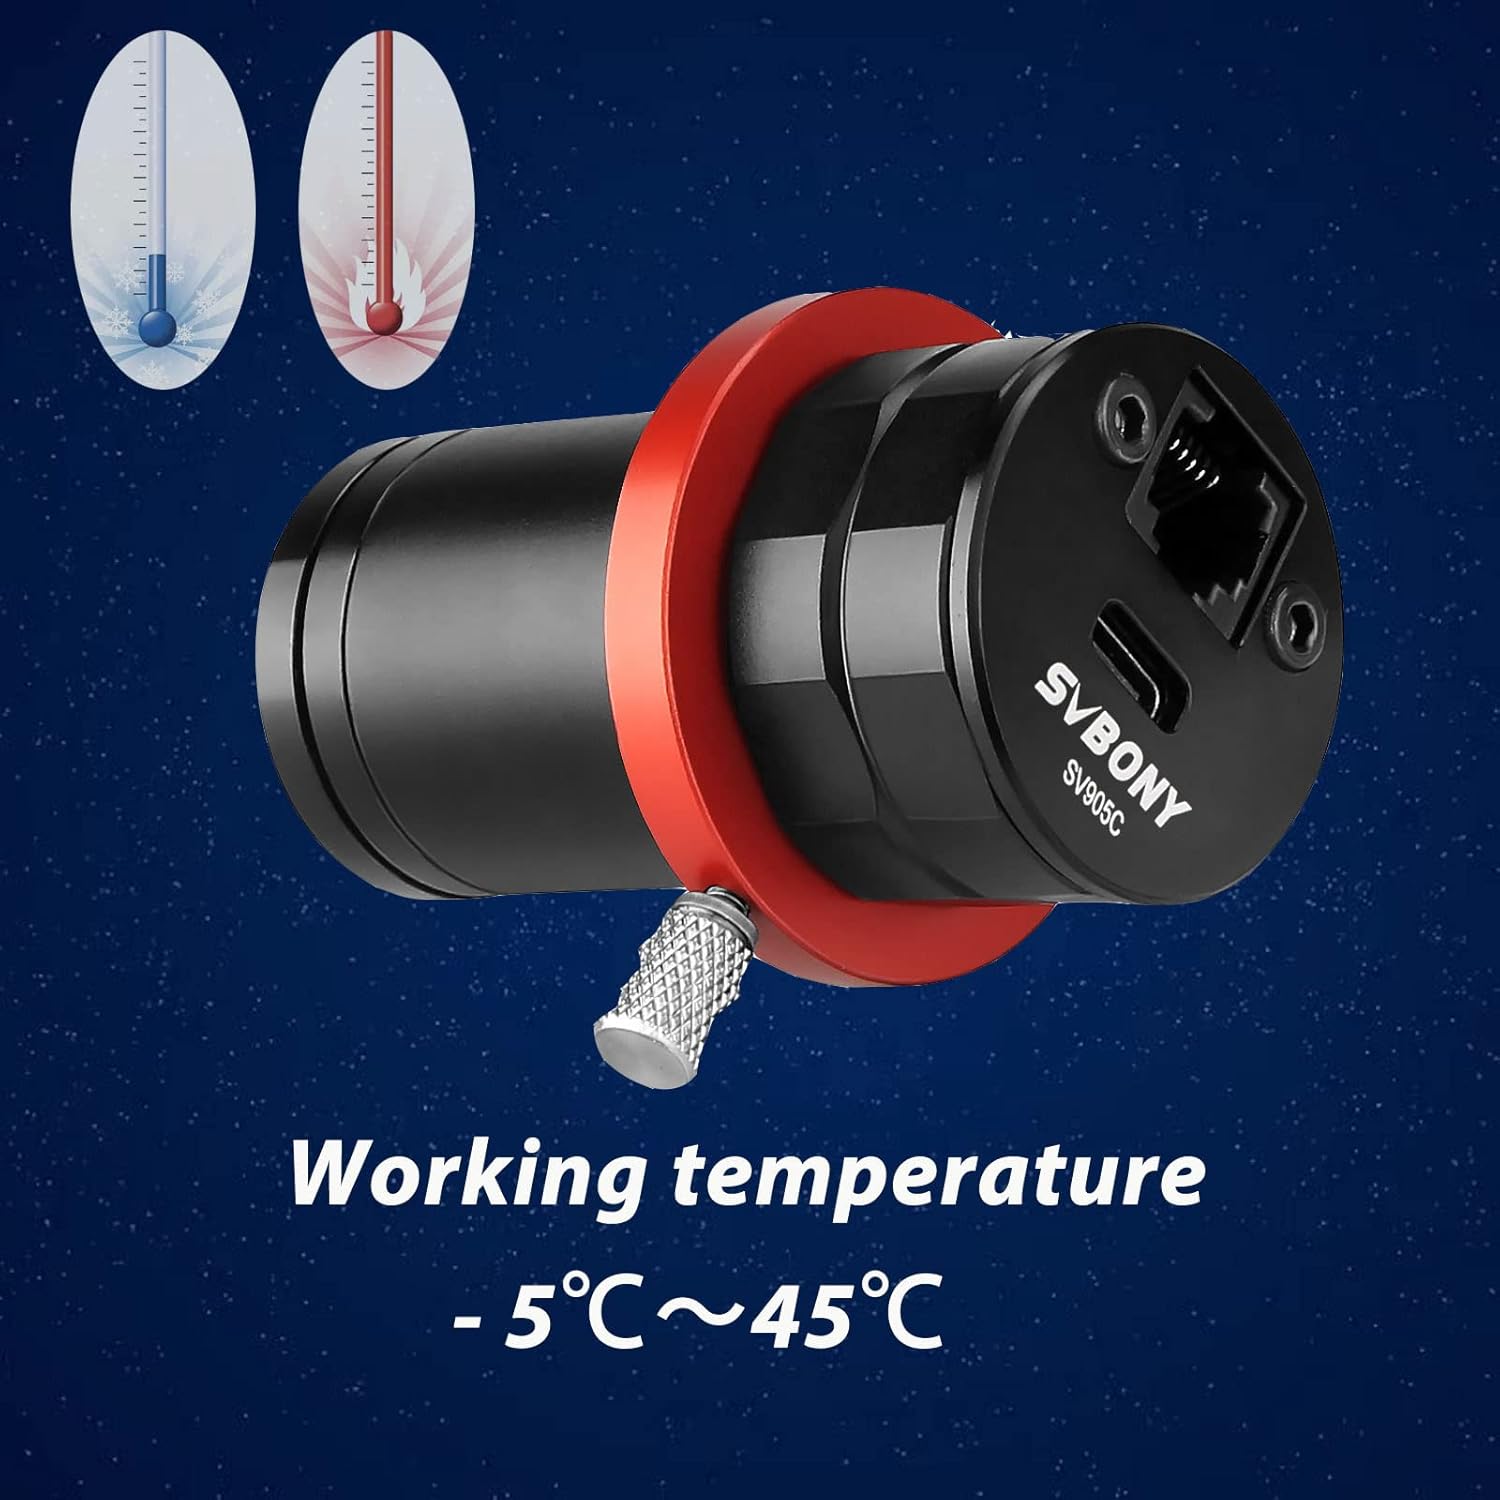
Figure 9: The SV905C camera is designed to operate within a temperature range of -5°C to 45°C.
7. Care and Maintenance
- Cleaning the Sensor: Use a specialized sensor cleaning kit (blower, brush, or swabs) to remove dust from the sensor. Avoid touching the sensor directly with your fingers.
- Cleaning the Body: Wipe the camera body with a soft, dry cloth. Do not use harsh chemicals or abrasive materials.
- Storage: Store the camera in a dry, dust-free environment, preferably in its original packaging or a padded case, when not in use.
- Temperature: Avoid exposing the camera to extreme temperatures or rapid temperature changes, which can lead to condensation.
8. Troubleshooting
8.1 Camera Not Detected by Computer
- Check USB Connection: Ensure the USB cable is securely connected to both the camera and the computer. Try a different USB port or cable.
- Driver Installation: Verify that the correct camera drivers are installed. Reinstall drivers if necessary.
- Software Selection: Make sure the camera is correctly selected within your astrophotography software (e.g., PHD2, SharpCap).
- Power: Ensure the camera is receiving sufficient power via the USB connection.
8.2 Guiding Issues
- ST4 Cable: Check the ST4 guiding cable connection between the camera and the mount. Ensure it is securely plugged in.
- ST4 Pinout: Be aware that some ST4 port wirings can differ. Consult your mount's manual and SVBONY support if issues persist.
- Focus: Ensure the guide scope and camera are properly focused.
- Gain/Exposure: Adjust gain and exposure settings in your guiding software to detect enough guide stars.
8.3 Image Quality Problems
- Focus: Verify precise focus of your telescope and camera.
- Exposure/Gain: Experiment with different exposure times and gain settings to optimize image brightness and reduce noise.
- Light Pollution: Use appropriate filters (e.g., narrowband filters) to mitigate the effects of light pollution.
- Condensation: If condensation occurs, allow the camera to acclimate to the ambient temperature before use.
9. Warranty and Customer Support
SVBONY products are typically covered by a manufacturer's warranty. Please refer to the warranty card included with your product or visit the official SVBONY website for detailed warranty information and terms.
For technical assistance, troubleshooting, or any inquiries regarding your SV905C camera, please contact SVBONY customer support through their official website or the contact information provided in your product documentation.


