1. Introduction
This manual provides detailed instructions for the operation and maintenance of your MYPIN VG0109 Video to Digital Converter. Please read this manual thoroughly before using the device to ensure proper functionality and to maximize your user experience.
The MYPIN VG0109 is designed to convert analog video sources (such as VHS, Hi8, camcorders, and set-top boxes) into digital MP4 format, saving them directly to a TF card or USB drive without requiring a computer. It features a 4.3-inch display for preview and playback, built-in stereo speakers, and a microphone input.
2. Safety Information
- Do not expose the device to moisture or extreme temperatures.
- Use only the provided power cable or a compatible Type-C to USB cable for power supply.
- Avoid disassembling the device, as this will void the warranty and may cause damage.
- Keep the device away from strong magnetic fields.
- Ensure proper ventilation during operation.
3. Package Contents
Verify that all items are present in the package:
- MYPIN VG0109 Video to Digital Converter
- AV Cable (3.5mm to 3RCA)
- USB Type-C to USB-A Power Cable
- RCA Couplers (Red, White, Yellow)
- User Manual (this document)
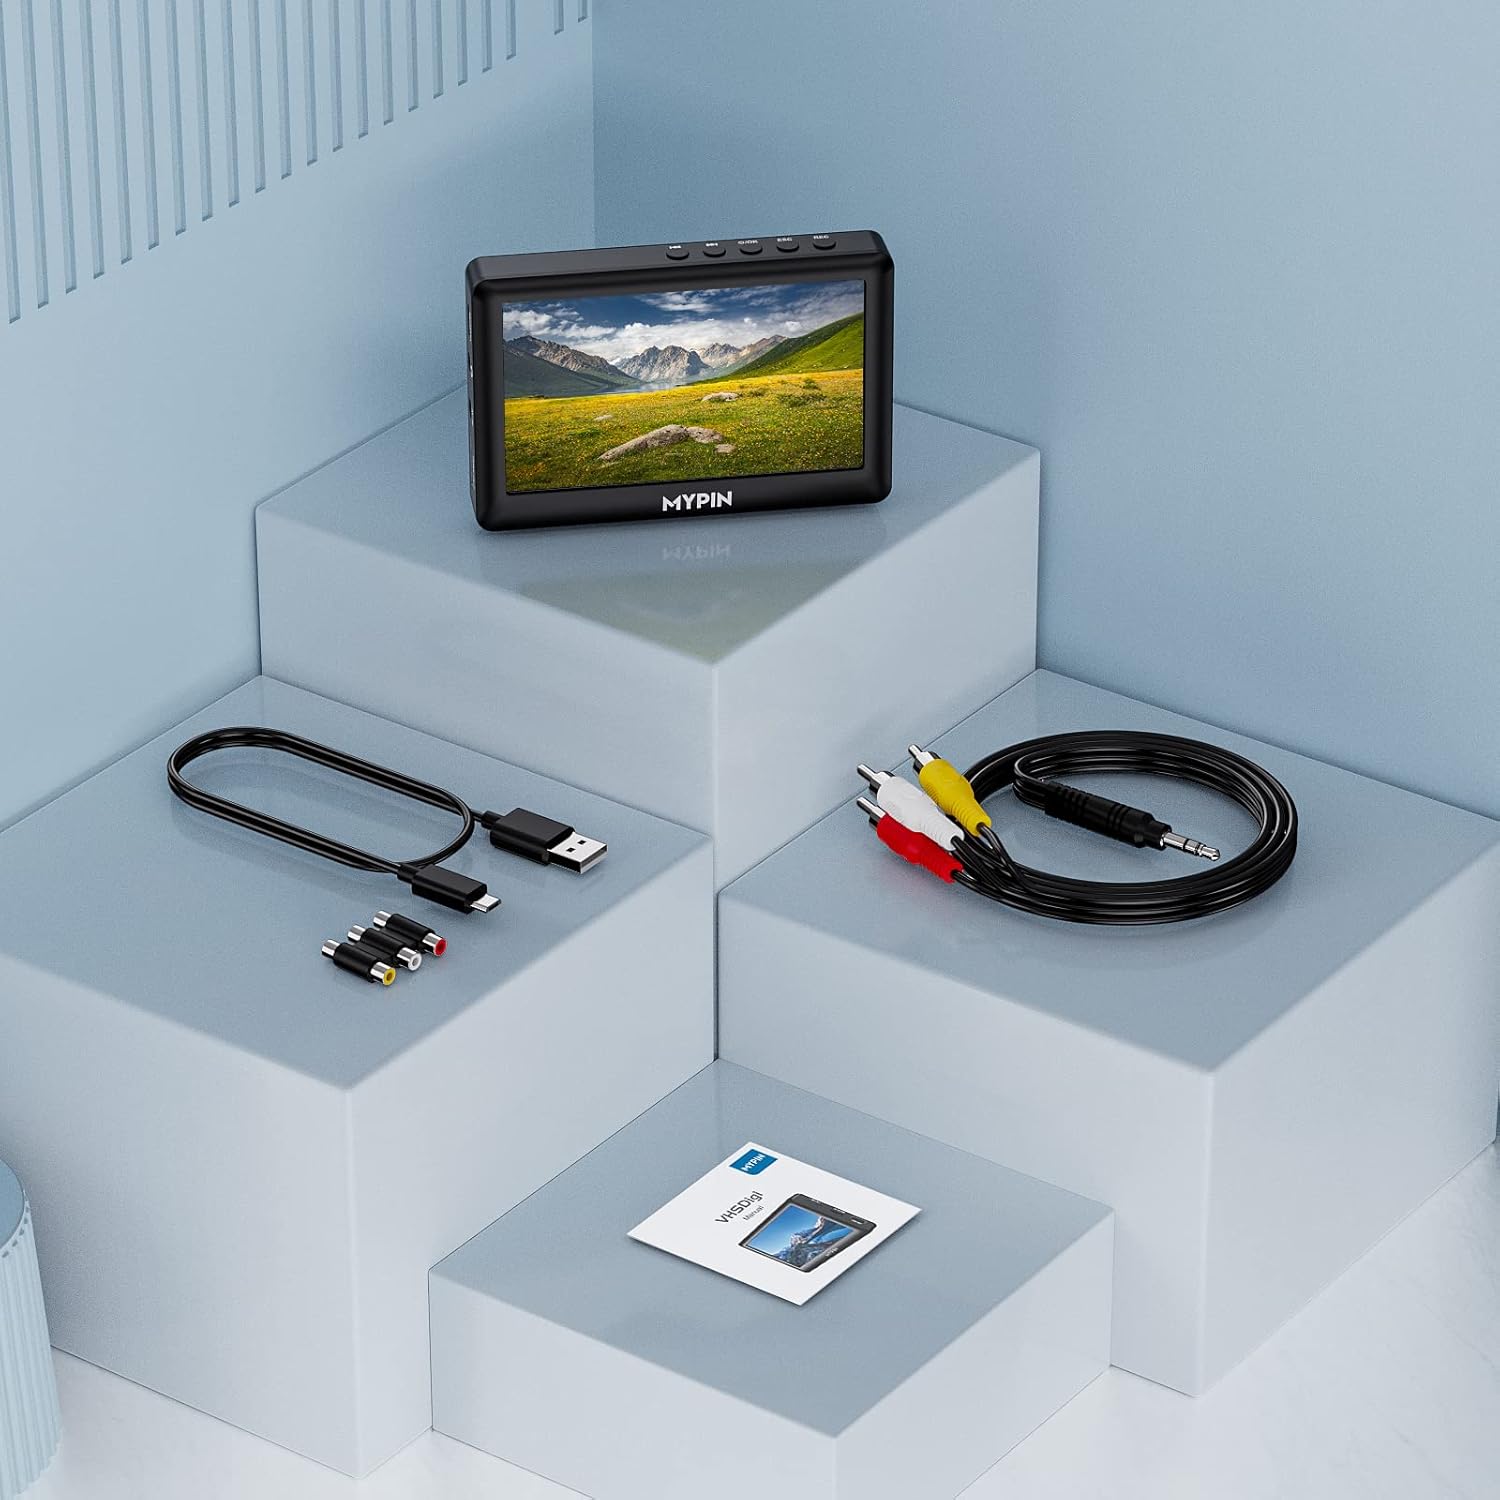
Image: The MYPIN VG0109 converter unit, an AV cable, a USB power cable, RCA couplers, and the instruction manual, laid out on a light blue background.
4. Device Overview
Front Panel and Controls

Image: A detailed view of the MYPIN VG0109 converter, highlighting the 4.3-inch LCD screen, control buttons (REC, ESC, OK, Next, Previous), and various ports on the side.
- REC Button: Press to start recording in video preview mode. Press again to stop recording and save the file.
- ESC Button: Returns to the previous menu.
- OK Button: Long press to power on/off. In playback, press to play/pause.
- Previous/Next Buttons: Press to navigate. Long press for fast forward/rewind during playback.
Side Ports
- DC/5V: USB Type-C port for power supply.
- AV IN: 3.5mm jack for analog video and audio input (connects to AV cable).
- HDMI OUT: HDMI port for connecting to an external display.
- MIC IN: 3.5mm jack for microphone input (TRS standard microphone only).
- USB HOST: USB-A port for connecting USB flash drives.
- Micro SD: Slot for TF/Micro SD cards.
- VOLUME +/-: Volume control buttons.
- Headphone Jack: 3.5mm output for headphones.
5. Setup
Powering the Device
Connect the provided USB Type-C to USB-A cable to the DC/5V port on the device and to a USB power adapter (not included) or a computer USB port. The device has a built-in battery for portable use.

Image: The MYPIN VG0109 screen displaying a battery icon and text indicating a 1500mAh capacity, 2 hours recording, and 2 hours video playback.
Inserting Storage Media
The device supports TF cards (Micro SD) up to 64GB and USB flash drives. Ensure the storage device is formatted to FAT32 or exFAT before use.
- Insert a TF card into the Micro SD slot until it clicks.
- Insert a USB flash drive into the USB HOST port.

Image: A close-up of the MYPIN VG0109's side, showing a USB flash drive inserted into the USB HOST port and a Micro SD card inserted into its slot, with "64GB Max Capacity" indicated.
Connecting Analog Video Source
Use the provided 3.5mm to 3RCA AV cable to connect your analog video source (e.g., VCR, camcorder) to the "AV IN" port on the converter.
- Connect the 3.5mm jack of the AV cable to the "AV IN" port on the MYPIN VG0109.
- Connect the yellow RCA plug to the video output of your source device.
- Connect the white RCA plug to the left audio output of your source device.
- Connect the red RCA plug to the right audio output of your source device.

Image: The MYPIN VG0109 converter connected to a VCR using the yellow, white, and red RCA cables, with a USB flash drive inserted into the converter.
For audio-only recording, connect only the white and red RCA plugs.

Image: A diagram illustrating how to connect a VHS player or camcorder to the MYPIN VG0109 converter, which then outputs to a television, enabling instant viewing and capture.
Connecting to an External Display (Optional)
To view the video on a larger screen, connect an HDMI cable from the "HDMI OUT" port on the converter to an HDMI input on your TV or monitor.
6. Operating Instructions
Power On/Off
Long press the OK button to power the device on or off.
Recording Video
- Ensure your analog video source is connected and playing.
- Power on the MYPIN VG0109. The 4.3-inch screen will display the live video feed from your source.
- Press the REC button to start recording. A recording indicator will appear on the screen.
- To pause recording, press the OK button. Press OK again to resume.
- To stop recording and save the file, press the REC button again. The recorded video will be saved as an MP4 file on your inserted TF card or USB drive.
Note: The device supports recording from HDMI video sources as well.
Adding Microphone Commentary
Connect a TRS standard microphone to the "MIC IN" 3.5mm jack. Your commentary will be recorded along with the video.
Playing Back Recorded Videos
- From the main menu, navigate to the "Playback" option using the navigation buttons.
- Select the desired video file from your storage device.
- Press the OK button to start playback.
- During playback, press OK to pause/resume. Use the Previous/Next buttons for navigation or long press for fast forward/rewind.
The device supports playback of various video (avi, mov, mkv, webm, mp4, m4v, flv, 3gp, 3g2, 3gpp, dat, vob, evo, mpg, asf, trp, ts, m2ts, mts) and audio (mp3, ogg, ape, flac, wav, amr, aiff, mpc) file formats.

Image: The MYPIN VG0109 converter displaying a movie scene on its 4.3-inch screen, illustrating its playback capability for movies, music, or pictures from USB storage devices.
Audio Recording Only
To record audio only, ensure only the white and red RCA audio cables are connected to the AV IN port. Then, follow the recording steps.
7. Maintenance
- Clean the device with a soft, dry cloth. Do not use liquid cleaners or aerosols.
- Store the device in a cool, dry place when not in use.
- Regularly back up your recorded files from the TF card or USB drive to prevent data loss.
- Keep the ports free of dust and debris.
8. Troubleshooting
No Video Signal on Screen
- Ensure the AV cable is securely connected to both the source device and the "AV IN" port on the converter.
- Verify that the source device (VCR, camcorder) is powered on and playing video.
- Check if the correct input is selected on the converter (if applicable, though this model typically auto-detects AV IN).
No Audio During Playback or Recording
- Check the audio RCA cable connections (white and red).
- Adjust the volume using the +/- buttons on the device.
- Ensure the source device's audio output is functioning.
- If using headphones, ensure they are properly plugged into the 3.5mm headphone jack.
Device Not Powering On
- Ensure the USB Type-C power cable is correctly connected and the power source is active.
- Charge the internal battery for at least 30 minutes if it's completely drained.
- Try a different USB power adapter or USB port.
Recording Fails or Files are Corrupted
- Ensure the TF card or USB drive has sufficient free space.
- Verify that the storage device is formatted to FAT32 or exFAT.
- Try a different TF card or USB drive.
- Ensure the storage device is securely inserted.
Screen Goes Green or Flashes During Recording
- This may indicate a temporary display issue. The recording itself might still be valid. Try restarting the device.
- Ensure the power supply is stable.
9. Specifications
| Feature | Detail |
|---|---|
| Model Number | VG0109 |
| Display | 4.3-inch LCD |
| Video Input | AV (3.5mm jack) |
| Video Output | HDMI |
| Audio Input | AV (3.5mm jack), MIC IN (3.5mm jack) |
| Audio Output | 3.5mm Headphone Jack, Built-in Stereo Speakers |
| Recording Format | MP4 |
| Storage Media | TF Card (Micro SD) up to 64GB, USB Flash Drive |
| Battery | 1500mAh Lithium Ion (approx. 2 hours recording/playback) |
| Power Supply | DC 5V (USB Type-C) |
| Dimensions | 5.04 x 5.04 x 2.24 inches (Package) |
| Weight | 11.7 ounces |
10. Warranty and Support
For warranty information and technical support, please refer to the contact details provided with your purchase or visit the official MYPIN website. Keep your proof of purchase for warranty claims.
This product is covered by a standard manufacturer's warranty against defects in materials and workmanship.


