
1. Product Overview
This manual provides instructions for the ZTBH Manual Toilet Pump Assembly, designed as a replacement part for various RV and boat manual toilets. It is compatible with models 29040-3000, 29120-3000, and 29090-3000, and can also be used to upgrade older manual toilets manufactured as far back as 1986.
Key features of this pump assembly include:
- Direct replacement for part number 29040-3000.
- Compatibility with 29120-3000 and 29090-3000 manual toilets.
- Upgrade capability for older manual toilets (pre-1986).
- Locking handle mechanism: Apply lock with a 90° turn of the handle; return to the natural operating position to open the lock.
- Designed for quick start, high efficiency, and long service life.

Figure 1: Front view of the ZTBH Manual Toilet Pump Assembly, showing the handle and control knob.
2. Specifications
The following table details the key specifications of the ZTBH Manual Toilet Pump Assembly:
| Specification | Value |
|---|---|
| Brand | ZTBH |
| Item Weight | 1.1 pounds (500 Grams) |
| Color | Onecolor (White with dark blue handle) |
| Style | Pump |
| Manufacturer | ZTBH |

Figure 2: Dimensional drawing of the ZTBH Manual Toilet Pump Assembly, showing overall height, width, and port diameters.
- Approximate Dimensions (from diagram):
- Overall Height: 328mm (12.93")
- Main Body Diameter: Ø53mm (2.07")
- Base Width: 108mm (4.26")
- Overall Depth (from front to back of base): 231mm (9.09")
- Inlet Port Diameter: Ø20mm (0.77")
- Outlet Port Diameter: Ø38mm (1.49")
3. Setup and Installation
This section outlines the general steps for installing the ZTBH Manual Toilet Pump Assembly. It is recommended to consult your specific toilet model's manual for detailed removal instructions of the old pump.
3.1. Included Components
Before beginning, ensure all components are present:
- 1 x Toilet Manual Pump Assembly
- 1 x Base Valve Gasket
- 4 x Accessories (various fittings/seals)
- 6 x Screws
3.2. Installation Steps
- Preparation: Ensure the water supply to the toilet is shut off and the toilet bowl is empty. Disconnect any hoses connected to the existing pump.
- Remove Old Pump: Carefully unbolt and remove the old pump assembly from the toilet base. Be prepared for residual water.
- Clean Mounting Surface: Clean the mounting surface on the toilet base thoroughly to ensure a good seal for the new pump.
- Install New Gasket: Place the new base valve gasket onto the mounting flange of the ZTBH pump assembly or onto the toilet base, ensuring it is correctly aligned.
- Mount Pump Assembly: Position the new pump assembly onto the toilet base, aligning the screw holes. Secure it using the provided screws. Tighten screws evenly to ensure a watertight seal, but do not overtighten.
- Connect Hoses: Reconnect the inlet and outlet hoses to the appropriate ports on the new pump assembly. Ensure all connections are secure and leak-free. Use hose clamps if necessary.
- Test for Leaks: Slowly turn on the water supply to the toilet and check all connections for any leaks. Operate the pump a few times to ensure proper function and check for leaks under pressure.

Figure 3: Side view of the pump assembly, showing the inlet and outlet ports for hose connections.
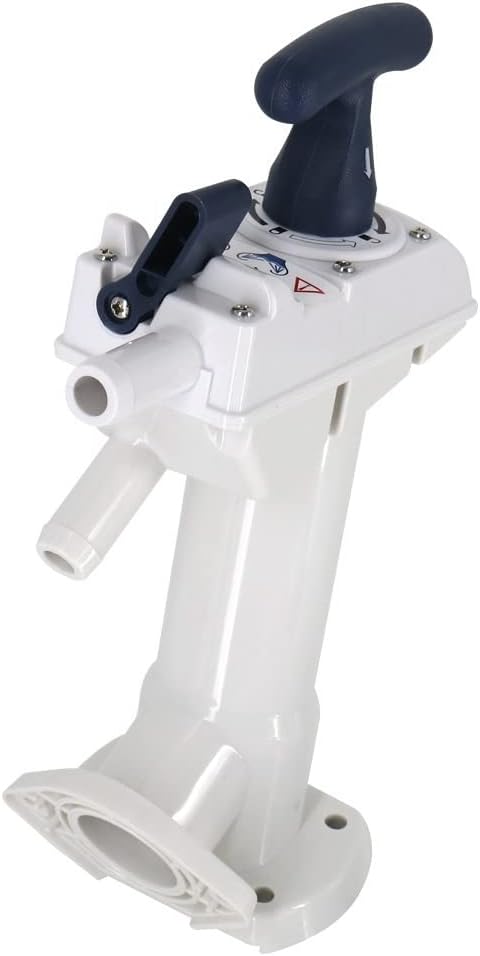
Figure 4: Angled view of the pump assembly, highlighting the base and mounting points.
4. Operating Instructions
The ZTBH Manual Toilet Pump Assembly is designed for straightforward operation. Familiarize yourself with the handle and control knob functions.
4.1. Pumping Operation
- Ensure the handle is in the unlocked, natural operating position (typically straight up or slightly angled, as shown in Figure 1).
- To flush the toilet, operate the pump handle with a full stroke, pushing it down and pulling it up repeatedly until the bowl is clear.
- The number of strokes required will vary depending on the amount of waste and the desired water level.
4.2. Handle Locking Mechanism
The pump assembly features a locking mechanism to prevent accidental operation or to secure the handle during travel.
- To Lock: With the handle in the down position (or as indicated by the markings on the pump head), turn the handle 90 degrees. This will engage the lock, preventing the handle from being pulled up.
- To Unlock: Turn the handle back to its original position (90 degrees in the opposite direction). The handle will then be free to operate for flushing.
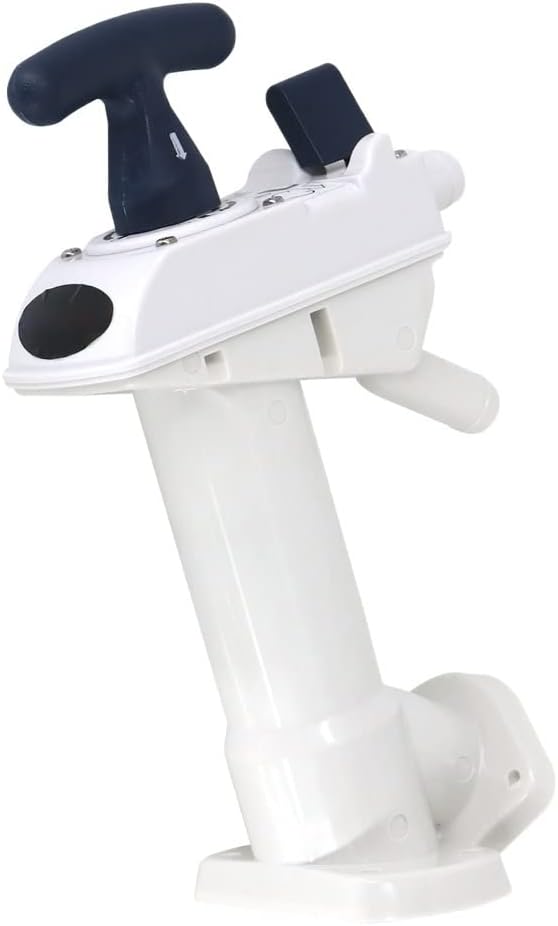
Figure 5: The pump assembly with the handle in a position that may indicate a locked state or a specific operational mode, as per the 90-degree turn instruction.
5. Maintenance
Regular maintenance ensures the longevity and efficient operation of your ZTBH Manual Toilet Pump Assembly.
- Regular Cleaning: Periodically flush the toilet with fresh water to clear any debris or buildup in the pump mechanism. Avoid harsh chemicals that can damage seals.
- Inspect Seals and Gaskets: Annually, or if you notice reduced pumping efficiency or leaks, inspect the base valve gasket and other internal seals. Replace them if they show signs of wear, cracking, or damage.
- Lubrication: If the pump handle becomes stiff, a marine-grade lubricant suitable for rubber and plastic components can be applied to the moving parts and seals. Consult a marine service professional if unsure.
- Winterization (for RV/Boat use): Before storing your RV or boat in freezing temperatures, ensure the pump and associated plumbing are completely drained and winterized according to your vessel's specific instructions. This typically involves flushing with non-toxic antifreeze.
6. Troubleshooting
This section addresses common issues you might encounter with your manual toilet pump assembly.
| Problem | Possible Cause | Solution |
|---|---|---|
| Pump loses prime or doesn't draw water | Air leak in inlet hose or connections; Worn or damaged inlet valve/seal; Blockage in inlet line. | Check all inlet hose connections for tightness. Inspect and replace inlet valve/seal if damaged. Clear any blockages in the inlet line. |
| Water leaks from pump base | Damaged or improperly seated base valve gasket; Loose mounting screws. | Ensure mounting screws are tightened evenly. Inspect and replace the base valve gasket if damaged. |
| Pump handle is stiff or hard to operate | Lack of lubrication; Buildup of mineral deposits or waste; Worn internal components. | Apply marine-grade lubricant to moving parts. Flush with fresh water. If problem persists, internal components may need inspection or replacement. |
| Poor flush performance | Partial blockage in discharge line; Worn outlet valve/seal; Insufficient water supply. | Check discharge line for blockages. Inspect and replace outlet valve/seal if damaged. Ensure adequate water supply to the toilet. |
7. Warranty and Support
ZTBH is committed to providing quality products and customer satisfaction. While specific warranty details are not provided in this manual, we encourage you to reach out for any assistance.
If you have any questions during the use, installation, or maintenance of your ZTBH Manual Toilet Pump Assembly, please do not hesitate to contact us. Our support team is available to help you resolve any issues you may encounter.
Please refer to your purchase documentation or the seller's contact information for the most direct way to reach customer support.