Introduction
This manual provides detailed instructions for the safe and effective use of your WilTec XPOtool Drain Cleaning Hose. This 15-meter hose is designed to connect to a high-pressure cleaner (not included) for clearing blockages in drains, gutters, and pipes, as well as for general cleaning tasks on various surfaces. Please read this manual thoroughly before first use and keep it for future reference.

Figure 1: The WilTec XPOtool 15m drain cleaning hose, coiled, with the four included adapters laid out in front.
Safety Instructions
Always observe the following safety precautions to prevent injury or damage to the product.
- Read the Manual: Before operating, read and understand all instructions in this manual and the manual for your high-pressure cleaner.
- Protective Gear: Always wear appropriate personal protective equipment, including safety glasses and gloves, when operating the drain cleaning hose.
- Pressure Warning: The hose operates under high pressure. Never point the nozzle at people, animals, or electrical equipment.
- Water Temperature: Do not exceed the maximum water temperature of 60°C (140°F).
- Pressure Limit: Do not exceed the maximum working pressure of 160 bar (2320 PSI).
- Chemicals: Avoid using corrosive or flammable chemicals with the hose.
- Electrical Safety: Ensure all electrical connections for the high-pressure cleaner are dry and safe.
- Children and Pets: Keep children and pets away from the work area during operation.
- Hose Inspection: Before each use, inspect the hose and connections for any signs of damage, wear, or leaks. Do not use if damaged.
- Proper Connection: Ensure all adapters are securely attached to prevent accidental disconnection under pressure.
Package Contents
Verify that all items listed below are present in your package:
- 1 x WilTec XPOtool Drain Cleaning Hose (15 meters)
- 4 x High-Pressure Cleaner Adapters (various types for compatibility)
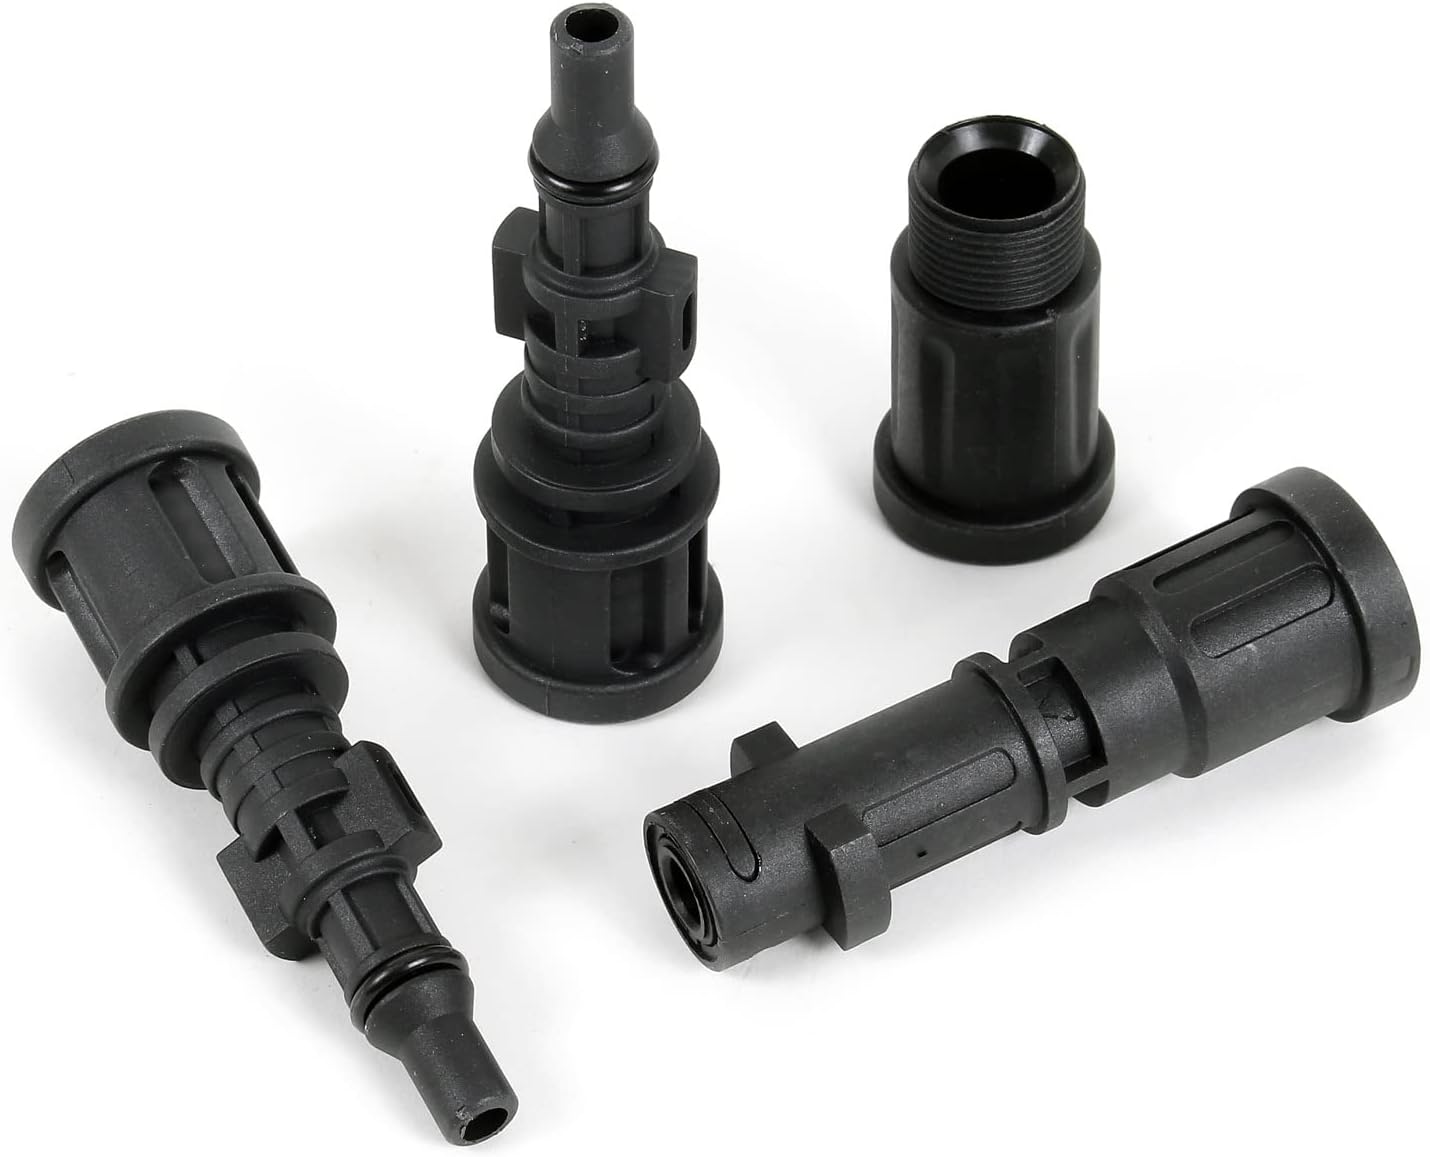
Figure 2: The four distinct high-pressure cleaner adapters included with the hose, designed for broad compatibility.
Setup and Connection
- Select Adapter: Identify the correct adapter for your specific high-pressure cleaner model. The kit includes four different adapters to ensure broad compatibility.
- Attach Adapter: Securely attach the chosen adapter to the inlet end of the drain cleaning hose. Ensure a tight, leak-free connection.
- Connect to High-Pressure Cleaner: Connect the adapter end of the drain cleaning hose to the high-pressure outlet of your high-pressure cleaner. Refer to your high-pressure cleaner's manual for specific connection instructions.
- Prepare Nozzle End: The hose features a special nozzle at the other end, designed to propel the hose forward and clear blockages. Ensure this nozzle is clear of obstructions.
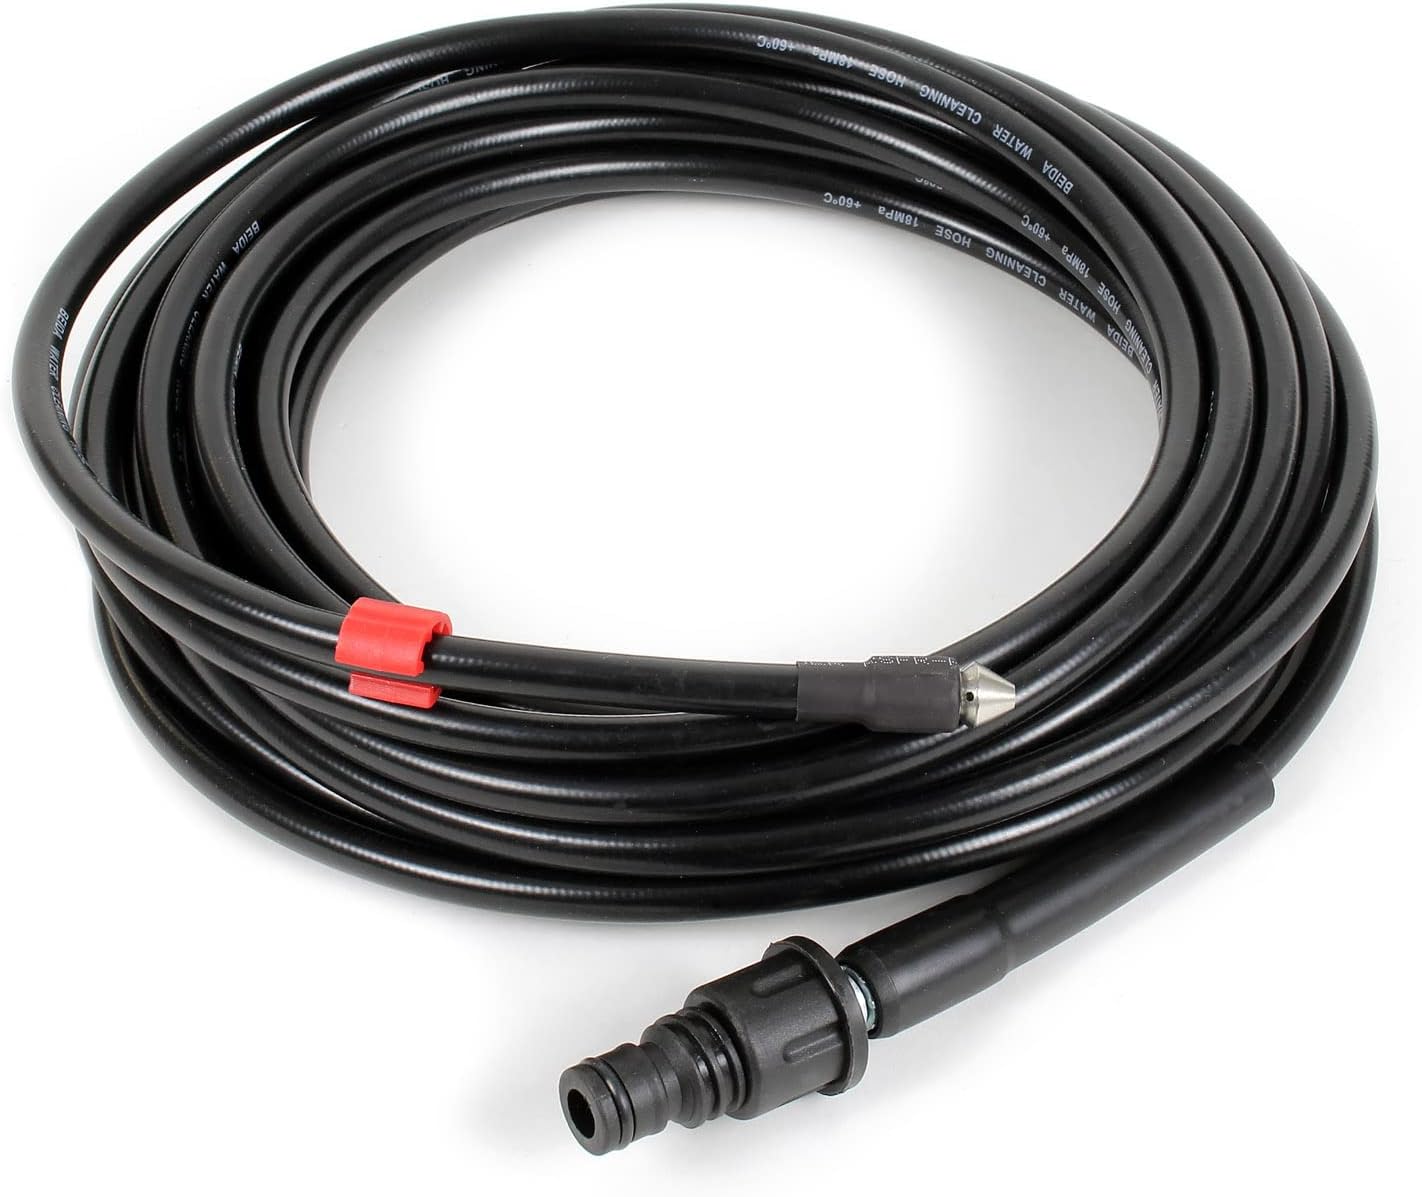
Figure 3: The drain cleaning hose with an adapter connected, ready for attachment to a high-pressure cleaner.
Operation
Follow these steps for effective and safe operation of the drain cleaning hose:
- Insert Hose: Before turning on the high-pressure cleaner, carefully insert the nozzle end of the drain cleaning hose into the pipe or drain you intend to clear. Push it as far as possible by hand until resistance is met.
- Activate High-Pressure Cleaner: Once the hose is securely in the pipe, turn on your high-pressure cleaner. The backward-facing jets on the nozzle will create thrust, propelling the hose further into the pipe and dislodging debris.
- Monitor Progress: The hose is equipped with a marking ring that helps you determine its exact position within the pipe. This allows you to monitor how far the hose has advanced.
- Clear Blockages: Slowly feed the hose into the pipe, allowing the high-pressure water to break up and flush away blockages. For stubborn clogs, you may need to pull the hose back slightly and push it forward again to apply more pressure.
- General Cleaning: For cleaning surfaces like paving stones or garden furniture, hold the nozzle at an appropriate distance from the surface and move it steadily to remove dirt.
- Retract Hose: Once the cleaning is complete, turn off the high-pressure cleaner. Carefully pull the hose out of the pipe.
- Drain Water: The hose features kink protection to prevent water accumulation. Ensure any remaining water drains out before storage.
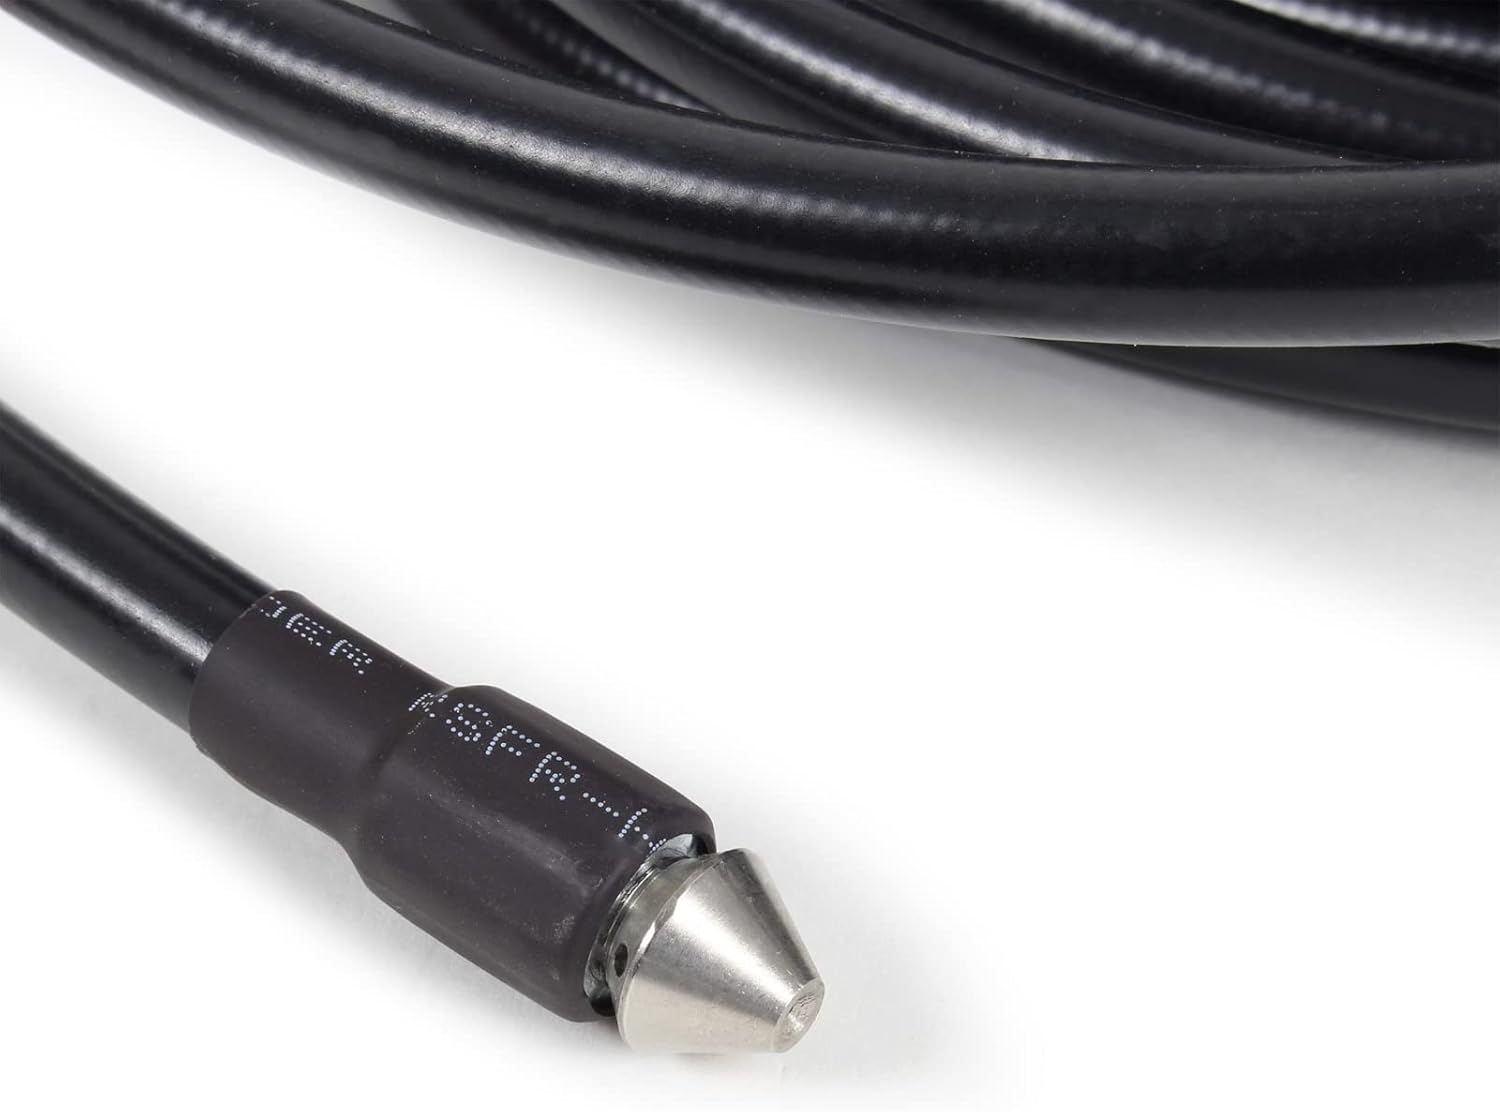
Figure 4: A close-up view of the specialized nozzle at the end of the drain cleaning hose, designed for propulsion and effective cleaning.
Maintenance and Storage
- Cleaning: After each use, rinse the hose thoroughly with clean water to remove any debris or residue.
- Inspection: Regularly inspect the hose, adapters, and nozzle for signs of wear, cracks, or damage. Replace any damaged components immediately.
- Storage: Store the hose in a cool, dry place, away from direct sunlight and extreme temperatures. Coil the hose neatly to prevent kinks and tangles.
- Adapter Care: Keep the adapters clean and free of debris. Lubricate O-rings if necessary to maintain a good seal.
Troubleshooting
| Problem | Possible Cause | Solution |
|---|---|---|
| No water pressure from nozzle. | High-pressure cleaner not on or not supplying pressure; nozzle clogged. | Ensure high-pressure cleaner is operating correctly. Check and clear nozzle for blockages. |
| Hose not advancing in pipe. | Severe blockage; insufficient water pressure; hose kinked. | Increase pressure if possible. Gently pull back and push forward. Check for kinks. If blockage is too severe, professional help may be needed. |
| Water leaking from connections. | Loose connection; damaged O-ring or adapter. | Tighten all connections. Inspect O-rings and adapters for damage and replace if necessary. |
| Hose appears damaged. | Wear and tear; improper use or storage. | Discontinue use immediately. Do not attempt to repair. Replace the hose. |
Specifications
| Feature | Detail |
|---|---|
| Model Number | 62992 |
| Hose Length | 15 meters (approx. 49.2 feet) |
| Maximum Working Pressure | 160 bar (2320 PSI) |
| Maximum Water Temperature | 60°C (140°F) |
| Inner Diameter | 6 mm (1/4") |
| Outer Diameter | 10 mm (3/8") |
| Materials | Polyethylene (PE), Polyvinyl Chloride (PVC), Polyester |
| Weight | 1.1 Kilograms (approx. 2.4 lbs) |
| Dimensions (L x W x H) | 1500 x 1 x 1 cm (approx. 590.6 x 0.4 x 0.4 inches) |
Warranty and Support
For warranty information and customer support, please refer to the documentation provided with your purchase or visit the official WilTec website. Keep your proof of purchase for any warranty claims.
For further assistance or technical inquiries, please contact WilTec customer service.


