
ONN 100020900
Contents
Onn 720p LCD Home Theater Projector
Instruction Manual
Model: 100020900
Introduction
This manual provides detailed instructions for setting up, operating, and maintaining your Onn 720p LCD Home Theater Projector. Please read this manual thoroughly before using the projector to ensure proper operation and to maximize your viewing experience.
What's in the Box
Verify that all the following items are included in your package:
- Onn 720p LCD Home Theater Projector
- Remote control (batteries not included)
- HDMI cable
- 3.5mm to RCA audio/video adapter
- AC/DC power adapter
- Lens cover
- Cleaning cloth
- Storage bag
Product Overview
Familiarize yourself with the physical components and dimensions of your projector.

The Onn 720p LCD Home Theater Projector, shown alongside its remote control. The projector features a sleek black design with a prominent lens on the front.
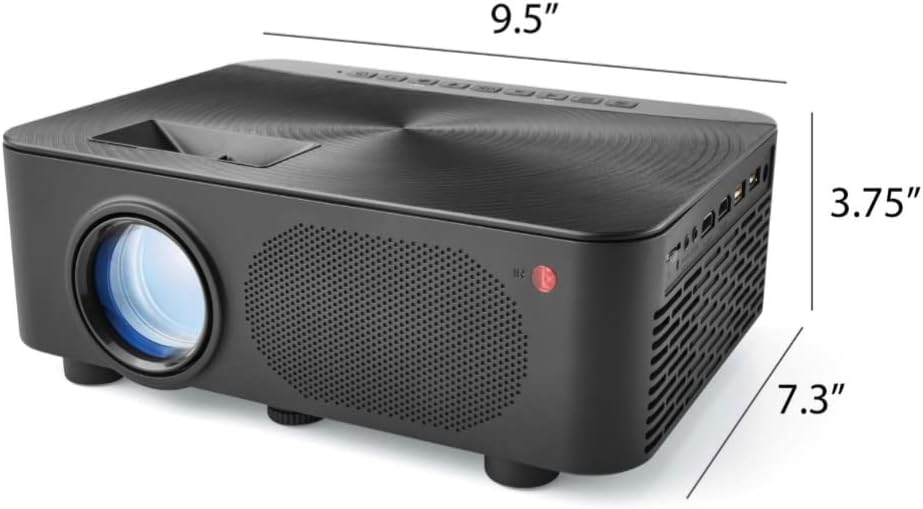
Side view of the projector illustrating its approximate dimensions: 9.5 inches in length, 7.3 inches in width, and 3.75 inches in height.
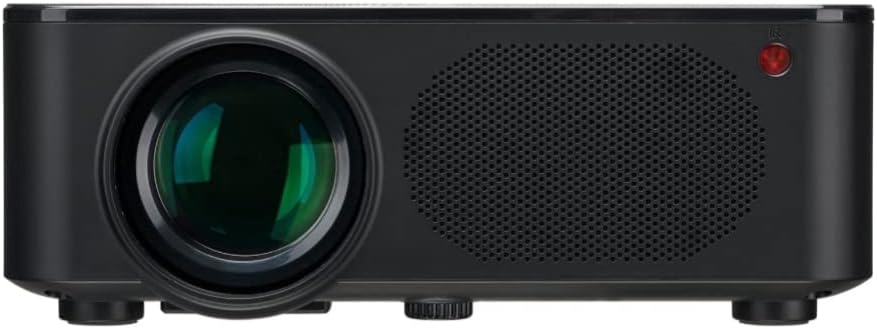
A direct front view of the projector, highlighting the main projection lens and the integrated speaker grille.
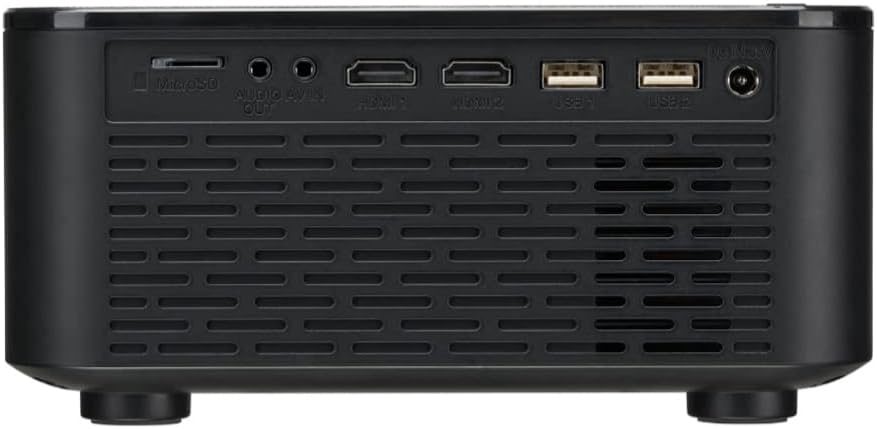
The rear panel of the projector, displaying all available input and output ports including MicroSD, Audio Out, AV In, HDMI 1, HDMI 2, USB 1, USB 2, and DC In.
Setup
1. Power Connection
Connect the included AC/DC power adapter to the 'DC IN' port on the rear of the projector. Plug the other end of the adapter into a standard electrical outlet.
2. Connecting Devices
The projector offers multiple connectivity options:
- HDMI: Use one of the two HDMI ports (HDMI 1 or HDMI 2) to connect devices such as Blu-ray players, gaming consoles, or streaming sticks (e.g., Roku, Fire TV Stick) using the provided HDMI cable.
- USB: Insert USB flash drives into the USB 1 or USB 2 ports to play media files directly.
- MicroSD: Insert a MicroSD card into the MicroSD slot to access media files.
- VGA: Connect a computer or laptop using the VGA port.
- AV: Use the 3.5mm to RCA audio/video adapter to connect older devices with RCA outputs.
3. Focus and Keystone Adjustment
Once powered on and projecting an image, adjust the focus and keystone correction:
- Focus: Rotate the focus knob located near the lens until the projected image appears sharp and clear.
- Keystone: If the projected image appears trapezoidal (wider at the top or bottom), use the keystone adjustment feature (often a ring around the lens or a digital setting via the remote) to correct the distortion and achieve a rectangular image.
Operating
1. Power On/Off
Press the power button on the projector or the remote control to turn the unit on or off.
2. Input Source Selection
Use the 'Source' button on the remote control or the projector's control panel to cycle through available input sources (HDMI 1, HDMI 2, USB, MicroSD, VGA, AV) until your desired input is displayed.
3. Remote Control Usage
The included remote control allows for convenient operation from a distance. It features buttons for power, input source selection, navigation (up, down, left, right, OK), volume control, menu access, and playback controls.
4. Audio Output
The projector has built-in 3W speakers. For enhanced audio, connect external speakers or a soundbar to the 'AUDIO OUT' 3.5mm jack on the rear of the projector.
Maintenance
1. Cleaning the Lens
Gently wipe the projector lens with the provided cleaning cloth. Do not use abrasive cleaners or solvents, as they may damage the lens.
2. General Care
Keep the projector in a clean, dust-free environment. Avoid exposing it to extreme temperatures or humidity. When not in use, place the lens cover over the lens to protect it from dust and scratches, and store the projector in its carry bag.
Troubleshooting
- No Image: Ensure the power adapter is securely connected and the projector is powered on. Verify the correct input source is selected. Check all cable connections.
- Blurry Image: Adjust the focus knob until the image is clear. Ensure the projector is placed at an optimal distance from the projection surface.
- Image is Trapezoidal: Use the keystone correction feature to square the image.
- No Sound: Check the volume level on the projector and your connected device. Ensure external speakers (if used) are properly connected and powered on.
- Remote Not Working: Check the batteries in the remote control. Ensure there are no obstructions between the remote and the projector's IR receiver.
Specifications
| Feature | Specification |
|---|---|
| Brand | ONN |
| Model | 100020900 |
| Display Resolution (Native) | 1280 x 720 (720p HD) |
| Supported Resolutions | 480p, 720p, 1080i, 1080p |
| Aspect Ratio | 16:9, 4:3 |
| Maximum Projection Size | 150 inches (over 12 feet) |
| Brightness | 190 ANSI lumens |
| LED Bulb Life | 20,000 hours |
| Display Distance | 4.5 feet - 16.5 feet |
| Connectivity | 2 HDMI, 2 USB, Micro SD Card slot, VGA, AV In |
| Audio | Built-in 3W speakers x 2, Audio Out (3.5mm) |
| Item Weight | 5.33 pounds |
| Dimensions (L x W x H) | 14.37 x 9.29 x 5.28 inches |
Warranty and Support
For warranty information, technical support, or service inquiries, please refer to the manufacturer's official website or contact their customer service directly. Keep your purchase receipt for warranty claims.
Ask a question about this manual
Ask about setup, troubleshooting, compatibility, parts, safety, or missing instructions. Manuals+ will review the question and use this page’s manual context to help answer it.