
PERLESMITH PSLF6
PERLESMITH TV Wall Mount PSLF6 Instruction Manual
Model: PSLF6
1. Product Overview
The PERLESMITH PSLF6 Full Motion TV Wall Mount is designed for large flat or curved screen televisions ranging from 37 to 85 inches, supporting weights up to 132 lbs (60 kg). This robust mount offers extensive adjustability, including a unique sliding design for horizontal TV centering, full swivel, tilt, and leveling capabilities, ensuring optimal viewing angles from various positions in your room. It is compatible with VESA patterns from 200x100mm to 600x400mm and can be installed on 16 to 24-inch wood studs, concrete, or brick walls.

Figure 1.1: PERLESMITH PSLF6 Full Motion TV Wall Mount, showcasing its articulating arms, mounting plates, and included accessories like a spirit level and cable ties.
2. Safety Information
WARNING: Failure to read and understand all instructions may result in serious personal injury, property damage, or voiding of warranty. Improper installation can lead to the TV falling, causing severe injury or death.
- Do not install into drywall alone. This mount is designed for installation into 16-24 inch wood studs, solid concrete, or brick walls.
- Ensure the wall structure can safely support the combined weight of the mount and the television.
- Do not exceed the maximum weight capacity of 132 lbs (60 kg).
- Verify VESA compatibility (200x100mm to 600x400mm) before installation.
- Always use a qualified professional for installation if you are unsure about the process.
- Keep all small parts away from children.
- Check all connections and fasteners periodically to ensure they remain secure.
3. Compatibility Check
Before proceeding with installation, ensure your television and wall are compatible with the PSLF6 mount.
- TV Weight: Your TV must weigh less than 132 lbs (60 kg).
- TV Size: The TV screen size should be between 37 and 85 inches.
- VESA Pattern: Check the mounting holes on the back of your TV. The horizontal distance must be between 200mm and 600mm, and the vertical distance between 100mm and 400mm. Common VESA patterns supported include 200x100, 200x200, 300x200, 300x300, 400x200, 400x300, 400x400, 600x200, 600x300, and 600x400mm.
- Wall Type: The mount is compatible with 16 to 24-inch wood studs, solid concrete, or brick walls. Do not install on drywall alone.

Figure 3.1: Visual guide for checking TV specifications, VESA mounting patterns, and compatible wall types for the PERLESMITH PSLF6 mount.
4. Setup and Installation
This section provides a general overview of the installation process. Refer to the detailed installation guide included with your product for step-by-step instructions and hardware identification.
4.1 Tools Required (Not Included)
- Stud Finder (for wood stud installation)
- Drill with appropriate drill bits (e.g., 5/32" for wood studs, 3/8" for concrete/brick)
- Socket Wrench or Ratchet
- Phillips Head Screwdriver
- Pencil
- Measuring Tape
- Level (a small one is included with the mount)
4.2 Installation Steps Overview
- Prepare the TV: Attach the TV brackets to the back of your television using the provided screws and spacers. Ensure the brackets are securely fastened and level.
- Locate Studs/Mark Drill Holes: For wood stud installation, use a stud finder to locate the center of two adjacent studs (16-24 inches apart). For concrete/brick, mark the desired drill locations. Use the provided drilling template to ensure accurate placement.
- Drill Pilot Holes: Drill pilot holes at the marked locations. The size of the drill bit depends on your wall type (refer to the detailed guide).
- Mount the Wall Plate: Secure the wall plate to the wall using the appropriate lag bolts and washers. Ensure the wall plate is level before tightening all fasteners.
- Hang the TV: Carefully lift the TV with the attached brackets and hook it onto the wall plate. Secure the TV to the mount using the safety screws or locking mechanisms.
- Adjust and Level: Make final adjustments for tilt, swivel, and leveling. The mount allows for +/-3° post-installation leveling.

Figure 4.1: The installation process is simplified with a drilling template, ensuring accurate placement of the wall mount.
5. Operating Instructions
The PERLESMITH PSLF6 mount offers various adjustments to optimize your viewing experience.
5.1 TV Centering (Sliding Design)
This mount features a unique sliding design that allows you to shift your TV horizontally up to 9.3 inches (23.6 cm) left or right after installation. This is particularly useful if your wall studs are not perfectly centered where you desire your TV to be.
- To adjust, gently push or pull the TV horizontally along the wall plate.
- Ensure the TV is securely positioned after adjustment.

Figure 5.1: The centering mounting system allows for lateral TV adjustment to achieve perfect placement.

Figure 5.2: The PERLESMITH PSLF6 mount allows for flexible TV positioning, including extension and swivel, to suit various viewing needs.
5.2 Swivel Adjustment
The dual articulating arms allow for a 120° swivel range (60° left or 60° right), enabling you to adjust the TV's angle for optimal viewing from different seating positions.
- Gently push or pull the TV screen to the desired left or right angle.
- Ensure the arms move smoothly and do not obstruct any cables.
5.3 Tilt Adjustment
The mount supports a tilt range of +5° (upward) to -15° (downward). This feature helps reduce glare and provides a better viewing angle, especially if the TV is mounted higher than eye level.
- Loosen the tilt adjustment knobs (if present, or use the tool-free tilt mechanism).
- Adjust the TV to the desired vertical angle.
- Tighten the knobs to secure the tilt position.
5.4 Level Adjustment
After installation, you can fine-tune the TV's level by +/-3° to ensure it is perfectly horizontal.
- Gently rotate the TV screen to achieve a perfectly level display.
- Use a spirit level to confirm accuracy.
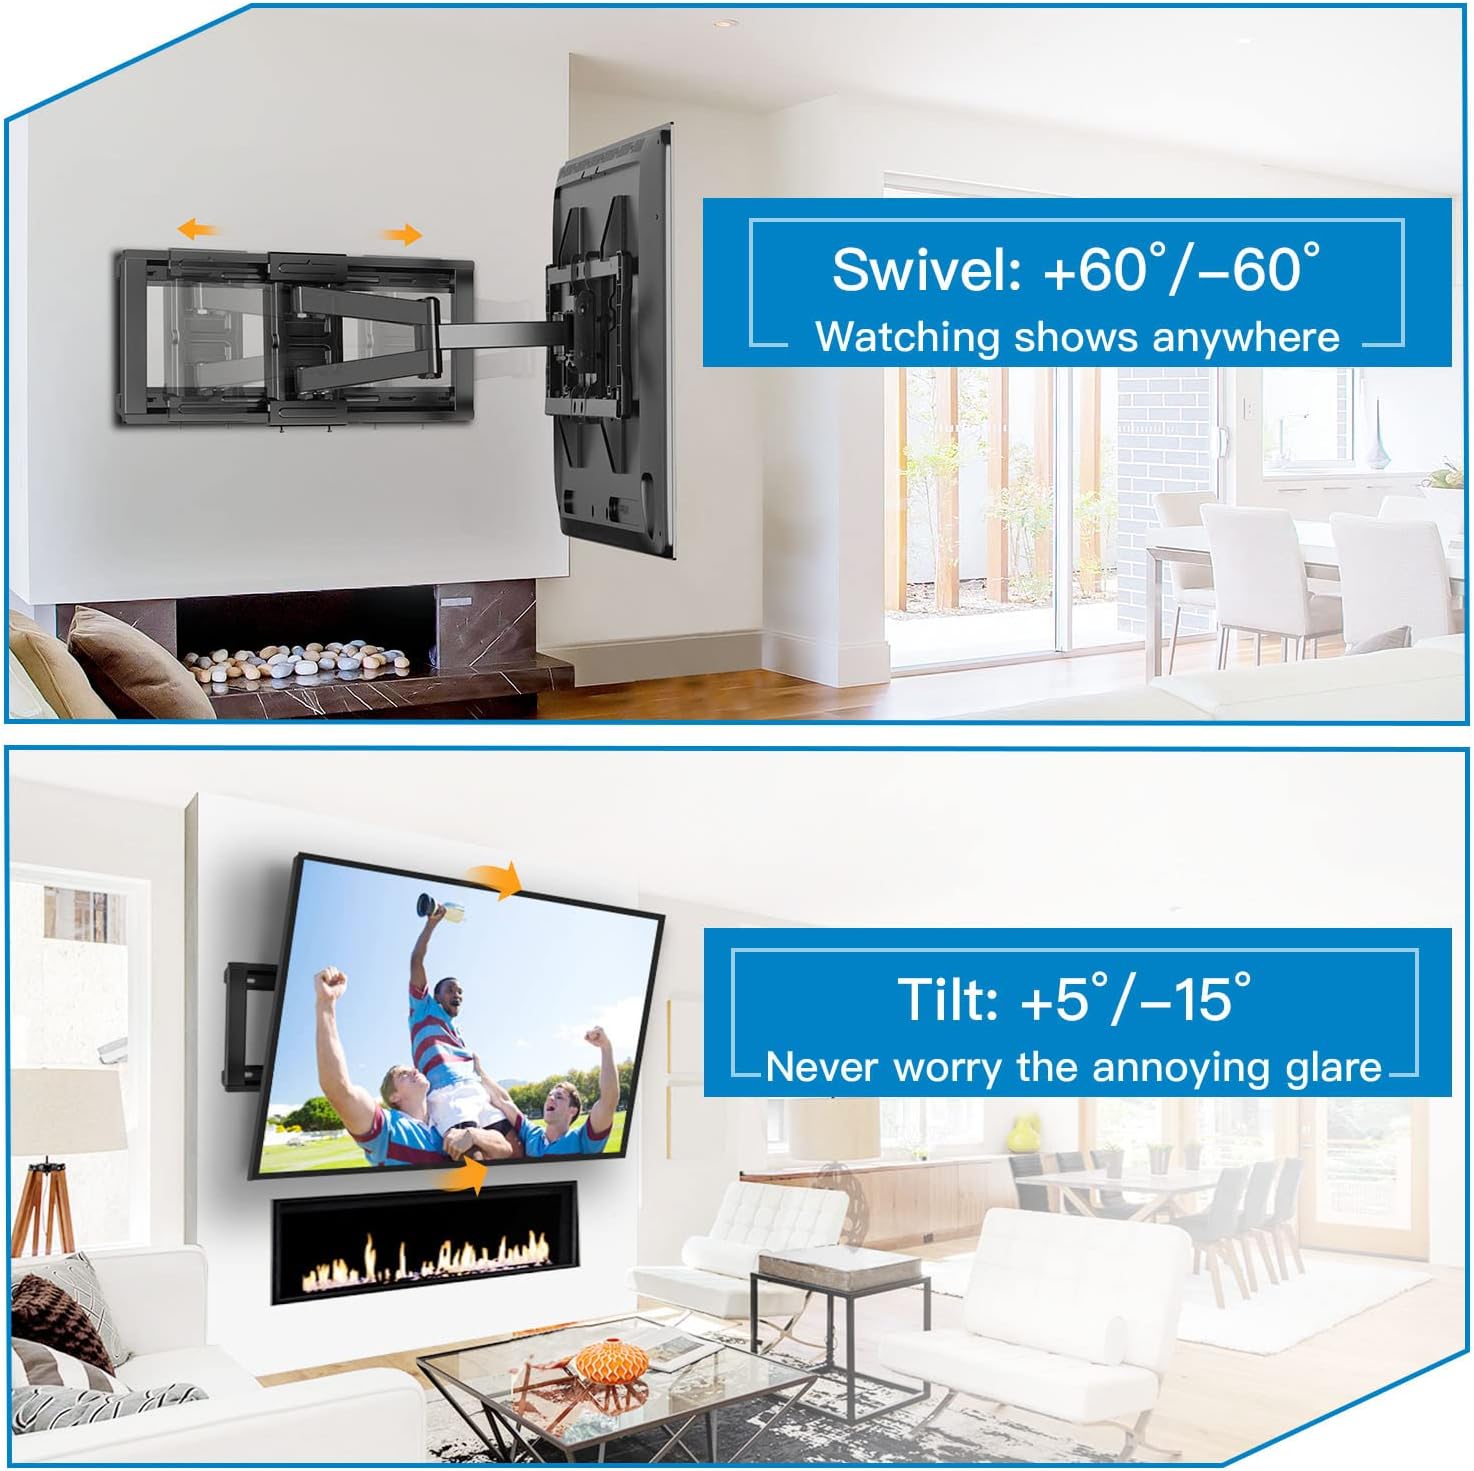
Figure 5.3: The mount allows for significant swivel and tilt adjustments to optimize viewing angles and reduce glare.

Figure 5.4: Post-installation leveling and arm extension capabilities for flexible TV positioning.
5.5 Extension and Retraction
The dual articulating arms allow the TV to extend up to 24.21 inches (61.5 cm) from the wall for an immersive viewing experience or retract back to a slim 3.94 inches (10 cm) to save space.
- Gently pull the TV forward to extend the arms.
- Push the TV back towards the wall to retract the arms.
- Ensure cables are not pinched during extension or retraction.
6. Maintenance
Regular maintenance ensures the longevity and safe operation of your TV wall mount.
- Periodic Inspection: Every 3-6 months, inspect all screws, bolts, and connections to ensure they are tight and secure. Re-tighten any loose fasteners.
- Cleaning: Wipe the mount with a soft, dry cloth to remove dust. Do not use abrasive cleaners or solvents, as they may damage the finish.
- Lubrication: The articulating joints are designed for smooth operation. If any stiffness occurs, a small amount of silicone-based lubricant can be applied to the moving parts, avoiding contact with electrical components.
- Cable Management: Ensure all cables are properly routed and secured using the provided cable ties or similar solutions. Periodically check cables for wear or pinching.
7. Troubleshooting
This section addresses common issues you might encounter with your PERLESMITH TV wall mount.
| Problem | Possible Cause | Solution |
|---|---|---|
| TV is not level after installation. | Initial installation was slightly off, or minor settling occurred. | Utilize the +/-3° post-installation level adjustment feature. Gently rotate the TV until level, using a spirit level for accuracy. |
| Mount feels loose or wobbly. | Wall plate fasteners are not fully tightened, or wall structure is inadequate. | Immediately remove the TV. Re-tighten all lag bolts securing the wall plate. If the issue persists, consult a professional to assess wall integrity. |
| Arms are stiff or difficult to move. | Lack of lubrication or dust/debris in joints. | Apply a small amount of silicone-based lubricant to the articulating joints. Clean any visible debris. |
| TV does not fit the mount. | Incorrect VESA pattern or TV weight/size exceeds limits. | Verify your TV's VESA pattern, weight, and size against the mount's specifications (37-85 inches, max 132 lbs, VESA 200x100-600x400mm). If incompatible, a different mount may be required. |
8. Specifications
| Feature | Specification |
|---|---|
| Model Number | PSLF6 |
| Compatible TV Sizes | 37 - 85 inches |
| Maximum Weight Capacity | 132 lbs (60 kg) |
| VESA Compatibility | 200x100mm, 200x200mm, 300x200mm, 300x300mm, 400x200mm, 400x300mm, 400x400mm, 600x200mm, 600x300mm, 600x400mm |
| Tilt Angle | +5° / -15° |
| Swivel Angle | +/- 60° (120° total) |
| Level Adjustment | +/- 3° |
| Extension from Wall | 3.94 inches (retracted) to 24.21 inches (extended) |
| Horizontal Shift | +/- 9.3 inches (23.6 cm) |
| Compatible Wall Types | 16-24 inch Wood Studs, Solid Concrete, Brick Wall |
| Material | Alloy Steel |
| Product Weight | 33.8 lbs (15.3 kg) |
| Package Dimensions | 40.75 x 16.6 x 5.1 inches |
9. Warranty and Support
PERLESMITH stands behind the quality of its products. For warranty information, technical support, or assistance with installation, please contact PERLESMITH customer service.
- Customer Service: Refer to the contact information provided in your product packaging or visit the official PERLESMITH website.
- Online Resources: Additional installation videos and FAQs may be available on the PERLESMITH website.
For the most up-to-date information, please visit the PERLESMITH Store on Amazon.
Related documentsPSLF6


Ask a question about this manual
Ask about setup, troubleshooting, compatibility, parts, safety, or missing instructions. Manuals+ will review the question and use this page’s manual context to help answer it.