
1. Introduction
This manual provides detailed instructions for the installation and use of the A-MIND LCD Screen Replacement Kit for the Samsung Galaxy A12 Nacho A127F. This kit is designed to replace a damaged or non-functional display assembly, restoring your device's visual and touch capabilities. Please read all instructions carefully before beginning the repair process.
2. Compatibility
This replacement screen is compatible with the following Samsung Galaxy A12 Nacho models:
- Samsung Galaxy A127F
- Samsung Galaxy A127M
- Samsung Galaxy A127F/DSN
- Samsung Galaxy A127F/DS
- Samsung Galaxy A127U
Please verify your device's model number before proceeding with the replacement.
3. Package Contents
The A-MIND Samsung Galaxy A12 Nacho A127F LCD Screen Replacement Kit includes the following items:
- 1x Original Black For Samsung A127F Display Screen (LCD Panel + Touch Digitizer Assembly)
- 2x Strong Suction Cups
- 1x Triangle Opening Tools (Set)
- 1x Card Pin (SIM Ejector Tool)
- 1x Spudger
- 1x Free Tape (Adhesive)
- Screwdrivers (various types, as pictured)

Image: Contents of the A-MIND Samsung Galaxy A12 Nacho A127F LCD Screen Replacement Kit.
4. Safety Information
Performing electronic repairs requires caution. Please observe the following safety guidelines:
- Power Off: Always ensure your device is completely powered off before beginning any disassembly.
- Disconnect Battery: Disconnect the battery as early as possible during disassembly to prevent accidental short circuits.
- Static Electricity: Work in a static-free environment. Consider using an anti-static wrist strap.
- Handle with Care: LCD screens and flex cables are delicate. Avoid bending or applying excessive force.
- Eye Protection: Wear appropriate eye protection to guard against small flying debris.
- Organize Screws: Keep track of all screws and their original locations, as they can vary in size and length.
- Professional Assistance: If you are unsure about any step, seek professional repair assistance.
5. Installation Guide
This section outlines the general steps for replacing the screen. Specific disassembly procedures may vary slightly by device model. Refer to online resources or repair videos for your exact model if needed.
Preparation:
- Power Off Device: Ensure your Samsung Galaxy A12 Nacho is completely powered off.
- Remove SIM Tray: Use the card pin to eject the SIM card tray.
- Clear Workspace: Prepare a clean, well-lit, and organized workspace.
Disassembly:
- Heat the Back Cover: Gently heat the edges of the phone's back cover using a heat gun or hairdryer to soften the adhesive.
- Pry Open Back Cover: Use a suction cup to create a gap, then insert a triangle opening tool or spudger to carefully pry open the back cover. Work slowly around the edges.
- Remove Screws: Locate and remove all screws securing the mid-frame and any protective shields. Keep them organized.
- Disconnect Battery: Carefully disconnect the battery flex cable from the motherboard. This is a critical safety step.
- Disconnect Old Screen: Locate the flex cables connecting the old display to the motherboard. Carefully disconnect them using a spudger.
- Remove Old Screen: Gently heat the edges of the old screen to soften its adhesive. Use a suction cup and opening tools to carefully separate the old screen from the frame.
Assembly:
- Clean Frame: Ensure the phone frame is clean and free of old adhesive or glass fragments.
- Connect New Screen (Test First): Before fully adhering, connect the new screen's flex cables to the motherboard. Do not apply adhesive yet.
- Test New Screen: Reconnect the battery and power on the device to test the new screen's functionality (see Section 6).
- Apply Adhesive: If the screen functions correctly, power off the device, disconnect the battery, and carefully apply the provided adhesive tape or a suitable adhesive around the frame where the screen will sit.
- Install New Screen: Carefully place the new screen into the frame, ensuring it sits flush.
- Reconnect Components: Reconnect the battery flex cable and any other components that were disconnected.
- Reinstall Screws and Back Cover: Reinstall all screws and carefully reattach the back cover, ensuring its adhesive seals properly.
- Reinsert SIM Tray: Reinsert the SIM card tray.
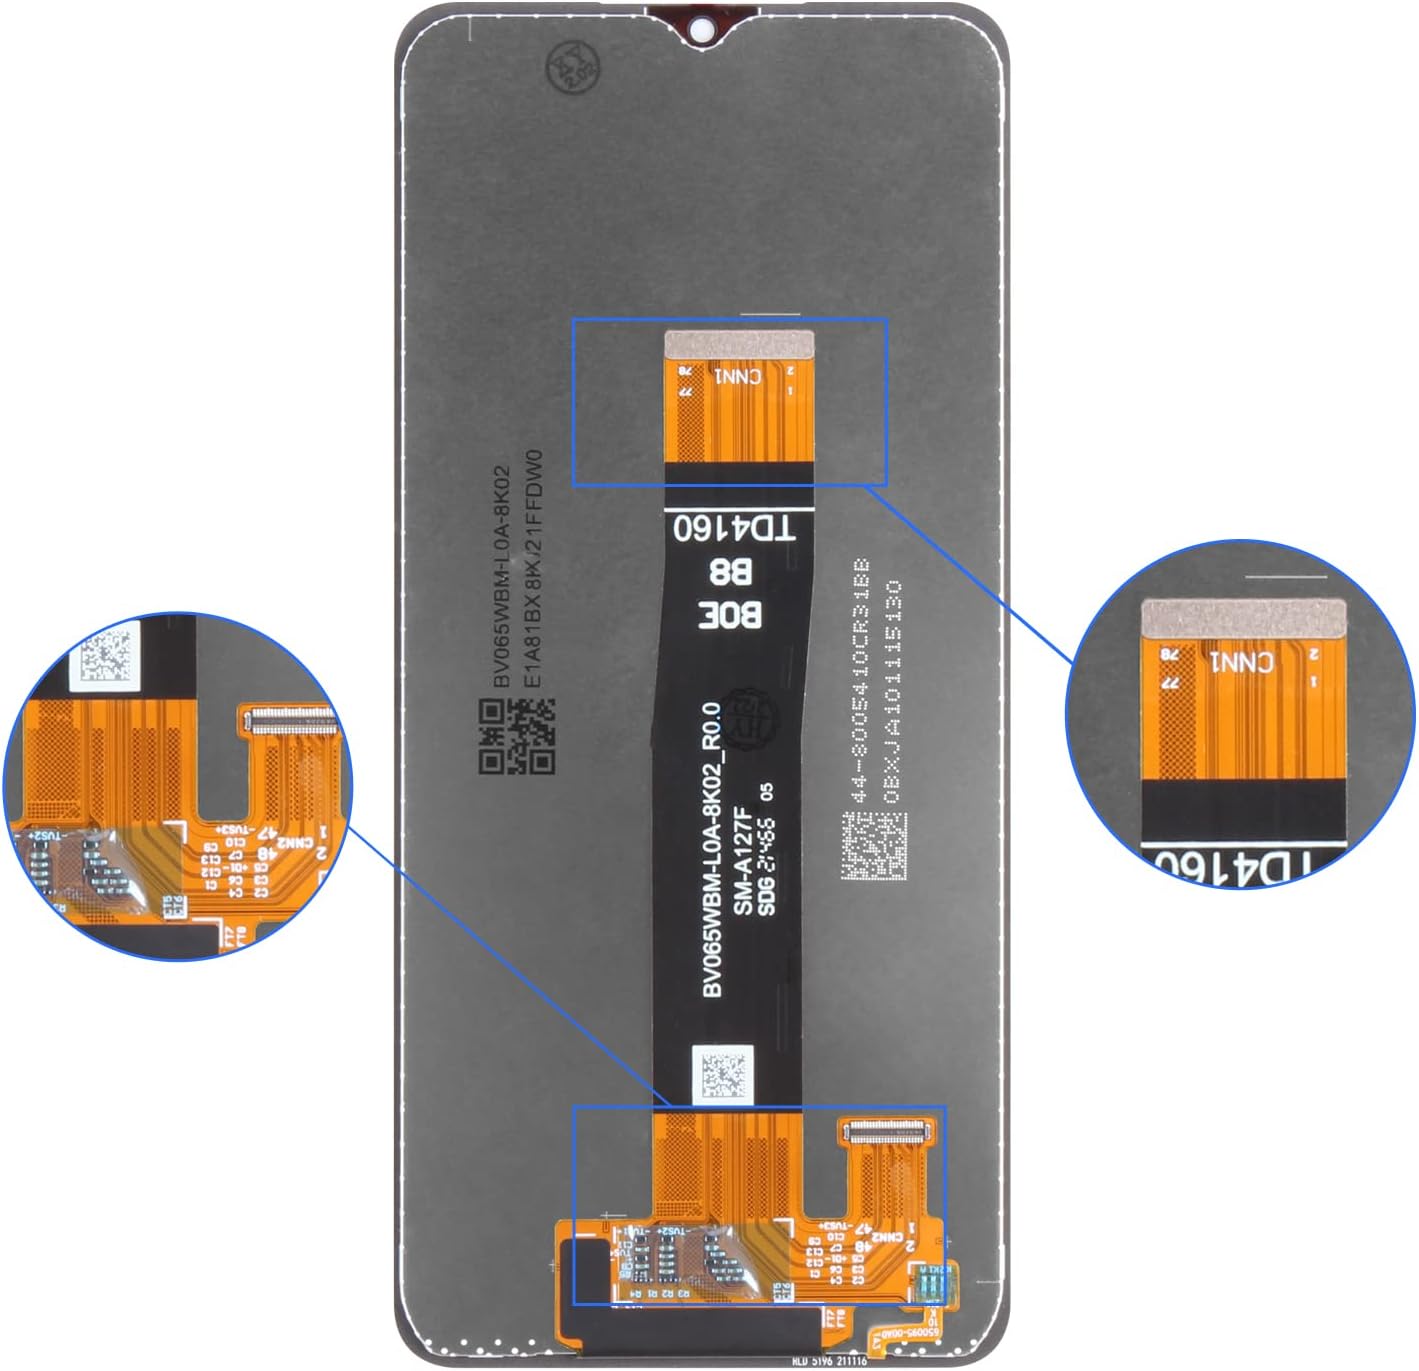
Image: Flex cable connections on the replacement screen.

Image: Illustrative image of a phone repair process.
6. Testing the New Screen
Before fully reassembling your device, it is crucial to test the new screen. Follow these steps:
- With the new screen connected and the battery reconnected (but not yet fully adhered), power on your phone.
- Check for any display issues: dead pixels, lines, discoloration, or uneven backlighting.
- Test the touch functionality across the entire screen. Open an app that allows drawing or typing to ensure all areas respond correctly.
- Test brightness adjustment and auto-rotation.
- If any issues are detected during this preliminary test, power off the device, disconnect the battery, and recheck all flex cable connections. If problems persist, contact customer support.

Image: Screen corners inspected for quality assurance.

Image: Detailed view of flex cable connections.
7. Troubleshooting
If you encounter issues after installation, refer to the following common problems and solutions:
- Display Issues (Black Screen, Lines, Wrong Color):
- Ensure all flex cables are securely connected to the motherboard.
- Check for any damage to the flex cables or connectors.
- Perform a hard reset of the device (refer to your phone's specific instructions).
- Touch Not Working or Unresponsive:
- Verify the digitizer flex cable is properly seated.
- Clean the connectors on both the screen and the motherboard.
- Ensure there is no debris or foreign material between the screen and the frame.
- Screen Flickering or Unstable Display:
- Check for loose connections.
- Ensure the battery is fully charged.
- If the issue persists, the screen itself may be faulty.

Image: Common screen problems addressed by replacement.
8. Specifications
| Screen Size | 6.5 Inches |
| Resolution | 720x1600 Pixels |
| Pixel Density | 270 ppi |
| Display Type | IPS LCD |
| Color | Gray (for the phone model, screen is black) |
| Item Weight | 5 ounces |
| Manufacturer | A-MIND |

Image: Detailed specifications of the replacement screen.
9. Maintenance
To ensure the longevity and optimal performance of your new screen, consider the following maintenance tips:
- Screen Protector: Apply a high-quality screen protector to prevent scratches and minor impacts.
- Cleaning: Use a soft, lint-free cloth and a screen-safe cleaning solution (or distilled water) to gently wipe the screen. Avoid harsh chemicals.
- Avoid Extreme Temperatures: Protect your device from extreme heat or cold, which can affect screen performance and battery life.
- Careful Handling: Avoid dropping your phone or placing it in situations where the screen could be subjected to pressure or sharp objects.
10. Warranty and Support
A-MIND provides a 3-month warranty for this product. All products undergo strict quality control and are tested before shipment to ensure good condition.
If you encounter any problems with your order or the product, please contact our customer service team. We are committed to providing assistance within 24 hours. For quality-related issues, as long as the screen has no man-made or physical damage, we can arrange for a replacement if it does not function normally.
For support, please refer to the contact information provided with your purchase or visit the A-MIND official support channels.