
1. Introduction
This manual provides essential information for the safe and efficient operation of your PowMr 7200W Solar Inverter. This multi-function inverter combines the capabilities of an inverter, solar charger, and battery charger to provide uninterruptible power support. The comprehensive LCD display allows for user-configurable and easily accessible operations, including battery charging current, AC or solar charging priority, and acceptable input voltage settings.
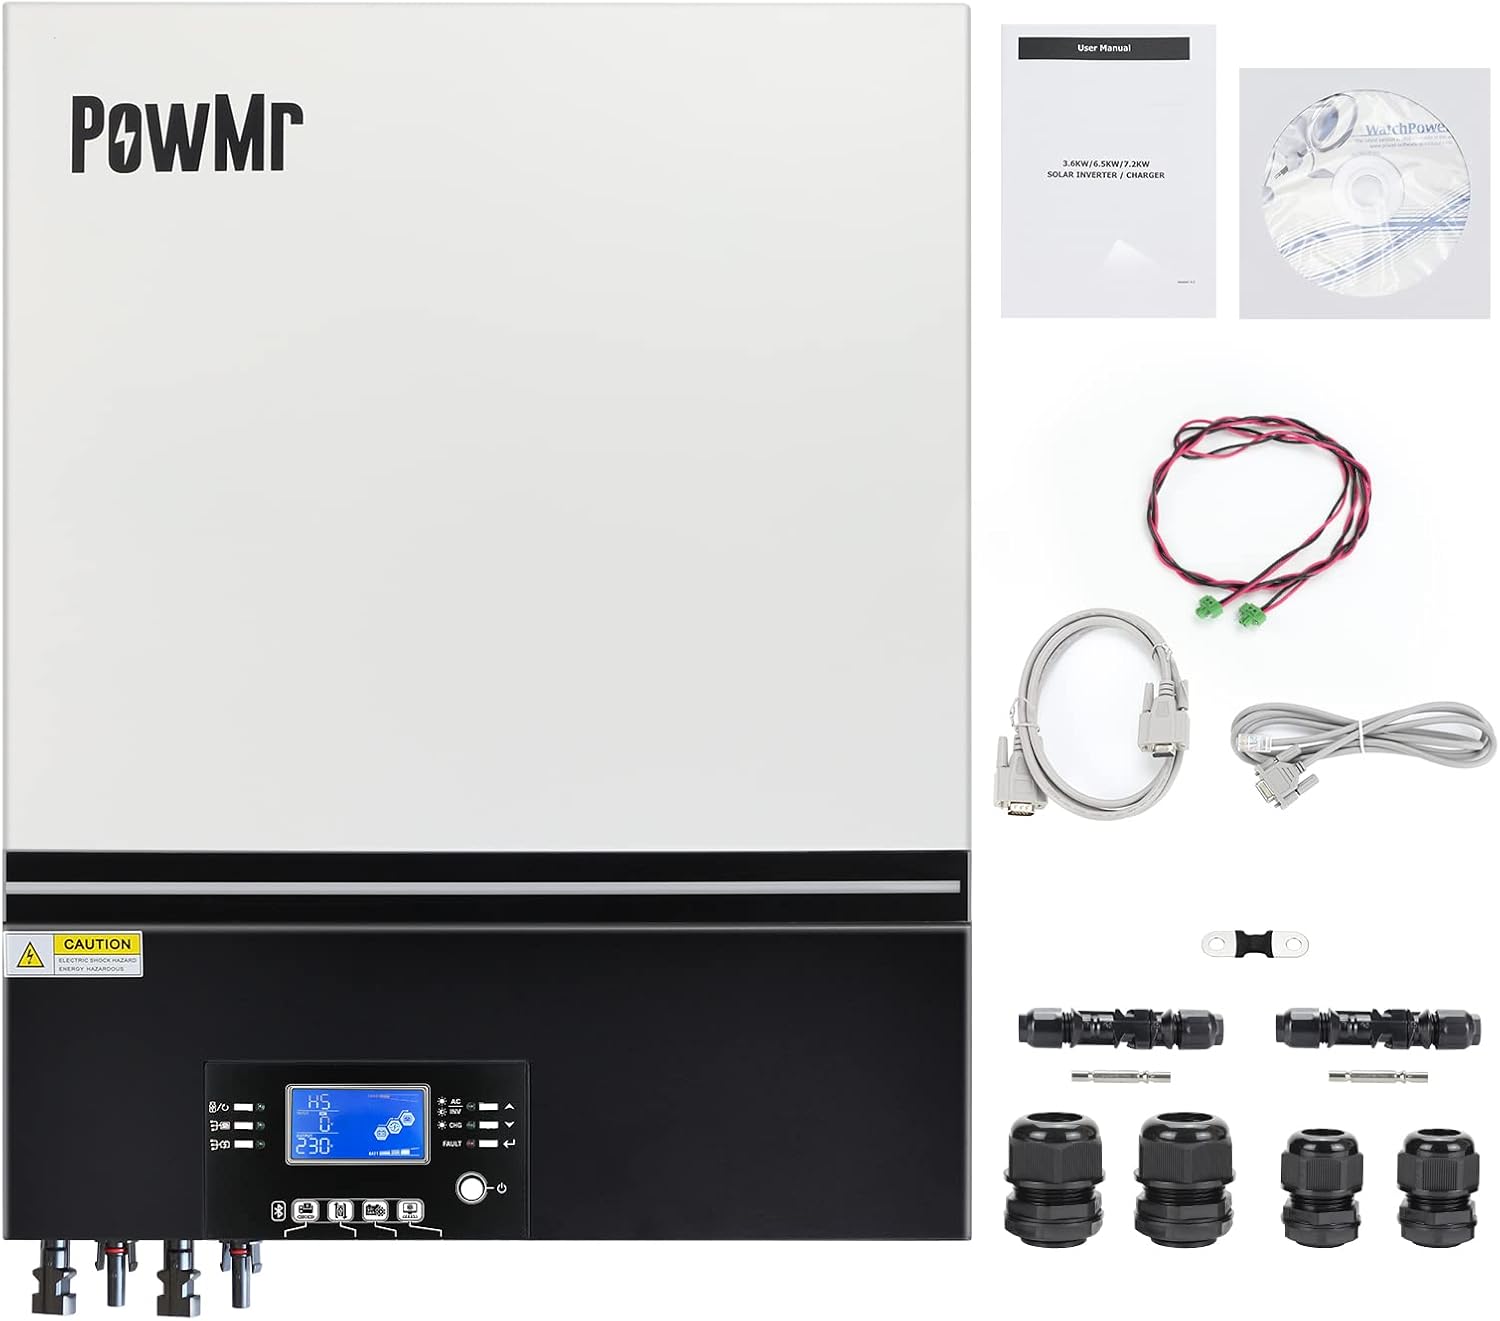
Figure 1: PowMr 7200W Solar Inverter and included components, including the inverter unit, user manual, software CD, communication cables, and various connectors.
2. Product Features
- Hybrid Inverter: Single-phase 230V, Pure Sine Wave Inverter with a rated power of 7200W and surge power of 15000VA.
- Dual PV Input: Two PV inputs supporting up to 8000W (4000W*2) total, with a maximum PV Open Circuit Voltage of 500Vdc and a maximum solar charge current of 80A. Max. Solar Input Current: 18A.
- Parallel Operation: Supports parallel operation in single phase for up to 6 units, or a maximum of 6 units working together for three-phase equipment. Up to four units can support one phase.
- RGB LED Bar: Built-in RGB LED BAR displays operation mode, energy source, battery capacity, and load level through different colors and light effects.
- Maintenance Friendly: Features a built-in anti-dust kit and replaceable fan design for ease of maintenance.
- Battery Compatibility: Compatible with 48V Lead-Acid (Sealed/AGM/Flooded/Gel) and Lithium batteries.
- Connectivity: Built-in Wi-Fi for mobile monitoring (APP required) and supports USB On-the-Go function.
- Communication Ports: Detachable LCD control module with multiple communication ports for BMS (RS485, CAN-BUS, RS232).
- Protection Features: Offers multiple protections including Overload, Over temperature, and short circuit protection. Includes battery cold start function (46V) and automatic restart upon AC recovery.

Figure 2: Key features and dimensions of the PowMr 8000W MPPT Solar Inverter, highlighting 80A MPPT, 8000W max PV array power, 500VDC max PV open circuit voltage, WiFi, RGB lights, and up to 6 units in parallel support.
3. Safety Information
WARNING: Before installation and operation, please read all instructions and cautionary markings on the unit and in this manual. Improper installation or operation can lead to serious injury or damage to the unit.
- Ensure all wiring is performed by qualified personnel.
- Do not disassemble the unit. There are no user-serviceable parts inside.
- Disconnect all power sources (AC, DC, and PV) before performing any maintenance or wiring.
- Ensure proper grounding of the inverter.
- Do not operate the inverter in wet or dusty environments.
- Verify battery voltage and polarity before connecting to the inverter.
- Keep children away from the inverter and its connections.
4. Setup and Installation
4.1 Product Connection Diagram
The following diagram illustrates the typical connection setup for the PowMr Solar Inverter, integrating PV panels, a generator/utility, external battery packs, and household loads.

Figure 3: Connection diagram showing PV1 and PV2 inputs from solar panels, generator or utility input, connection to 48V external battery packs, and output to various household loads such as refrigerators, lights, monitors, and fans.
4.2 AC Input and Output Wiring
Proper wiring of AC input and output is crucial for safe operation. Refer to the internal terminal block for connections.

Figure 4: Detailed view of AC input wire connections within the inverter's terminal block.
Figure 5: Detailed view of AC output wire connections within the inverter's terminal block.
4.3 Parallel Function Setup
The inverter supports parallel operation for increased capacity or three-phase systems. This function requires a battery connection. The parallel feature is disabled when only PV power is available.
Figure 6: Diagram illustrating parallel operation for up to 6 units with battery connected, showing utility, load, and communication connections between multiple inverters.
4.4 Battery Compatibility
This inverter is compatible with various 48V battery types, including Sealed, AGM, Flooded, Gel, and Lithium batteries. Ensure your battery type is correctly configured in the inverter settings.

Figure 7: Visual representation of compatible 48V battery types: AGM, GEL, Flooded, and Lithium, alongside the inverter's specification label.
For more information on the product, refer to the manufacturer's product page using the identifier: 96342101600002
5. Operating Instructions
5.1 Component Identification
Familiarize yourself with the various components and ports of the inverter for proper operation and monitoring.

Figure 8: Detailed diagram identifying the LCD display, status indicators, function buttons, various input/output connectors, communication ports, and the RGB LED bar.
| No. | Component | Description |
|---|---|---|
| 1 | LCD display | Displays operational status, settings, and error codes. |
| 2 | Status indicator | LEDs indicating various operational states. |
| 3 | Charging indicator | Indicates battery charging status. |
| 4 | Fault indicator | Indicates system faults or errors. |
| 5 | Function buttons | Used for navigating menus and adjusting settings. |
| 6 | Power on/off switch | Main power control for the inverter. |
| 7 | AC input connectors | Terminals for connecting AC utility or generator input. |
| 8 | AC output connectors (Load connection) | Terminals for connecting household loads. |
| 9 | PV connectors | Terminals for connecting solar PV panels. |
| 10 | Battery connectors | Terminals for connecting 48V battery bank. |
| 11 | Remote LCD module communication | Port for connecting a detachable remote LCD display. |
| 12 | Current sharing port | Used for parallel operation to ensure balanced load sharing. |
| 13 | Parallel communication port | Used for communication between multiple inverters in parallel. |
| 14 | Dry contact | Programmable relay for external control or signaling. |
| 15 | USB port as USB communication port and USB function port | For data communication and USB On-the-Go functions. |
| 16 | BMS communication port: CAN, RS-485 or RS-232 | For communication with Battery Management Systems. |
| 17 | Output source indicators | Indicates the current power source (e.g., utility, battery, PV). |
| 18 | RS-232 communication port | Serial communication port for monitoring and configuration. |
| 19 | RGB LED bar | Visual indicator for operation mode, energy source, battery capacity, and load level. |
5.2 LCD Display and Settings
The LCD display provides real-time information and allows for configuration of various parameters. Use the function buttons (5) to navigate through menus and adjust settings such as:
- Battery charging current
- AC or solar charging priority
- Acceptable input voltage range
- Output voltage and frequency
- Battery type selection
- Energy priority settings (refer to LCD Setting section in the full manual for details on RGB LED bar behavior)
5.3 Wi-Fi Monitoring
The built-in Wi-Fi module allows for remote monitoring of the inverter's performance via a dedicated mobile application. Download the official PowMr app and follow the in-app instructions for setup and connection.
6. Specifications
| Attribute | Value |
|---|---|
| Brand | PowMr |
| Model | 7.2KW Pure Sine Wave Inverter |
| Rated Power | 7200W |
| Surge Power | 15000VA |
| Input Voltage (DC) | 48V |
| Output Voltage (AC) | 220V-230V AC |
| MPPT Solar Controller | 80A |
| Max PV Open Circuit Voltage | 500Vdc |
| Max Solar Charge Current | 80A |
| Max. Solar Input Current | 18A |
| Parallel Capability | Up to 6 units |
| Dimensions (L x W x H) | 69.85 x 57.4 x 24.89 cm |
| Weight | 22.13 kg |
| Date First Available | 1 December 2021 |
7. Maintenance
Regular maintenance ensures the longevity and optimal performance of your inverter.
- Cleaning: Periodically clean the exterior of the inverter with a dry, soft cloth. Ensure ventilation openings are free from dust and debris. The built-in anti-dust kit helps minimize dust accumulation.
- Fan Replacement: The inverter features a replaceable fan design. If fan noise increases or cooling performance degrades, consider replacing the fan. Refer to the full service manual for detailed instructions on fan replacement.
- Connection Checks: Annually inspect all electrical connections (PV, battery, AC input/output) for tightness and signs of corrosion.
- Firmware Updates: Check the manufacturer's website or mobile app for available firmware updates to ensure your inverter has the latest features and bug fixes.
8. Troubleshooting
This section provides guidance for common issues. For complex problems, contact technical support.
- Inverter Not Powering On:
- Check battery connections and voltage. Ensure battery voltage is above 46V (cold start function).
- Verify AC input power is present and connected correctly.
- Ensure the power on/off switch is in the 'ON' position.
- No AC Output:
- Check AC output connections to the load.
- Verify that the inverter is not in fault mode (check fault indicator).
- Ensure the load does not exceed the inverter's rated power (7200W). The inverter has overload protection.
- Battery Not Charging:
- Check PV panel connections and ensure sufficient sunlight.
- Verify PV open circuit voltage is within the specified range (Max 500Vdc).
- Check battery charging current settings on the LCD.
- Ensure the charging indicator is active.
- Over Temperature Fault:
- Ensure adequate ventilation around the inverter.
- Clean any dust or obstructions from the cooling vents and fans.
- Reduce the load if operating in a high ambient temperature environment.
- Short Circuit Protection Activated:
- Disconnect all loads and check for short circuits in the wiring.
- Reconnect loads one by one to identify the faulty device.
- The inverter will automatically restart once the short circuit is cleared and AC power is recovering.
9. Warranty and Support
PowMr provides a limited warranty for this product. Please refer to the warranty card included with your purchase or visit the official PowMr website for detailed warranty terms and conditions.
For technical support, troubleshooting assistance, or warranty claims, please contact PowMr customer service:
- Website: www.powmr.com
- Email: Refer to the contact section on the official website.
- Phone: Refer to the contact section on the official website.
When contacting support, please have your product model number (7.2KW Pure Sine Wave Inverter) and serial number (if applicable) ready.