
Easyfone Prime-A6
Easyfone Prime-A7 (Model Prime-A6) User Manual
Your comprehensive guide to the Easyfone Prime-A7 4G LTE Big Button Mobile Phone.
Introduction
This manual provides detailed instructions for the setup, operation, and maintenance of your Easyfone Prime-A7 mobile phone. Please read this manual carefully before using the device to ensure proper functionality and safety.
Key Features:
- Large, easy-to-press buttons for simplified dialing and navigation.
- Designed for ease of use, suitable for all users.
- Integrated SOS emergency button for quick access to assistance.
- Photo speed dial functionality for calling favorite contacts with a single press.
What's Included
Verify that all items are present in the package:
- Easyfone Prime-A7 Handset
- Rechargeable Battery
- User Manual (this document)
- Lanyard
- Charging Dock
- Wall Charger
- USB Cable

Setup
1. Battery Installation
Locate the battery compartment on the back of the phone. Insert the provided Lithium Ion battery, ensuring the gold contacts align with the phone's terminals. Close the battery compartment cover securely.

2. SIM Card and SD Card Installation
The Easyfone Prime-A7 supports a SIM card for cellular network connectivity and an optional SD card for expanded storage. Carefully open the battery cover and locate the SIM and SD card slots. Insert your SIM card into the designated slot with the gold contacts facing down. If using an SD card, insert it into its respective slot. Ensure both cards are securely seated.
3. Initial Charging
Before first use, fully charge the phone. Connect the USB cable to the charging dock and then to the wall charger. Place the phone into the charging dock. The battery indicator on the screen will show charging status. A full charge typically takes approximately 3-4 hours. The phone offers a standby time of up to 96 hours on a full charge.

Operating Instructions
Power On/Off
To power on the phone, press and hold the red End Call/Power button until the screen illuminates. To power off, press and hold the same button until the power-off options appear, then confirm.
Making Calls
Dial the desired phone number using the large numeric keypad. Press the green Call button to initiate the call. To end a call, press the red End Call button.

Receiving Calls
When an incoming call is received, press the green Call button to answer. To reject a call, press the red End Call button.
Sending and Receiving Messages (SMS)
Navigate to the 'Messages' menu. Select 'New Message' to compose a text. Enter the recipient's number and your message. To read incoming messages, access the 'Inbox' within the 'Messages' menu.
SOS Emergency Button
The SOS button, located on the back of the phone, is designed for emergency situations. Press and hold this button to automatically dial pre-set emergency contacts. The phone will cycle through the contacts until one answers. Ensure emergency contacts are properly configured in the phone settings.

Photo Speed Dial
The Easyfone Prime-A7 features photo speed dial buttons, allowing you to call frequently contacted individuals by pressing a dedicated button associated with their photo. Refer to the phone's settings to assign contacts to these speed dial slots.

Adjusting Volume
The phone is designed with loud and clear volume for ease of hearing. Adjust call and ringtone volumes using the side volume buttons or through the phone's settings menu. The device is M4/T4 hearing aid compatible.

Practical Unlock Switch
A physical unlock switch is located on the side of the phone. Slide the switch to the 'Unlock' position to activate the keypad and screen, and slide it to 'Locked' to prevent accidental touches.
Flashlight Function
The phone includes a high-bright flashlight. To activate, press and hold the '0' key. Repeat the action to turn off the flashlight.
Additional Features
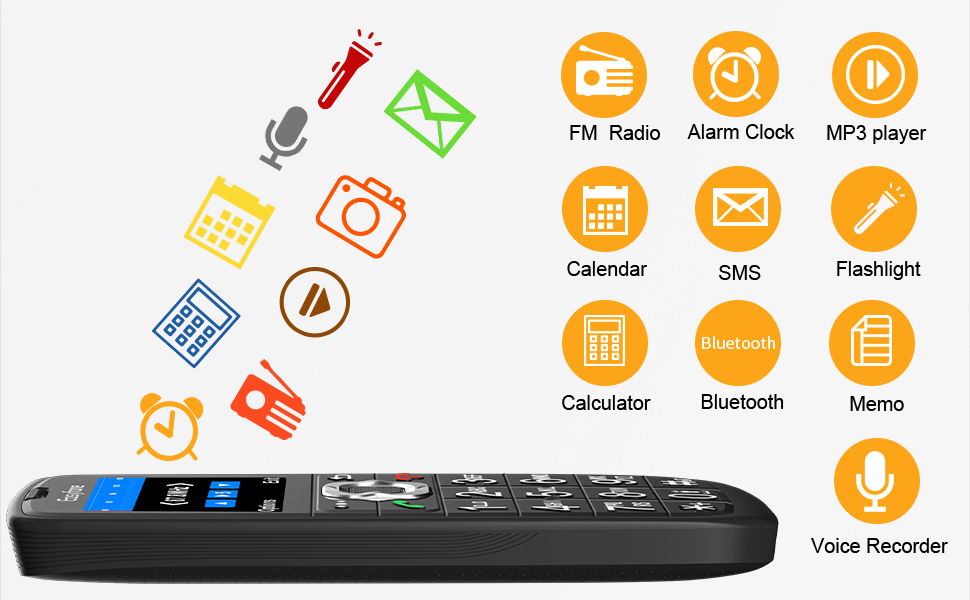
The Easyfone Prime-A7 includes several utility features:
- FM Radio: Listen to your favorite radio stations.
- Alarm Clock: Set multiple alarms for reminders.
- MP3 Player: Play audio files stored on the device or SD card.
- Calendar: Keep track of dates and appointments.
- Bluetooth: Connect to compatible wireless accessories.
- Calculator: Perform basic arithmetic operations.
- Memo: Create and store short text notes.
- Voice Recorder: Record audio memos.
Maintenance
Battery Care
To prolong battery life, avoid exposing the phone to extreme temperatures. Charge the battery regularly, but avoid overcharging. If the phone will not be used for an extended period, charge it to about 50% before storing.
Cleaning
Use a soft, dry cloth to clean the phone's exterior. Avoid using liquid cleaners or abrasive materials, which can damage the device.
Troubleshooting
Phone Does Not Power On
Ensure the battery is correctly installed and fully charged. Connect the phone to the charger and attempt to power on again.
Cannot Make or Receive Calls
Check if the SIM card is properly inserted and activated. Verify that you have network signal. Contact your service provider if issues persist.
Poor Audio Quality
Ensure the speaker and microphone are not obstructed. Adjust the call volume. If using a hearing aid, ensure compatibility settings are correct.
Battery Drains Quickly
Reduce screen brightness, close unused applications, and limit background data usage. Ensure the battery is not old or damaged; consider replacing it if necessary.
Specifications
| Feature | Detail |
|---|---|
| Brand | Easyfone |
| Model | Prime-A6 |
| Operating System | Nucleus OS |
| Processor Type | Snapdragon |
| Memory Storage Capacity | 1 GB |
| Flash Memory Installed Size | 256 MB |
| Screen Display Size | 1.8 Inches |
| Display Type | LCD |
| Resolution | 240 x 320 |
| Optical Sensor Resolution | 2 MP |
| Battery Description | Lithium Ion |
| Battery Capacity | 1050 Milliamp Hours |
| Battery Average Life (Standby) | 96 Hours |
| Cellular Technology | 4G |
| Connectivity Technology | Bluetooth |
| Human Interface Input | Buttons |
| Form Factor | Bar |
Warranty and Support
For warranty information and technical support, please refer to the contact details provided in your product packaging or visit the official Easyfone website. Keep your purchase receipt as proof of purchase for warranty claims.
You can also visit the official Easyfone store on Amazon for more information: Easyfone Amazon Store
Related documentsPrime-A6


Ask a question about this manual
Ask about setup, troubleshooting, compatibility, parts, safety, or missing instructions. Manuals+ will review the question and use this page’s manual context to help answer it.