
Introduction
The Mr. Induction SR-108MRA is a built-in induction warmer designed for commercial food service facilities. This unit is intended for holding food at warm temperatures and is not for cooking. It features precise temperature control and two power levels to maintain food quality over extended periods. This manual provides essential information for the safe and efficient use of your induction warmer.
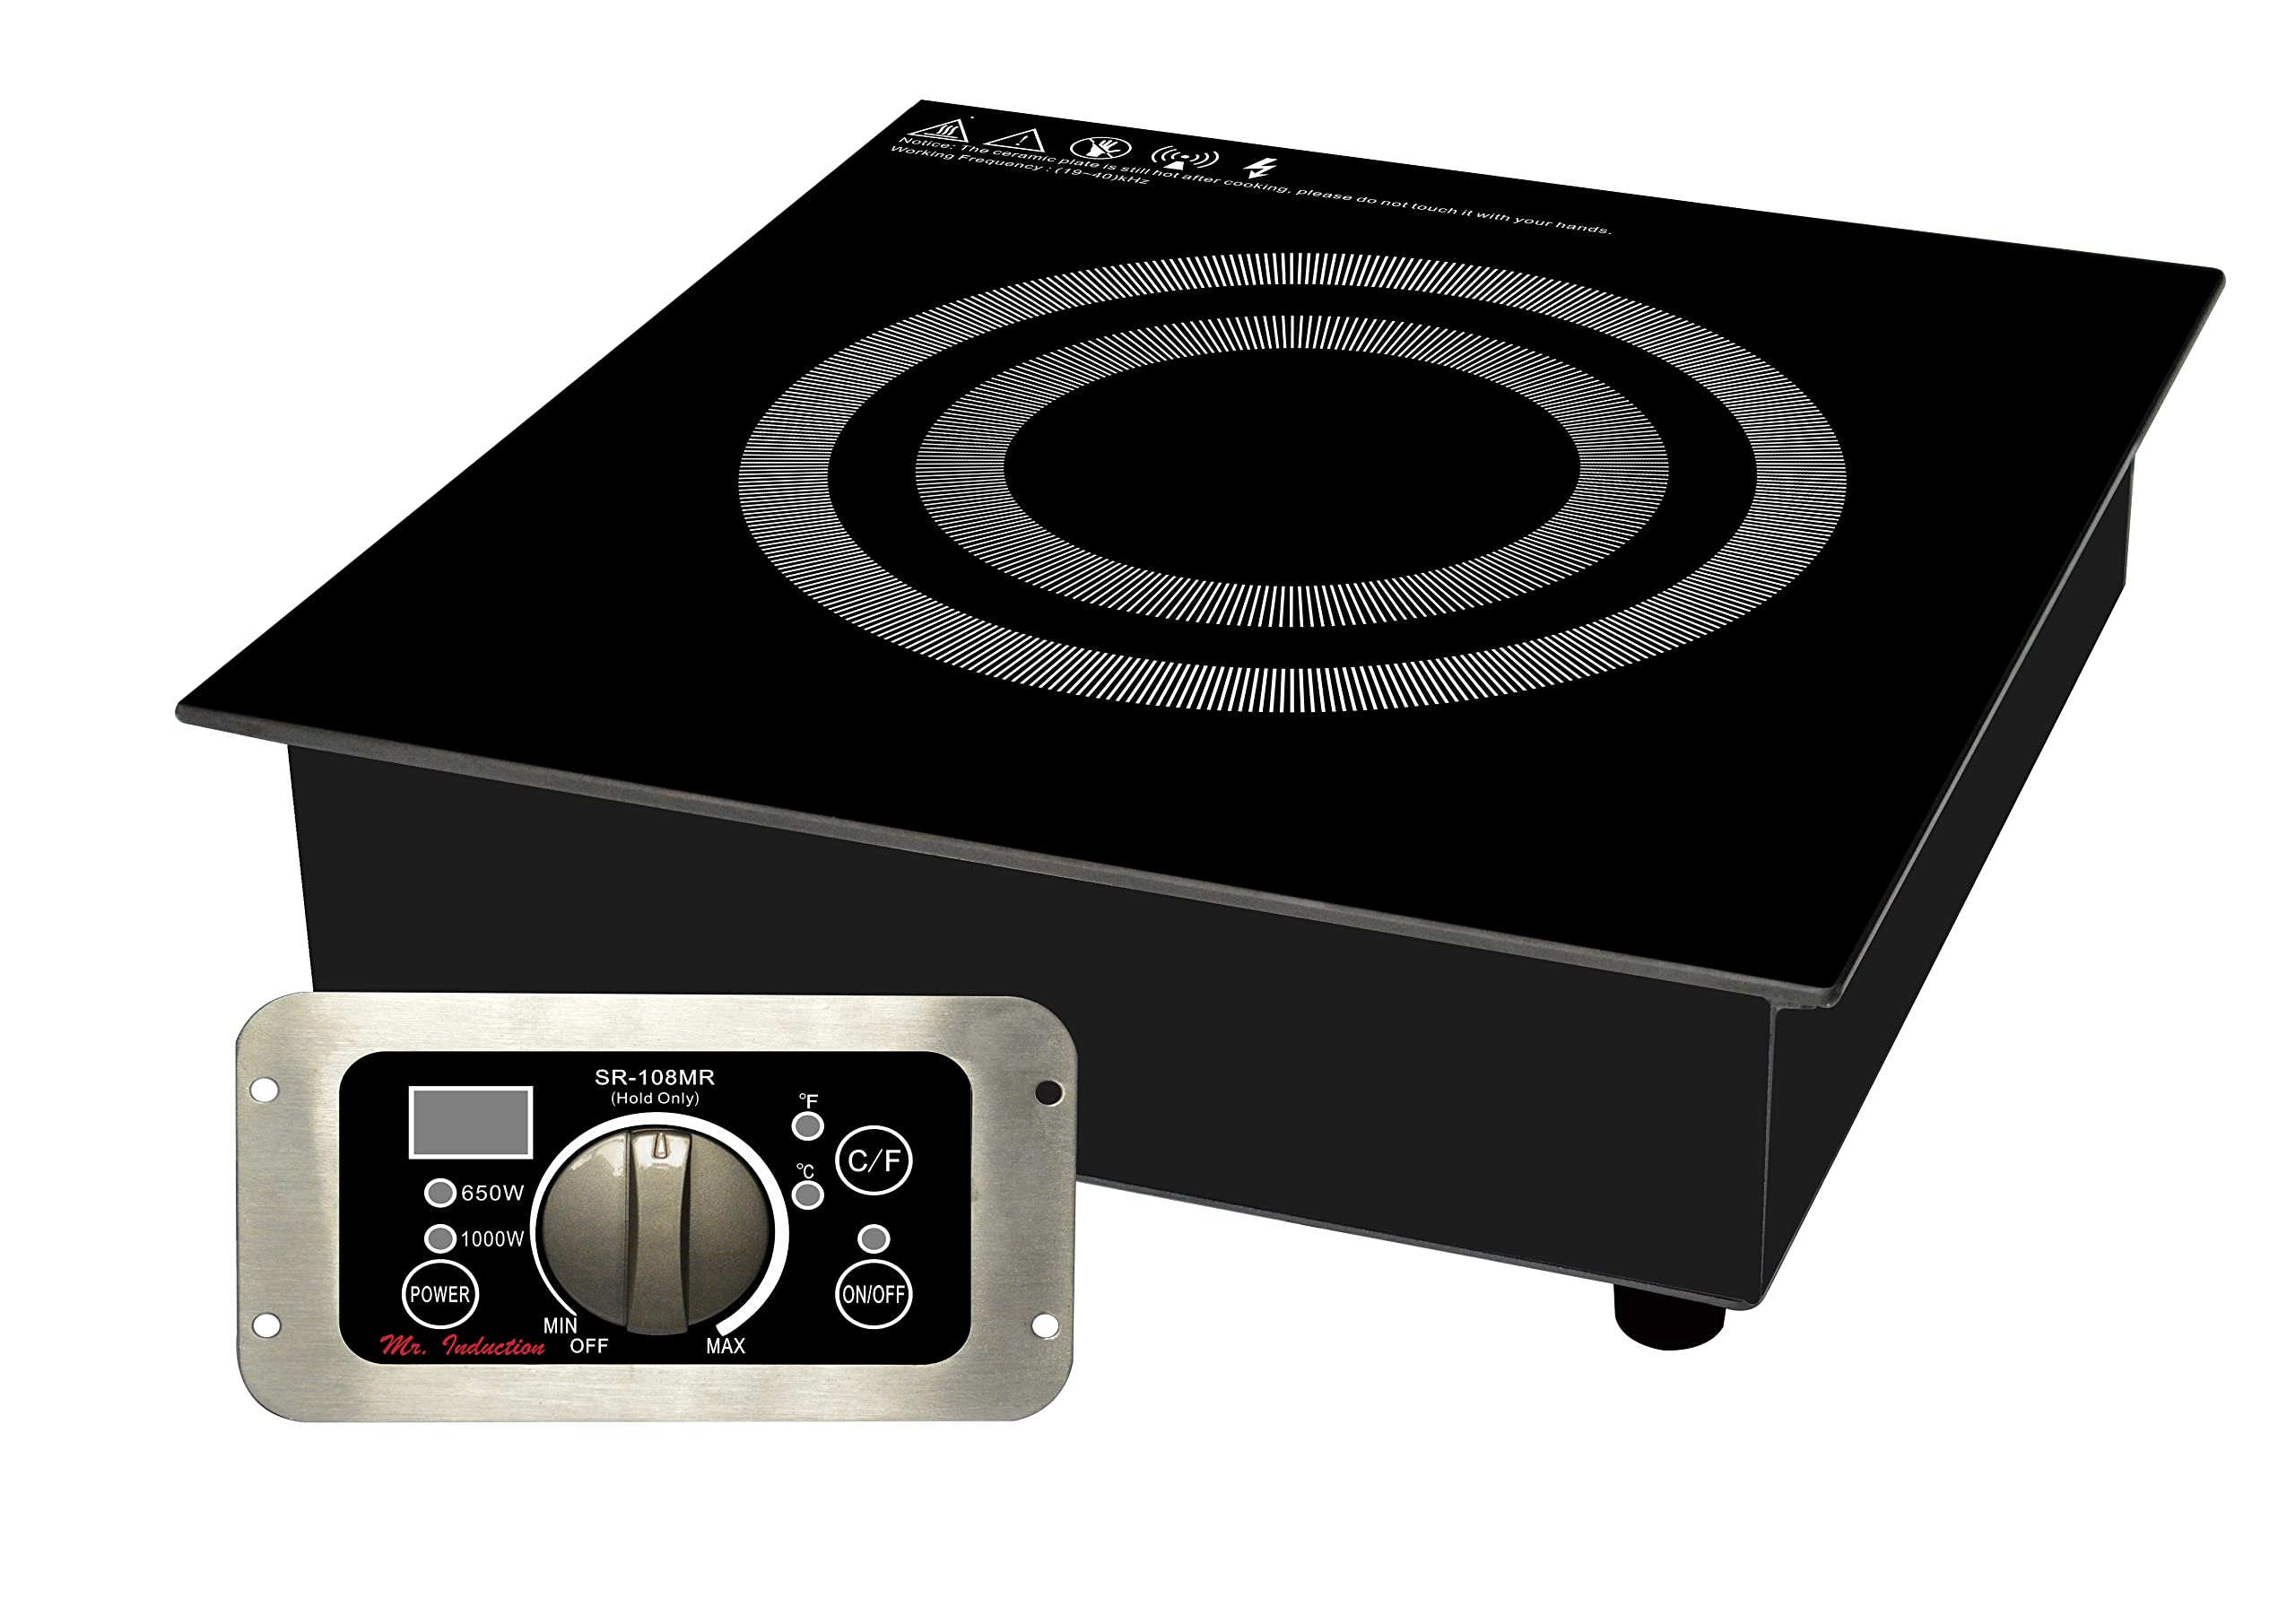
Image: Top-down view of the Mr. Induction SR-108MRA Built-In Induction Warmer, showing the black tempered glass cooktop with induction coil markings.
Important Safety Instructions
Read all instructions before using this appliance. Failure to follow these instructions may result in electric shock, fire, or serious injury.
- This appliance is for commercial use only.
- Ensure the unit is properly grounded according to local electrical codes.
- Do not immerse the unit or power cord in water or other liquids.
- Keep the power cord away from heated surfaces.
- Do not operate the appliance with a damaged cord or plug. Contact qualified service personnel for repair.
- Always use induction-compatible cookware. Non-compatible cookware will not heat.
- The tempered glass cooktop will be hot after use. Allow it to cool before cleaning or touching.
- Maintain adequate ventilation around the unit. Do not block air vents.
- This unit is designed for holding food warm, not for cooking.
Product Features
- SmartScan Technology: Automatically detects voltage, pan size, and pan type.
- Durable Cooktop: Features a 5mm thick tempered glass surface.
- Dual Heating Powers: Select between 650W and 1000W for optimal warming.
- Precise Temperature Control: 20 hold temperature settings ranging from 90°F to 440°F.
- Clear Display: Large LED display shows temperature in either °F or °C.
- Safety Protections: Includes over or under voltage protection.
- User-Friendly Controls: Simple knob-set thermostat control and touch-sensitive control box.
- Remote Control Panel: Separate control box with a 40-inch cable for flexible mounting.
- Certifications: FCC, CETL, and ETL-Sanitation to NSF-4 standards.
Setup and Installation
The SR-108MRA is a built-in unit designed for integration into a countertop or food service line. Proper installation is crucial for safety and performance.
Unpacking and Inspection
- Carefully remove all packaging materials.
- Inspect the unit for any shipping damage. Do not install if damaged.
- Verify all included components are present: the main induction unit, the separate control panel, a 100% silicon rubber protective top seal, and the 6-foot power cord.
Installation Requirements
- Power Supply: The unit requires a 240 Volt electrical supply. Ensure the circuit can handle 1000 watts.
- Ventilation: Adequate airflow is essential for the unit's cooling fans. Ensure the installation area allows for proper air circulation around the base of the unit. Do not obstruct the fan vents.
- Cutout Dimensions: Refer to the provided installation template for precise countertop cutout dimensions.
- Control Panel Mounting: The separate control panel connects via a 40-inch cable, allowing for flexible front mounting in a convenient location.
Installation Steps
- Prepare the countertop cutout according to the template.
- Place the silicon rubber protective top seal around the edge of the cutout.
- Carefully lower the main induction unit into the cutout, ensuring it sits flush and the seal is properly seated.
- Mount the separate control panel in its desired location, connecting it to the main unit using the provided cable.
- Connect the 6-foot power cord to a dedicated 240V grounded outlet.

Image: Top view of the induction warmer, showing the tempered glass surface and the built-in design.

Image: Rear view of the induction warmer, highlighting the cooling fans that require unobstructed airflow.
Operating Instructions
The SR-108MRA is designed for simple and intuitive operation to maintain food temperatures.
Control Panel Overview
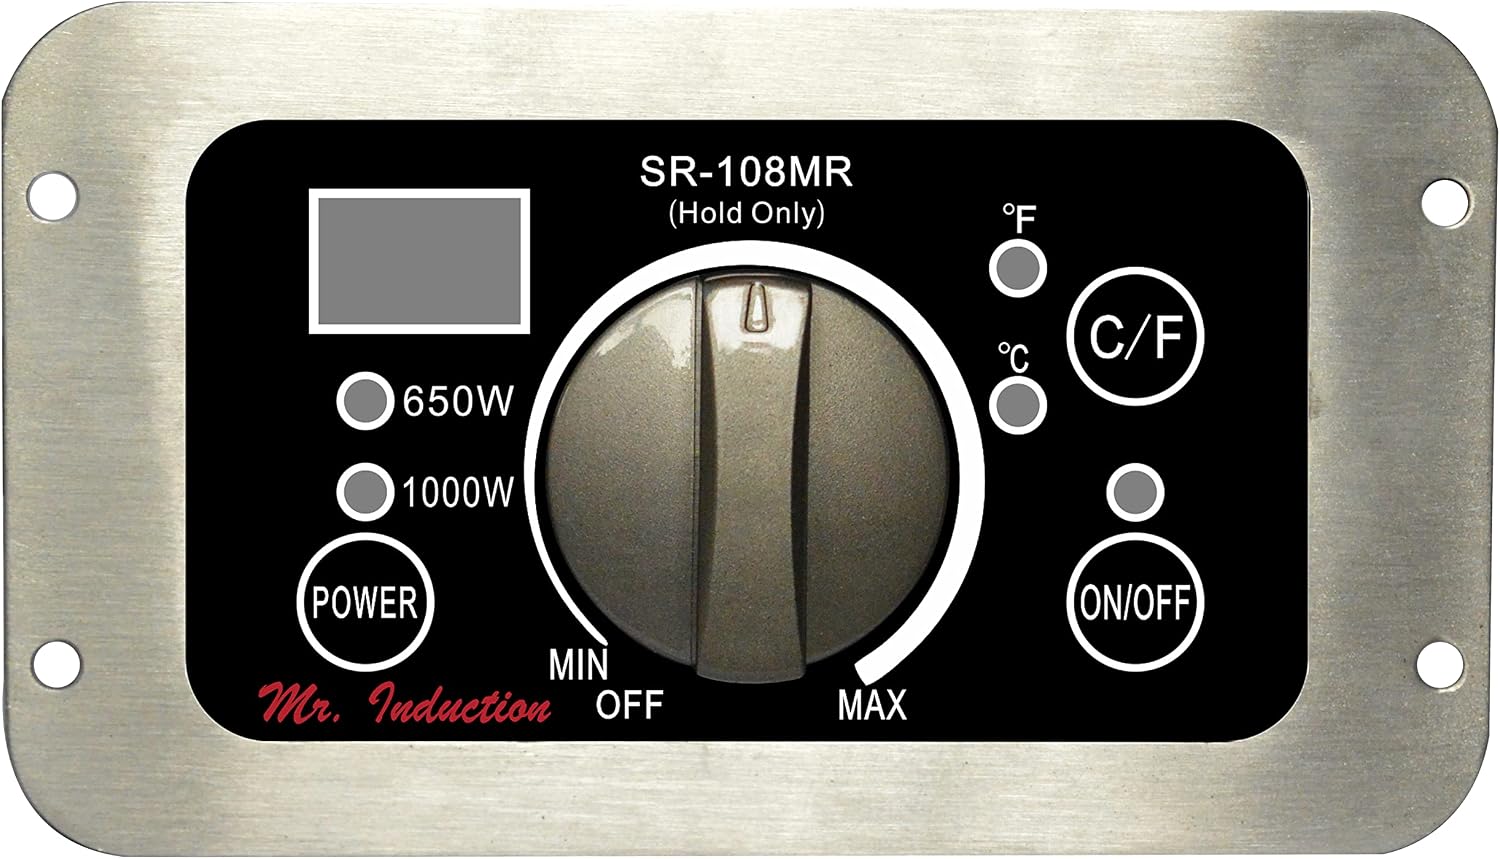
Image: Close-up of the SR-108MRA control panel, showing the temperature knob, power selection buttons, ON/OFF button, and LED display.
- POWER Button: Touch-sensitive button to select between 650W and 1000W heating power. An indicator light will illuminate next to the selected power level.
- ON/OFF Button: Touch-sensitive button to turn the unit on or off. An indicator light confirms the unit is active.
- Temperature Knob: A simple rotary knob to set the desired holding temperature. The range is 90°F to 440°F (32°C to 227°C).
- C/F Button: Toggles the temperature display between Celsius and Fahrenheit.
- LED Display: Shows the current set temperature.
Operating Steps
- Ensure the unit is properly installed and connected to power.
- Place an induction-compatible pan containing food on the tempered glass cooktop.
- Press the ON/OFF button to power on the unit. The indicator light will illuminate.
- Select the desired heating power (650W or 1000W) by pressing the POWER button.
- Rotate the Temperature Knob to set the desired holding temperature. The LED display will show the selected temperature.
- The unit will begin to warm the food to the set temperature. The SmartScan technology will ensure efficient operation.
- To turn off the unit, press the ON/OFF button again.
Maintenance and Cleaning
Regular cleaning and maintenance will ensure the longevity and optimal performance of your induction warmer.
Daily Cleaning
- Always turn off the unit and unplug it from the power source before cleaning.
- Allow the tempered glass cooktop to cool completely.
- Wipe the glass surface with a damp cloth and mild detergent. For stubborn stains, use a non-abrasive ceramic cooktop cleaner.
- Clean the stainless steel frame and control panel with a soft, damp cloth. Avoid abrasive cleaners or scouring pads.
- Ensure all surfaces are dry before plugging the unit back in.
Periodic Maintenance
- Regularly check the power cord for any signs of damage.
- Ensure the ventilation openings at the rear of the unit are free from dust and debris. Use a soft brush or vacuum cleaner to gently clear any blockages.
- Do not attempt to disassemble the unit. All internal servicing should be performed by qualified personnel.
Troubleshooting
If you encounter issues with your SR-108MRA induction warmer, refer to the following common problems and solutions.
| Problem | Possible Cause | Solution |
|---|---|---|
| Unit does not turn on. | No power supply; Power cord not fully plugged in; Circuit breaker tripped. | Check power connection; Ensure plug is secure; Reset circuit breaker. |
| Food is not warming. | Non-induction compatible cookware; Pan not centered; Temperature set too low. | Use induction-compatible cookware; Center pan on cooktop; Increase temperature setting. |
| LED display shows an error code. | Over/under voltage; Internal malfunction; Overheating. | Unplug unit for 5 minutes and restart; Ensure proper voltage supply; If problem persists, contact service. |
| Unit shuts off unexpectedly. | Overheating; Over/under voltage protection activated. | Ensure proper ventilation; Check power supply voltage; Allow unit to cool before restarting. |
For issues not listed above, or if troubleshooting steps do not resolve the problem, contact customer support.
Specifications
| Specification | Detail |
|---|---|
| Brand | Mr. Induction |
| Model Number | SR-108MRA |
| Manufacturer | SPT |
| Installation Type | Built-In |
| Heating Elements | 2 |
| Heater Surface Material | Tempered Glass |
| Material (Housing) | Stainless Steel |
| Power Source | Corded Electric |
| Voltage | 240 Volts |
| Wattage | 1000 watts |
| Control Type | Touch, Knob |
| Temperature Settings | 20 hold settings (90°F to 440°F) |
| Included Components | Silicon rubber protective top seal, 6' power cord, Built-in range with flanged base, Separate control panel with 40" cable |
| UPC | 810012685092 |
Warranty and Support
Warranty Information
This Mr. Induction SR-108MRA Built-In Induction Warmer is covered by a 1 YEAR LIMITED MANUFACTURER WARRANTY. This warranty covers defects in materials and workmanship under normal use. Please retain your proof of purchase for warranty claims.
Customer Support
For technical assistance, warranty service, or to inquire about replacement parts, please contact the manufacturer's customer support. Refer to your purchase documentation for specific contact details.