1. Introduction
Thank you for purchasing the SUNTEK Monocular Night Vision NV-300. This device is an advanced optical instrument designed to provide clear visibility in low-light and complete darkness by utilizing faint ambient light or infrared (IR) reflection. It is ideal for various outdoor activities such as bird watching, surveillance, and night survival games. Please read this manual thoroughly before operating the device to ensure proper use and optimal performance.
2. Product Overview
The SUNTEK NV-300 features a robust design with a 40mm objective lens, 5x fixed optical zoom, and up to 8x digital zoom, allowing for detailed observation. It records in 1080P resolution and has a simple waterproof construction for durability in various environments.
2.1. Components
- Monocular Night Vision Device (NV-300)
- Storage Pouch
- USB Cable (for data transfer/charging)
- User Manual
2.2. Device Layout
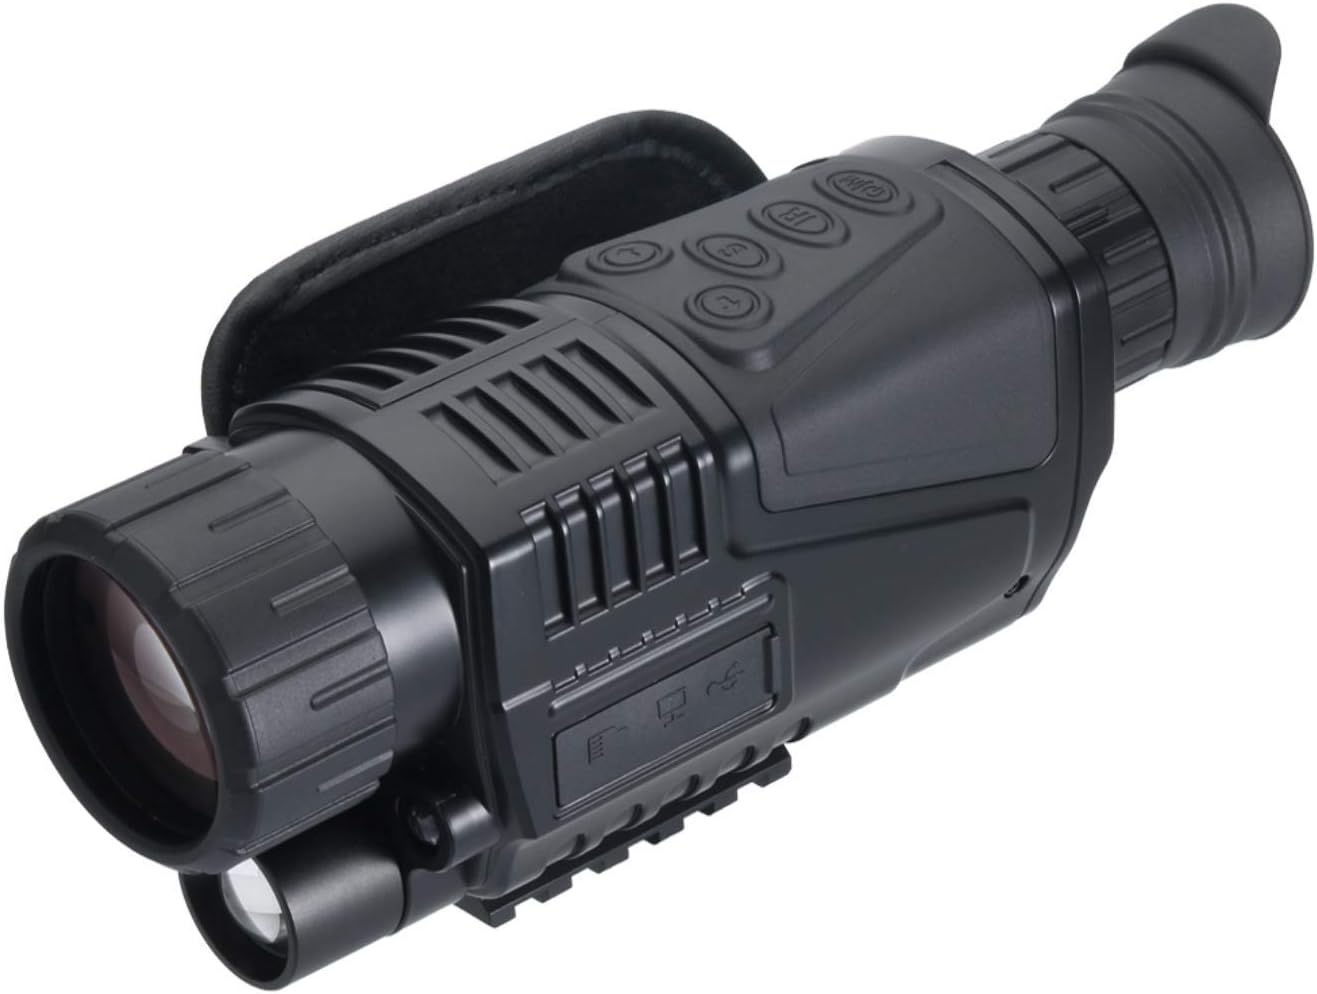
Figure 2.2.1: Angled view of the NV-300, highlighting the main body and controls.

Figure 2.2.2: Side view of the NV-300, illustrating the ports and overall shape.

Figure 2.2.3: Front-side view of the NV-300, showing the eyepiece and focus adjustment.
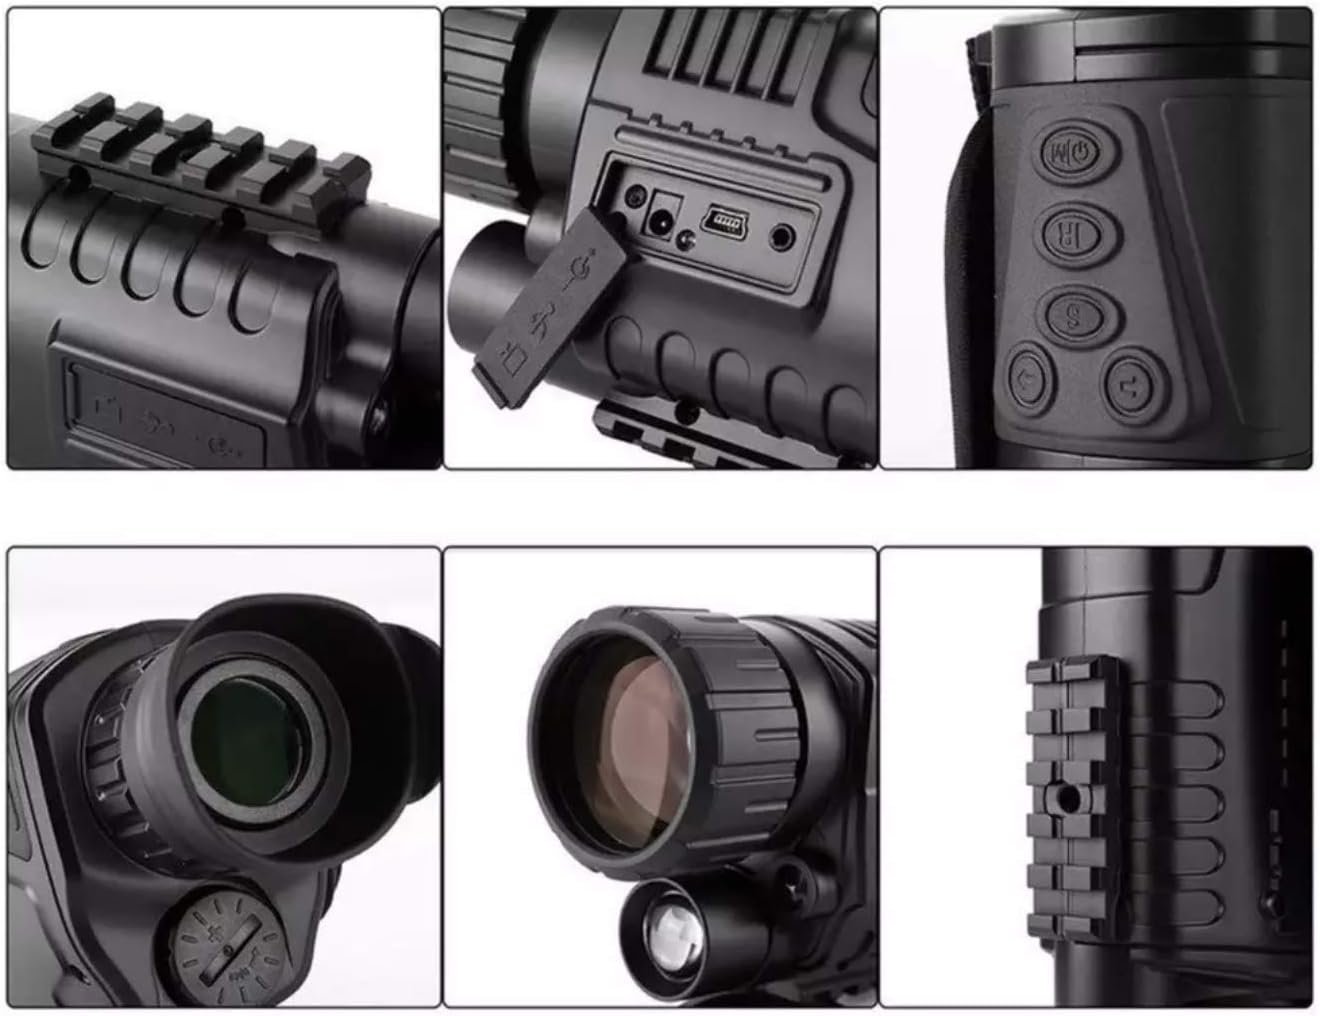
Figure 2.2.4: Detailed views of various parts of the NV-300, including ports, buttons, and the mounting rail.
3. Setup
3.1. Battery Installation
- Locate the battery compartment cover, typically on the side or bottom of the device.
- Open the cover by twisting or sliding it according to the markings.
- Insert the required batteries (not specified in product data, assume standard AA or rechargeable pack) according to the polarity indicators (+/-).
- Close the battery compartment cover securely to ensure the simple waterproof seal is maintained.
3.2. Initial Power-On
Press and hold the power button (usually marked with a power symbol) for a few seconds until the display illuminates. The device will perform a self-check before entering observation mode.
3.3. Mounting (Optional)
The NV-300 features a Picatinny mount for attachment to compatible rails. Align the mount on the device with the rail and secure it using the appropriate fasteners. Ensure the device is firmly attached before use.
4. Operating Instructions
4.1. Power On/Off
- To Power On: Press and hold the power button until the screen activates.
- To Power Off: Press and hold the power button again until the screen shuts down.
4.2. Adjusting Focus
Rotate the focus ring on the objective lens (front of the device) until the image on the display appears sharp and clear. Adjust the diopter on the eyepiece (rear of the device) for individual eye comfort if available.
4.3. Zoom Function
- The device has a 5x fixed optical zoom.
- Use the digital zoom buttons (often marked with '+' and '-' or zoom icons) to increase magnification up to 8x digital zoom.
4.4. Activating IR Illumination
In complete darkness, activate the infrared (IR) illuminator. This button is typically marked with an 'IR' symbol. Multiple levels of IR intensity may be available; cycle through them to find the optimal brightness for your environment.
4.5. Recording Video and Taking Photos
The NV-300 supports 1080P resolution recording. Insert a compatible microSD card (not included) into the designated slot. Use the dedicated photo/video buttons (often marked with a camera or video camera icon) to capture images or start/stop video recording. Refer to the on-screen menu for specific recording settings.
4.6. Menu Navigation
Press the 'Menu' button to access device settings. Use the directional buttons (up/down/left/right) to navigate through options and the 'OK' or 'Enter' button to confirm selections. Settings may include date/time, resolution, IR intensity, and display brightness.
5. Maintenance
5.1. Cleaning
- Lenses: Use a soft, lint-free cloth specifically designed for optical lenses. Gently wipe the lens surfaces. For stubborn smudges, use a small amount of lens cleaning fluid. Avoid abrasive materials or excessive force.
- Body: Wipe the device body with a soft, damp cloth. Do not use harsh chemicals or solvents.
5.2. Storage
When not in use, store the NV-300 in its provided storage pouch in a cool, dry place, away from direct sunlight and extreme temperatures. Remove batteries if the device will not be used for an extended period to prevent leakage.
5.3. Battery Care
Always use high-quality batteries. If using rechargeable batteries, follow the manufacturer's charging instructions. Do not mix old and new batteries or different types of batteries.
6. Troubleshooting
- Device does not power on:
- Check battery installation and ensure correct polarity.
- Replace with fresh batteries or ensure rechargeable batteries are fully charged.
- Image is blurry:
- Adjust the objective lens focus ring.
- Clean the objective and eyepiece lenses.
- Poor visibility in darkness:
- Ensure the IR illuminator is activated.
- Increase the IR intensity level.
- Check for obstructions in front of the objective lens or IR illuminator.
- Cannot record or save images/videos:
- Ensure a compatible microSD card is inserted correctly.
- Check if the microSD card has sufficient free space.
- Format the microSD card (this will erase all data).
7. Specifications
| Feature | Specification |
|---|---|
| Product Model Number | ca-nv300 |
| Color | Black |
| Material | Plastic |
| Type | Survival / Night Vision Scope |
| Package Dimensions | 22 x 14 x 8 cm |
| Item Weight | 500 g |
| Maximum Magnification | 5x (Optical), 8x (Digital) |
| Objective Lens Diameter | 40 mm |
| Resolution | 1080P |
| Mounting Type | Picatinny Mount |
8. Warranty and Support
For warranty information and technical support, please refer to the documentation provided at the time of purchase or contact the seller, ChaosAirsoft, directly. Keep your purchase receipt as proof of purchase.


